Showing posts with label StencilGuts. Show all posts

Monday, February 14, 2022

Colour-coordinated Gel Printing with StencilGirl® Masks

Hi there! It's Marsha Valk here today with a new column!

For the past 11 years, I've started the new year creatively, spending time watching the Creative JumpStart videos and creating alongside them.

If you're reading this, you're probably familiar with Nat Kalbach's Creative JumpStart, and perhaps you've even seen me mention it before.

However, if you don't know what CJS is: it's an annual monthlong online mixed media art event meant to inspire and motivate you to get creative.

It's like an advent calendar with a new video every day in January (this time it went into February) by outstanding teachers like Mary Beth Shaw, Kristin Williams, Martice Smith, Rae Missigman, Carolyn Dube, Gwen Lafleur, Jane LaFazio, Kae Pea, Nancy Curry, Seth Apter and Tina Walker.


So on January 1st, I grabbed a new art journal and started to follow along and/or create inspired by what each teacher shared in their video.

And this year, I really took stock of what supplies I enjoyed working with, which techniques made me want to dive right in, what I liked and did not like doing and what aesthetic I liked and did not like.

I tried to create one page after watching each lesson; however, I did allow myself to skip a few. Creative JumpStart isn't a challenge, and I did not want to make it into one either.

Besides, I was in the middle of (another) studio reorganisation, which did not allow me to pull out every supply needed.


Anyway, the lessons I enjoyed most were the ones that involved painting with acrylics. You know, the kind you do with a brush and perhaps a palette knife. Which surprised me, and it's something that I could potentially explore more.

The second realisation was that I love colour (no surprise there); however, it turns out that some colours fail to make my heart sing, no matter how hard I try.

Watching the other teachers and participants use colour palettes outside my comfort zone somehow convinced me to experiment with different colours. And… it didn't work. They don't feel like 'me', and I struggle with making them look good.


So… just for my enjoyment, I decided to take cues from a vintage magazine I found while decluttering. These colour combos excite me, inspire me and make me sooo happy!


Watch me gel print with a limited 70s colour palette and StencilGirl® masks by Mary Beth Shaw and Martice Smith!


Until next time!

Marsha Valk

Featured masks and stencils: 

Graphic Mod Mask 1: 70s Play by Martice Smith


Paint colours used: Deep Turquoise, Mixing White, Phthalo Green (Yellow Shade), Process Magenta and Titanium White.


Saturday, September 26, 2020

NEW StencilGuts are on Sale While Supplies Last


StencilGuts are on sale, available on a first ordered, first filled basis.


NEW GUTS ALERT! here are 3 new sets courtesy of Mary Beth & John Shaw's partner in the business, the super Frank Karfs.

StencilGuts sell out incredibly fast, just sayin'! 

Click any picture to go to the StencilGuts page.


StencilGuts Alphabet #1, SG10 Bonus: Comes with the stencil!


These random font alphabet letters are approximately 1" tall.


StencilGuts Numbers, SG11 Bonus! Come with the stencil!

These numbers are approximately 1 1/4" & 1/3/16" tall.


These capital Times letters are approximately 1 1/4" tall.


StencilGuts Alphabet Times, SG10 Bonus! Comes with the Stencil!


What can you do with StencilGuts? Mary Beth will show you in this video and you can see what some of our current and past Creative Team members (Tina Walker, Louise Nelson, Debi Adams, Carol Baxter, and Torrie Gass) created too!


Birds, SG01


Cats & Rabbits SG02


Flourishes, SG03


Geometric Shapes SG04


Hands SG05


Random StencilGuts, SG06


Check out these marvelous mixed media projects by Mary Beth Shaw, stencil designers Trena Brandon and Sandee Setliff, as well as our loyal customer and friend Janis Graham.


There is a small number of random States left.

Random States SG09


Are you still undecided about StencilGuts?

You can use them to add texture to journal covers and pages, cover with washi tape for later use as collage elements, and even make funky jewelry like Janet Joehlin, Gwen Lafleur, Mary C. Naser, Mary Beth Shaw, and Carol Baxter did!


Monday, June 22, 2020

Creating Cyanotypes with StencilGirl® Products

Most mixed media artists who use collage in their work are usually in search of unique collage material.  The convenience of pre-printed collage papers and ephemera is all well and good, but nobody likes to see material that they have used showing up in someone else's work.  Speaking from experience,  I can attest that it can be an uncomfortable feeling.  This is one reason (among many reasons) why so many of us appreciate the exclusive designs available through Stencil Club.
Hand StencilGuts (limited availability)
         One of my favorite techniques lately has been cyanotyping, and now with the weather so cooperative it is high time for more sun-printing.  If you have never used this photographic technique, it's easy to get started with pretreated lightweight paper, sold as "Sunprint" paper.  The basic chemistry is that a light-sensitive solution is painted onto paper; when exposed to sunlight, the treated paper will darken.  Any shadow cast during the whole exposure will remain white.  A wash in cold water will stop the reaction, and you'll be left with a beautiful cyan blue and white print, such as the small print to the right.  The beauty of this process is that each print is unique - the length of exposure and the brightness of the sun will result in subtle variations every time, as will some of the next-level techniques I'll be discussing in this column.   Once you have experimented with the pretreated paper, I highly recommend purchasing the chemicals (available on-line at the big art supply retailers) and sensitizing your own paper.  The advantage of this is that you can sensitize book
Bird StencilGuts (limited availability)
paper, fabric, large sheets of heavy watercolor paper - whatever you like, with some caveats to be discussed shortly.  Once you start with "cyanotyping 101" you'll be hooked.  I particularly like leaving brushstrokes on the paper, or sensitizing a shape.  Lately I've been experimenting with what you might call "cyanotyping for the adventurous" -  adding water, soap, vinegar, ink, and other dyes into the process.  More on that shortly, too.
Botanical Wildflowers Masks L774, Botanical Stem Mask L773
                   Cyanotypes with stencils and masks is a match made in heaven, but first you have to make sure that your Mylar is opaque - it has to block the sun or it will not give you a good print.  If a mask is small, I'll just dip it into a jar of India ink and let it dry - with larger stencils and masks, a good coat of black spray paint on both sides does the trick.  Rae Missigman's recent botanical masks were an obvious choice for a project like this; I followed her directions for freeing these delicate beauties from the Mylar sheet, and spray painted them (although sometimes the paint peels off, as you see in the lower right - I can just paint it again).
        As I mentioned earlier, one of the few limitations on making cyanotypes is that the substrate has to be able to withstand washing.  Because collage material ideally is thin, this presents a bit of a challenge.  Very thin paper simply will not hold up to this process (trust me, I've tried) and although heavy watercolor paper yields a beautiful cyanotype, its stiffness does not lend itself to collage, especially in an art journal.  For these reasons, I decided to try cyanotyping on very thin silk.  I had some in my fabric stash, so I treated some pieces and got to work.
This unappealing pile of rags is my treated silk.  Although sensitized paper will appear dark green, on silk, this chemistry turns a deathly gray.  The solution and treated paper or fabric in this process is not sensitive to electric light, only direct sunlight, so you can handle this inside without ill effect, and no special darkroom conditions are required.  This makes it easy enough to set up your print.  You'll need a rigid platform of some kind (I use an old cutting board) and a pane of glass to hold everything in place.  The basic process is that you lay down your sensitized substrate - paper or fabric on the base - then the opaque stencil or mask, cover with glass, and take out into the sunshine.  Exposure time will depend on the time of year and the time of day, but figure on somewhere in the neighborhood of 8 minutes on a cloudless summer day.  There is a lot of experimenting with this process and you'll go through many prints to find the right exposure time: use a timer and take notes!  When the time is up, bring it all inside and rinse the print for several minutes to remove the unexposed chemical, then hang to dry.  This will yield a crisp blue and white image.
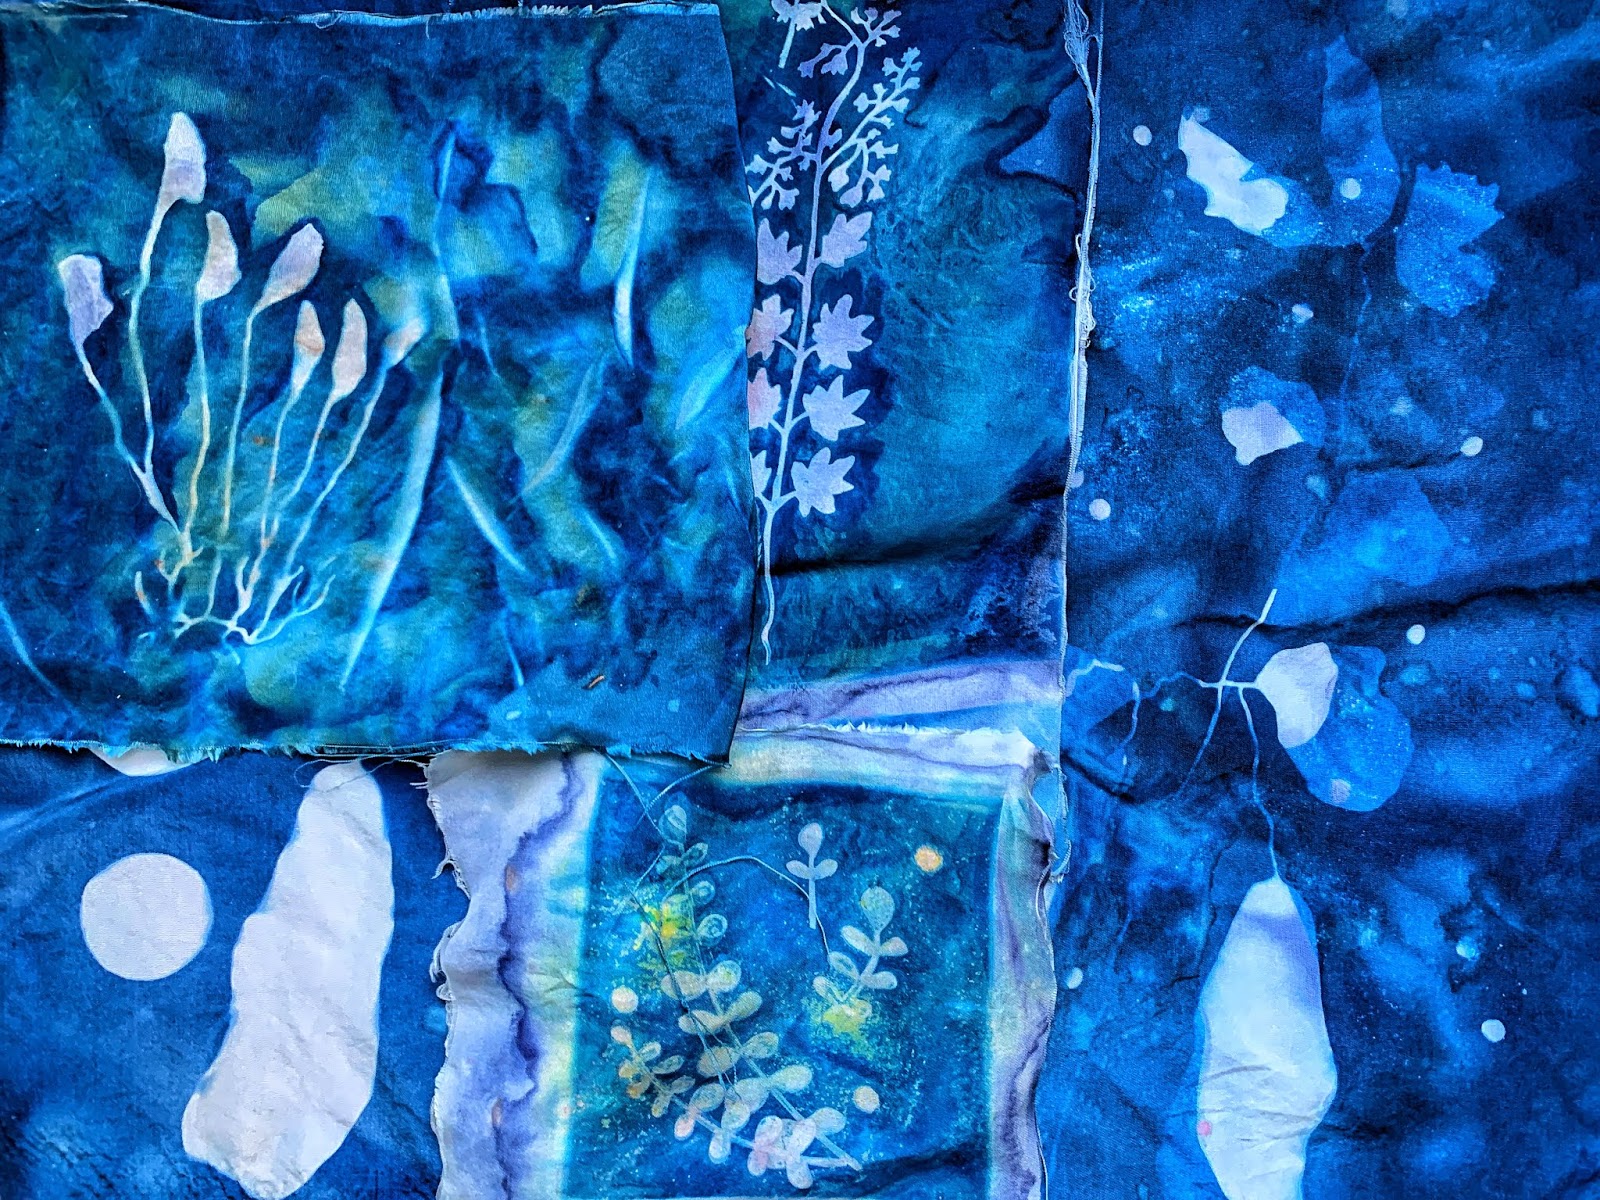
            With cyanotyping for the adventurous, or wet cyanotyping,  the magic really begins.  As above, you lay your substrate on the platform, and then your stencil or mask, but before covering with glass, try sprinkling some powdered turmeric (it contains a strong yellow dye) and spritzing with water.  The turmeric and water will react with the cyanotype solution in unpredictable ways, leaving splots, dots, and blotches that can be absolutely gorgeous.  Diluted vinegar will also make the chemistry go wild, as will inks and soap bubbles. Anything water-based will instantly effect the dried cyanotype solution.  Some wet cyanotype artists leave their wet prints out to expose for many hours, which really does wacky things to the chemistry, and depending on the substrate - paper or fabric - the reactions will vary. You'll never get the same results twice.
Different swatches of silk with the botanical masks - different exposures, different additions (water, vinegar, spray inks, turmeric) - showing unpredictable and unique results.  

       To see how the finished sun-printed silk held up to collaging, I decided to make an encaustic collage.  I love the wax finish and the ghostly quality it adds to an already mysterious print, like some kind of night-blooming fantasy flower. I added a few pin pricks of white oil paint and called it done.


       One of the great pleasures of cyanotyping is that once you have the chemicals, which aren't expensive and last a long time, you can print just about anything on any porous surface.  The technique lends itself particularly well to botanicals, and collecting leaves, flowers and branches outside to print this way is a great activity to do with children.  But anything that casts a shadow will work - although be aware that the more 3D an object is, the less distinct its shadow will be, which is why stencils are ideal for sun-printing. Here's to sunny days ahead!


Friday, February 28, 2020

NEW Product: Ephemera Tape Holder

Except for Random, Eastern & Middle States, StencilGuts are SOLD OUT.

But we do have a cool

TAPE HOLDER!


Mary Beth Shaw has a new product, a Tape Holder, for you to store your handmade ephemera tape!

There are 6 sections incrementally sized to hold your beautiful tapes.

Perfectly designed for storage, travel, and gifts!


Nab a Tape Holder


Wednesday, October 30, 2019

Guts! Guts! Guts! Stencil Guts available while they last!


StencilGuts are for sale right now!

There are several sets to choose from but orders are filled first come first serve - when they are gone, they are gone.


Cats Rabbits There's a few left!


Birds  There's a few left! Uh oh! They just flew away too!


Geometric  Sorry, sold out!


Random Sorry, sold out!

Flourishes  Sorry, sold out!

 
Cats Rabbits There's a few left!

Hands  Sorry, sold out!

What are StencilGuts? How might you use them?

So glad you asked!

StencilGuts are the pieces and parts of a stencil that get removed as it is being readied for sale. There are 6 sets available.

You can use them as pieces and parts in mixed media art or jewelry! 

The masks of things like cats and birds, leaves and curlicues are marvelous used as, well, masks! 

You are sure to be inspired by the mixed media shadow boxes 4 of our fave creative folk (Sandee Setliff, Trena Brannon, Janis Graham, and Cathy Costelle) and Mary Beth made recently incorporating StencilGuts: 


Sold out fast: Geometric, Random Guts, Flourishes, Cats Rabbits, Hands, Birds  

Click to grab your StencilGuts now!


Sunday, April 22, 2018

StencilGirll® & Resketch Blog Hop!


Welcome to the 
Earth Day Blog Hop! 

To celebrate Earth Day today, Team StencilGirl® members are getting creative with 
Resketch products and StencilGirl® stencils!

Resketch creates unique journals and sketchbooks made of high-quality reclaimed paper.

Why use reclaimed paper?
Resketch explains: "We think it's tragic when paper that's otherwise perfectly fine to use is tossed in the garbage, or even the recycling bin.
Let's take that paper and create something awesome with it."

We couldn't agree more!
You’ll be inspired AND for every comment you leave on each blog,
you’ll earn a chance to win our GIVEAWAY! YAY!
Please share some feedback with these artists who worked hard to inspire and excite us for!


What would a Blog Hop be without a GIVEAWAY??!!! 
One lucky winner will receive both

Enter to win by leaving a comment below. 
Then be sure to visit the other blogs in the hop and comment to win. 
The more blogs you comment on, the more chances you have to WIN! 
One winner will be chosen at random from all blog comments! 
(One comment per blog please.) 

Blog Hop Order


You have until Wednesday, April 25th at 11:59PM Central Time to leave your comments. 
Winner will be announced on
StencilGirl®'s Facebook page on Thursday, April 26th.

If you don't already, we would LOVE if you would sign up
for The Scoop HERE
and join us on Facebook, Instagram, Twitter, Google+, Pinterest and Bloglovin for more inspiration! 

Thank you for hopping with us and Happy Earth Day!