Thursday, August 25, 2016

History and My Creative Process, a Guest Post by Andrew Borloz

Hi, I'm Andrew Borloz and have been a member of StencilGirl Products design team since April 2012. I've already written about my early experiences with stenciling in my blog. As mentioned in my blog on creativity, I promised that I would give some sort of history on the design work that I did for StencilGirl Products.
     Even though I have cut stencils before, the set of stencils that I hand-cut at Penland School of Crafts back in 2012 was a turning point in the creation of pattern-based stencils for Stencil Girl Products. At that time, I was thinking of stencil more as a tool for the creation of various patterns rather than reproducing the image once on any surface. 
     For example, the stencil below is more of a static pattern which does not allow me to create different patterns except that I will have to overlay the same image over the previous ones to create a different effect. 
I used the above stencil to create "decorative" paper for the inside of an accordion book: 

As shown in the photos above, I have rotated the hand-cut stencil to create a "different" look effect. 
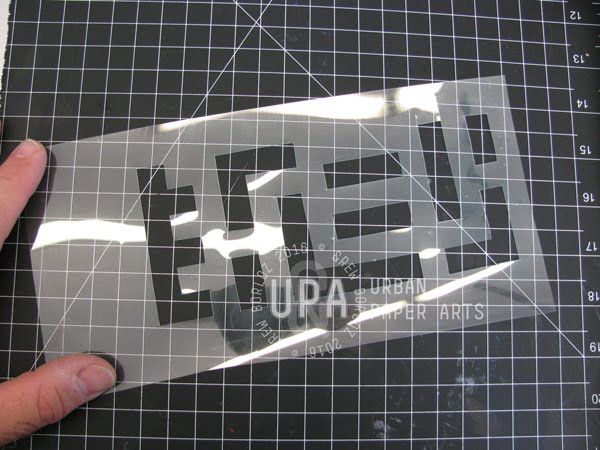
The next hand cut stencil shows the turning point in my stencil design creation - using the stencil as a pattern making tool. 
     I used the grid on the cutting mat as a guide for determining the shapes. 
At first, it looks similar to an old eye exam where multiple images of capital E were printed in various sizes on the rows but actually they're rectangular bars joined together. I used gouache to stencil them and overlaid or rotated the same stencil, creating square-like images as I used several colors. Hence, the name, "Pseudo-Squares". 
The above process has resulted in the creation of Pseudo Squares stencil:

The 9" x 12" Pseudo Squares stencil pictured above is also available in a 6" x 6" S028!
The next technique that I sometimes used in the creation of my stencil is the repeating pattern technique often used for fabric pattern designs. Because I want to create decorative paper for use as endpaper for bookbinding (similar to the one printing/stenciling techniques used by the French printers: papier dominoté). 
     For the connection stencils, I carved a pattern on the linoleum plate so that I could block print them on the hand-made paper, and at the same time, I thought about creating stencils from them to make it quicker and easier to produce decorative paper.  The photo below shows how I used one of the stencils in creating this kind of pattern. 
I designed one of the stencils by printing the original on a paper, photocopied it, and then clean up the artwork by cutting it up and making sure the ends match. I then photographed it and upload the image to the photoediting software where I further cleaned it up and again made sure the ends match when repeated. 

The work that I did has resulted in four stencils - two large and two small. Shown below is one of them which is actually a negative of the above image.
The 9" x 12" Connection Open stencil has a large companion stencil, L017 Connection Full, 
After the stencils in two sizes were released to the public for purchase, I used it as a printing plate for the creation of another accordion book at a book arts center in upstate New York. 


The photo in above lower corner shows what's inside of the "envelope" - it was not stenciled, but letterpress printed. This is one of the projects that I used stencils for printing purposes - you can reproduce the similar effect using the gelatin printing technique. 
     Sometimes, I was inspired to create patterns using everyday objects. For example, I carved the lines on top of the pencil eraser and created these patterns by "stamping", uploading to the computer and digitally created the similar shapes. The top left corner of the photo below is the original one, the top right corner is where I duplicated the same images, and the bottom photo is where I come up with a cleaner and more abstract designs. 
The digitally created patterns above has inspired me to create two stencil designs as shown below:

Pictured left: 9" x 12" Crossed Rounds stencil 

The above mylar StencilGirl stencils then enabled me to create a whole different set of patterns:
Last May of 2016, I decided to create corrugated cardboard frames using two stencils mentioned in this post - Pseudo-Squares and Crossed Rounds:
 
From reading and seeing how I was inspired to create various stencil designs, I hope you can appreciate the various processes that I used to create different designs that would allow you to create a whole set of new patterns for your projects. 


Blog: www.andrewborloz.blogspot.com 
Facebook Page: www.facebook.com/urbanpaperarts

11 comments:

  1. Awesome backstory on these amazing stencils. Thanks!

    ReplyDelete
  2. you are ingenious!! I LOVE to look at your art!!! Very Inspiring!

    ReplyDelete
  3. Great stencils Andrew!...and your books are marvellous.

    ReplyDelete
  4. I loved reading about how you go about creating your stencils. Plus, how you use them is very inspiring.

    ReplyDelete
  5. Thanks for sharing "the rest of the story", Andrew!! The stencils are fabulous!!!

    ReplyDelete
  6. This comment has been removed by the author.

    ReplyDelete
  7. This comment has been removed by the author.

    ReplyDelete

If you are entering a GIVEAWAY, please add your email address in the event we need to contact you.

To avoid SPAM, please write it like this:

marybeth (at) stencilgirltalk (dot com)

Thank You!