Showing posts with label Julie Snidle. Show all posts

Tuesday, April 23, 2019

Poetry - You are Phenomenal with Trena Brannon


Hello Beautiful!

When I was thinking about what I wanted to do for this post, I thought about the poems that have influenced my life - words that are encouraging and real. Maya Angelou’s Phenomenal Woman jumped out.  In a story about Maya, one of the things she said that resonated with me is “there’s nothing I don’t love about my life, it’s a struggle, but that’s life."  Life is not perfect - we are not perfect, however, each of us brings our uniqueness everywhere we go. 

From talking with my family and friends and my own experiences, I know that many of us feel full with commitments, requests, criticism, information coming at us fast and furious, and then there's the voice in our heads that's not always kind to us. All the noise can sometimes just wear us out. I just want to remind you that you are phenomenal!   

phenomenal synonyms: exceptional, extraordinary, remarkable, outstanding, amazing, astonishing, astounding, stunning, staggering, marvelous, magnificent, wonderful, sensational, breathtaking, miraculous, singular; incredible, unbelievable, inconceivable, unimaginable, uncommon...

you are!

I created a page in my homemade (10x11 inches) journal that captures phenomenal.


Step 1:
Background - I started with a page that already had some paint on it. Many of my pages do have some kind of markings, as I clean my brush, sponges and pallet knife off in whatever journal I can find at the time the need arises. I laid down more color with an open stencil - using a little gesso in my paint to soften the color and increase the opacity.


Step 2:
Next, I added more layers of color with a couple more open stencils - not thinking about what colors I was using where- just enjoying the process.


Step 3:
I warmed up the page a bit with the secret ingredient I learned from Mary Beth, Golden Quinacridone / Nickel Azo Gold.  I used the first open stencil for a repeat design in a different color.


Step 4:
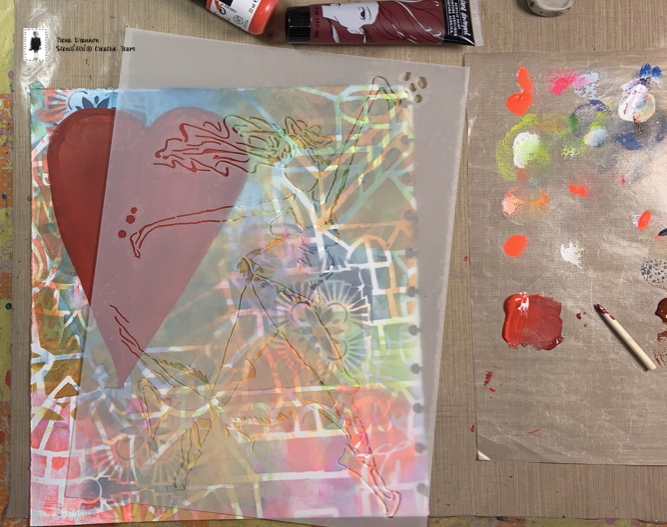
I painted a big heart to hold my words.  Another very cool feature about stencils is that you can "audition" where you want the design on your page.  I moved the words and my phenomenal woman around on the page to see where I wanted to place them. Because the woman is larger than my page, I thought about what part of her I wanted to be sure to place on the page. Let me just say for the record, I don't always pre-think in this way.  Most of the time, I'm caught up in the coloring and fun. :) It just works out or I come up with a design to make it work. That's what I love about creating!



Before adding the words and woman, I added a touch of the hearts' color to the background.


Step 5:
I verified word placement again, auditioning with my phenomenal woman.  I added her into the scene and painted her.


Step 6:
Lastly, I added the words and details. 


Notes/Tips/other ideas:
  • write down the words you want to include in the page - that way you can consider how much room you will need, which impact the size of the letters. 
  • write slowly with white pens
  • to gets tips on using alphabet/word stencils, you can see my video here.
  • make a page showing a phenomenal man
Supplies I used:


  • Substrate: hot press watercolor paper 140 lbs.
  • Paints/Gesso: Jane Davenport, Liquitex, Golden, DecoArt
  • Other Stuff: tulip dauber, paintbrushes, Sharpie white paint pens, Molotow, Pentel milky, Faber-Castell Big Brush, Tombow Dual Brush Pen
  • StencilGirl® stencils:  My Mind S641, Scribble Scratch Handwriting Stencil L266, Hamilton L661, These Jeans L647
  • StencilClub sets: Loose Woman SC-07-13, Lost Languages SC-September-2015, Fragmented SC-11-2017


I hope this post inspires you to create something fun that makes your heart smile!
Thank you so much for reading.
Take care and STAY POSITIVE!
Trena

Friday, September 7, 2018

Guest Designer: Karen P. Johnson

Hi, everyone! Karen P. Johnson here! I’m a Mixed Media Illustrator and Graphic Designer.
And it’s my pleasure to be here today to show you a technique using my StencilGirl® Products.
Art Journaling with StencilGirl® Products by Karen P. Johnson
I was a freelance designer for 16 years. During that time, I used a lot of airbrush and I cut my own stencils using an X-Acto knife and poster board. You can only imagine how excited I was to find so many different stencils on the market and how happy I am to have my own line of stencils with StencilGirl® Products. It has been my goal to bring diversity to the craft and hobby industry, and I am grateful to StencilGirl® Products for the opportunity to bring them to you today in the Karen P. Collection. Today I’m going to take one of my stencils and create for you step-by-step a Tip PiC. A Tip PiC will show a hidden image as the angles are changed when you tip it towards the light. It is based on an old printing process called lenticular printing used to make baseball cards in the 60s.
Art Journaling with StencilGirl® Products by Karen P. Johnson
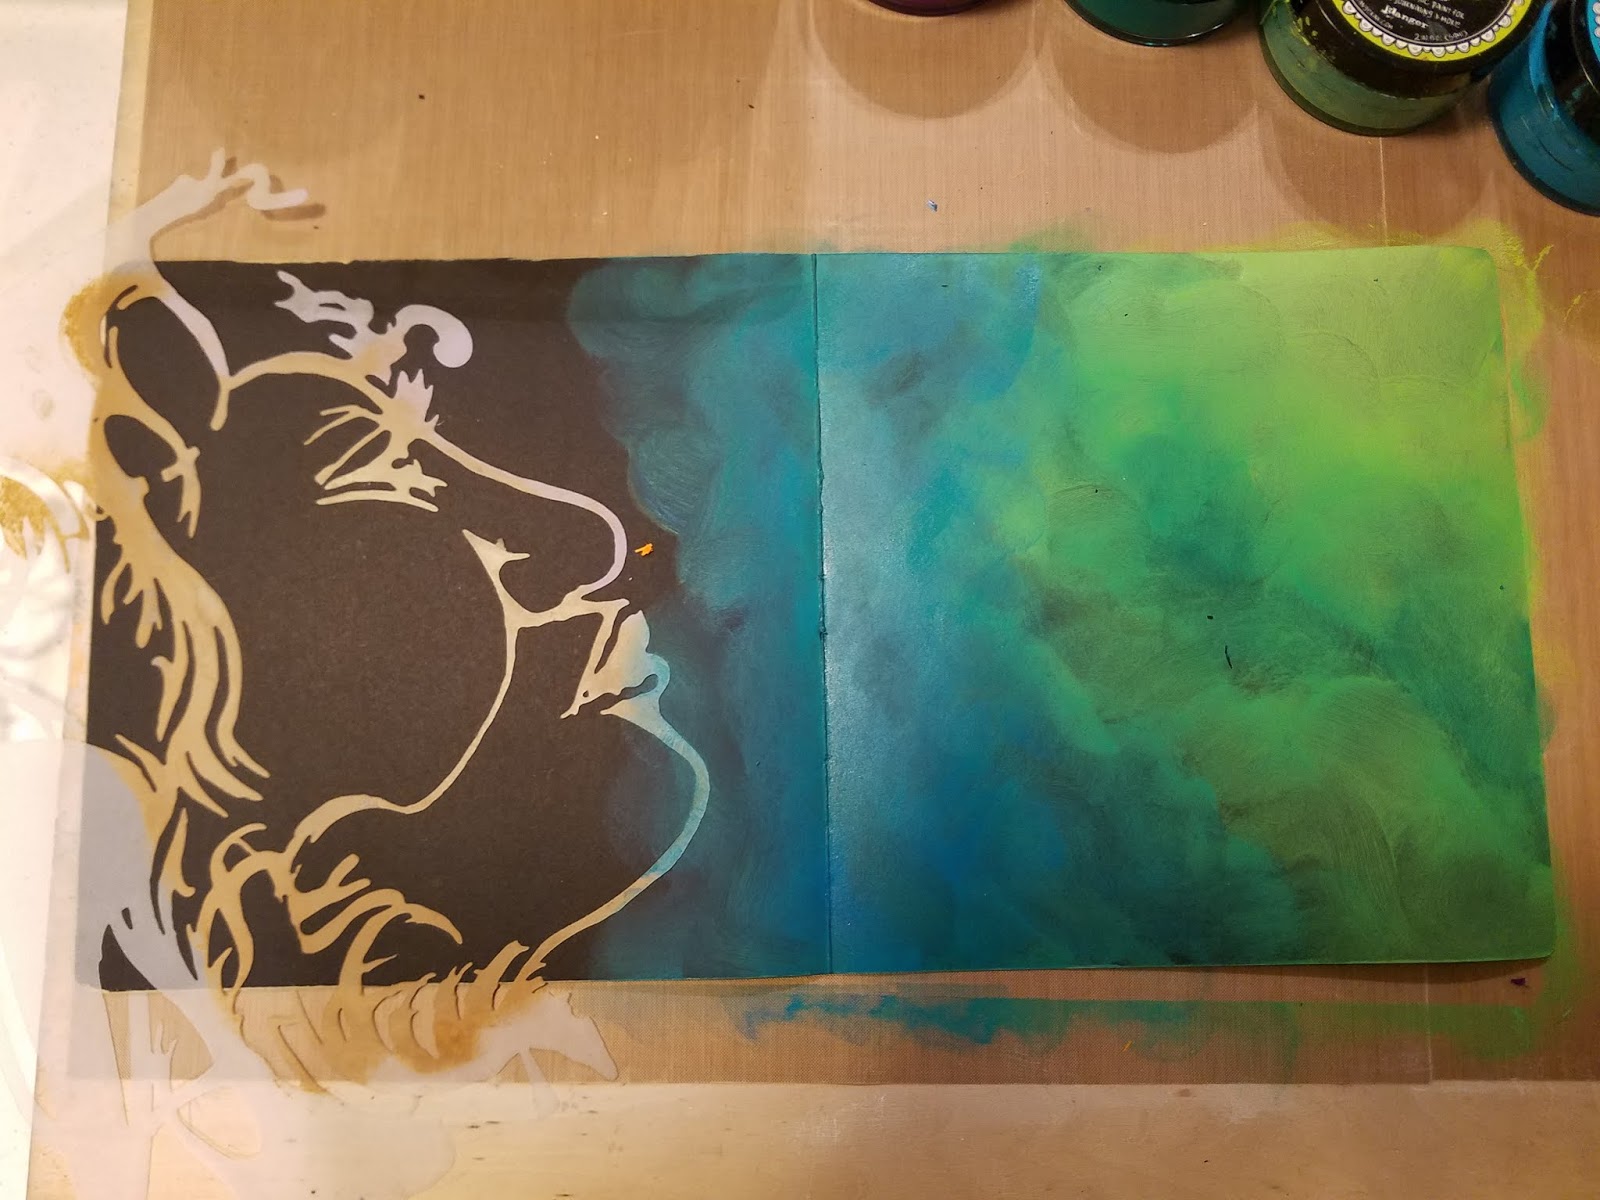
First pick your substrate and your stencil. I will be using pages from my Dylusions Creative Journal
with black cardstock and my Fulfillment Large Mask stencil.
Art Journaling with StencilGirl® Products by Karen P. Johnson
The paints I used were also from the Dylusions Acrylic Line in
Fresh Lime, London Blue, Crushed Grape and Squeezed Orange.
Art Journaling with StencilGirl® Products by Karen P. Johnson
Once the background was completed, I began breaking up the space using
more stencils from StencilGirl® Products.
Art Journaling with StencilGirl® Products by Karen P. Johnson
The first stencil is from Julie Snidle's Lost Languages collection.
I used Laid Back Lilac and Periwinkle Blue along with Squeezed Orange through the stencil.
The second stencil is the 6" x 6" stencil from Mary Beth's Private Collection 15.4.
I used Laid Back Lilac through the stencil.
Art Journaling with StencilGirl® Products by Karen P. Johnson
Then I used Cecilia Swatton's Prayer Flags stencil. If you do not have it, you should get it, because when you need it, this stencil covers a multitude of sins. And I really like it. I used StazOn solvent ink in Midnight Blue through the stencil. And to add dimension, I used Laid Back Lilac.
Art Journaling with StencilGirl® Products by Karen P. Johnson
I removed the Fulfillment Large Mask stencil revealing the face
along with the background and dimensional patterns.
Art Journaling with StencilGirl® Products by Karen P. Johnson
In order to create the browns of the skin tone, I used the complementary color of blue on the orange.
Due to its transparent quality, Distress Ink Broken China is the perfect complementary color.
Art Journaling with StencilGirl® Products by Karen P. Johnson
I used Pomegranate Seed to color the lips and to begin the process of adding detail to complete the face.
For those of you who are into the coloring book craze, my stencils offer numerous possibilities for coloring and drawing. Just choose your Weapon of Mass Creation. Here are a few of mine:
Art Journaling with StencilGirl® Products by Karen P. Johnson
Once you are happy with the details it’s time to add the magic that turns this into a Tip PiC.
You will need an iridescent or pearlescent medium with no color. This is a colorless medium you add to other colors to change them into an iridescent or a pearlescent.
Art Journaling with StencilGirl® Products by Karen P. Johnson
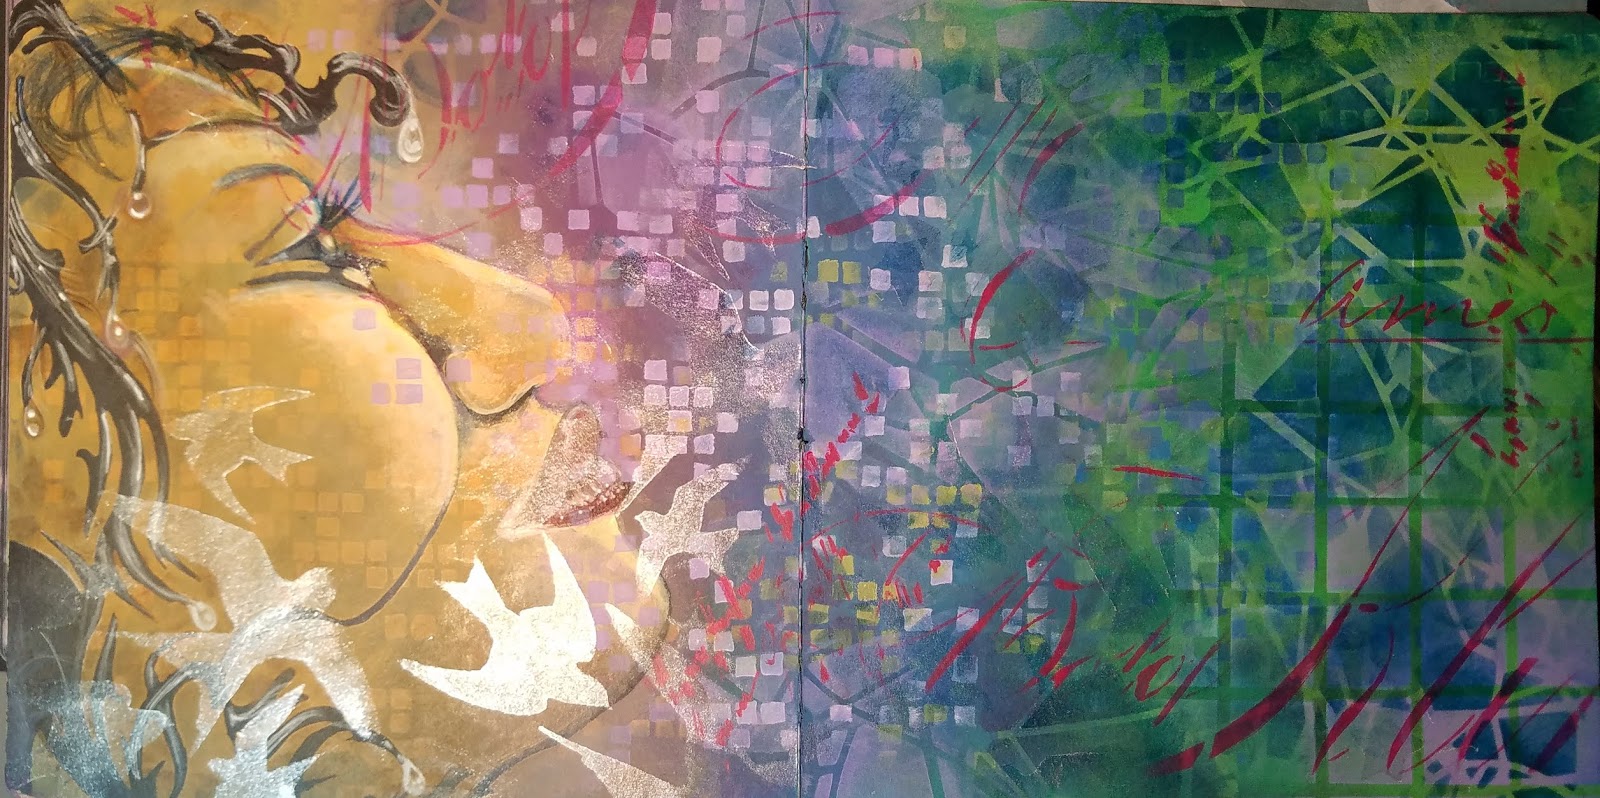
After placing the iridescent through Swallows stencil designed by Tracie Lyn Huskamp and Starlight Starbright stencil by Cat Kerr, you will have the hidden image of your Tip PiC.
Art Journaling with StencilGirl® Products by Karen P. Johnson
When lying flat, you will not be able to see the hidden image.
Art Journaling with StencilGirl® Products by Karen P. Johnson
I finished up this piece with stencil Cecilia Swatton's Vintage Script Stencil,
another favorite of mine, using Cherry Pie paint.
Art Journaling with StencilGirl® Products by Karen P. Johnson
When you tip these pages towards the light, hidden figures will be revealed
and birds appear to fly across the page.
Art Journaling with StencilGirl® Products by Karen P. Johnson
Thanks so much for visiting today! I can’t wait to see what you do!

Monday, October 17, 2016

Gwen's Gems: Mini Stenciled Junque Journals

Hi everyone, it's Gwen back again with the October edition of Gwen's Gems! 

Recently I found myself wanting to make some small gifts to share with a few friends in my art tribe and I thought that since we're starting to get closer to the season of giving, I'd share what I did with all of you as well! 

Here's what I made - a whole series of mini junque journals which would also make great little gifts and stocking stuffers. You could turn these into mini scrapbooks, recipe journals... whatever you want!


These fun little books are super easy to make, with the added bonus that mine were made from upcycled StencilGirl chipboard mailers!

Here's how I put these together:

First, I took a few of my mailers (I never throw them away!) and cut them down. I only used the front sides for this project so I wouldn't have overlapping pieces. I cut them into strips that were about 4.5" tall by about 10" long.


Once I had them all, I scored lines where it was going to fold. I knew I wanted there to be a flap, so I scored them at the 4.25" mark and the 8.5" mark, leaving around 1.5" to overlap. Next I painted them all - black gesso on the insides, bright colors on the outside. I used Dylusions paints so that I wouldn't have to gesso and they would dry quickly. Next I took different types of paper and cut them to 4"x8" and folded and scored them. Then I poked 4 evenly spaced holes through the signature and into the fold at the 4.25" mark on the chipboard and used a pamphlet stitch and some bookbinding thread to bind it all together.


Here you can see what they looked like all bound up. What a fun little rainbow!

Next up, I decorated. I went through each of them with various rubber stamps (some hand-carved, some commercially made,) and randomly stamped over the background. I mainly used texture stamps and designs that wouldn't complete too much with the stenciling yet to come (although I couldn't resist some heavier patterns, as you'll see.)


After stamping, I stenciled on each of them using gold pigment ink and a foam blending tool, then I heat embossed the stenciled images with various colors of embossing powder.

Here are all of the stencils I used on the 10 books I made:
Finally, I went through and added pen work and details, especially on the books where the stamped images were a little more prominent. I mainly used oil-based paint markers for this step - I really liked the bright, glossy colors, and they had good coverage without having to take a lot of time doing multiple layers.

Here you can see how some of them looked at this point:


Finally, I attached some twine to use as the closure for the books. I just wrapped a piece of baker's twine through the middle of one of the binding stitches as you see below:


Then I just wrapped the twine around the book and tucked it in. You could add beads or charms to this part or to the threads in the binding if you really wanted to fancy it up.

Here you can see what they look like on the inside:

Also, you can see below that as I stenciled, I made sure to stencil the flap so that it would line up with what was on the book when it was closed. It's a nice detail that's especially good for when you're using larger stencil designs like this. For a smaller all-over pattern, it would be much less noticeable.


Here you can see what each of them looked like. Some I made very ornate with colors and patterns, some I kept more simple since not everyone likes all the layers the way I do.


And that's it! I made ten mini journals to give as gifts in just a few hours! I may need to make some more... I can think of a few little girls who might like something similar that they could use as a sketchbook that would slip into a little purse.

I hope you enjoyed today's project and tutorial! Have you ever made a journal from your chipboard mailers? We'd love to see!

Until next time, happy stenciling!


Friday, September 4, 2015

Building a Village with the September Stencil Club Stencils


Hi - Jessica Sporn here to show you a small canvas I created with the inspiring September StencilClub stencils designed by Julie Snidle.


I started by creating collage papers with the 9 x 12 and 6 x 6 stencils.  I didn't have an idea of the project yet, but just started playing with the stencils and several colors of Ranger Distress Ink (using techniques I learned in Marjie Kemper's Craftsy Class, Inventive Ink).  I over lapped and gently nudged the 9 x 12 stencil to create a patchwork of little squares.  (For a great demo of this technique, check out this video by Carolyn Dube.)
As I worked on these pages, the idea of building blocks popped into my head, as well as the idea of maps that show population concentrations.  I decided to combine these ideas and create a village.  For that, I needed a background.  I pulled out a collage I had made in a class taught by Julie Balzer and Stencil Girl Nathalie Kalbach called "A Taste of Collage."  I had considered this a "fail," and saved it knowing it would morph into something else.  


I scraped molding paste through Julie's 9x 12 stencil.  Once it dried, I glazed the collage to create a ground and a pink sky.  While that was drying, I stenciled another paper using the 6 x 6 stencil, as well as a dictionary page, to have colors that would contrast with my "warm" page of yellows, oranges and pinks. 


I cut up my collage papers in the shapes of buildings, roofs and paths, and got gluing.


Lots of doodling, shading, and glazing followed, as I "built" my community.


I've started a little project of illustrating inspiring lines from Psalms.  I love that this canvas is part of this project.  


I hope this tutorial gives you a creative spark!  I didn't end up using the 4 x 4 stencil, but I know it will be making appearances in my designs very soon.

I look forward to seeing what YOU create with the September StencilClub stencils.