Showing posts with label mixed media stencils. Show all posts

Monday, August 9, 2021

Unique One-of-a-Kind Gift Tags with Renee Day

Mixed Media Gift Tags by Renee Day


Hello there!  It's Renee with @thediyday here to share a simple way to create your very own gift tags.  Mass-produced store-bought gift tags are a bit impersonal for me so I like to up my game and make my own.  The beautiful part, these can be any color, any shape, and modified for any occasion!  See how I incorporated some of my favorite StencilGirl® stencils on my tags.

Because I'm blending colors together using Distress Oxides and water, I decided to use 140lb watercolor paper to help prevent the paper from curling.  First, I blended the lightest Distress Oxide color in the center, followed by the next two colors - ending with the darkest color on the outside edge.

Mixed Media Gift Tags by Renee Day


Next, I heavily misted the paper with water to help blend the colors together.  I attempted to allow the paper to air dry, but it was taking too long so I dried it with a heat gun.  

Mixed Media Gift Tags by Renee Day


Once the paper was completely dry, I used a script stamp to add more design to the future gift tags.

Mixed Media Gift Tags by Renee Day


Then I stenciled in some triangles using the Mini Triangles Stencil (S061).  I wanted the triangles to lightly blend into the background without being overly pronounced so I used yellow acrylic paint.  

Mixed Media Gift Tags by Renee Day


The next stencil I used is one of my go-to stencils,  The Circles Layer Me Stencil (L380).  This stencil is literally 3 stencils in one and I wanted this one to pop!  I used neon pink acrylic paint for the base and then added a 3D Matte Gel (for texture) to the mini circles.

Mixed Media Gift Tags by Renee Day


Mixed Media Gift Tags by Renee Day


Once the Matte Gel dried (I gave it about 2 hours), I used a gift tag die cut to make the shape.  I added a little more eye appeal to the tags with ribbons, buttons, and drawing some imperfect circles around the neon circles to give it a little edge.     


Mixed Media Gift Tags by Renee Day


Enjoy!

Renee Day   


Friday, May 1, 2020

May 2020 StencilClub Reveal: Light Catchers

We can all use a little more lightness these days :)

Light Catchers by Roxanne Evans Stout are revealed!


Roxanne designed the Light Catchers set with sgraffito, mark making, working with layers, and using modeling paste in mind.

You may see different shapes in these exclusive to StencilClub member stencils but to Roxanne, the large 9" x 12" is based on cut blocks of light. The small 6" x 6" is based on dangling earrings and the mini 4" x 4" is reminiscent of tribal drumsticks with soft tips.

This is her first set for StencilClub and everyone at StencilGirl products is excited!


Light Catcher ship exclusively to StencilClub members on May 15, 2020. 

Reading this post after that day? No worries. StencilClub members can purchase past club sets and even have access to the artist-designed video and tutorial. 

There are more perks to membership such as access to the art community and a monthly loyalty coupon.
You can find out more about StencilClub and join here.

Roxanne has her own somewhat ethereal yet earthy style. You can discover all of her stencils here.

Tuesday, March 20, 2018

Keeping it Simple for Big Impact :) :) :)


Hello Hello :) Louise here.


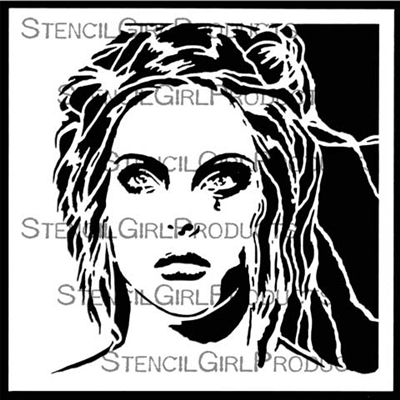
Today I would like to share a small canvas I created using the absolutely fabulous 'Talaya, Goddess of Ran' stencil designed by the amazing Andrea Matus DeMeng.


The canvas is 5"x7". I had originally started painting another image but I disliked it so much that I painted over it with white gesso and started again. 


I used a make up sponge to apply black gesso over the stencil to create the Talaya Goddess image.


I just love that Talaya is the Goddess of rain as part of my technique was to spritz the black gesso whilst it was still wet with water, which allowed the diluted black gesso to run down the canvas; like rain :).


The water spray also helped to add to shadow shading of the face as well as adding visual interest.


Im not usually a fan of having the grain of the canvas show through, however for this particular canvas it works!  I am so glad that I resisted the temptation to use a patellate knife to apply the white gesso thickly, [as is my usual practice].

Whilst the techniques use were very simple, and the color palette monochrome; it has all come together to create a little canvas with Big visual impact!

Well that is it for me for the moment, I do hope that you have enjoyed my lil creative share. I so loved creating this lil canvas, so much so it has become a new personal favourite.

Cheers and Happy StencilGirl Creating :) :) :)


Thursday, April 7, 2016

Decorative Elements Stencils Series from Gwen Lafleur + Peacock Feathers

Take your artwork to lush places with the 10 versatile stencils Gwen Lafleur designed as her Decorative Elements Series. 

The giraffe on this art journal card is proof that lush places can be full of whimsy ~ perhaps Carmen Miranda gone to the steampunk zoo? Ah! Gwen is here to share how she came to create this piece:


"Not Carmen Miranda specifically... this piece came out pretty organically. Because I'd used someone else's illustration (from an Uppercase publication), I wanted to make it mine. I started out by painting over it, then I glanced at some flower print-outs that were sitting on my desk and thought it would make a fun contrast to have a giraffe with a crown of flowers. Then I thought it would be cool to put something around its eyes and decided to use a stencil and color it in. Then I just happened to be looking for something else and found those gears and it was a lightening bolt moment where I thought it would be super cool and a bit steampunky. So at the beginning, there was no plan for any of it, but I love how it came out!"
M112, a 4x4 inch stencil, Decorative 6 Petal Flower
A few more art journal cards round out the deck:


Close ups!


S387, 6x6, Decorative 6 Petal Flower Screen
S388 a 6x6 stencil, Decorative Medallion
M114, a 4x4 stencil, Decorative Folk Flower
S389, 6x6, Decorative Folk Flower Screen

The art card above is all done in layers of paper. Gwen painted the background and stenciled over it, then with the 4x4 Folk Art Flower stencil, she stenciled it several times on different sheets of paper and cut them out and layered them to get the colored flower. Then she added the other collage layers as she built it up on the background.
M113, 4x4, Decorative Medallion


M116, 4x4, Decorative Filigree Repeating Corner

Gwen made a video so you can share in her excitement about her quarter repeat designs!


What are you yearning to create?

M115, 4x4, Decorative Curvy Corner Repeating

Gwen used this next stencil to embroider a piece that will probably become part of an iPad cover.
S390, 6x6, Decorative Curvy Ornament


Gwen made a gorgeous repoussé and journal spread with this last stencil in her Decorative Series, but we'll share more about it and some layering tips with you in the May edition of the StencilGirl Scoop!

S391, 6x6, Filigree Ornament
The 11th stencil by Gwen that StencilGirl is releasing, Peacock Feathers, is a stylized, hand-drawn one, and a companion to her Ornamental Peacock Mask.

S392, a 6x6 stencil, Peacock Feathers
Gwen also used S387 and S388 in the artwork pictured below.

She says, "Originally I was just building layers in the background knowing that I was going to do that reverse painting thing on top. In the end they end up working like leaves within the composition because the focal point kind of drives what you think you're seeing."


We hope you are as excited to use these stencils as we are to release them! You can find out more about Gwen on her website. You can find all of Gwen's newest releases on our website.