Showing posts with label purse. Show all posts

Monday, January 29, 2018

Stenciled Canvas Purse by Judi Kauffman

Time for a Facelift: Stenciled Canvas Purse
By Judi Kauffman for StencilGirl Products

After serving me faithfully for many years, my sturdy old leather-trimmed canvas sidekick was sorely in need of a facelift. The fabric had faded and there were all sorts of stains, but the design and convenient pockets made it too good to toss out!

Here’s how it looked when I started:

And here it is, transformed with stencils and paint:

It retains some of the original khaki color and is by no means a fancy, perfect purse – even with the facelift, but it will serve me well as a bag to take to workshops (who cares if I get more paint or stains!) and on errands (Costco, here I come…).

INSTRUCTIONS:

1. Protect hardware, strap, and leather edges with masking or painter’s tape.

2. Randomly brush on acrylic paint in two colors, making sure to leave some of the surface of the canvas visible. Allow to dry. Shown: Aqua and black.

3. Using a stencil brush, stencil allover patterns on top of the brushed-on paint with metallic paints in two or more colors plus more black. Use Woodcut Blossoms Background Inverted for the inside of the flap, the outside front of the flap, the sides and the inside front. Shown: Dark and bright copper, dark gold, black.
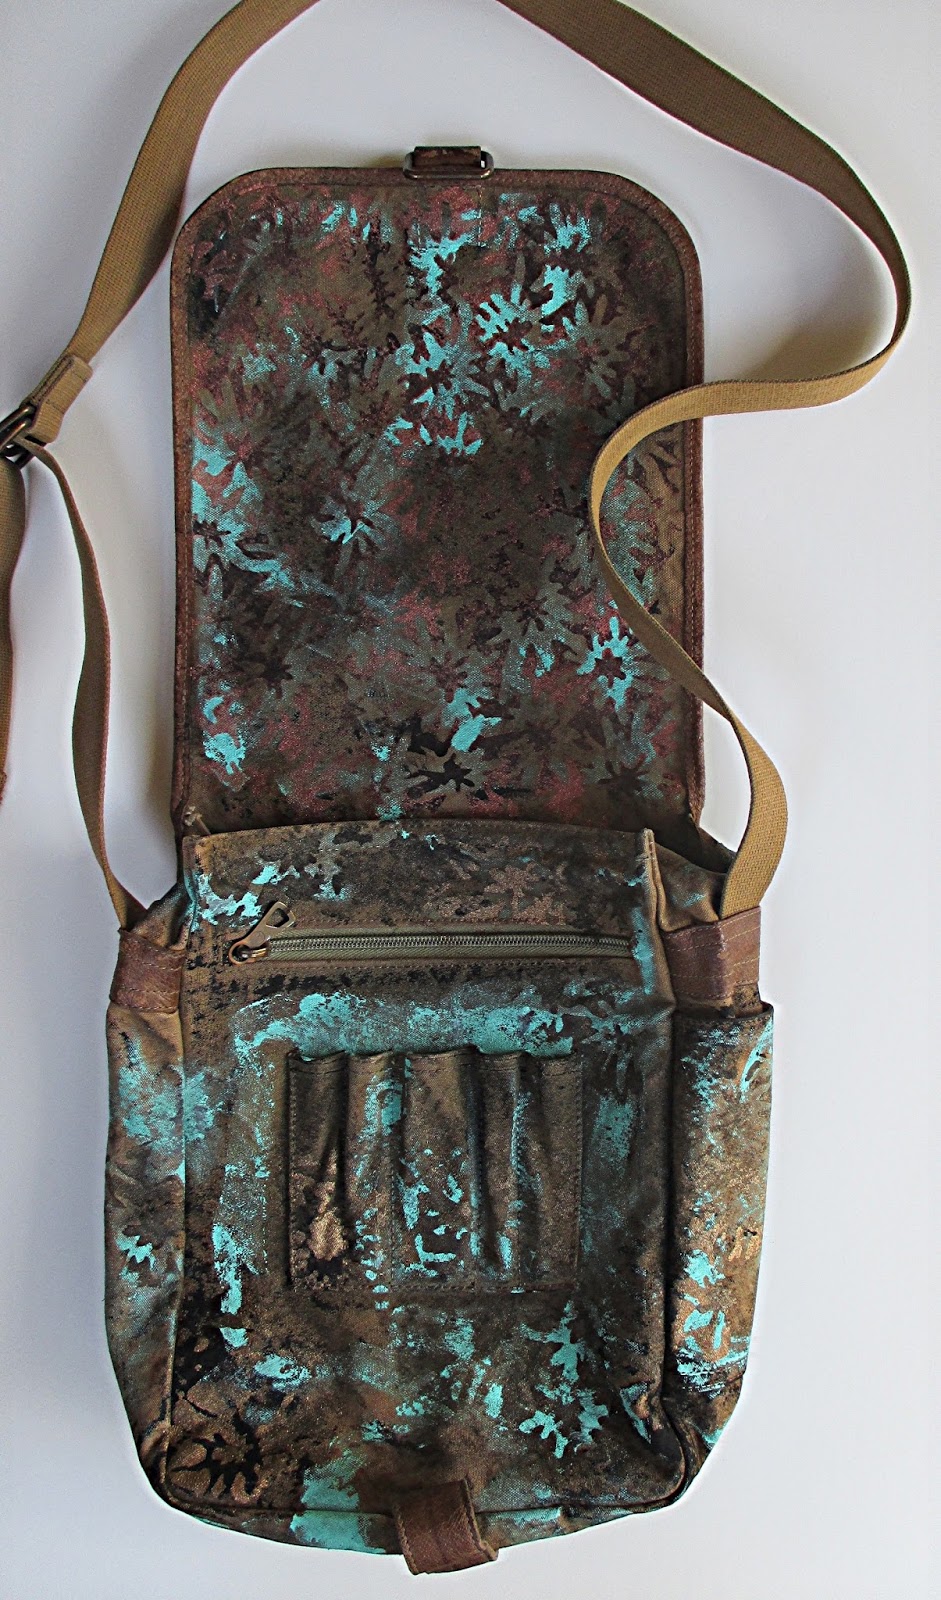
4. Use the same paints and Ladders for the back of the purse, allowing the two patterns to merge. The pattern from the front flap extends onto the back just a bit.

YOUR TURN

Start with a leather purse or one made from softer fabrics and use the appropriate paints and medium for the surface you’ve selected. This bag was stiff to start with so I used acrylic paints straight out of the bottle, no fabric medium.


SUPPLIES

StencilGirl Products –
Woodcut Blossoms Background Inverted 9 x 12 by Margaret Peot
Ladders 9 x 12 by Carolyn Dube

Other –

Canvas (or other) purse in need of a facelift
1” Paintbrush
Stencil brush
Americana Acrylics in colors shown or of choice (DecoArt)

Wednesday, February 17, 2016

Guest Designer Lenna Andrews: Stenciled Windswept Bag!


Hi, everyone! Lenna Andrews here as a Guest Designer for StencilGirl!
I am so tickled that I was asked to develop a StencilGirl project and share it with you!
I adore working with StencilGirl stencils and I also love to share my art process.
I have even made a video tutorial for you so I could share a bit more:


Materials
:
Small black cotton bag
practice fabric similar to bag (Thrift Shop)
Halo Pink Gold Lumiere Paint
small sponges
leftover plastic container for paint
small rubber stamp

1. Start by practicing on your scrap fabric that is similar to the bag.

2. Shake the Halo Pink Gold Lumiere up well and pour a dollop of paint into the plastic container (example: a yogurt container). Take a small sponge, pounce it into the paint and tap it off on the side of the container so there’s not too much paint on it.

3. Place the Windswept Tree Stencil on the scrap fabric, hold it in place with your fingers or clip it down. Try pouncing the paint over the stencil with the sponge, so you get a feel for how much paint & pressure you need.

4. When you feel you have gotten the hang of it, go on to your bag.

5. I put a piece of cardboard inside my black bag so there would be more stiffness to work against instead of just the soft fabric. My idea was to start the design on the front of the bag and wrap it around to the back. I positioned the tree so the stencil could be wrapped around to the back and I pounced paint on just the front.

6. You can let this dry naturally, or if you are impatient like me - use a heat gun to dry the paint more quickly, not too close to the fabric. 

7. When the front of the bag is dry, clip the stencil in place in the front so it matches the branches.

8. Then flip the bag and pull the stencil over to the back of the bag. I held the stencil in place as I pounced the paint on the back but you may want to clip it to the bag for a neater look as far as the finished stencil is concerned.

9. I did not like the blank area next to the end of the branches on the back of the bag so I found a texture kind of stamp to fill the space. I used the same sponge and paint to ink up the stamp by pouncing it with the sponge and then used the stamp to cover the blank space and meld it together with the stenciled sections!

Lenna Andrews is a multi-media artist who lives in Florida with her husband Steve Deming, two sweet dogs and one energetic kitten. She loves to create, share and inspire. Lenna enjoys taking photographs, creating videos, dancing in Nia classes, working in her art journal, creating mail art, making small collages, playing with paint and fabric...anything creative!
Find Lenna Andrews on Facebook, too!