Showing posts with label Carol Ponsford. Show all posts

Saturday, November 2, 2024

Carol Ponsford - Creating a Travel Collage Roll


Hello Bloggers! Today I am going to share how I created a Travel Collage Roll
to take with me when I travel that will take up a small amount of space
but will result in several days of fun and creativity,


The main stencils I chose to work with are shown above and I also used
 the stencils I have listed at the end of this post to create 
some other random bits of collage to use in creating journal pages.


I started with my 6"x6" gel plate and a roll of tissue from Time Holtz. If you can't find
the roll of tissue then you could use a large adding machine tape roll or create a roll
by piecing together strips of any type of paper that you enjoy working on. 
I also prepared a strip of newsprint paper to roll the excess paint off of 
my brayer to create additional collage paper that I could roll up inside the collage roll.


This is the newsprint paper used to clean the brayer between colors.

 
I used my brayer to apply a layer of paint on the gel plate and lightly placed the roll of paper 
on the plate then moved it randomly around the plate until I had picked up all of the paint,


I continued doing this process along the roll of paper until I had as much of the paper 
covered that I wanted. You will see that as I moved along the paper, 
I blended new colors along the way. I did leave a lot of unpainted paper at the end to 
add some washi tape, black and white images, and text.


Above is a picture of the painted section of the paper and the 
colors of Paper Artsy Fresco Acrylic Paint used in this step.


Next I took black paint with a tiny blending tool and sponged paint
through the face and pi stencils being sure to leave some space 
between so that I could cut or tear these images out to put in my journal.


I also changed it up on the last face and used white to stencil the face
which I thought would give me some different choices as I use them in my journal.


 On the next section of the roll, I taped some different washi tapes from 
my stash. I realize some of them may not release when I go to use
them but figured that I could just adhere them with a glue stick if necessary.


To end it up, I sponged black paint through some text and image stencils
to use in addition to the faces on my journal pages.


These next 6 pictures show the roll after I was finished with it. The 
dots on the right were done when cleaning some of the black paint out of my blending tool. Lot's of 
great materials to use to create at least 4 - 5 journal spreads while I am on my trip.


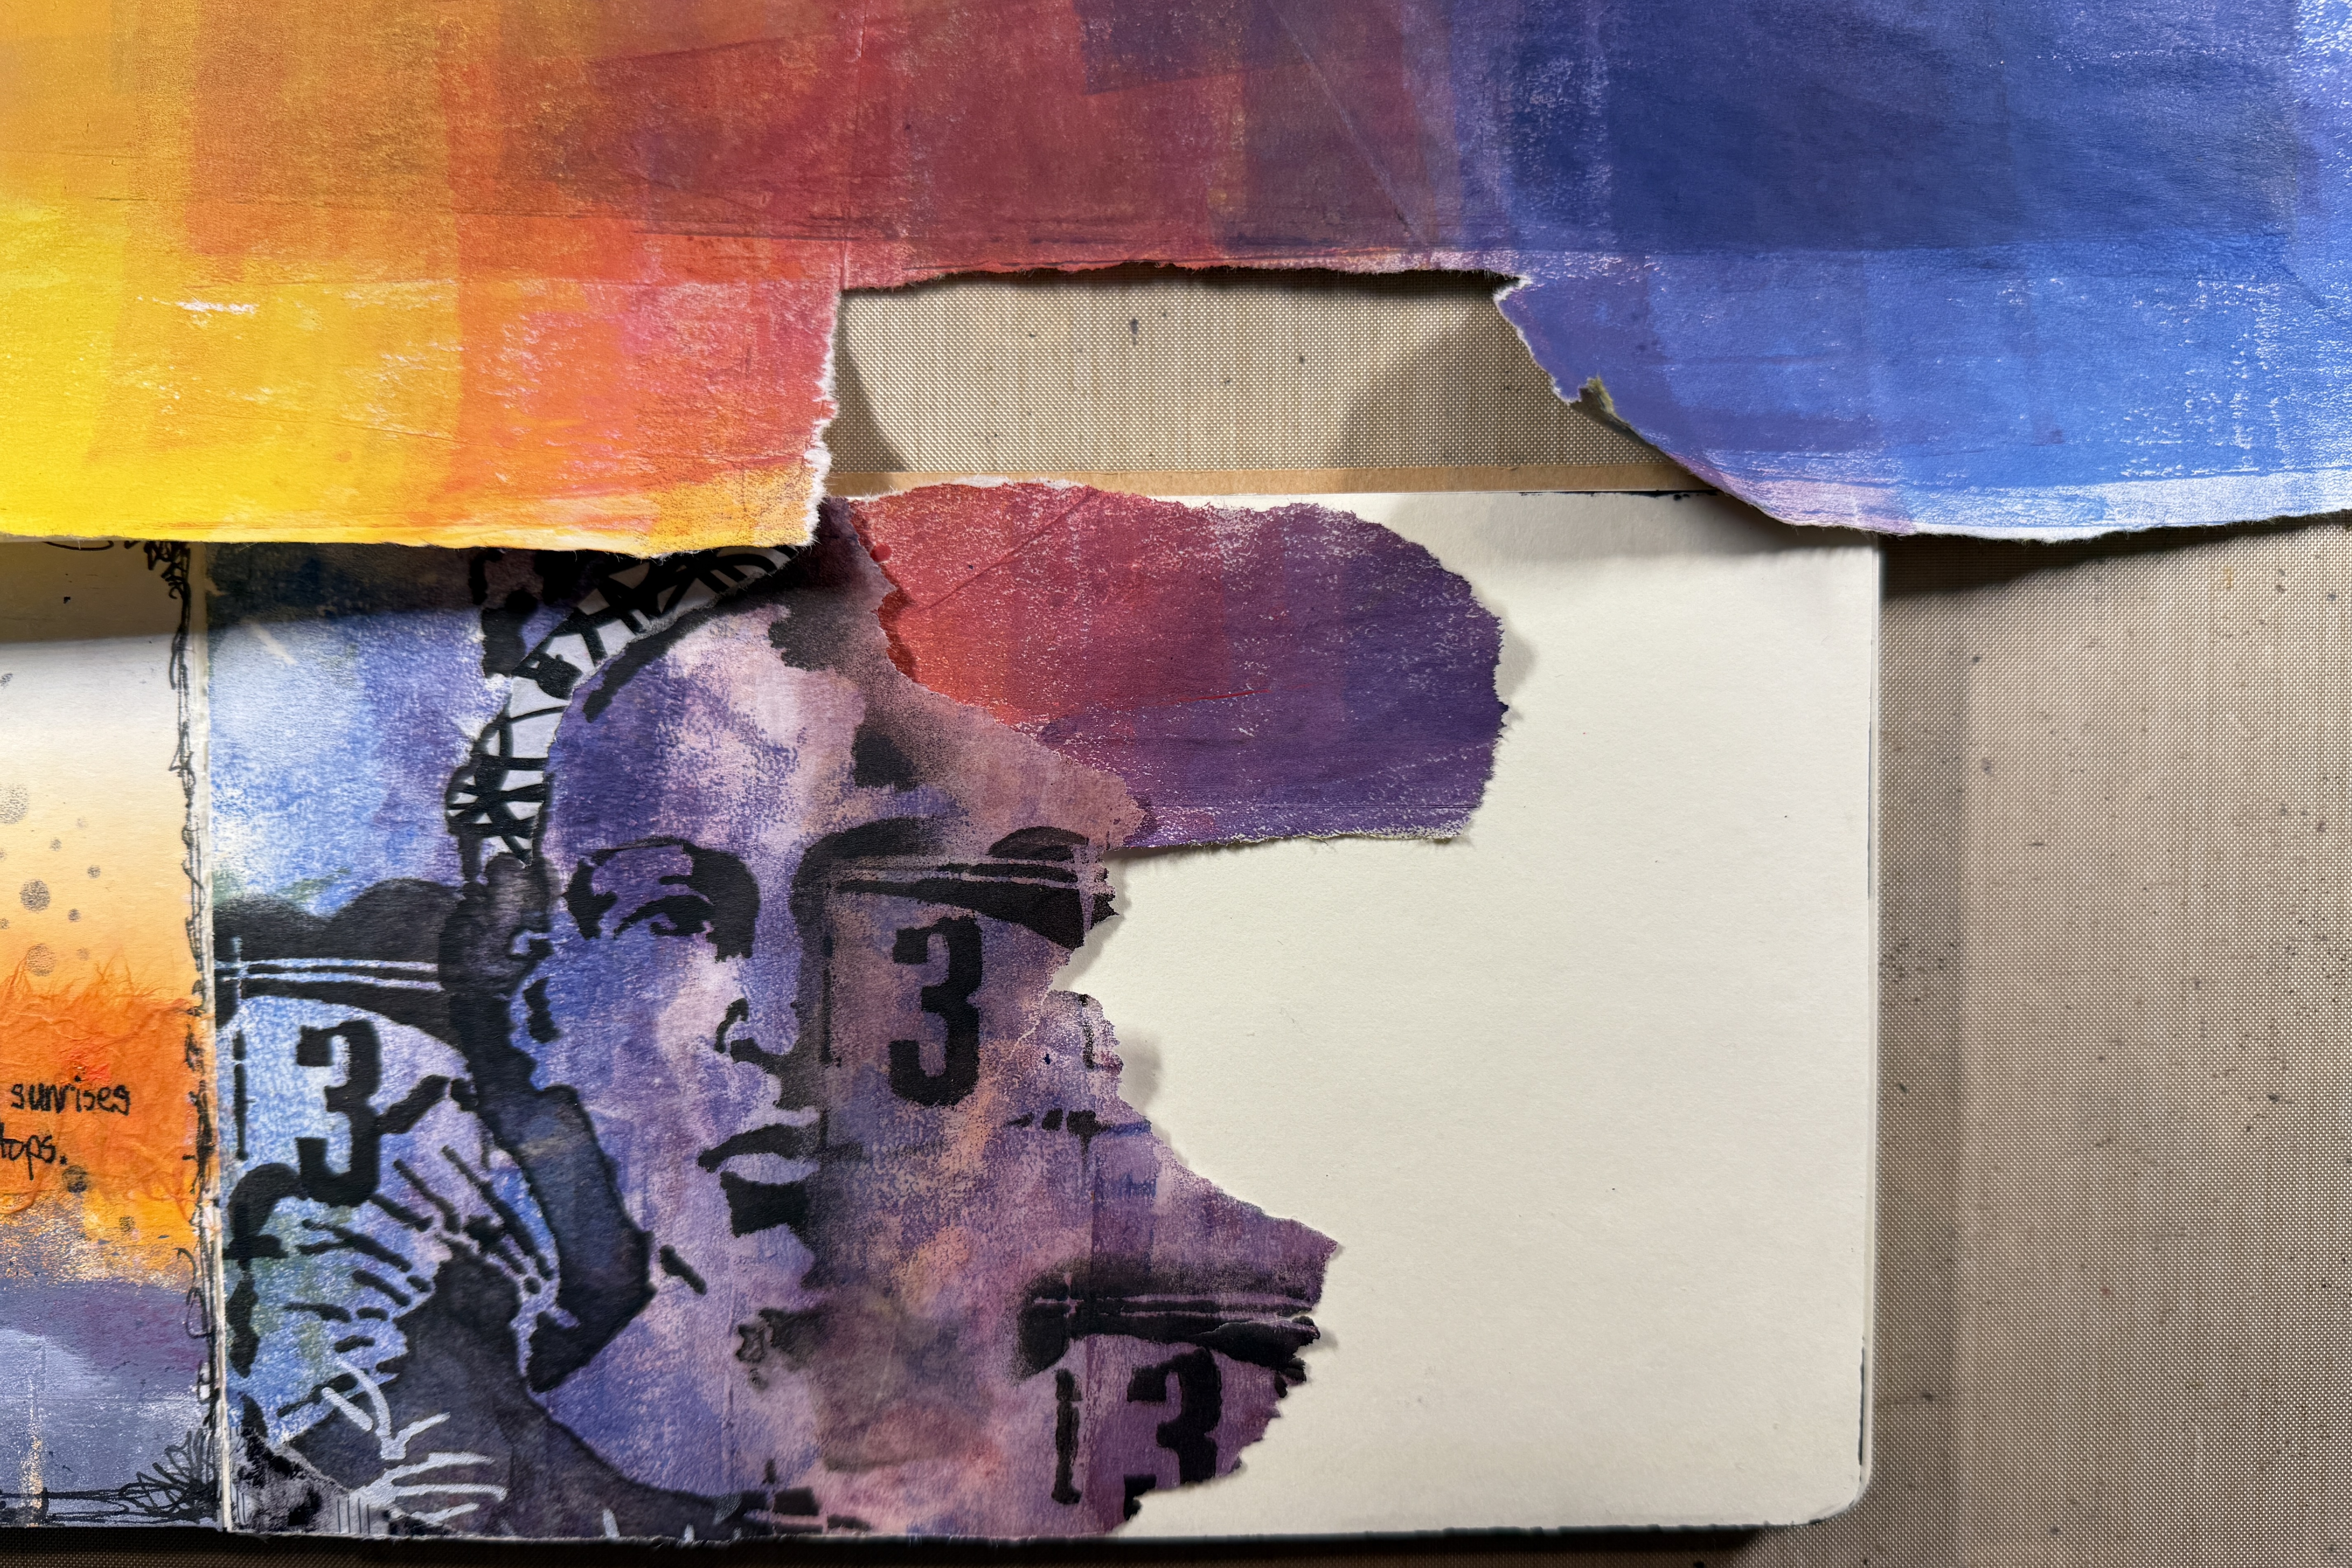
Above are a couple of pictures showing how I started creating the journal page below.
All of the images used were on the Travel Collage Roll that I 
had created and any additional marks were made with the Posca pens.


Along with the Collage Roll, I will pack a pair of scissors (these 
are optional as I could just tear the images I want to use), a glue 
stick, a black and white Posca pen, and my journal!

This is a list of the other stencils I used to create my Travel Collage Roll

Pi

S613


Faces

S647

S648

S651

S652


Words

L184

L209

L311

L 317

L318


I hope that you enjoyed this project and consider making a Collage Roll next time

you are planning to travel to lighten up your suitcase and have some stress-free 

creative time. If you would like to see a short video of this Travel Collage Roll, 

I will be posting one on my Instagram page so be sure to check it out. My 

Instagram link is below. I want to thank StencilGirl® Products for providing me with 

these stencils so that I can share what I create each month with you.


Happy Creating!


To see more of my work please visit my Instagram page.

https://www.instagram.com/reel/DB3yorpu_QD/?igsh=Ym1rMTlrYjk0ajk0


Friday, September 6, 2024

Carol Ponsford - Time for some "Reflection"


Hello Bloggers! Carol Ponsford here today sharing how I created a fun mirror 
to give as a gift to a friend or for yourself using StencilGirl® Products stencils.


I started with the "Faces in a Crowd" stencil #S445 designed by Jennifer Evans and 
the "Yang" stencil S969 designed by Cat Kerr and a bamboo plant coaster as my base.


I laid the stencil backwards from how I wanted to use it on a sheet 
of black card stock and with a white pen, I traced around the outside 
of the stencil and the inside of each of the open areas.
 

Once I finished tracing all of the sections and the outer edge, I removed the stencil 
and cut each inside area out with a very sharp exacto knife and cutting mat. I waited until 
later to cut around the entire circle to add stability while cutting the smaller shapes.


I flipped the stencil over and laid it on the coaster so that as I cut the 
shapes that I wanted to put faces on, I could keep track of where they belonged.
 

Using the black card stock pieces shown on the left above, I traced around each shape 
(except the middle one where the mirror would show) adding about 1/8" on all sides 
for gluing purposes onto a piece of copy paper that I had painted with 
random pastel watercolor paint (of course you can use any color you choose). 
Be sure to keep the paint side up on the cutout.


I took each piece of painted paper and sponged a face through the face stencil with black paint.


While the faces were drying, I painted the coaster with black gesso on the sides and into the 
middle by about an 1 1/2" (just toward the center enough so that the paper I add would cover).


I did not put a face in the center space because this is where I wanted the
mirror to show and the person who is looking at the piece will see their reflection.


I glued each piece in place with a glue stick onto the grid of black card stock.


I traced the outside of the Yang stencil onto a piece of mirror card stock that 
had peel off adhesive on the back side and a plastic cover on the front side and 
cut it out.  (I believe this is a Tim Holtz, Ranger product) I carefully removed the plastic 
cover making sure not to get fingerprints on the mirror. (You could also use a round 
mirror if you can find one the correct size.) After cutting the mirror paper into the circle 
shape, I centered the mirror paper onto the grid paper and traced around the 
circle so that there would be an even edge of black around the faces and cut it out. 


I covered the back of the grid with the faces on it with a glue stick and 
centered it on the front side of the mirror. I tried not to over apply the glue stick
so that I would not have glue oozing out onto the mirror surface. This is also
why I chose to use a glue stick and not a wet adhesive like matte medium. 
I also used a piece of paper on top while I gently pressed the grid onto the 
mirror to avoid leaving any marks or fingerprints on the mirrored surface. 


I decorated the edge and interior edge of the coaster with Posca markers
 then using double sided red tape adhered the grid piece to the coaster.


This picture just shows how I figured out what size font and style I wanted to use for the 
saying. It also helped me with placement so that it would be centered on the piece. I
used the white Stabilo pencil to write the letters on the black in case I made any errors on spacing, 
(which I did) which made it easy to wipe off and correct before using the Posca marker.


I enjoyed creating this piece and hope you will look in your stencil stash and
always try to look outside the box on ways to utilize them in a unique way.

Thank you StencilGirl® Products for providing me with these 

stencils so that I can share what I create with you on this blog and a special

thanks to you for checking out this post and as always I wish you...

Happy Creating!


D6859F19-84FC-4D41-9C31-F614553BCBAD_1_201_a.heic.jpg


To see more of my work please visit my Instagram page.


Friday, July 12, 2024

Carol Ponsford - Fun shrink art clips for art journaling!


Hi bloggers, Carol Ponsford here today with a project to add some fun to 
your art journaling, I will be showing you how I created these clips to hold your pages
open while you create in your art journals that will add a smile to your face.


I started with Shrink plastic, the stencil of choice (this one is L767 - Three Swamp Monsters 
stencil designed by Angela Treat Lyon), and a fine line Sharpie. I love these little whimsical characters!
(I also created one using L502 designed by Gwen Lafleur that you will see further down the page.)


I placed the stencil down on some card stock paper and traced around all of the sections
of the stencil and added some extra embellishments where I wanted.


With the stencil still in place, I took colored pencils and colored in all of the areas.
When using Shrink plastic, you need to remember that when you shrink the image,
the colors will become darker than first applied during the shrinking process.


Next, I carefully cut the image out. Since this image had many thin areas, I left 
some of the uncolored areas to add support for the thin sections.


The next step was to shrink the image. I used an old splatter screen to help 
keep the plastic from curling up too much and getting stuck to itself.
I had some areas stick but I was able to use a needle tool to pull the 
stuck areas apart carefully so I would not tear pieces off of the image.


I stopped part of the way through to show how much the piece will twist and curl
during the heating/Shrinking process. As you can see it gets quite curly.


The image will shrink approximately to half of it's original size as shown above.


I also did 3 other images using other types of pens to color the image. The top image 
was done with Posca markers, the second image was done with Copic markers, 
and the 3rd was the one with colored pencils. On this 4th image I 
did not trace the image on first, I started with placing the stencil under the 
shrink plastic, colored in areas with Copic markers and then laid the stencil 
on top and traced with the Sharpie pen. I wanted to show that there
are several ways to use shrink plastic and different pens that will work.
The colored pencils will give a much softer look than the Posca or Copic markers.


The next step was to trace each piece onto a piece of card stock and 
cut it out. Because I wanted to make sure the colors showed as much as possible
I felt putting white behind them would add to their brightness as well
as add a more absorbent base to help them adhere to the metal clips.


I used Gel Matte Medium to glue them on to the card stock.


This step might not be necessary but I did sand the card stock on the back
of the pieces a little as well as the metal hair clips I used to help them adhere better.
 

I used 2 thin popsicle sticks to hold the hair clips in place during the gluing stage
to help insure that the glue would not drip on the clip and seal it closed. This 
also helped to level the clips and stabilize them while they were drying.
I used 527 glue but I am sure there are many other glues that would work.


Once they are dry, I hope you will enjoy using them in your art journaling to hold the 
pages open as you create in your journal. And just maybe, when you catch 
one out of the corner of your eye, they will bring a smile!

Thank you so much for joining me today on the blog and I hope you will
create some of these journal clips for yourself. I want to thank 
StencilGirl® Products for providing me with these stencils so 
that I can share what I created with you.


Happy Creating!

D6859F19-84FC-4D41-9C31-F614553BCBAD_1_201_a.heic.jpg


To see more of my work please visit my Instagram page.