Showing posts with label stenciled faces. Show all posts

Friday, September 6, 2024

Carol Ponsford - Time for some "Reflection"


Hello Bloggers! Carol Ponsford here today sharing how I created a fun mirror 
to give as a gift to a friend or for yourself using StencilGirl® Products stencils.


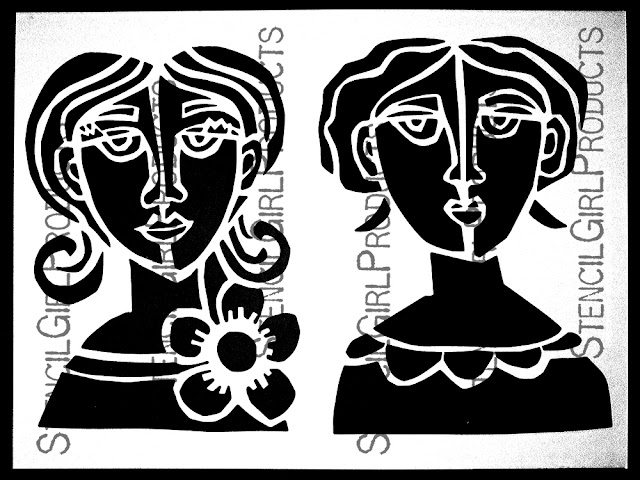
I started with the "Faces in a Crowd" stencil #S445 designed by Jennifer Evans and 
the "Yang" stencil S969 designed by Cat Kerr and a bamboo plant coaster as my base.


I laid the stencil backwards from how I wanted to use it on a sheet 
of black card stock and with a white pen, I traced around the outside 
of the stencil and the inside of each of the open areas.
 

Once I finished tracing all of the sections and the outer edge, I removed the stencil 
and cut each inside area out with a very sharp exacto knife and cutting mat. I waited until 
later to cut around the entire circle to add stability while cutting the smaller shapes.


I flipped the stencil over and laid it on the coaster so that as I cut the 
shapes that I wanted to put faces on, I could keep track of where they belonged.
 

Using the black card stock pieces shown on the left above, I traced around each shape 
(except the middle one where the mirror would show) adding about 1/8" on all sides 
for gluing purposes onto a piece of copy paper that I had painted with 
random pastel watercolor paint (of course you can use any color you choose). 
Be sure to keep the paint side up on the cutout.


I took each piece of painted paper and sponged a face through the face stencil with black paint.


While the faces were drying, I painted the coaster with black gesso on the sides and into the 
middle by about an 1 1/2" (just toward the center enough so that the paper I add would cover).


I did not put a face in the center space because this is where I wanted the
mirror to show and the person who is looking at the piece will see their reflection.


I glued each piece in place with a glue stick onto the grid of black card stock.


I traced the outside of the Yang stencil onto a piece of mirror card stock that 
had peel off adhesive on the back side and a plastic cover on the front side and 
cut it out.  (I believe this is a Tim Holtz, Ranger product) I carefully removed the plastic 
cover making sure not to get fingerprints on the mirror. (You could also use a round 
mirror if you can find one the correct size.) After cutting the mirror paper into the circle 
shape, I centered the mirror paper onto the grid paper and traced around the 
circle so that there would be an even edge of black around the faces and cut it out. 


I covered the back of the grid with the faces on it with a glue stick and 
centered it on the front side of the mirror. I tried not to over apply the glue stick
so that I would not have glue oozing out onto the mirror surface. This is also
why I chose to use a glue stick and not a wet adhesive like matte medium. 
I also used a piece of paper on top while I gently pressed the grid onto the 
mirror to avoid leaving any marks or fingerprints on the mirrored surface. 


I decorated the edge and interior edge of the coaster with Posca markers
 then using double sided red tape adhered the grid piece to the coaster.


This picture just shows how I figured out what size font and style I wanted to use for the 
saying. It also helped me with placement so that it would be centered on the piece. I
used the white Stabilo pencil to write the letters on the black in case I made any errors on spacing, 
(which I did) which made it easy to wipe off and correct before using the Posca marker.


I enjoyed creating this piece and hope you will look in your stencil stash and
always try to look outside the box on ways to utilize them in a unique way.

Thank you StencilGirl® Products for providing me with these 

stencils so that I can share what I create with you on this blog and a special

thanks to you for checking out this post and as always I wish you...

Happy Creating!


D6859F19-84FC-4D41-9C31-F614553BCBAD_1_201_a.heic.jpg


To see more of my work please visit my Instagram page.


Thursday, November 16, 2023

Introducing the Curious Girls Collection by Cat Kerr


"Live the wonderful life that is in you! Let nothing be lost upon you. Be always searching for new sensations. Be afraid of nothing." Oscar Wilde

My Curious Girls were originally hand-cut into Matte Duralar film measuring 30" x 40". They were born with this Oscar Wilde quote in mind, and with every girl that came to life, I thought of the girls that came before me, the girls that stand beside me, and the girls that come tomorrow. Our mothers, our daughters, and sisters, unique and curious in their own way.  Now offering them in smaller sizes, my "Curious Girls" would make a great addition to a card, journal page, or canvas. 


Cat's latest stencils are available now at www.stencilgirlproducts.com


Thursday, November 11, 2021

StencilGirl® Faces & Figures


Get All Your Ducks (or heads) In a Row

        When creating a composition with human figures at different distances from the viewer (and each other) it's helpful to understand something about perspective and how we see.  When we look toward the distance, the invisible line between our eyes and the horizon is our eye level.   Because most adults fall within a general range of height,  the eyes of a person standing in front of you will line up more or less with the horizon at your eye level, too.  Even if that person stands twenty feet away from you, if the ground is level, you will still be at the same eye level, and that person's eyes will still roughly line up with the horizon - even though their figure now appears to be smaller.  The same holds true if the person is fifty feet away from you and appears even smaller still.  On level ground, the sight lines of people at different distances from the viewer fall along the same horizontal line.  As perspective shrinks them, they shrink from top and bottom, anchored on the horizon at their eye level.  In composition, we naturally tend to identify with the most prominent face and adopt their sight line, meaning that other people in the composition on that same sight line are presumed to be the same stature as the viewer.  It's a brain thing!

Head masks by Pam Carriker Face Silhouette S171 and  ATC Mixup L651 
 

    In the first example, the horizon runs along the tops of these figures' ears. and because the second figure is smaller but on the same line, it appears to be the same height as the one on the left, but farther away from the viewer.  In the next example, putting the second figure lower than the horizon (established by the larger, closer figure) has the effect of making that second figure smaller in stature, like a child.  Both compositions use the same masks, but the effect is different from one to the other.  The second example could conceivably be showing a same-sized figure that is farther back and lower down (going down a slope, for example),  but taking the second figure off the horizon creates different visual information.  In the absence of other elements establishing a horizon line, we are more likely to identify with the closer (larger) figure,  and we the automatically assume the smaller figure is smaller than we are.  It would work in reverse if the smaller figure aligned with the horizon (established by other visual information in the composition) and the larger figure were much higher - it would make the larger figure appear to be monumental.


Here are two more quick examples to illustrate this principle. (Ordinarily I would make these pages much more finished, but they are illustrations only, not completed art journal spreads.)  In the second one you can see I had to sketch in tiny figures in the far distance, but still, their heads are lined up with the ones closer to the viewer.  It thus creates the illusion of a crowd of people all of the same size, with their heads all on the same horizon.  If their feet were all on the same line it would look like a collection of Gullivers and Lilliputians.

Figures from Carolyn Dube's Finding My Tribe stencil L414

Figures from Valerie Sjodin's ATC Mixup L762 and Figures Praising L727
 
    In September I had the great pleasure of traveling with MaryBeth Shaw, owner of StencilGirl® Products, on a traveling art workshop in northern Italy.  Our project was to create an accordion-fold painted travel journal, adding bits and pieces of ephemera as we wandered from Padua to Venice to Parma to Bellagio.  I took a number of stencils and masks that have the same figures in different sizes, and had fun arranging them in my travel journal.  Because of the pandemic, cities that are normally mobbed with tourists were relatively uncrowded.  We had a wonderful time strolling through near-empty piazzas, through colonnades, down narrow passages, over bridges, on trams, in boats, on trains, in cable cars, and on foot.  (Trust me, if you have the chance to take a travel art workshop with MaryBeth, you should do it!)
 
figures from Carolyn Dube's  Finding My Tribe L414 and ATC Mixup L657

    On this side of the journal I used the principle I am featuring in this column. I used stencils and masks of figures by Carolyn Dube, and kept their heads on roughly the same line across the pages of the journal in order to create the illusion of depth.  I even suggested a horizon line with a line of black dots running from figure to figure.  (Notice that in the photo of the Venetian canal in the second panel I misaligned the horizon - raising that image up half an inch would have done a better job of emphasizing the same horizon line from panel to panel.  What can I say? Creating on the fly doesn't always leave you time to think carefully before pressing down a photo sticker!)


This composition may possibly give the impression that we were all running to the last panel in order to clink glasses with our aperitivos - and that impression would not be entirely misleading!  I used a plethora of stencils and masks on this project, as well as some rubber stamping and some mark-making tools.  We are fortunate to have stencil and mask designs that come in multiple sizes - it makes creating a composition like this a lot of fun.  If you have a few figure stencils in different sizes, experiment with placement and see what you come up with.  Ciao!


Other stencils featured in this blog post  Near Miss, by Wendy Aikin S622, Arched Aqueduct by Carolyn Dube L359, Venetian Stencil Large by Carolyn Dube L255,  Monoprint Stencils and Mask Set by Rae Missigman L739, Grand Wisteria by Trish McKinney L679,  Cuba Libre Club Set by Jane LaFazio October 2017,  MaryBeth Shaw's Private Collection Club Set April 2016

Tuesday, December 4, 2018

Artful Celebrations: The Influence of Street Art with Trena Brannon


Hello Beautiful!
My artful piece was inspired by the creativity of street art.


I looked up artful in the dictionary. 😊

adjective: 
1. (of a person or action) clever or skillful, typically in a crafty or cunning way.
"her artful wiles"
synonyms: sly, crafty, cunning, wily, scheming, devious, Machiavellian, sneaky, tricky,  conniving, designing, calculating;
antonyms: ingenuous
2. showing creative skill or taste. 
"an artful photograph of a striking woman"
synonyms: skillful, clever, adept, adroit, skilled, expert "artful precision"

The description made me think of how people who paint on buildings and huge spaces have to think in a truly creative way – a way that is beyond a controlled environment.  Below are the steps for my faux street art – a little piece of a building that will hang in my creative space.
Step 1:
I painted a thin coat of a medium shade gray onto a canvas panel with a sponge, being sure to paint the final strokes horizontally.

 
Step 2:
After it totally dried, I painted a thin coat of a lighter shade gray with a sponge, being sure to paint the final strokes horizontally.  While the paint was still wet, I lightly wiped with a baby wipe through the Intersecting Brick Circles Stencil (S137) stencil in random areas to create the illusion of a brick wall.

Step 3:
After that layer completely dried, I used a sponge to paint the first face through the Shadow Face (S559) stencil
 

Step 4:
I created a mask out of a piece of scrap paper.  To make the mask, I sponged color through the face stencil onto the scrap paper and cut it out creating a side of the face shape. After the first painted face dried, I laid the mask over it and placed the stencil next to it, lining it up to overlap with the first. I then sponged in color, adding a face outline with a thin paintbrush.


I repeated Step 4 until all the faces were finished.


Step 5:
Using the Brush Alphabet stencil (L645) and a paint pen, I created the word “COMPASSION.” I practiced on a scrap piece of paper before adding the letters to my canvas.  First – making sure I spelled the word correctly. 😊 Then deciding how I wanted to outline.


Step 6:
To add some interest and perspective to the “building,” I added a fire hydrant.  I drew it with a pencil first, used a red marker for the outline and then erased the pencil.


Step 7:
At this point, I decided to have the first face be a full face. I flipped the stencil over and positioned it as mirror-image and sponged in the matching paint color.  Using a small round brush, I drew in a hint of the left side of the face. I also painted the fire hydrant.


Step 8:
I absolutely love the November StencilClub Her Story set SC-11-2018 and wanted to incorporate the cool word design from Pam Carriker. I spayed a light white mist through the 6x6 stencil in two different areas.


Step 9:
To really make the letters pop, I added a vivid pink over the paint marker, being careful to not paint over the black lines.


Notes/Tips:
  •  I used dry sponges to apply paint - with a small amount of paint dabbing most of it off.
  • Since I’m right-handed, I turned the canvas upside down to sponge the faces.
  •  I cleaned my stencil in between paint, first wiping off with a paper towel, then spritzing with alcohol to get all the paint off. I wanted the colors to remain pure as I applied them.
  • Before outlining, I allowed the paint/ink to dry, wiping off pen tips before putting away.
  • Be sure to move your artwork far away from where you are cleaning, otherwise, you will get some splatters and sprays – that may or may not end up enhancing your piece. Hehehe
  •  I shared my second attempt at creating this piece. The first time I tried to make this piece, the implementation did not align with my vision. Sometimes that’s ok, the implementation turns out better than my vision! In this case, it did not. 😊 I decided to start over. I repainted the canvas gray. I learned a lot from the first try – what not to do.


 Supplies I used:
  • Substrate:  canvas board
  • Paints/Inks: Liquitex gesso and acrylic paint, Jane Davenport acrylic paints, Golden fluid acrylic paint, Pebeo high viscosity acrylic, Mister Huey’s color mists
  • Other: sponge, Tulip handle sponge, #4 round paintbrush, Sharpie markers, Derwent Graphik line painter
  • Stencils: S137, S559L645November StencilClub 6x6 stencil


I hope this post inspires you to create something artful that makes your heart smile!
Thank you so much for reading.
Take care and STAY POSITIVE!
Trena