Showing posts with label #artjournal. Show all posts

Friday, April 11, 2025

Flowers in bloom tags


Happy Spring creatives!

April showers bring May flower tags and these were simply a joy to create using Vintage Thicket S976  and Travel Note M102 both designed  by Rae Missigman.

What I love about this 6x6 stencil is the assortment of floral blooms that one can incorporate in their artwork.
The Travel note mini stencil is one I tend to reach for time and time again. I find it the perfect companion for art-journal pages and tags. It’s design is perfect for backgrounds and bits of it can be used for mark making as I did here.

The Process:


Cut your paper to preferred size ( I am using watercolour paper.
Create a flowing background first by applying water to the paper and then follow with acrylic ink or watered down paint.


Add the flower of your choice.


I wanted a flower that had more petals and to achieve this I simply flipped, turned the stencil upside down and added paint with my sponge.


With the Travel Note stencil apply sections to different pints of the tag with a contrasting colour.
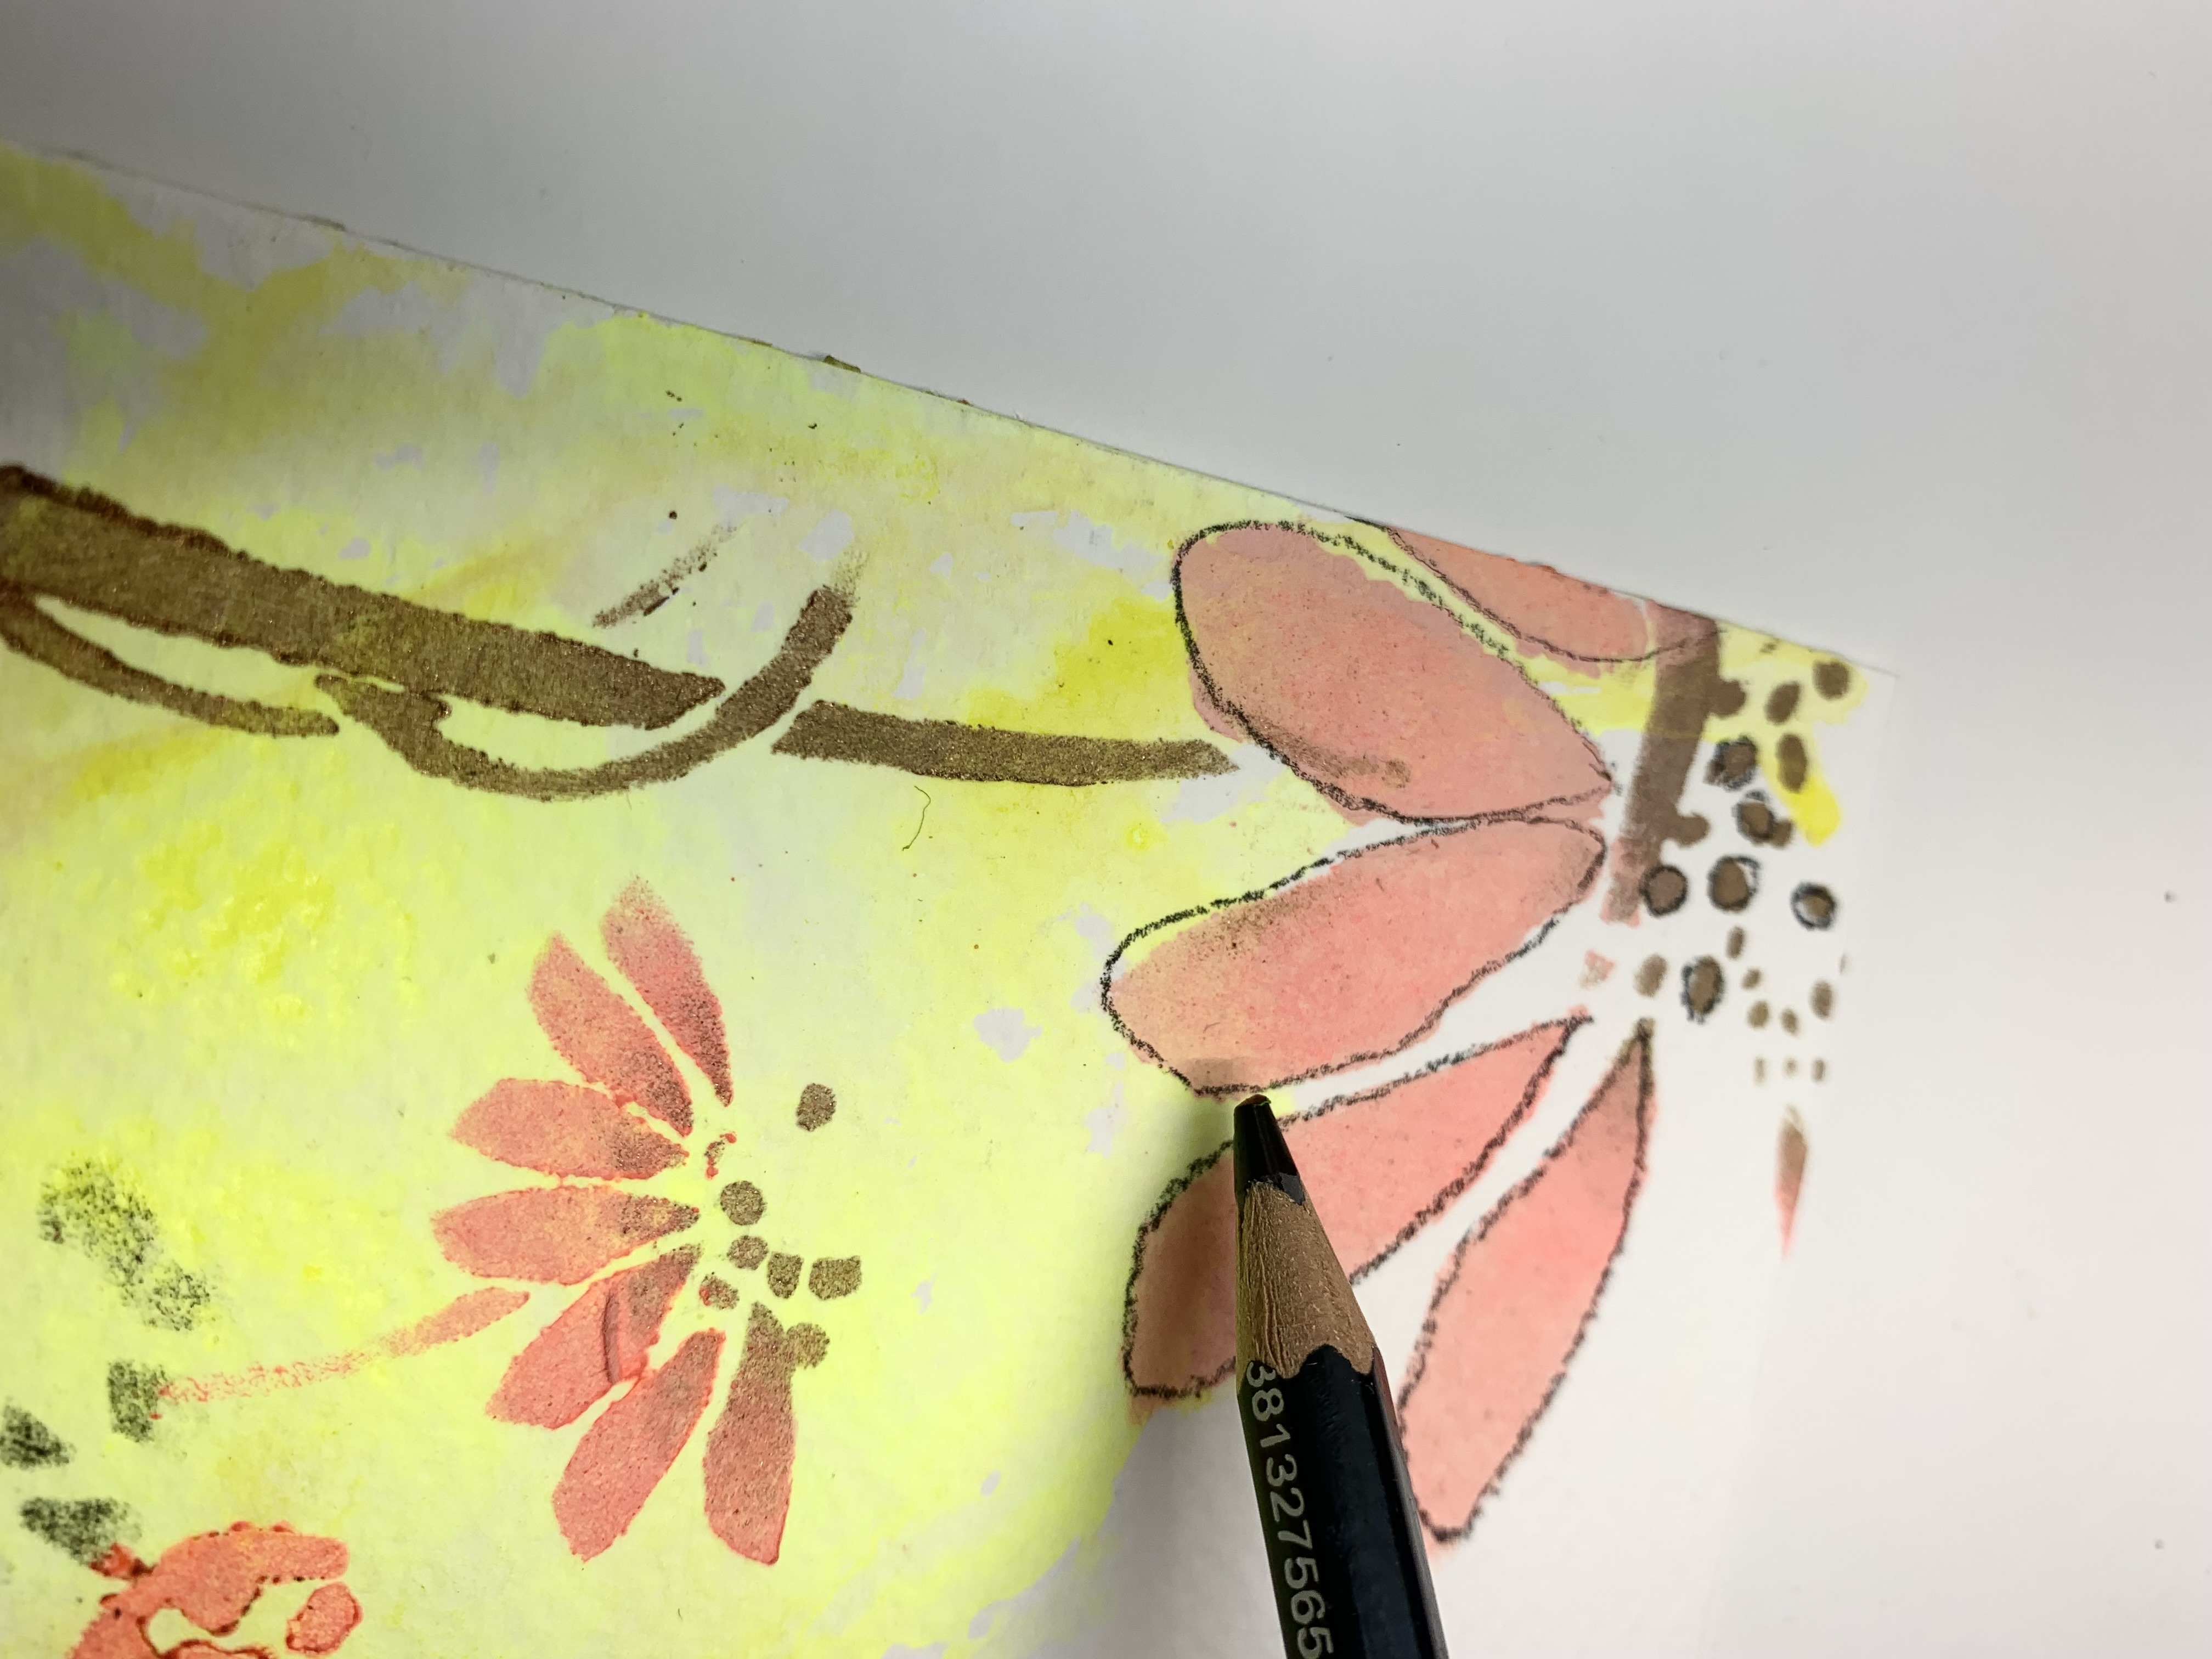

To add dimension and softness to the petals I am using an Aquarell pencil which is water soluble. Simply trace the area with the pencil and with a wet brush trace the pencil lines to generate movement . See picture below.

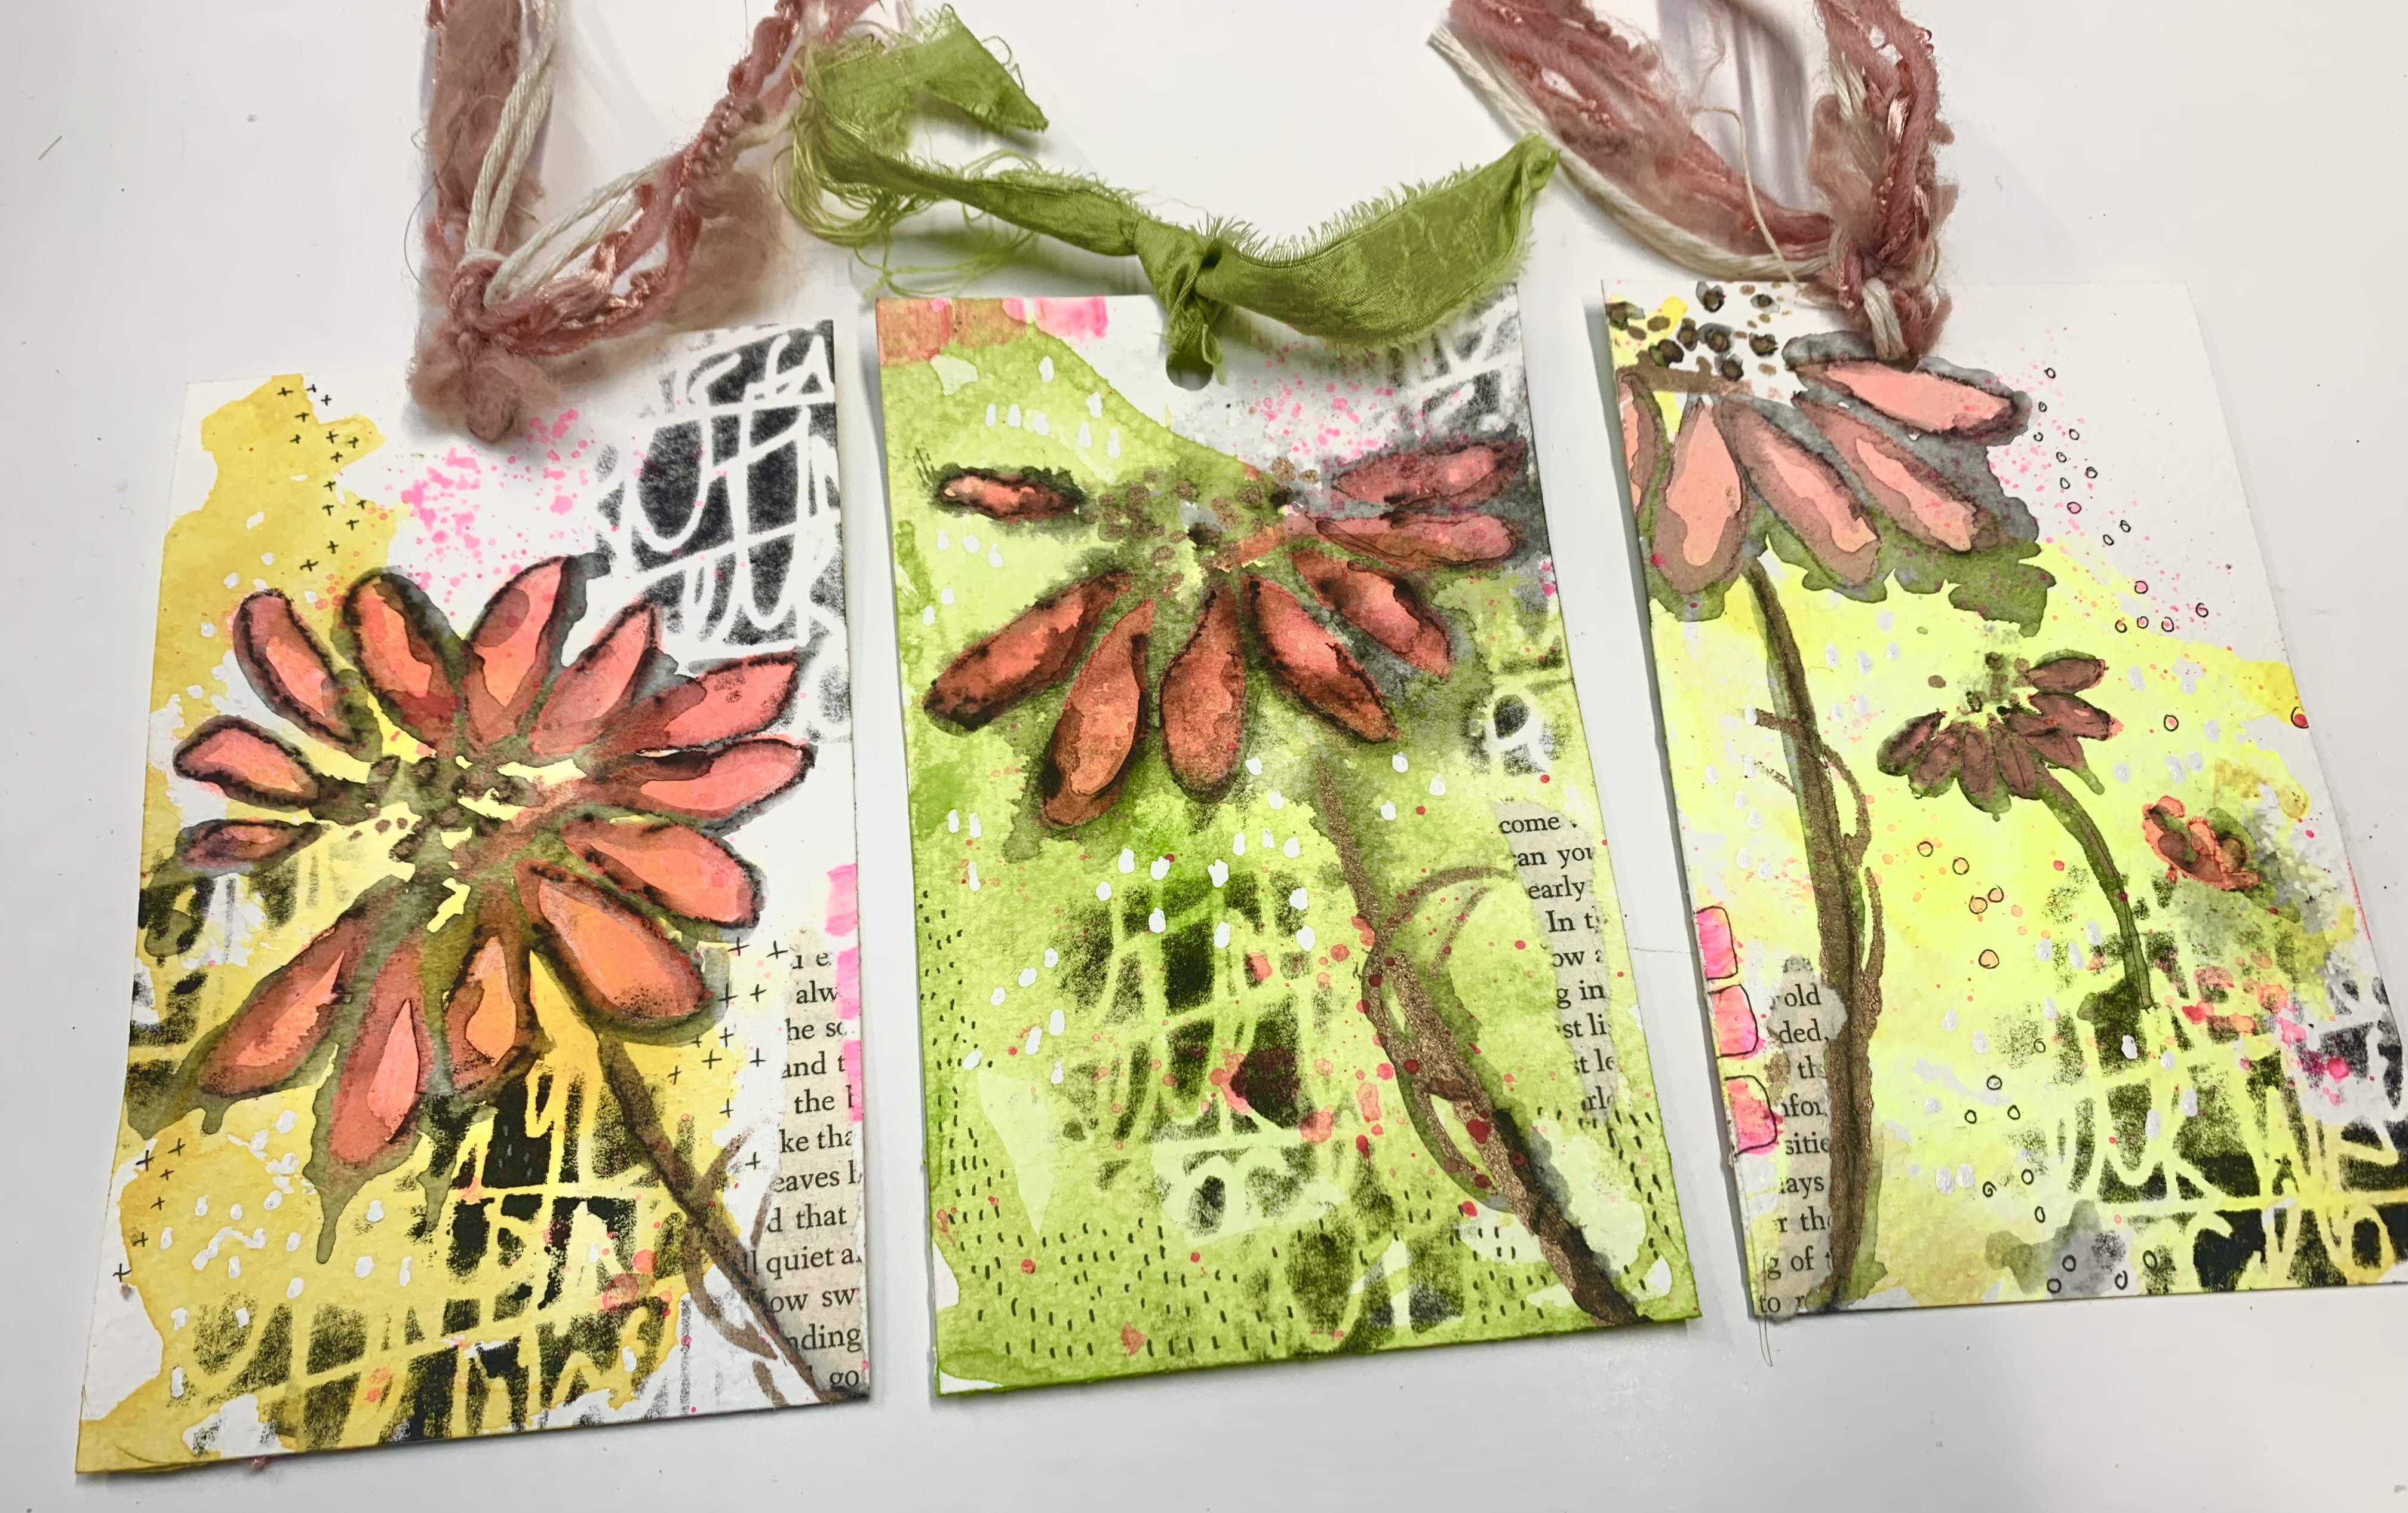

For the final steps, punch a hole in each tag, add pieces of old book pages and bits of fabric.

Take the time to enjoy your garden and it’s spring awakening.
Hope you enjoyed the tutorial.


Supplies:

Watercolor paper
Acrylic inks
Aquarell pencil
Fine paint brush 
Water 
Hole punch 
Ribbon 


Tina


Friday, August 30, 2024

Slow Stitched Boho Birds


Hello creative friends,

As a stencil artist I always push my creative options with each stencil - what else can I create with this- and I so love the results with this fabulous stencil! 

Today’s project was an answer to that question.
Get ready to slow down and enjoy the meditative process of stencil art & slow stitching.

I am using Boho Birds stencil designed by Gwen Lafleur and her passion for creating collage animals in here art.
This stencil has three beautiful hand drawn birds as well as words and phrases making it the perfect addition to any stencil collection.

The Process:

With a pencil trace the outline of the bird ( I’m showing two here because we will be bird stuffing later!)
This will be the template for our bird base.
Trace the tail, the wing, beak and eye.
Feel free  to piece out as many and multiple pieces of each bird section- in my bird I also cut out a piece for the underbelly. 


Cut each piece and we will use them as templates on our fabric or papers.


Trace each piece onto your fabric pieces and cut.


Assemble the bird using a glue stick to temporarily tack down the pieces~ this will make it easier to stitch. 


Select your thread and start stitching.
Remember this is not about perfection so create stitches intuitively, some short some longer. 
Varied stitches will also add interest.
A variety of thread colours and densities can also be incorporated for further interest and dimension. I am using a crochet thread, feel free to use thread if your choice.
Once you are satisfied with the stitching - this little guy can be used as is in your art. 
If you want to use it as decor refer to the next steps.


To create a dimensional bird, grab the second base piece.
Use cotton, batting, tissue or like I did here a  dried baby wipe! (Nothing gets wasted) 

With the glue stick to adhere the top stitched piece to this base and join them together with stitching around the perimeter.


Watch the full process here YouTube


Supplies:
Stencil L628 Boho Birds 
Fabric or papers 
Needle & thread 
Pins
Cotton batting 


Let’s connect


Tuesday, March 5, 2024

Striped Leaves Art Journal


Hello Creative Friends, 

I for one love creating my own art journals and as a curious creative I am endlessly experimenting with unique and interesting shapes for my journals.

Todays little journal is created with two diffent stencils.  Striped Leaves stencil created by Terri Stegmiller and Sprigs stencil created by Cecilia Swatton.

I love the creative possibilities both these stencils offer.
The  Striped Leaves stencil hosts a variety of 6 leaves and an assortment of various size circles and the Sprigs stencil is full of lovely flourishes.
In addition to this project the stencils can be incorporated in your art a mulititude of ways which can be found under the description and details of each one.


Let's get started!

On a gel plate spread your choice of acrylic paint. This will be the base colour of the leaves.


  • place watercolour or mixed media paper down and pull the paint ( a sturdy paper is needed and will be used for the front and back covers)
              

Adding the layers ~ add a contrasting colour directly on top of the base (step 1) I am adding black~it adds wonderful contrast and depth 


While the paint is still wet, place the sprigs stencil on top and with a baby wipe remove excess paint to reveal the delicate outlines (see below).  


Allow to completely dry.


For the final layer, add white acrylic paint.  Select the leaf you will be using from  Stiped Leaves stencil, place that section on to your paper and once again remove excess paint with the baby wipe.  This will real the beautiful background we created above


NOTE: 
  • lift the stencil and flip it over so that now we have the mirror image of the leaf.  Remove excess paint as before.   These are the front and back covers of your journal
  • repeat the process with the various leaf sizes and these will be used as journal pages 
  • if you prefer both sides of the leaves to have pattern then repeat the above process on the other side of your watercolour or mixedmedia paper


Cut out the leaves and place to the side with the exception of the front cover leaf


Use the top cover leaf as a template ~ trace and cut as many pages as you like to fill your journal.
I used dyed found papers from old books, some painted papers and some stenciled papers


Stack your leaf pages together and puch a hole in one end 


Now for the my aha! moment.
I could not for the life of me find a ring clip that would work and I was concidering some thin rope but then I saw these! Yes they are shower curtain rings and let me tell you they work so much better than a regular ring. 


This made me so happy!!!!


For added flair, tie some vintage ribbons, lace and torn strips of fabric.


Thank you for stopping by. 
Enjoy creating your own Striped Leaf journal and adorning it with all the bits that represent you.


Supply List:


Tina 


Tuesday, January 9, 2024

Mixed Media stenciled Pin/Brooch


Hello creative friends! 

Happy 2024 to you all.

Today I will be guiding you through an adorable little mixed media project using Faces in the Crowd stencil by Jennifer Evans.

When inspiration strikes I always act. 
With that said, a piece of fabric that I had stenciled faces on stared at me from the pile of “inspiration” on my desk, along with other bits of fabric and I immediately started stacking.
The result are these adorable mixed media pins that can be incorporated in art journal pages, adorned on gift packaging, given as friendship gratitude tokens or worn on your favourite clothing!

I have used the Faces in the crowd stencil designed by Jennifer Evans, countless times! 
Check out this project ~Paper Dolls

Let’s start the process:

Step 1:

Gather your base fabric, faces in the crowd stencil and black acrylic paint.
Stencil the faces of choice on to the fabric
Allow to dry completely 
Cut around each face allowing some room for stitching


Step 2:

Select fabric pieces of your choice (I also used a small piece of batting to create dimension.)
Cut the first piece ( the one beneath the face) 1/4” longer than the face 
Continue with all following layers increasing by 1/4”
Stack the fabrics with the largest piece on the bottom 


Step 3:

With the face outline on top,  pin all pieces together and stitch around the face 
I used my sewing machine but hand stitching works just as well
Using your fingers (or a tool you prefer) fray each of the fabric edges
I love me worn, unraveled edges!


Step 4:

Add some further individual personality to each one with beads and buttons! 


Step 5:

To create a brooch, simply stitch a safety pin in the back


Your pins are now ready to find their receiver- a perfect token in happy mail✨


Supplies:

Stencil~Faces in the Crowd Faces in the crowd
Black acrylic paint
Cosmetic sponge
Fabric
Needle
Thread
Scissors
Safety Pin


Thank you for being here, I look forward to seeing your creative ladies! 
Have a fabulously blessed and creative year!


xoTina 


Wednesday, December 20, 2023

Rainbow backgrounds using stencils


Hi Everyone,
It's summer here down under, and that means bright colours!!! Well, it means that year round for me, but I digress!
This simple journal page was created using only stencils and acrylic paint, and it was so fun to make. I love how the background is such a strong focus, yet stands up to the bold image in the foreground.

To create this page I used the Circle Tile Stencil (L015) and sponged rainbow colours through the parts of the stencil all over my page. I started with the lighter colours and built up to darker, so if there was some overlap it would be covered.

Once dry, I then stencilled the pretty as a Peacock face ( S288) in black gesso and part of the You Got Time (M398) stencil to create a body. I used white paint pen to add highlights to the black gesso. I then stencilled a quote from the Rainbow Quote stencil (L956) and added white highlights as well. 

I love how happy this piece makes me, so I experimented with doing a similar piece using bright watercolours. This turned out okay - but there was some bleed through under the stencil, which you could avoid if you used a stencil spray to hold it close to the page. I freehanded a silhouette of a vase of flowers, but you could easily create your own stencilled version. 

Here is a list of the stencilled used in this journal page:

Here is a link to a video creating this page: 


Happy creating
Niamh

Tuesday, November 14, 2023

Nesting Doll Journal and Tags


Hello friends, 
Tina here, and I’m so thrilled to share this project with you. 
Today I will be creating and assembling a little journal and some tags using a main stencil that brings me back to childhood and the endless moments I spent playing with my first set of Matryoshka Dolls/Nesting Dolls.  To my delight both of my daughters relished in the same joy and I hope you do as well.

Before I start lets talk about the stencil: Nesting Dolls was designed by Valerie Sjodin and it comes with 6 nesting doll stencils and masks.  For more ideas on how to use and cut these little beauties refer to the item description in the StencilGirl shop.
I love that each doll has it's own unique little face and embelishment identity, but please feel free to stray and mix it up.  As you will see below I did just that.

Step 1

Grab the Nesting Dolls stencil and remove the masks.  Trace the outline with a gel marker or pencil and then cut.  For the journal cut a front and back cover as well as filler pages (all the same size) and as many as you like!


Step 2

Working on the front and back covers~
With a pencil or gel marker outline the dolls face and dress outline.
For the facial features I used black paint.
Reapeat so that there are now 2 Nesting dolls~ one front cover and one back cover.


Step 3

With the Lemon Button Fern stencil I used yellow oxide and some black to add some stems to her gown and with markers or paint fill in the heart and leaves.


Step 4

With a watercolor pencil ( I am using Stabilo aquarellable) outline the facial features and the body.
With a wet brush trace over the outline to give it a soft watercolor effect. 
Once dry I outline around the head, face and body with a gel marker creating loose lines. 


Step 5

I selected bits from the Nesting Doll stencil for extra embelishment and used the Broken line column stencil to create some contrasting marks.


Step 6

On the reverse side of each doll I am gluing some hand made papers and stenciling on the face and some flowers that can be found on the Nesting doll stencil. 
NOTE: I am not adding the body mask on the inside pages. The pages will hold art and images.


Repeat step six to all your inside pages or smaller tags


Step 7

Attach a piece of fabric or paper strip to any inside pages you would like to have dolls nesting.
I added fabric and ran it though the sewing machine (feel free to used gle or hand stitch).


Step 8

For the nesting doll tags I puched a hole on the tallest doll and added some fibres.


Step 9

The dolls are now ready for your art!!


Note: To create a Nesting doll journal follow all the above steps, add as many pages as you prefer.
Add a hole to each page and secure with a key ring.


Attaching a little video flip through of my little journal for inspiration. Nesting Doll Journal Inspo


Supplies

Stencils:
Lemon Button Fern designed by Rae Missigman
Broken Line Columns designed by  Cynthia Silveri
Nesting Dolls designed by  Valerie Sjodin

Acrylic paint
Scissors
Gel marker
Watercolor pencil
Small paint brush
Small sponge
Patterened papers
Fabric 
Glue
Needle and thread or sewing machine


      Let's Connect;