Showing posts with label #paperarts. Show all posts

Friday, December 20, 2024

Fan~Tastic paper folding


Hello friends, 
Tina here with another creative stencil idea not only for the holidays but for any celebration (or just because they are so fun to make!)  

Below I will guide you through the steps of creating stencilled layered papers using just one stencil, a gel plate and a simple folding technique to create quick paper fans that can dress up a tree, gift or made into a garland.  Please don't stop here, use these papers in your art journals, cards and tags!

I am using acrylic paint in the same colour family ~ I love that slight contrast of tone and adding gold acrylic for some shine.

The stencil I am working with forthis project is Stone Stack by Jane Monteith.
I love the organic stone formation and when used with the tequinique below it creates gorgeous layers.

The Process:

Apply paint to the gel plate and with a plain piece of printer paper lift this first layer


Apply a contrasting colour to the gel plate, lay the stencil on top and with the same piece of paper lift the second layer


Remove the stencil and wait for a few seconds then apply the gold paint.  Lay the same paper on top (rotate the paper so that the stones are not laying over the negative image on the gel plate. Lift this final layer.


Fold the paper in half and cut down the center so you have two equal pieces.
Take one of the pieces and create the first fan fold (2.5cm) continue until the entire piece is folded.


Fold it half and trim the edges~I snipped them to a point but feel free to snip as desirre
d.
Note: Folding the paper vertically will create a longer fan and horizontally a wider fan. I made both!


Lay the piece flat with the painted side facing up and with a piece of string tie a double knot in the center


Turn it over and glue the two flat sides together


Once the glue is dry unfurl the folds 


To add a festive touch I am adding glitter to the tips (optional) . For this a glitter glue or glue and glitter can be used. I had the later on hand.


Add a wooden bead (optiional) for a finishing touch 


ALL DONE!

Check out the full process video here Tina Hois Art

Thank you for stopping by, have fun creating your personalised festive fans!


Wishing you all a Fan~Tastic holiday!

          ~Tina


Let's connect here:


Supplies:    

Stencil Stone Stack by Jane Monteith
Printer paper
Acrylic paint
Gel Plate 
Brayer
Glue stick
String
Glitter glue
Wood bead
Scissors


Tuesday, September 19, 2023

Four Stenciled cards~ one technique


Hello Creative Friends,

I am the first to tell you that a good challenge always stirs my creative soul!
So getting my head around this technique, the stencil choices and then the decision on colours!
Need I say more!

Today I will be guiding you through a technique that was inspired by a fellow creative  Jennifer McGuire.
Love the fact that with one technique we end up with four individual art pieces that can be used for cards, tags, journal inserts, banners or simply framed and gifted.

I did alter the process abit and that means more options!
Check it out below 

*Paint was used vs  ink pad
* Gel Plate vs tape


Cut four equal pieces of paper (use any paper that will work well with the medium you will be applying)
Here I am using mixed media paper that I tore out of a journal 7"x10" (98lbs) cut into four


Place the papers on the gel plate  so that the seams are all touching.
I found that becasue the papers stick to it, it makes for easier adjustment.


Center the stencil over all four pieces of paper 
Apply your favourite colours (paint or ink)


With a light touch apply a different colour sparingly on top of the base colour.
I used three colours.


Remove the stencil


Rotate all four pieces so that there is a void in the center.
Repeat the same technique as in step 1 and continue on all four corners.


Note: Due to my paper size selection I opted to stencil only three corners.

The cards most certainly can be left as they are with a sentiment added but I am going to keep going with two more layers. 


I will be making this batch the same.
A variety of focals can be added to the cards. I reached for the Feathers 6 Stencil. 
I love this nature inspired stencil. It's perfect for focals and backgrounds. 

Position the stencil and apply black acrylic paint with an applicator.


Loving the crispness of the black against the pastel background.
Once again feel free to stop here or continue on to the next layer with me.


For the final layer I am using another favourite and well used stencil CrossStitch-Two Step Stencil.
With the remaining paint on my applicator I stencil random marks so that there faint enough to see but strong enough to ground that gorgeous feather.


I love the end result and that I have four individual cards!

Check out the process on YouTube.


Supplies


Stencils:

Puddles  S331 designed Rae Missigman was inspired by the art in our everyday environment.
Feather 6 Stencil S178 designed by Cecilia Swatton is a soft stencil offering many arty options
Crossstitch two step stencil designed byTammy Tutterow is a definate go to for backgrounds, marks and even stitching.

Paint:
Liquitex Basics~fluorescent pink
                        ~ cadmium orange hue
                        ~ light olive green
                        ~ black

Paint aplicator
Mixed media paper
Gel press plate
blank cards


Hope you enjoyed the process and that you found inspiration to create your versions.

Stay Creative ✨


Tina

Wednesday, November 23, 2022

Got My Mind Set on You


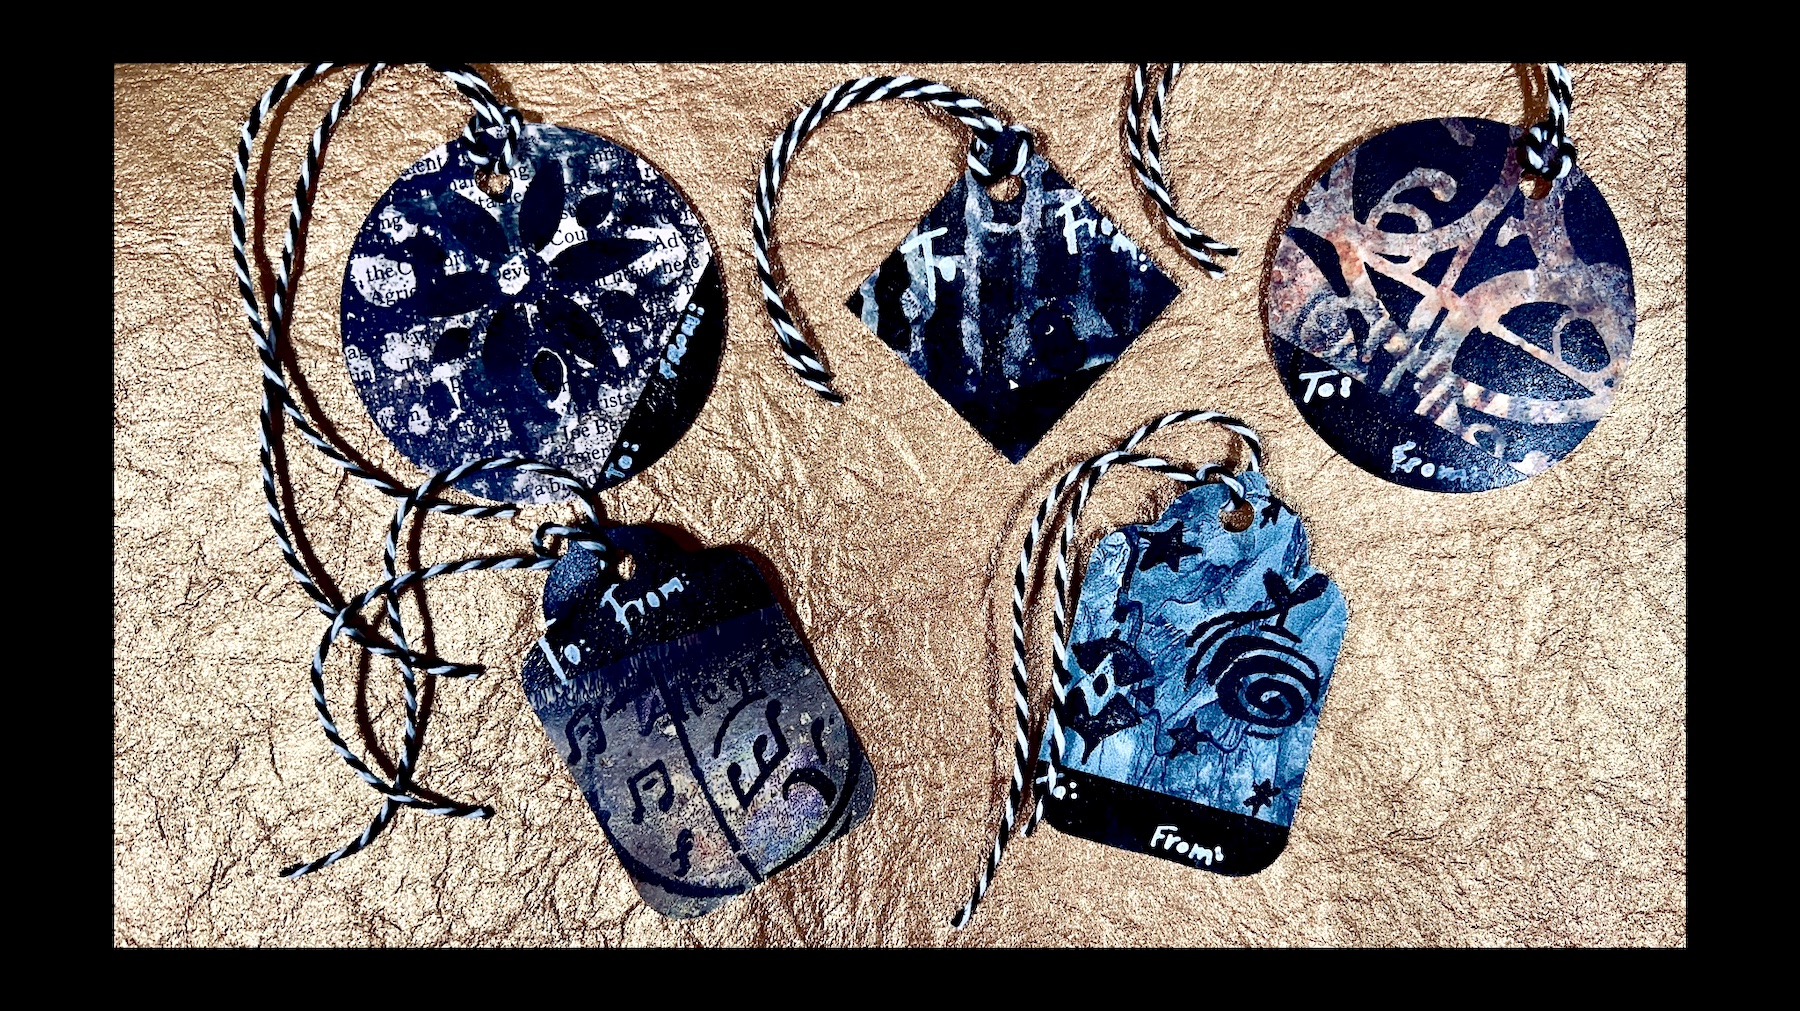
Happy November!  It's Nancy Curry back for another project usually "loosely"  based on a song title.  This one shows my age a bit and it has nothing to do with the project.  You'll understand more when you watch the video.  Let's just say that my project mind was all over the place so you actually will see samples from both techniques.  I'd call that bonus material.  The project in the photo above is the project that I demonstrate in the video.  It is another use for my huge Citra Art paper stash (organic papers rich in mark-making made from older National Geographics) besides framing finished pieces or collaging. Click here to see some finished work. Today we will use those papers and paint to create high contrast tags for those special people you want to impress.  If you don't have Citra pages, you could try doing this with other old magazines that have background pictures that would be a good backdrop for a stenciled layer.  If you don't have any shape punches, you would need to use tag blanks or make your own to use as a template for the shapes.  

Before we get to the video, I'll give you a materials list for the videoed project and a stencil list for the tags I did on and off the camera. 

Materials:

Shape punches or tag blanks (big box craft stores)                                    
Citra art magazine pages                                                                          
1/4" hole punch                                                                                           
stencils
black and white acrylic paint
washi tape
twine or fibers 
 
 
Stencils:
 
 In video  
                                                                             
M223    Kalbach        Park Blvd                                                                    
M055    Curry            Allegro Clef                                 
Club      Apter            12-2017                                                     
Club      Butler            03-2019     
Club      Shaw/Dube   08-2020     
 
Additional Samples
 
S860    Oliver    Mark M w Bot Embellish 
S517     Nichols  Vintage Ornaments  
Club     Sporn     04-2015   
Club    Sjodin/ Shaw  06-2020 


Now onto the show.........


I really enjoyed turning some of my page pile into the tags in the video and the extras pictured below I did off camera.  It really reinvigorated my interest in Citra Art.  Lately, I've been obsessed with watercolor but I am always excited when I head back.  Enjoy the extra tags below and take some time to play with symmetry, high contrast,  and a lot of fun stencils.  You may look at them in a new way.  I wish you and yours a safe, healthy and fun holiday season and beginning of 2023.  As always, you can find me on social media @nancycurryart or find me on my website where my shop is located.  There's a sale coming soon.  


xoxo

Nancy