Showing posts with label Book Making. Show all posts

Thursday, January 11, 2024

This is One for the Books! New Designs from Valerie Sjodin


Do you love the look and feel of Vintage books? Do you also enjoy adding art to your journals, crafting cards, and making things beautiful?

If you do, I have something special to share with you: The Vintage Book Stencil Collection. One stencil is designed to make many sizes, for many uses.

What if one stencil could make all the different sizes we use so often in our art making and make it easy ? 
            
It can, and Valerie shows you how in her video tutorials.

What if a small collection of stencils spark your art journaling and card making to shine with a bright and cozy Vintage style? 

             It can! Check out the Vintage Book Stencil Collection.


•    Each of the Vintage stencils in the collection feature one stencil with many sizes and uses!

•    The Vintage Book Collection stencils are sized to fit standard sizes often used: 5x7” cards & paper, A5  (journals), ATC’s (2.5x3.5”), standard and mini tags etc.

•    Since all the stencils in the Vintage Book Collection are designed to fit standard sizes, many of their elements are interchangeable. The designs in each stencil can be combined to make numerous art designs that coordinate together

•    The Vintage Book Collection stencils are also designed as a companion with the mini Open Book stencil, creating beautiful book plates as well as fitting in the standard sizes.

•    The Vintage Book Collection stencils can be paired with themed and patterned stencils you may already have, so there are unlimited possibilities for their use.


Vintage Book Elements


Reminiscent of Vintage book covers and patterns, this Vintage geometric patterned stencil is designed to fit standard sizes often used: 5x7” cards & paper, A5 ( journals, ATC’s (2.5x3.5”), standard and mini tags etc. The individual designs in this stencil can be combined to make numerous art designs that coordinate together. The diamond patterns are repeatable if you want the pattern to cover more area.


This Vintage Book Elements stencil is also designed as a companion with the mini Open Book stencil, creating beautiful book plates as well.


All the stencils in the Vintage Book Collection are designed to fit standard sizes, so many of their elements are interchangeable and can be used together, offering you more design choices in the same piece of artwork or series.


This Vintage Book Elements 1 stencil can be paired with themed and patterned stencils you may already have, so there are unlimited possibilities for their use.


The video shows you how to make beautiful Vintage book art!


Vintage Book Leaves


Reminiscent of Vintage book covers and patterns, this Vintage leaf patterned stencil is designed to fit standard sizes often used: 5x7” cards & paper, A5 (journals, ATC’s (2.5x3.5”), standard and mini tags etc. The individual designs in this stencil can be combined to make numerous art designs that coordinate together.


This Vintage Book Leaves stencil is also designed as a companion with the mini Open Book stencil, creating beautiful book plates as well.


All the stencils in the Vintage Book Collection are designed to fit standard sizes, so many of their elements are interchangeable and can be used together, offering you more design choices in the same piece of artwork or series. Check out the Vintage Book Elements 1 stencil.


This Vintage Book Leaves stencil can also be paired with leaf and nature themed stencils you may already have, so there are unlimited possibilities for their use.


Open Book Stencil


This mini 4”x4” Open Book stencil has been designed for making personalized book plates in journals, and to fit Artist Trading Card and tag art. It is a great companion to the Vintage Book Stencil Collection, easily combining with the elements in those stencils.


The versatile open book image can be paired with themed and patterned stencils you may already have, so there are unlimited possibilities for its use.




Valerie's Stencils are available now at stencilgirlproducts.com


Tuesday, June 14, 2022

Wildflowers

 
W   I   L   D   F   L   O   W   E   R   S

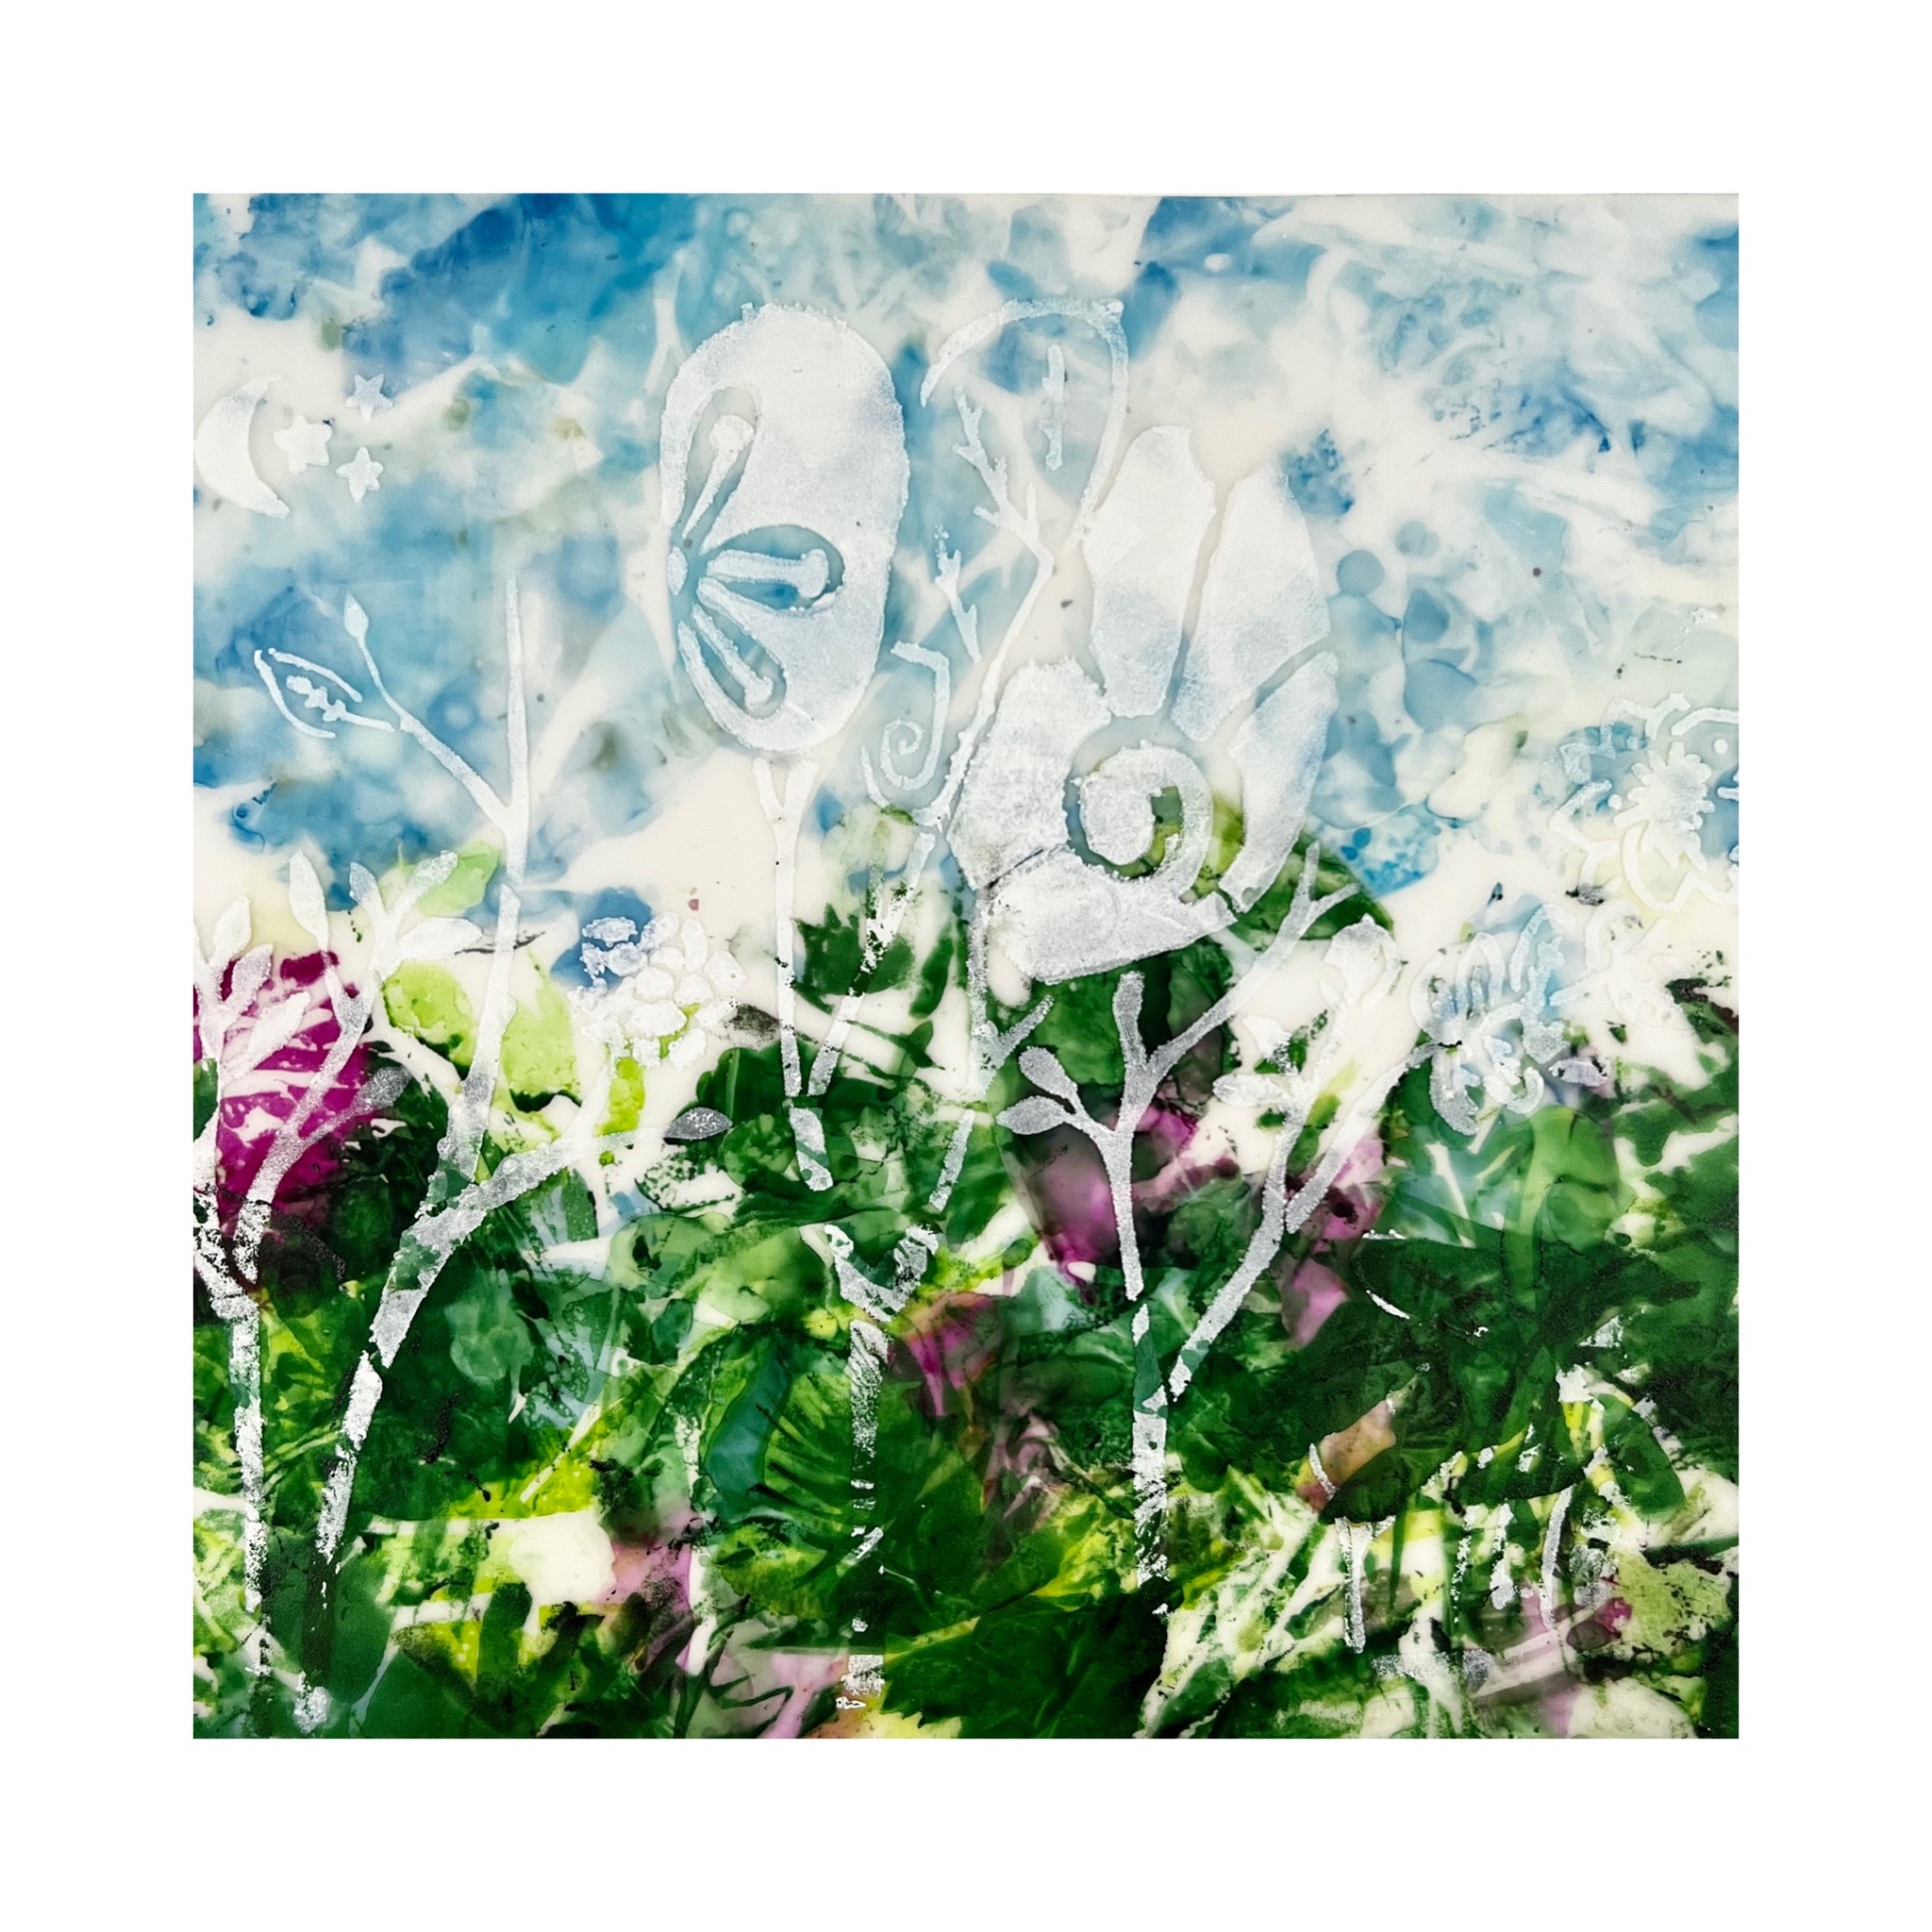
I am so happy to be back on the blog and to spend another year on ®StencilGirl's design team. I am Nancy Curry coming to you from the suburbs of St. Louis.  I'm in pretty dazzling company on the team and look forward to every Tuesday when new inspiration drops. I also love all the guest artist posts.  We all have a different artist voice that sings loudly and I love to hear them all.   For those new to my blog projects, almost all of them are titles of songs.  This one happens to be a Tom Petty song, but my choices head across all genres.  I also paint and design a lot of pieces that are floral related so I didn't leave my wheelhouse this time.  This project came about when I wasn't even thinking about it.  I was walking around my local Michael's looking for frames that weren't dented a few weeks ago, but, of course, I browsed the art materials and did a general loop around the store.  I also needed some foam board for  mailing so I headed off to find that and lo and behold I saw a 22" x 28" piece of translucent polyethylene  (mylar is a brand) plastic that was a nice weight (12 pt) and decided to get it and some day I'd have a spin around it.    Fast forward to this week and that's exactly what happened.  A few minutes in,  the lightbulb went off and this project was born.

I delved into my vast stencil stash and got four out to play with.  The main project and the one featured on the video tutorial was done with a favorite of mine, Cathy Nichols' Love Story (L341).  I knew immediately it was the perfect stencil for me to curate parts of for the ideas going on in my head. I love to use parts of larger stencils.  The others I chose were David Daniels' Rooted in Nature Large Caladium (L810) which is more abstract yet still intriguing, Traci Bautista's organically patterned,  Circles Circles (L301), and one of the most interesting SG stencils, Moths by Jane Dunnewold (L520). All of them were approached in the same matter.  Without further adieu, here's the materials list and then the video tutorial.  
 
MATERIALS:
plastic sheet cut into working size
gesso or white paint
cosmetic sponge
stencils
91% rubbing alcohol in a spritz bottle (good ventilation is recommended when you are using alcohol inks)
Ranger alcohol inks:  wild plum, everglades, botanical, glacier, cloudy blue, sailboat blue, boysenberry
paper towels
plastic wrap or white plastic trash bag cut down to size
mats/frames or deep cradle
Krylon Kamar varnish & Krylon UV Archival spray (spray in well-ventilated area)


I hope you enjoyed the process.  It is one I have used for years on clear acetate with varous types of ink or paint.  It was really fun to work it with a translucent substrate that was inexpensive so I could save my more expensive Yupo for other projects.  Below you will see a close up of the original piece that really shows how much visual texture comes from the alcohol ink on the backside.  It would have overpowered the gesso to be on the front, but from the back it allows the white flowers have enough high contrast to shine.  I have also included the other pieces I mentioned in the introduction.  This process will work for many genres and I love processes that can be versatile.  I'd love to see what you do with these should you head down the road to try this.  


Rooted In Nature Large Caladium
 
Moths

Circles Circles

 
As promised in the video, I said I'd share the finishing process.  I do two-three light coats of Kamar as an isolation coat and then two coats of UV Archival in whatever finish you want. I am partial to satin.  Let it thoroughly dry in between layers and keep the can 12" away.  Even with this finishing, do not hang in direct sunlight.  Indirect should be fine.  They mat well or you can go the deep cradle route.  Both look great.  I'm sure there will be more great options floating around. 
 
As always it's a pleasure sharing my meanderings with you.  Should you want to see what I am up to more frequently, I post most of my tutorials on Instagram on my grid and reels page and post art almost daily.  I post most of it also on my Facebook art page.  My regular Facebook page includes some art, no politics, and lots of standard poodles.  My website is always a little behind, but when I get a chance I update it.  It does have my online store that carries originals and prints available any time.  To get updates about classes, art sales (one coming in June), please sign up for my low volume newsletter.  

Have a wonderful rest of June.  I'll be back on the blog later in the summer. 


xoxo

Nancy

Monday, July 30, 2018

Six Ways to Use Your StencilGirl® Stencils & Stenciled Papers for Book Art Projects

Six Ways to Use Your StencilGirl® Stencils & Stenciled Papers for Book Art Projects
Hi Everyone!
Kiala Givehand here with my first post as a StencilGirl® Columnist. 

My hope is that this year, as a columnist focused on Book Art and Bookbinding related topics, I can bring you lots of fun ways to start, continue, and complete those many projects you have sitting around your studio/art table (or the ones floating around in your heart). 

In this first post, I'm delighted to share six of my favorite ways to use stencils and stenciled papers in book art and bookbinding projects. If you are new to bookbinding or to the term "Book Art", don't worry, there's lots of time to get up to speed. For now, all you need to know is that these are my working definitions when I use these terms: 

BOOK ART: Art that incorporates the form, and/or function of a book as inspiration or as a way to deliver content. 

BOOKBINDING: The act of binding papers together to create a book (or book-like) structure that can be blank or filled with words and images. 

But for now, just take it easy and see what strikes your fancy as I share my love for paper, stencils, and bookbinding. I welcome conversation, your questions, and tons of alternative ideas. I love when I share something you've done or hear how you might take my idea/suggestion and expand on it. 


StencilGirl® Stencils I used:


Now that you've seen my favorite 6 ways to give my projects an intentional look, I'm curious, which was your favorite? Which one are you going to try this week? 

Stay tuned for more tips, techniques, and talk about Book Art. 

Hugs and Creative High Fives...
Kiala

Thursday, July 6, 2017

Marsha Valk: DIY Accordion Fold Mini Journal

Hi there! It’s Marsha Valk here! I'm a crafter from the Netherlands. I especially love creating mixed media projects, printmaking, stenciling, collage and stamping.

I’m super honored to be a guest at the StencilGirl blog, and I have a fun little mono printed and doodled accordion fold to share with you today.

Watch the video to follow my process:

And here are the written steps:
Step 1:
Take a sheet of 11³/₄” x 16¹/₂” drawing paper and cut it into strips of 4¹/₈” x 16¹/₂”.

Cut more strips if you want a longer accordion fold!

Fold the strips into an accordion.
Step 2:
Cut one square of the accordion to about an inch. Use this strip of paper to adhere the two accordions together to form one big accordion.
Step 3:
Hand-cut a couple of masks to use to cover up parts of the gel printing plate while mono printing. I made two: a circle and a rectangle.

I used two scraps of paper to cover my 5” x 5” Gelli Plate. I drew a 4¹/₈” x 4¹/₈” box in the middle of both scraps, and then I hand cut the shape I wanted, making sure I stayed inside each box.
Step 4:
Choose three colors of acrylic paint and start mono printing using your favorite stencils.
Alternate colors, stencils and hand cut shapes and masks.
Use repositionable adhesive to adhere the hand cut shapes to the accordion fold temporarily.

Don’t worry about imperfect prints. You can alter them with watercolor and doodles later on!

Step 5:
Take out your favorite waterproof pens, a watercolor medium and a couple of colored pencils and doodle away!
I choose the same colors as I used for mono printing. I also used Ecoline Brush Pens and a water-brush instead of traditional watercolors.
Step 6:
Cut two chipboard squares, slightly larger than 4¹/₈” x 4¹/₈”.

Cover the chipboard squares with paper. I used the sheet of paper I used to roll my brayer clean during mono printing!

Adhere the chipboard squares to the ends of the accordion fold.

Enjoy your day!


Supplies by StencilGirl Products:
Clustered Leaves by Cecilia Swatton
Kunst Masken 1 by Andrew Borloz
Ancient Marks by Suzi Dennis
Santiago Mini by Nathalie Kalbach
MesaVerde by Nathalie Kalbach
Batik by Nathalie Kalbach

Other:
Drawing paper 100 lbs, 11³/₄” x 16¹/₂” (Lana Dessin 220)
Glue stick
Scraps of paper at least 5”x5”
Gelli Arts Student Gelli Plate 5”x5”
Brayer
Acrylic paint (Talens Amsterdam: Primary Magenta, Primary Yellow, Turquoise Blue)
Repositionable adhesive (Scrapbook Adhesives E-Z Dots)
Black waterproof pens and markers
Watercolor medium (Talens Ecoline Brush Pens: Light Yellow, Magenta, Turquoise Blue)
Colored pencils
Chipboard