Showing posts with label falling leaves. Show all posts

Friday, October 4, 2024

Autumn Leaves Three Ways


Hello stencil friends! Nicole here with an easy little project (or three!) to add a touch of fall to your home. I don’t know about the weather where you are, but here in Central Texas we recently had three days of amazing, fall weather. It was glorious! I made chicken soup, my favorite pumpkin bars, and had the most amazing (cold!) morning walks while dreaming of wearing pants and long sleeves. 


Unfortunately, it didn’t last long as our temps went back up to near 100. Ugh! However, despite our rise in temps, I officially declared it fall. I bought all the new fall things from Trader Joes and put out my fall décor.


One of my favorite things about fall, besides the weather, is the changing of the leaves and fall colors.  


With leaves and the colors of fall on my mind, I thought it would be fun to make something new for fall. I grabbed the Autumn Leaves stencil and began blending colors to create leaves.


First, like most of my painted paper projects, I began by adding watered-down gesso to some old book and ledger pages. This does a couple things. It adds some integrity to the sometimes-brittle pages and allows for a better surface to paint on. Since I don’t want to cover up the text and I don’t need a thick layer of gesso, I water it down. You can also use clear gesso.

Then, I grabbed all the fall colors of paint, an applicator and began to play. This is a fun, simple process but does require some patience. The Autumn Leaves stencil is a bit more delicate, so sometimes you have to hold down parts of it while you stencil. 

I love how fall colors blend together, especially purple and orange (trust me, try it!). 


A couple ideas and tips:

1. Less is more! Don't over-saturate your applicator.

2. However, if paint seeps under the stencil, don’t stress! Just go back and stencil again a bit when it dries. This creates a cool shadow look. 

3. Lift the stencil to peak at your leaf before completely removing it. Then, set it back down if you need to add more paint.

4. Use one color on several leaves, lifting the stencil each time, and then go back with another color, for more of a two-step approach (or even three). The paint blends a little less this way for a different look.


5. Try an ombre palette, or a candy-corn one. 


6. Start with a lighter color, add a darker one and then go back and blend more with the lighter color.

7. If you don’t like how one turns out, stencil over a bit with a darker color. 

8. Don’t forget a few solid leaves, too!  


9. Flip the stencil over half-way through for more variety (or to make your leaves double sided in the end, more below) 

10. Put your favorite fall movie on a screen and have fun!

My favorite fall leaves are the ones with spots of color, so when my leaves were finished, I splattered leftover paint on them.

After the splatters dried, I cut them out and grabbed some kraft-colored card stock to give them some strength.

I stuck them down with matte medium, front and back, and then also added another layer on top for extra protection. 


Then, once they dried, I had to cut them out again! I chose to leave a border each time, one with the original paper and one with the kraft paper. 


Check out the beautiful pile of leaves! 

Now that you’ve made some amazing leaves, what can you do with them?


Create a Garland 

Grab some bakers twine or thin jute and string them up! I am putting together a fall-themed thank you basket for a friend, and adding a garland to it is the perfect final touch. I’m also going to hang a small one in my house.


All you have to do is punch a couple of holes in each leaf and add them to the string of choice. I added some extra colors of twine by weaving it around my original one after I added the leaves.


Make a Mobile or Wall-hanger 

Similar to the garland, string some leaves to dangle from a branch, old paint brush, vintage wooden spoon, or anything you can think of! You could add some beads or other fall-themed items. 


Start a Thankful Tree Tradition

Use bakers twine or string to create single, hanging leaves. Place them in a container with a pen or makers. 

Then, find a fun branch and add it to a vase or other container. Each day leading up to thanksgiving, write something you are thankful for on the back of the leaf and hang it on the tree. You could use multiple leaves for each family member, or all write on the same leaf each day. After the fall season, save them in a special container for a fun keepsake from the year.


More Ideas

For the garland, mobile, or wall hanger, if you think your leaves might twist in the wind, you could always make them double sided. All you need to do is add a back-side leaf after you cut them from the Kraft cardstock. This will take a bit more planning to match up your leaves so you have a front and back one (stenciled from each side of stencil).


I have a few leftover leaves even after the three projects. I’m going to scatter some on our Thanksgiving table, tuck them inside letters and packages, maybe make a card or two, and I think I might add a couple to my door wreath. I might even need to make more. They are so fun to create!


You can watch how I made the leaves + the projects following in the video below


Happy fall!

-Nicole


Connect with me on


Stencil

Autumn Leaves


Supplies for the leaves:

  • Gesso
  • Vintage book and ledger papers
  • Matte medium
  • Fall colors of acrylic paint (I used Golden's SoFlat)
  • Scissors
  • Kraft card stock
  • Palette paper
  • Round applicator
Extra supplies for projects:
  • Bakers twine or another string of choice
  • Twig (and anything else you want to add to your mobile) 
  • Branches, Vase, Bucket, Marker, etc... for your tree
  • Hole punch


Tuesday, September 27, 2022

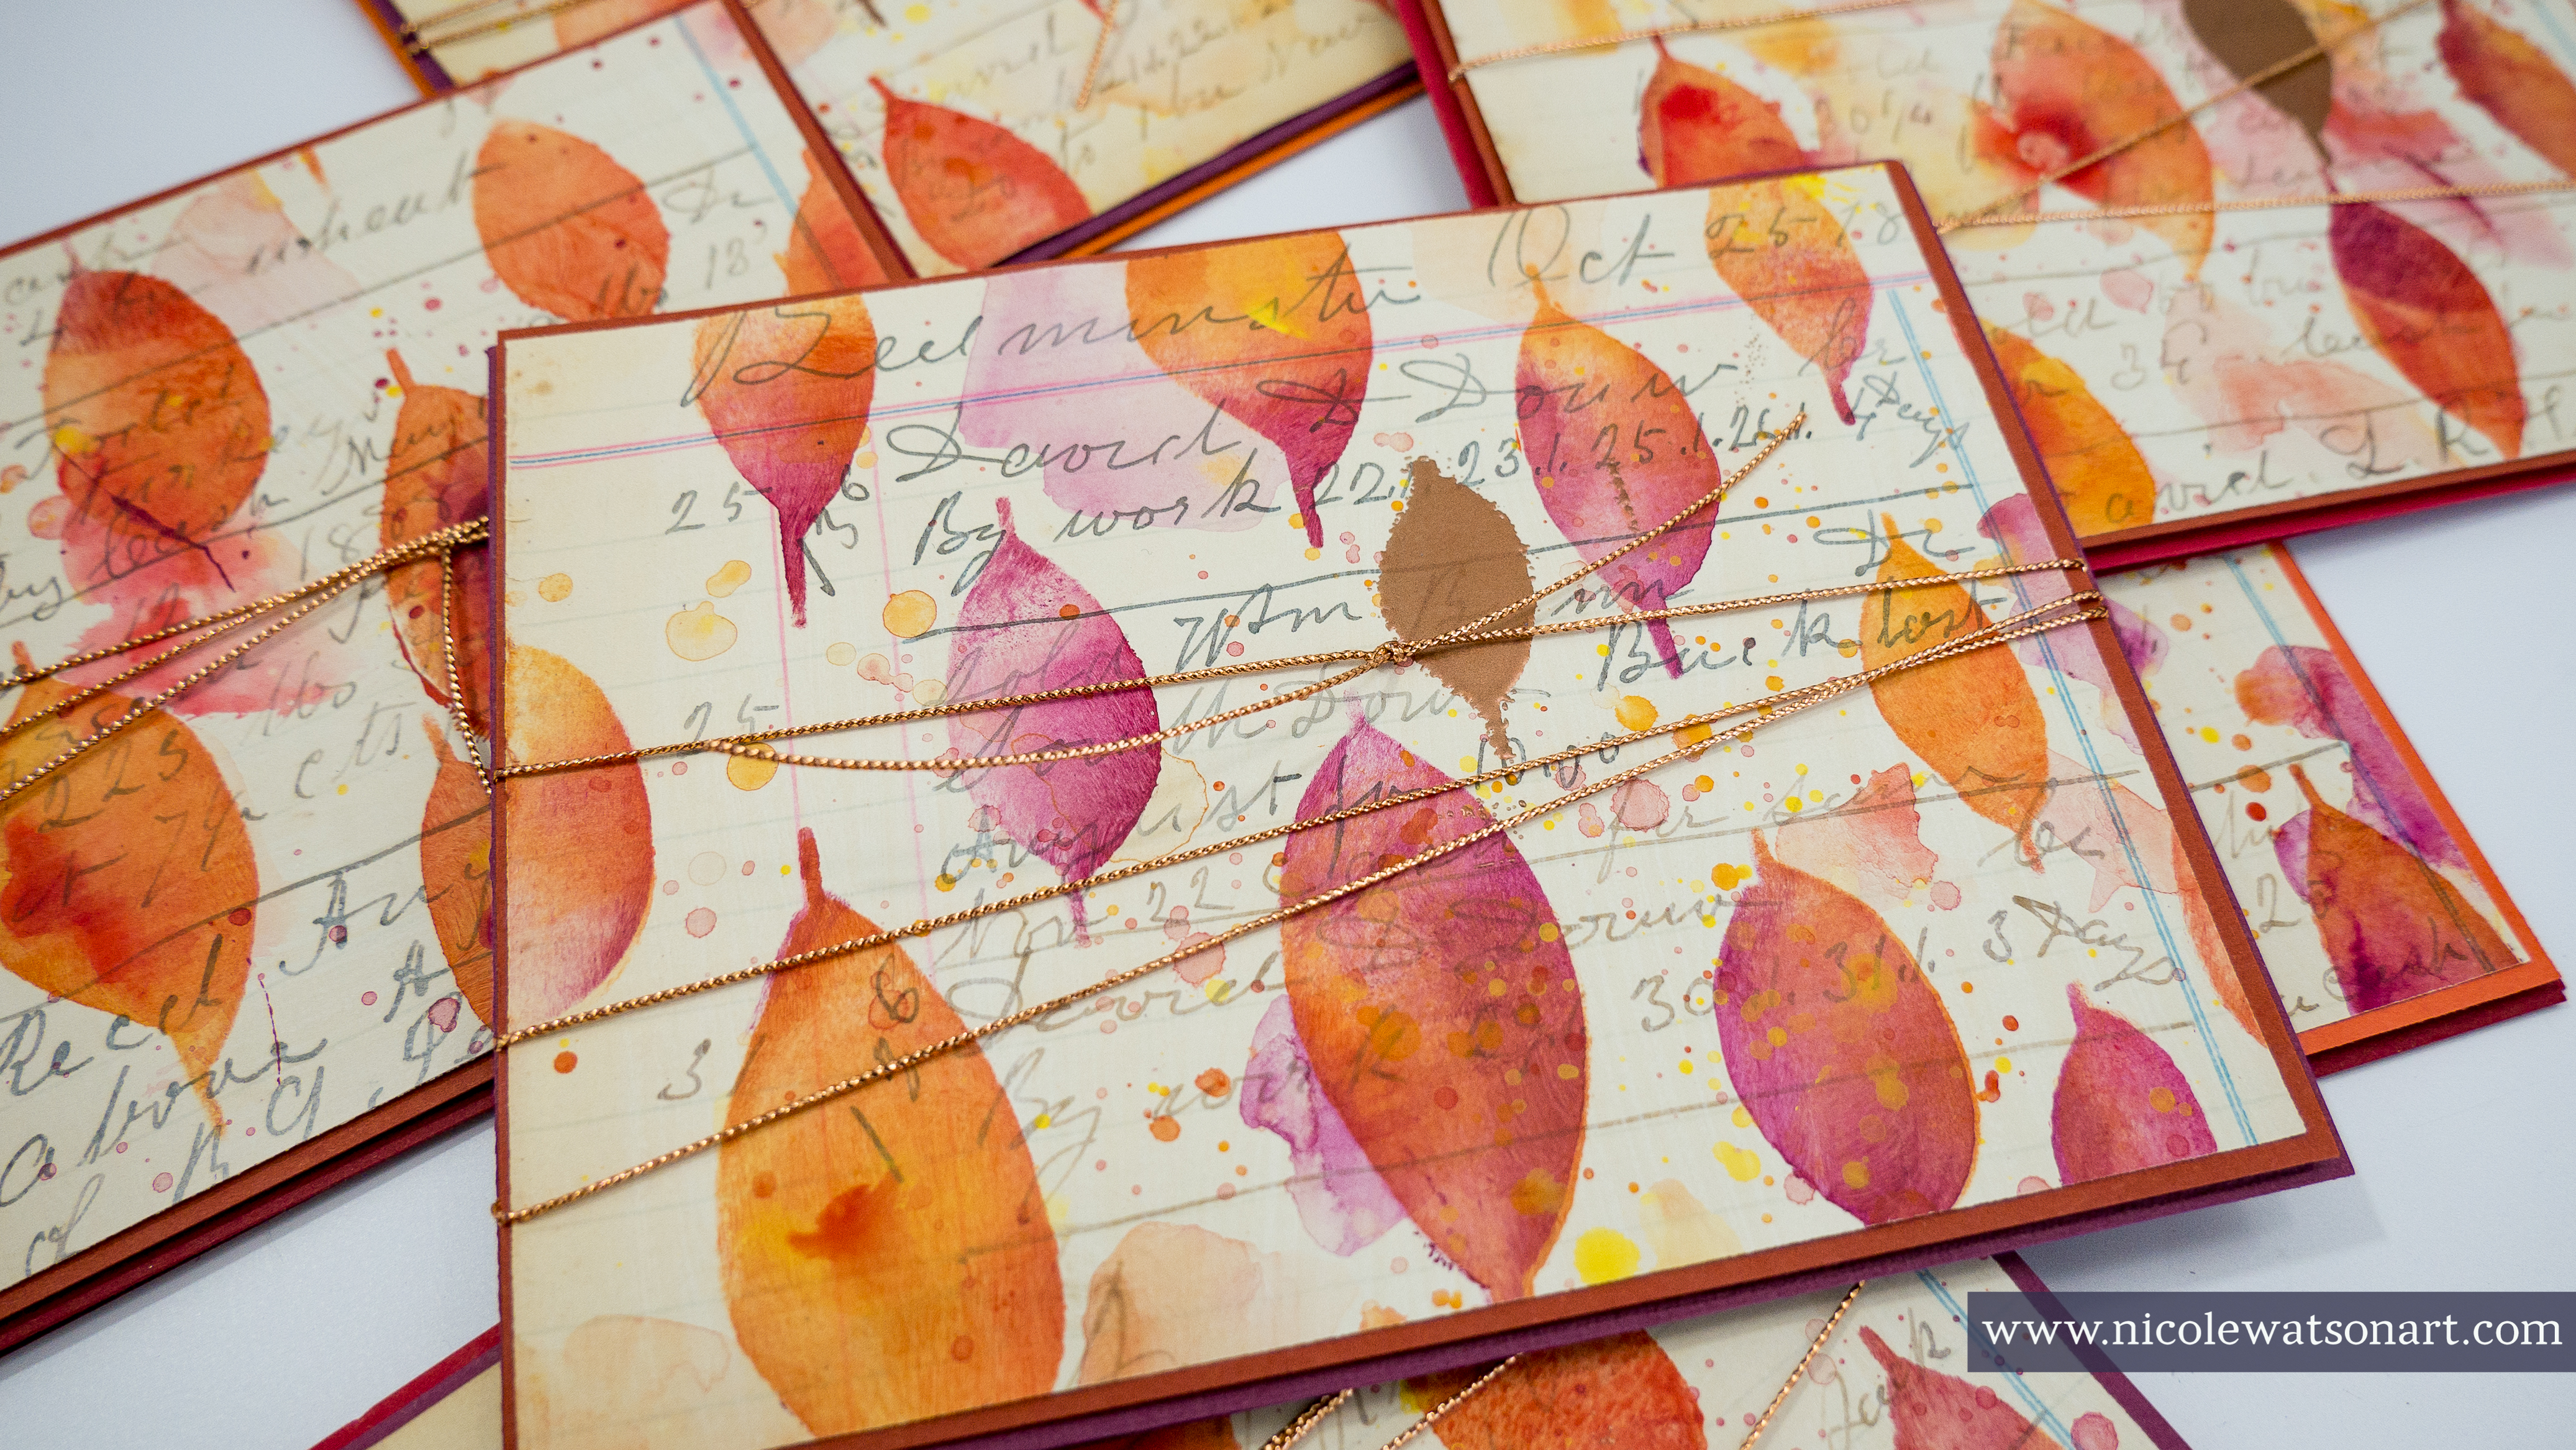
Simple Fall Inspired Cards


Hello and happy fall! 


Nicole here to share a fun, quick and easy card that’s perfect for the fall season. It’s almost starting to feel a little more fall-like here in Central Texas, and I am waiting in anticipation for our leaves to start changing. Until then, I am going to have to be satisfied with making my own fall leaves.


I always like to have a variety of cards on hand for sending happy mail or tucking into giveaways and attaching to art that someone purchases from me. With my stash dwindling a bit, I needed to get creative to make some more. 


Often when I sit down to make cards, I find making multiples takes just about as much time as making one. (Plus the supplies are all out!) In just under a couple hours, with four large ledger sheets, one stencil, a bunch of paint, cardstock, and a few other supplies, I was able to create 10 cards and 10 different postcards.


I began by adding a small amount of watered-down gesso to some vintage ledger sheets. If you don’t have a ledger that’s falling apart or that you want to take pages out of, you could also use book text or even use your own handwriting on some pages. This card would be awesome with a fall poem as the background, too!


The way white gesso mingles on the old book text is one of my favorite layers, however you can also use clear gesso. The white doesn’t cover up the pages much at all, it just adds a sort of chalky-like coloring. The gesso protects the pages just a bit from the paint we’ll be adding next.


Once that gesso was dry, I grabbed my closed leaves stencil, all the fall (warm) colors from my Dina Wakley Media paint, sponge applicators and some patty paper for my palettes.  


Begin with one of the fall colors. I like to start lighter and then progress to darker colors. (By the fourth ledger sheet, I just had fun and didn’t use that rule!) Use the sponge applicator to stencil loosely inside the leaf shapes. Don’t stencil prefect; keep some of the leaves half stenciled. Lift the stencil and repeat the process to fill maybe about half of the page or so. My favorite part about this particular stenciling process is that it does not have to be perfect.

Then, pick up another color and place the stencil in the same spots to add color to the leaves and complete the shape. Repeat this process with several colors on the page. All these colors mix beautifully together, so you do not have to worry about making mud. A quick note, if this isn’t making sense, I have a video of the process linked below!


Once the page is full of leaves, grab a paintbrush and add splatters, watered-down pools of color, and even paint a bit on top of the leaves. Use this process to add interest, grunge the page up a bit, and disguise any problem areas.


Repeat this process with several different color combinations on all of the ledger sheets.


When the sheets are dry, cut the pages into card fronts (mine are 4 by 5 ¼"), and also cut colored card stock into base cards and a layering card as well (the layer is 4 1/8 by 4 3/8").


At this point, you can assemble the cards as they are, or add some embellishments like I did. 


I decided it would be fun to add one embossed leaf to the front, so I squished versamark ink through one of the leaves on the ledger page. I chose a spot that needed a leaf and whatever size leaf fit best. Be careful to not get the versamark anywhere else, by using a mask to prevent this. 


Then, I sprinkled copper embossing powder on top and use a heat gun to melt it.


After repeating this process nine more times, I added the ledger sheets to the layering card. I felt they needed something else, so I wrapped them with some copper string. 


I stuck the card front to the base with some dimensional foam adhesive.


When the cards were finished, I still had some leftover stenciled papers that were odd sizes, so I made some postcards with those.


This process was so much fun to make cards with. I anticipate myself making similar cards each season with a different stencil. Winter snowflakes, spring flowers, summer sunshine… or even shapes in seasonal colors. I’m getting excited just thinking about it!


Check out the process video below (or click here!):


I hope this inspires you to create some cards and send some happy mail! If you do, be sure to tag me on social media so I can see your beautiful art


Happy Fall!
-Nicole


Connect with me on


Stencil

Other Supplies
  • Ledger Paper
  • Colored Cardstock
  • Acrylic Paint (warm/fall colors)
  • Gesso (white)
  • Palette Paper
  • Paper Trimmer
  • Versamark Ink Pad
  • Embossing Powder (copper)
  • String (copper)
  • Tape Gun
  • Adhesive Foam
  • Heat Gun
  • Sponge/Foam Applicators

Tuesday, January 22, 2019

Love & Friendship with Natalie May


Hey there Stencil Fan!

Natalie here sharing an easy Scrapbook layout featuring the Love of my Life, Trevor's and my daughter Jessica. 


This month we are celebrating Love & Friendship here at StencilGirl and there was a heap of photos I could have scrapped but I particularly love this one taken in Tasmania a little while ago.

This was the trip we took to see my beautiful Grandmother and it would turn out to be the last time we saw her before she passed away ... so this trip was definitely all about love! 


I started by taking the Fallen Leave 9x12' stencil designed by Jessica Sporn and used three colors in the Lindys Sprays to add color to 2 pieces of flat white cardstock.


I then took one of the stenciled pieces and cut out a heap of those beautiful leaves.


With the remaining stenciled sheet, I trimmed it down to just under 9x11' and adhered it to my page.  To create the stitched edge, I used some 13arts transparent stickers instead of dragging out my sewing machine (I love a good shortcut).

I foam mounted the image to the page and then each of the leaves was then slid in underneath the photo before I added some pretty Prima flowers.


Here is a quick YouTube tutorial just to show you how easy it really is!


Thanks for dropping by and I would love to hear what you think so leave me some love!


Natalie May

STENCILGIRL PRODUCTS USED - Fallen Leaves L522
LINDYS GANG PRODUCTS - Hydrangea Blue, Luscious Lime & Bachelor Button Blue
OTHER PRODUCTS - Rosie's Studio acetate,  13@rts stickers, Prima & Green Tara flowers

p.s. Click the pic if you want to be part of our Instagram Contest!