Showing posts with label travel journal. Show all posts

Monday, August 14, 2023

Inspiration Overload

As some of you know, I am taking a #GapYear in 2023 to make art, deepen friendships, and travel. I am over halfway through the year and would give myself a solid B+ on meeting my intentions!! 

A highlight so far of the year (and frankly, a lifetime) was participating in the Blue Walk Tour of Amsterdam and Paris with Mary Beth Shaw as our group’s mixed media instructor. We spent about a week in both Amsterdam and Paris chugging as much art and inspiration as we could from exhibits of Vermeer and Van Gogh to Banksy and Basquiat the Mona Lisa, and so many famous artists at the Musee d’Orsay, just to name a few. 

At least a couple of hours each day were spent in the classroom working on a journal which I used to document my trip. Mary Beth showed us watercolor techniques, how to incorporate some of the bits and baubles we picked up along the way, and a wonderfully easy and travel-friendly binding system. If you’d like to skip the commentary and see my journal, click over to my YouTube Channel here: Kristin’s Travel Journal. 

Questions began emerging on the very first day of our trip as I stepped into Amsterdam’s MOCO, a museum of contemporary art. 

What is art?
Who are “real artists?”
Who decides? 

There is an entire museum dedicated to Vincent Van Gogh in Amsterdam yet he sold only one painting during his lifetime. In the last two years of his short life (died at 37) he created more than 850 oil paintings.


At the Musee d’Orsay in Paris, we wandered through halls and halls exhibiting artists who had been rejected by the Paris Salon. Artists such as Van Gogh, Vermeer, Cezanne, and Toulouse-Lautrec. “The Paris Salon, sponsored by the French government and the Academy of Fine Arts, took place annually and was a showcase of the best academic art. A medal from the Salon was the assurance of a successful artistic career; winners were given official commissions by the French government, and were sought after for portraits and private commissions.” 


We took a fascinating tour in Paris given by a “Street Artist” who explained how and why they did what they did at the risk of arrest! My favorite tip was placing a magnet at the bottom of your can of spray paint so the ball bearing inside doesn’t rattle when you run from the police. Our guide schooled us on THE USE OF STENCILS! I can honestly say I am looking at graffiti somewhat more appreciatively and definitely differently these days. 


So…….

What is art?

The textbook definition of art is: 
the expression or application of human creative skill and imagination, typically in a visual form such as painting or sculpture, producing works to be appreciated primarily for their beauty or emotional power.

Who are “real artists?”

If you have the overwhelming desire to create like Van Gogh, Vermeer, and the gal sitting next to me in a workshop, I'm going to call you an artist. If you daydream about your art, think about your art, dedicate time and resources to your art, and put in the work to improve your art, I’m going to call you an artist. 

Ultimately, who decides? 

You do. :)

Now go make some art!!!!


Thursday, November 11, 2021

StencilGirl® Faces & Figures


Get All Your Ducks (or heads) In a Row

        When creating a composition with human figures at different distances from the viewer (and each other) it's helpful to understand something about perspective and how we see.  When we look toward the distance, the invisible line between our eyes and the horizon is our eye level.   Because most adults fall within a general range of height,  the eyes of a person standing in front of you will line up more or less with the horizon at your eye level, too.  Even if that person stands twenty feet away from you, if the ground is level, you will still be at the same eye level, and that person's eyes will still roughly line up with the horizon - even though their figure now appears to be smaller.  The same holds true if the person is fifty feet away from you and appears even smaller still.  On level ground, the sight lines of people at different distances from the viewer fall along the same horizontal line.  As perspective shrinks them, they shrink from top and bottom, anchored on the horizon at their eye level.  In composition, we naturally tend to identify with the most prominent face and adopt their sight line, meaning that other people in the composition on that same sight line are presumed to be the same stature as the viewer.  It's a brain thing!

Head masks by Pam Carriker Face Silhouette S171 and  ATC Mixup L651 
 

    In the first example, the horizon runs along the tops of these figures' ears. and because the second figure is smaller but on the same line, it appears to be the same height as the one on the left, but farther away from the viewer.  In the next example, putting the second figure lower than the horizon (established by the larger, closer figure) has the effect of making that second figure smaller in stature, like a child.  Both compositions use the same masks, but the effect is different from one to the other.  The second example could conceivably be showing a same-sized figure that is farther back and lower down (going down a slope, for example),  but taking the second figure off the horizon creates different visual information.  In the absence of other elements establishing a horizon line, we are more likely to identify with the closer (larger) figure,  and we the automatically assume the smaller figure is smaller than we are.  It would work in reverse if the smaller figure aligned with the horizon (established by other visual information in the composition) and the larger figure were much higher - it would make the larger figure appear to be monumental.


Here are two more quick examples to illustrate this principle. (Ordinarily I would make these pages much more finished, but they are illustrations only, not completed art journal spreads.)  In the second one you can see I had to sketch in tiny figures in the far distance, but still, their heads are lined up with the ones closer to the viewer.  It thus creates the illusion of a crowd of people all of the same size, with their heads all on the same horizon.  If their feet were all on the same line it would look like a collection of Gullivers and Lilliputians.

Figures from Carolyn Dube's Finding My Tribe stencil L414

Figures from Valerie Sjodin's ATC Mixup L762 and Figures Praising L727
 
    In September I had the great pleasure of traveling with MaryBeth Shaw, owner of StencilGirl® Products, on a traveling art workshop in northern Italy.  Our project was to create an accordion-fold painted travel journal, adding bits and pieces of ephemera as we wandered from Padua to Venice to Parma to Bellagio.  I took a number of stencils and masks that have the same figures in different sizes, and had fun arranging them in my travel journal.  Because of the pandemic, cities that are normally mobbed with tourists were relatively uncrowded.  We had a wonderful time strolling through near-empty piazzas, through colonnades, down narrow passages, over bridges, on trams, in boats, on trains, in cable cars, and on foot.  (Trust me, if you have the chance to take a travel art workshop with MaryBeth, you should do it!)
 
figures from Carolyn Dube's  Finding My Tribe L414 and ATC Mixup L657

    On this side of the journal I used the principle I am featuring in this column. I used stencils and masks of figures by Carolyn Dube, and kept their heads on roughly the same line across the pages of the journal in order to create the illusion of depth.  I even suggested a horizon line with a line of black dots running from figure to figure.  (Notice that in the photo of the Venetian canal in the second panel I misaligned the horizon - raising that image up half an inch would have done a better job of emphasizing the same horizon line from panel to panel.  What can I say? Creating on the fly doesn't always leave you time to think carefully before pressing down a photo sticker!)


This composition may possibly give the impression that we were all running to the last panel in order to clink glasses with our aperitivos - and that impression would not be entirely misleading!  I used a plethora of stencils and masks on this project, as well as some rubber stamping and some mark-making tools.  We are fortunate to have stencil and mask designs that come in multiple sizes - it makes creating a composition like this a lot of fun.  If you have a few figure stencils in different sizes, experiment with placement and see what you come up with.  Ciao!


Other stencils featured in this blog post  Near Miss, by Wendy Aikin S622, Arched Aqueduct by Carolyn Dube L359, Venetian Stencil Large by Carolyn Dube L255,  Monoprint Stencils and Mask Set by Rae Missigman L739, Grand Wisteria by Trish McKinney L679,  Cuba Libre Club Set by Jane LaFazio October 2017,  MaryBeth Shaw's Private Collection Club Set April 2016

Thursday, August 19, 2021

Travel Art Journaling with StencilGirl® Stencils

Art journaling when traveling brings me awareness of what I am directly experiencing through my senses (mindfulness) by observing my surroundings through my artistic eye. I love to travel and was so excited to re-enter society this summer by traveling to Utah.

Check out this photo of me and my travel buddies at Landscape Arch in Arches National Park. Our matching world map shirts were a blast. When considering the weight of our hiking gear and water, we wanted to limit the art supplies we brought in our backpacks. 
I don’t always take the same supplies but have core items that I choose based on the method of travel, planned activities, and the length of the trip. When traveling by air, I don’t take anything with liquid such as acrylic paint since I tend not to check luggage. I use a watercolor pan set which is light weight and doesn’t take up a lot of space. I also bring a watercolor sketchbook, a waterbrush, a few pens and pencils, and for this trip I added several StencilGirl® stencils.

I have a lot of StencilGirl® stencils and love working with them in the studio. It hadn’t occurred to me to take them with me when traveling, but they are highly portable and do not take up space or add weight. I think they add such a fun element to my art journal pages and are great way to add texture. Here is a list of the stencils I chose as well as why I selected them (not all were used in the video):
• Compass Rose by Julie Snidle: compasses are a universal symbol of travel 
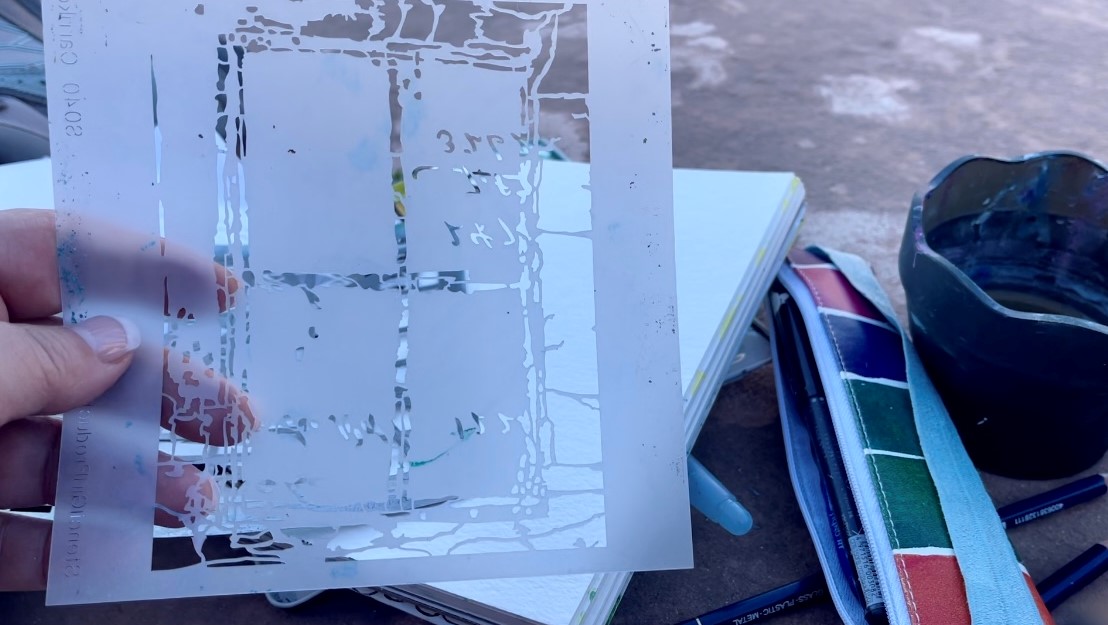
• Windows Large Stencil by Pam Carriker: represent ‘windows’ in the rock formations 
• City Map by Mary C. Nasser: urban vibe as a contrast to nature/national parks 
• Sunburst Crackle by Daniella Woolf: sun for sunny desert location 
• 6” leaf motif from Stencil Club September 2020 by Rae Missigman: botanical 
• Wheel of Hope from Stencil Club May 2017 by Pam Carriker: texture and shape 
In the video linked above you’ll see how I created a journal page while inside Arches National Park.
After finding a comfortable place to sit in the shade, the view of Turret Arch was the subject for my page. Don’t be surprised by people’s curiosity; I found they were really excited and thought what we were doing was very cool. It was a great reason to strike up a conversation and learn more about the area from other travelers.

I started my page with a line drawing using a watercolor pencil. Next, I painted the blue sky and earth-tone rock formations using a waterbrush and watercolors. I used the Mash Up stencil to add texture to the foreground. I added greenery and then used part of the Windows Large Stencil, subtle symbolism to our location, to add texture to the rock formations. 
A few extra lines and my art journal page memorializing my trip to Arches National Park was complete.
I hope I have inspired you to art journal on your next vacation to create something you can look back on for years to come. I’d love to see your travel journal pages so make sure to tag me on social media and check out my YouTube and Instagram accounts for more mixed media inspiration: https://www.flowcode.com/page/carolynmcgowan 
Native Cincinnatian, Carolyn McGowan works in finance, while also feeding her creative appetite as a mixed media artist through painting, art journaling, book making, photography and travel. 

Wednesday, July 11, 2018

A Sweet State Package Deal + Stenciled Girlfriend Trip Goody Bags

Hello!

Three years ago, I took on the task of designing state stencils. It was more complicated than I thought... I wanted every state to be relational to each other and every state to be a decent size for projects. In addition, I wanted to fit as many states as I could on one stencil along with including some fun little map icons. 

There was way more left brain involved than right (which is never fun, ha!) However, I'm glad I did as I LOVE having the states as part of my stencil collection and use them frequently for a wide range of projects from travel journaling to making goody bags (like the ones below.) 

Now, with the introduction of this 
SPECIAL 6 STENCILS/50 STATES PACKAGE PRICE
this is the perfect time to add these to your stencil collection!  


I so enjoy a girls getaway. 

And for every girl's trip I am very fond of putting together goody bags for my favorite girlfriends. 

This past May my group of five traveled to Los Angeles, CA. We had ELLEN tickets, which was amazing! Rob Lowe was the big guest and we won tickets to come back for the 12 days of Giveaways! I am still pinching myself. 

Anyway, to make the bags, I purchased a 10-pack of kraft gift bags from Michael's and stenciled the state of California in white. I let the state dry and added the starfish stencil on top in various shades of pink.


And here's what I packed inside! If you notice I'm a bit OCD about color. I wanted the bags to be pinkish so everything included inside is indeed "pinkish". Here's a list of what I included:

1) A stenciled scout book (see below) to record trip highlights
2) Migraine Relief for the morning after
3) A pocket tissue holder I made these myself using an online tutorial
4) Emergen C to keep us all healthy and energized
5) Personalized Wine Cups no explanation needed
6) Ghiradelli Chocolate everyone needs chocolate
7) Strawberry Face Masks to relax and indulge
8) Hand sanitizer a must for travel

To make the scout books, I simply opened the book flat and stenciled first the state and then the starfish. I added a bit of glittered washi tape at the bottom to finish the book as pictured above.


For each bag, I put together a monogrammed tassel making a tassel first, stringing a bead, adding a tag (paper flower and glittered letter adhered to tag) and knotting the top. Here's a visual of how it came together:


For friends visiting me this summer in my home state of Ohio, I customized similar bags for their visit. Instead of the starfish, I used the deer antler flowers stencil.


Below is a sampling of some additional projects I've completed over the years using the state stencils. As you can see from the large USA painting, every state is scaled relationally to each other so if you are so inclined you can fit them all together like a puzzle. This canvas is 24" x 24" to give you an idea of how large the entire USA ends up being.


My daughter used the stencils to help her learn the states by making a State Flip Book. Each page in this spiral-bound notecard book features a different state with fun facts.


For Christmas presents one year, I embroidered states using a heart for the city of family and friends. DIY instructions.


Below, I focused in on one state and some of the icons that remind me of Texas.


I hope you'll consider adding the states to your stencil collection. I'd love to see what you create!


You never know when the offer will disappear so act now!

Here is the link to get your favorite state stencils at a fabulous price! 


Monday, September 18, 2017

Gwen's Gems - Using Stencils to Prep a Travel Journal

Hi all, it's Gwen back with the September edition of Gwen's Gems! If you've followed me for a while, you probably know of my love for travel. Every year, if I'm able to, I like to do some kind of fun and cool international trip to see a new part of the world. I've been very blessed in all that I've been able to see and do, and this year is no different! 

Of course, when I go on my trips I like to take a travel journal - it's something I started doing back in 2008, and I love coming home with a book that's bursting with stories, photos, and ephemera! The structure of the book itself has evolved as I experiment and learn what I like. Over the last few years I've found that I like to have a hard-bound book with stitched signatures. I also like to make sure it's tall enough for brochures, wide enough for postcards, and yet small enough to fit easily in my carry-on. This year, I'm going to India, so of course I made a travel journal, and I'll show you how I used my stencils to customize and decorate the covers and some of the pages.

Here's the finished journal, ready and waiting to be filled!


I make the book itself from scratch using binder's board, book-binding tape, and various types of papers to make the signatures. In this case, I used some patterned scrapbook papers with an Indian theme, Indian cotton rag paper, hand-printed papers, and drawing paper (this is usually for my journaling.) I make the spine quite a bit wider than the text block and then I bind the whole book together - loosely, so it has room to expand, and then I decorate the covers.

I like to put the location and the year with dimensional lettering - in this case, I used my Art Deco Alphabet stencil to spell out "India," then used Seth Apter's Number Drips stencil to add the year - all done with molding paste. I also like to add some dimensional decoration, so I used half of the medallion from Jessica Sporn's Namaste stencil along the edge of the front cover.


Once all of the dimensional elements are dry, then I add a coat of paint. In this case I used shades of raspberry and magenta to start to echo the colors of India right from the start. When the paint was dry, I used a gold wax to highlight the raised letters and design. Then I used a black Stabilo All pencil and a water pen to add shadows and make all of the depth stand out even more.

After that was done, I added some gold metal corners to the covers (super helpful when your journal gets kicked around in a suitcase - lots of wear and tear on these trips!) and then I added some beautiful trims from India along the covers and spine to really dress is up.


With the outside done, it's time to work on the inside! 

For a trip to India, of course I had to go back to my collection of stencils by Jessica Sporn! On the title page I used her Lacy Lotus Repeat stencil with Archival Inks - I'll probably add some black lettering over top once I decide what to say!


In the middle photo above, you can also see where I used Jessica's Paisley Floral Repeat stencil with some Distress Oxide Inks to make a fun page where I'll add photos or ephemera during the trip. For the last photo above, I had added different papers as inclusions in each signature - this was a sheet of screen-printed paper from India, and I used my Ornamental Circle Clusters Screen stencil with gold embossing powder from Emerald Creek to decorate the back side.

For the inside of the covers, I used Jessica Sporn's Shiva Deity and Krishna Deity stencils with gold paint. I did that on a purple painted background that tied in with the colors in the beautiful India-themed washi tape I'd used along the edge of the text block.


I don't like to go too crazy decorating the pages ahead of time because I'm never sure what I'll find when I'm traveling. This trip is a craft-focused trip - we'll be touring a paper factory and taking all kinds of artisan workshops, so I wanted to leave even more pages blank than normal so I can add goodies from the road.

Of course, that doesn't mean I can't prep a few other pieces to be ready to use... I always like to have little pockets ready to add to the book where I can insert ticket stubs, receipts, business cards, and that kind of thing. I pulled out five different pockets and envelopes and stenciled each one of them with a hamsa from Jessica's Five Hamsas Stencil (one of my favorites!) Some were done with ink, some painted, some heat embossed... I wanted each one to be different.

I also had a large red envelope that fits perfectly in the book that I can use to hold pamphlets or larger pieces of ephemera, so I stenciled the back of that with the words and mudras from the Namaste stencil. I'll attach that during the trip when I know where it needs to go.

Here's a little overview of all of my stenciled prep work:


I added some more washi tape in a few places, but this is pretty much how it will look when I carry it onto the plane! 

For the kit to go with it, I'll take a few rolls of washi tape, a tape runner and refill, a travel watercolor palette using Peerless watercolors, a waterpen, pen (ballpoint - the paper eats up my Microns,) pencil, a mini stapler, and a pair of small travel scissors with blunt tips so I can carry them on the plane (some countries will take them from you for sharp tips, even though the blades are only about an inch long, so these work best for international travel.) I also take some pre-made labels with destinations from our itinerary, date stickers, and a Fuji Instax printer (I load photos onto my iPad and then print my favorites on the go and add them into the book.)


That's it! My travel journal is ready and prepped with lots of stencily goodness. Now I just need to pack my bags and get on the looooong flight to India and I'm ready to go!

Until next time, happy stenciling!

Friday, January 6, 2017

Canvas Travelers Notebook by Art and Whimsy!

Hi, everyone! Belen from Art and Whimsy here!

If you’re on social media you’ve likely seen that the planner craze is still going strong. There are many different styles & configurations to choose from. One popular style is the Travelers Notebook.
Because it's comprised of individual booklets, or inserts as they’re called, it's extremely customizable and has become a favorite with many artists who like to have a place to do some on the go watercolor or mixed media, along with their planning or fitness tracking.

What I'm going to show you today is how to create your own unique, single band style, Travelers Notebook using stencils, paint, canvas, and a few other supplies that you likely have laying around your studio or craft room.

First, take whichever size insert you want to use and measure out how much canvas you'll need to cover it.
I'm using adhesive backed canvas by Art-C but you can just as easily use regular canvas and iron-on fusible web.
You might want to use something like a binder clip to hold your canvas in place while you make sure that you have your edges lined up.
Trim to size.
If you plan to add several inserts, be sure to allow enough canvas so that all of your inserts are covered.
Side Note: To stop the canvas from fraying, run a bead of fray-check all around the edges. Allow to dry.
Next, prep your canvas with a generous coat of gesso and let dry.

Once your canvas is good and dry it's time to give your TN a base of color. Personally, I like brush on a heavy body paint using a stiff bristle brush, but you can use fabric paint if you like. Don't be afraid to play and experiment to see what works best for you. Allow your base to dry.
 Next comes my favorite part, playing with stencils! For this Travelers Notebook I use a couple of my most favorite StencilGirl stencils, Carolyn Dube's Scribble Scratch Handwriting stencil and Michelle Ward's Maltese Mix stencil.
Using cosmetic sponges, dab heavy body paint through the stencils onto your canvas. Have fun with it! Allow enough time for your canvas to dry completely.
Once dry, you can add some random marks to your canvas with pens or markers or you can trace around the stencil pattern to give your design a bit more visual interest, as I've done here.
When you’re happy with your cover, it's time to move on to the backing. This is what will be visible when you open your TN.
For this step you can use fabric or even designer paper, which is what I went with.
Since my canvas has an adhesive backing it was just a matter of lining up my edges, peeling away the backing and using a straight edge catalyst tool to smooth out any air pockets.
If you’re using iron-on fusible web, follow the manufacturer’s instructions and use accordingly.
Once your backing is in place, use your trimmer to clean up the edge as needed.
Next comes the binding! As with the construction of the TN itself, you'll find different ways to accomplish this on the web. Below is what I found to be easiest for me.
First find the center at the top of your cover. You can eyeball it or use a ruler. Go in about a 1/2 inch from the edge and make a mark.
Next, go in about a 1/2 inch from that mark and make a second mark. Basically you'll end up with 2 marks... one that’s 1/2 inch from the edge and one that's 1 inch from the edge.
Repeat this process along the bottom edge of your cover.
Once that's done, find the very center of your cover and make a mark in line with the others. You should now have 5 marks lined up vertically on your cover.
Using an awl or a Japanese screw punch, punch holes where you've made your marks.

The advantage of using a good Japanese screw punch is that it makes nice clean holes with no fraying or puckering.

If you want to round your corners, now is a good time to do that. I used a Corner Chomper but if you don’t have one handy, you can place something round, like a pen cap, in each corner and trace around it with a sharp craft knife.
Take some elastic cord. How much will vary depending on the size of your TN, but for a standard size or a bit larger like mine, about a yard will do just fine. It'll give you a little wiggle room too.

Fold your cord in half and from the backside of your canvas, or in my case the paper side, thread the folded end through the center hole of your cover. Pull through enough to loop over your cover.
From the paper side, take one end of your cording and thread it through the next closest hole and then back through the hole closest to the edge.
Repeat this process with the other end of your elastic cording.

The easiest way to make sure that the inside band that’s going to hold your insert in place is sized correctly is to use the actual insert you plan to house in your TN.
Open it up to the middle and place it on your cover. Take the ends of your cording and tie a knot, securing your insert in place. Trim the edges.
Now just close your cover and pull the loop over your TN to keep it closed and that’s it, your very own Travelers Notebook!
If you'd like you can accessorize your TN with a pretty charm. You can find them at your local craft store or on Etsy, like this one here from Posh Pieces By Melissa.
Whether you use yours for planning, art on the go, or tracking healthier habits, like I plan to, it's ready to just toss in your bag and go.
Have fun & Happy Stenciling!
-Belen

On Instagram: