Showing posts with label tutorial video. Show all posts

Wednesday, May 4, 2022

May The Fourth Be With You inspired Cards and Art Journaling by Cat Kerr

Hi, everyone! Cat Kerr here! When my kids were young I cannot even begin to tell you how many times I quoted Yoda to them. Ha! Yes, it’s true. He just always seemed to offer the perfect words after a fall or even a disappointment. His simple truths remind me not only of a galaxy far far away, but they also remind me that right here, in our small little lives, life is about getting up again after you fall. Just like Luke, all we have to do is…use the force and muster up some courage when we’re feeling lost.

With today being May the fourth, I decided to make some cards for my kiddos (now that they're off living their own adventures) because it doesn't matter how old you are, growing into who you are is achieved by making a series of mistakes and learning from them. We never arrive, we never stop learning, and even though it may feel scary at times, the ultimate purpose is to grow and be better than we were yesterday. We just need to have a little patience.

Patience you must have my young Padawan. Yoda

Today's cards were created by using some of my “Space” themed Stencils, because, hello Space, get it, heehee, as well as some of my other stencils. I started by picking out a handful of colors and then having a play session on my Gel Press monoprinting plate. I love using black card stock and I added texture with the stencils and then continued to play until I was happy with the layers!

Happy creating and May the Force be with you, my friends.

Material List:

  • My StencilGirl Stencils 
  • Ranger Monoprinting Plate with Brayer
  • Assorted Amsterdam Acrylic Paints including the Pearls
  • Black Cardstock
  • Circle Tool
  • Double Tack Dry Adhesive Film
  • 5 x 7 Card Base
  • Cricut to cut out quotes but can be hand-painted or stamped
  • Cosmetic sponge
  • Gelly Rolls
  • Deco Foil
  • Journal
  • Finetec Pearlescent Watercolor
  • Matte Medium

Monday, December 20, 2021

Creating Christmas Baubles Using Gel Prints and StencilGirl® Stencils by Niamh Baly

Hi, everyone! Niamh Baly here!

It’s that time of year again. I love Christmas and I really enjoy the process of decorating the tree, especially with my girls as they are old enough to help this year. I found some blank decorations in my decoration box and decided to add a mixed media spin to the tree. If you don’t celebrate Christmas, this technique can be applied to many different home décor items such as candle votives, photo frames and more.  And best bit is – as Christmas is nearly here, these blank decorations will probably be on sale, so you can stock up ready for next year!

To begin, create a heap of gel printed papers. It is important if you are doing a project like this that you use thin papers such as deli or tissue papers. You can use any colour scheme you like – one that will go with your Christmas décor, or random in the case of mine.

Once you have printed the papers, tear them into small pieces and apply them to the bauble using gel medium. Smooth the papers out by gluing underneath and over the top of the papers, and you may like to use your fingers to get rid of and wrinkles. Paper mache all over the bauble until all the surface is covered.

To add some extra shine to the bauble, I covered mine with icicle paste from Ranger Ink (a shimmery gel medium). You could make your own by mixing some iridescent glitter or mica powder into some gel medium. It is a good idea to have some sort of place to dry your bauble (unlike me in the video). If you do use a heat gun, make sure you don’t hold it too close as it may bubble, and it needs to be done in well ventilated area.

Finally, I added some bling to my bauble using some haberdashery trims I had in my stash. I used a hot glue gun to adhere the trim and the metal word to the top of the bauble. I also added some pearl rhinestones to the trim to add an extra Christmassy look. A red ribbon and then all you need to do is add your masterpiece to your tree. 

Here is a close up of the details of this bauble.

Here is a list of the StencilGirl® stencils I have used in this project to create the mixed media bauble:  

Thank you so much for stopping by the blog. I hope that this videos have inspired you to get into your journals and create something beautiful using the fabulous face stencils.

Happy Creating,
Niamh
Instagram: @niamhbaly
YouTube: https://www.youtube.com/niamhbaly/

Tuesday, December 14, 2021

Merry Makings - DIY Ornaments by Nancy Curry


M  E R R Y        M  A  K  I  N  G  S


I adore the magic of the holiday season, even the wrapping, but most of all, I enjoy putting my own diy stamp on our home decor that blends well with my favorite motifs that are part of my life story.  I've been making alcohol ink ornaments for a few years now and really enjoy the happenstance of them all.  I hadn't planned to do an ornament project until I walked into my studio and saw some ornaments at the ready.  That's when the idea of melding my process with stencil design was hatched.  In the tutorial video above, I talk through the process, but there are a few specifics I'll add here.  

I chose to use 3" white glass orbs but you could use clear and drop some diluted white in the middle to create the contrast layer or use metallic colored glass balls.  I love the look of alcohol ink on the metallics.  What I won't recommend are the powder coated ornaments.  The alcohol ink eats right through the powder coat and you are usually left with a silver undercoat.  It makes for a choppy application.  There is no prep that needs to happen with these ornaments.  I love that convenience.  You can find them at Michael's or Hobby Lobby early in the season. 


The rest of the products I used are in the flat lay photo below that includes a view of the finished orbs.  I used Ranger and Jacquard on this project.  Nothing tops Jacquard's Real Gold for me.  Any alcohol ink could be substituted except for Ranger's Alcohol Pearls.  The Pearls would not move as well over the surface in this process.  The bottle of 91% is rubbing alcohol.  As for the acrylic, I would use the most pigmented, smooth black you have so that it stands out well against the prior layer.  Cosmetic sponges are great to use because you can cut them to fit smaller stencils.  Last but not least, I chose a few abstract stencils:  The smaller scale stencils were from ( L792) Rae Missigman's ATC Mixup#1Art Marks, the mainly organic circles were a StencilClub  1/2019  by Mary Beth Shaw and Seth Apter, Cecilia Swatton's Ornamental Curls (S462) challenged me to use narrow lines,  and Daniella Woolf's Fez Medina Wall (S749) gave me the chunky coverage I was looking for.  What I would say about stencil choice is that abstract is the easiest to use because if you miss a little coverage pouncing on the orb, no one will know. Staying in the abstract genre also follows the random, abstract application of the bottom layer. 


Once the orbs are dry, it's your choice to add a spray sealant layer.  They really don't need it but if you do, you will need an isolation layer or two of Kamar Varnish and then your choice of a final coat, matte, satin or gloss spray.  Always give the layers time to dry before adding another spray.  All choices give a different look.  


As always, it is my pleasure and privilege to be on this blog.  I'll back in February with something new.  Follow me on FBK and Nancy Curry Art and  IG at Nancy Curry Art or browse my galleries on my site. I'll have a sale coming up shortly so sign up here if you want notice (very low volume).

Merrily On High,

xoxo

Nancy

Friday, November 19, 2021

Kecia Deveney: Two Wrapping Paper Tutorials with StencilGirl® Products!

Hi, everyone! Kecia Deveney here!
If you are like me, I never seem to have wrapping paper around when I need it. I didn’t have the time to run to the store, so I decided to see what I had on hand and make my own. I got out my stencils, ink sprays and spray paints and some paper. I did a little experimenting as well to see what I liked the best as the end result.

I used two types of paper; brown craft paper (Walmart) and packing paper (Home Depot). I found that the spray paint works really good on the craft paper and packing paper. The ink sprays worked best on the packing paper, although the paper is very thin and the ink can be a tad saturated and wet. But this is a good option because for spray paints, you want to do them outside with good ventilation and wearing a mask and gloves.

Stencils used:

I’d recommended that you do this project in advance of using it as wrapping paper since you do want to let it dry. After I sprayed my papers, I hung them on my clothes line to dry out. The packing paper will dry fast. This will also help remove that spray paint odor.  I also ironed my packing paper when it was dry.

Of course you can make papers like this as well to use in your mixed media art or journaling/collage.

I also made my own ribbon with torn scraps of muslin fabric that I scrunched up and ink sprayed. When they dried (also clip to clothes line), I ironed them and then did some marking making with a black sharpie in spots that I felt needed some interest. You can also mark make on your papers in the same fashion.

Thanks for joining me on StencilGirl® Talk today!
Kecia Deveney
https://www.instagram.com/keciadeveney/

Tuesday, October 5, 2021

Add a Napkin to your Art Journal

Add a Napkin to your Art Journal by Renee Day for StencilGirl Products


Hello there, it's Renee with @thediyday and I am all sorts of ready for Halloween.  I'm even bringing the vibes into my art journal using an appropriately themed decorative napkin and a few StencilGirl® stencils.  If you're new to art journaling, have never used a paper napkin as art, or looking for inspiration, keep reading - I'm sharing some of my favorite techniques.  

I am often asked what type of journal I use for art journaling.  The short answer, I'm using a book of poems I bought from a garage sale.  I liked the minimal amount of pages (80) and the words in the book serve as a background design.  Don't get me wrong, there are many wonderful art journals to choose from and I may use one in the future, but for now, this book works just fine.

Before I started designing my page I added a thin layer of gesso to the top and allowed it to dry.  Gesso hardens the page just a bit and it gives the paint something to stick to.  

Next, I peeled the front layer (skull layer) from the back layer of the decorative napkin, tore it to size, and brushed on a coat of Mod Podge.  With the Mod Podge still wet I placed it onto the page and added another coat right on top of the napkin.  

Add a Napkin to your Art Journal by Renee Day for StencilGirl Products

Add a Napkin to your Art Journal by Renee Day for StencilGirl Products


After the Mod Podge dried, I blended a light coat of Vintage Photo Distress Oxide Ink on the entire page followed by Black Soot in random areas.  

Add a Napkin to your Art Journal by Renee Day for StencilGirl Products


Now it's time for some stencils.  The first one I used was Antennas 6 Stencil.  This stencil reminds me of crossbones which works great with the skull paper napkin.     

Add a Napkin to your Art Journal by Renee Day for StencilGirl Products

  
Then I covered the entire page with dots using What's the Point? Stencil and a medium coat of Vintage Photo Distress Oxide Ink.

Add a Napkin to your Art Journal by Renee Day for StencilGirl Products


To complete the overall creepy Halloween look I used the Scarab Beetles Stencils in various colors throughout the page.  

Add a Napkin to your Art Journal by Renee Day for StencilGirl Products

Add a Napkin to your Art Journal by Renee Day for StencilGirl Products


On a side note, Mod Podge is often sticky for a few days or even longer depending on the thickness of the application.  Be sure to leave your art journal open to air dry to prevent the pages from sticking together.  


Have a wonderful day and a happy Halloween!

Renee 


Wednesday, September 15, 2021

Art Journaling with StencilGirl® Face Stencils

Hi everyone,

I am so excited to be here on the StencilGirl® blog again today as a guest designer. My name is Niamh Baly and I am a Primary (elementary) school teacher from Tasmania, Australia, a content creator and mum to two gorgeous girls. I am also stencil addict! Stencils are such an amazing tool to help produce fabulous artwork and are so simple to use. They are one of the most important tools that I use in my art journal pages, and nearly every page I create has a stencilled image or texture on it. In this project we will be using stencils to create a layered background and adding a face stencil as a focal point. I find face stencils like this help me create moody pages which can capture how I am feeling at the time. As I am not great at drawing, I love that a stencil can capture a hand drawn effect.  Below you will find a full process video as well if you want to see this page from start to finish.

To begin, gesso your journal page then apply some colour in the background. Dry the paint then apply a contrasting colour over the top and place a stencil over the top and wipe away the excess paint.  Repeat this until you are happy with the effect.

Using a small 6 x 6 gel plate and a script stencil, print the stencil into your journal by pressing your page directly onto the plate. You can roll the excess paint off your brayer onto your page to add a grungy effect as well. Then I have added the face image using Paynes grey as a focal point to my page. To create a figure I use another script 6 x 6 stencil to extend the body, then add the whites of the eyes and some linework with a white pen. I then used a stabillo all pencil to create a shadow around the figure and push it out from the background. I also added some colour pencils to the figure to add more interest.

Finally, I wanted to add some extra marks and layers to my page using metallic paints to catch the light. I then added some stencilled words to my page to capture my thoughts when I was creating this page. I find when I am creating art journal pages like this, my mind wanders and I think of things that have been bothering me. Usually by the time I am finished a page I have some clarity about why I created it. With this page, I was reflecting on some health issues I’d had during the year – hence the ‘you are tough’.

Here is a video of the full process creating this page:

Here is a close up of the details in this page.

Here is a list of the StencilGirl® stencils I have used in this project to create the unfinished art journal page:  

Here are two BONUS videos using StencilGirl® Face stencils in some different ways to get you inspired as well:

Thank you so much for stopping by the blog. I hope that these videos have inspired you to get into your journals and create something beautiful using the fabulous face stencils. 

Happy Creating,
Niamh
Instagram: @niamhbaly
YouTube: https://www.youtube.com/niamhbaly/

Thursday, September 2, 2021

Mixed Media Canvas with StencilGirl® Products

Hello stencil lover,
Sue Plumb here today with a fun new project to inspire you. It’s been a little while since I shared my last project here as part of the StencilGirl® Creative Team, so I was only too happy to jump in and get my hands dirty when I was asked to be a guest designer this month. 

As I will be moving house soon, I have been busy sorting through my art supplies and assessing what I have on hand. This task also highlighted which supplies have been neglected lately, particularly some of my paints. With that in mind, I decided to create a mixed media canvas for this project and put some of those paints to good use. Unfortunately, paint is one of those supplies that does have a shelf life, and I did have to throw some of them away that had dried up. (If you have paints in your stash that you haven’t pulled out for a while, I encourage you to check them and use them whilst you can!)

My project began with a 10x12” canvas panel which came pre-primed, so it saved me applying a coat of gesso. I started with some collage on my background, adding a Jane Davenport printed napkin and some spotted tissue paper using matte medium. I then dried it off and started on my painted layers using a mix of acrylic paints applied with a silicone spatula and my fingers.

If you are unfamiliar with mixed media, there are couple of important points I want to share with you here. First of all – layers! Mixed media is all about layers and each one contributes to the overall depth and impact a piece will have. Yes, along the way, you will inevitably cover up some of the layers you create, but it is the way in which those layers combine that will deliver the final result.  The second point is what many of us like to refer to as the “ugly stage”. At some point during the process you are likely to look at the piece you are working on and think it looks terrible, but my best advice here is to push past that stage, continue on, and know that it will all come together in the end.

Once I had my background colour down, it was time to start adding some stencilled detail. The first one I reached for was a branches mask that came from Into the Woods by Suzi Dennis. I used a green Distress Oxide and a sponge to add some detail along the bottom edge of the canvas. However, once I looked at it I realised that the detail didn’t stand out enough, so I went back to my painted layers and lightly added some white paint using a brayer to strip some of the colour back and allow my detail to show more clearly. I repeated the process with the mask and the Distress Oxide and was much happier with the result. (See – it really is a process of layers!) I then used the same Distress Oxide and sponge with the Looping Leafy Vines Background stencil to add detail along the remaining edges of the canvas.

Next, I added some floral detail using the Deconstructed Floral Bouquet stencil, teal Archival ink and a sponge. I only used one section of the stencil and moved it around the canvas to repeat the same flower design in different areas. At this point I decided it was time to add some texture, so I went back to the Looping Leafy Vines stencil but this time I used a teal-coloured texture paste instead. (I often like to use the same stencil more than once on a project but with different mediums to achieve a different look.) I then added more texture paste, only this time a pink, using the Peony Blooms stencil; and again I focused my attention around the edge of the canvas.

Now it was time to turn my attention to the focal point for my canvas. I had a printed napkin that featured a bright design with Toucans and tropical foliage, so I decided to use one of the Toucans as my centrepiece. I removed the backing layers from the napkin, leaving me with the topmost thin sheet, then traced around the part of the design I wanted using a water brush. Moistening the paper like this allows you to then separate the piece away gently and gives a softer edge that is easier to blend into the background than if it were cut with scissors. (Watch my process video to see exactly how it is done.) I used matte medium to apply it to the canvas, along with some extra foliage printed pieces.

Now it was time to start adding all the final details to bring the piece to completion. To add some light to the foreground and the surrounds, I used the small Maidenhair Fern Stencil with Masks and stippled some light green paint through it with a brush and then dried it off.

To tie in the black colour of the Toucan, I used a rubber stamp featuring small stars and spots and black StazOn ink to lightly stamp tiny black details randomly around the canvas. I also used a black Stabilo All pencil to create subtle shadowing around the Toucan’s silhouette.

I added further detail to the piece using one of my all-time favourite stencils, Organized Chaos by Cat Kerr, white paint and stippled the design randomly around the page. (This is one of my go-to techniques for finishing mixed media pieces like this.) After that, it was simply a matter of sticking down the large quote, small phrase stickers, and a few printed vellum flowers to add dimension. (I love the way the vellum curls up from the canvas when applied with a small dab of wet glue.)

If you would like to see the evolution of exactly how this piece came together, or see any of the techniques I have mentioned, please watch my process video. 

Thanks so much for joining me today, I hope you are feeling inspired. Happy stenciling!

Thursday, August 19, 2021

Travel Art Journaling with StencilGirl® Stencils

Art journaling when traveling brings me awareness of what I am directly experiencing through my senses (mindfulness) by observing my surroundings through my artistic eye. I love to travel and was so excited to re-enter society this summer by traveling to Utah.

Check out this photo of me and my travel buddies at Landscape Arch in Arches National Park. Our matching world map shirts were a blast. When considering the weight of our hiking gear and water, we wanted to limit the art supplies we brought in our backpacks. 
I don’t always take the same supplies but have core items that I choose based on the method of travel, planned activities, and the length of the trip. When traveling by air, I don’t take anything with liquid such as acrylic paint since I tend not to check luggage. I use a watercolor pan set which is light weight and doesn’t take up a lot of space. I also bring a watercolor sketchbook, a waterbrush, a few pens and pencils, and for this trip I added several StencilGirl® stencils.

I have a lot of StencilGirl® stencils and love working with them in the studio. It hadn’t occurred to me to take them with me when traveling, but they are highly portable and do not take up space or add weight. I think they add such a fun element to my art journal pages and are great way to add texture. Here is a list of the stencils I chose as well as why I selected them (not all were used in the video):
• Compass Rose by Julie Snidle: compasses are a universal symbol of travel 
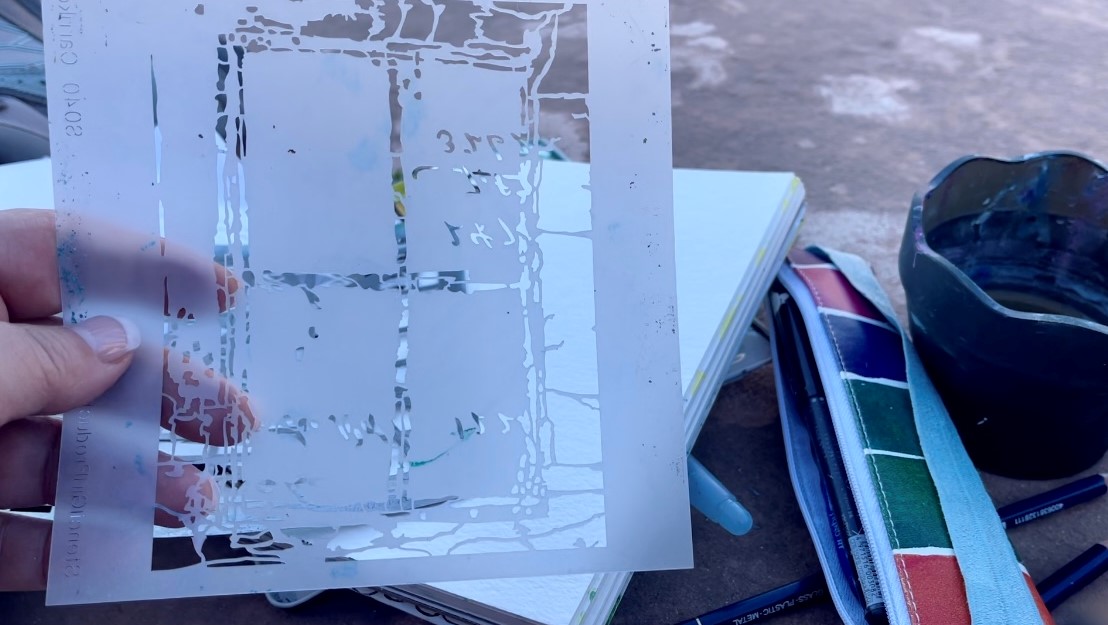
• Windows Large Stencil by Pam Carriker: represent ‘windows’ in the rock formations 
• City Map by Mary C. Nasser: urban vibe as a contrast to nature/national parks 
• Sunburst Crackle by Daniella Woolf: sun for sunny desert location 
• 6” leaf motif from Stencil Club September 2020 by Rae Missigman: botanical 
• Wheel of Hope from Stencil Club May 2017 by Pam Carriker: texture and shape 
In the video linked above you’ll see how I created a journal page while inside Arches National Park.
After finding a comfortable place to sit in the shade, the view of Turret Arch was the subject for my page. Don’t be surprised by people’s curiosity; I found they were really excited and thought what we were doing was very cool. It was a great reason to strike up a conversation and learn more about the area from other travelers.

I started my page with a line drawing using a watercolor pencil. Next, I painted the blue sky and earth-tone rock formations using a waterbrush and watercolors. I used the Mash Up stencil to add texture to the foreground. I added greenery and then used part of the Windows Large Stencil, subtle symbolism to our location, to add texture to the rock formations. 
A few extra lines and my art journal page memorializing my trip to Arches National Park was complete.
I hope I have inspired you to art journal on your next vacation to create something you can look back on for years to come. I’d love to see your travel journal pages so make sure to tag me on social media and check out my YouTube and Instagram accounts for more mixed media inspiration: https://www.flowcode.com/page/carolynmcgowan 
Native Cincinnatian, Carolyn McGowan works in finance, while also feeding her creative appetite as a mixed media artist through painting, art journaling, book making, photography and travel. 

Friday, May 28, 2021

Stenciled Floral Heart Mandala by Margaret Peot

In this video, I use my Floral Heart stencil to make a flower-petal-edged mandala. You will need a piece of paper at least 22 inches square to accommodate the whole circle shape. I used Rives BFK 22 x 30 white paper. You could also do this technique on fabric with fabric paints, maybe for the middle of a tablecloth.

You will need:
Floral Heart stencil 
pushpin
foam core
ruler  
compass
paint (I used Kuretake watercolor pans, but you could use gouache, watercolors of any sort or acrylic paint)
paper (at least 22 inches square)
brush
water

Optional:
Ideco foil glue and silver foil

Thursday, April 15, 2021

One Stencil, Multiple Layers by Cat Kerr

Hi, everyone! Cat Kerr here! I've been obsessed with stencils for a long time now. They're versatile, easy to use, and with all of the amazing designs available to choose from, well, the creative possibilities are endless. I can easily use 5 or 6 different designs in one journal page and sometimes you can even catch me with a stack of stencils, a stack of cardstock, and my Gel Press Plate ready and eager for a monoprinting session! Yes, I love my stencils.  

Now, lately, I've been trying something new. I've been creating a lot of abstract art and in doing so I found that using 1 stencil (instead of using multiple like I normally use) and repeating it in the different layers really helps to unify the piece. This revelation has taken me by surprise. I have always been a "more is more" kind of girl and I still am, but what I've now learned is that there is also great value in using only one design and repeating it. In the close-up photo, you can literally see the four layers in which I used the same stencil. How cool is that! 

Please join me as I create a fun abstract journal page using only my Flock 6 x 6 stencil, acrylic paint and some mark-making tools.


Friday, November 27, 2020

StencilGirl® Products Tutorial by Pamela Caughey

"It must be Fall," Acrylic, Mixed Media, 12" x 12" on Baltic Birch Panel

SUPPLY LIST:

StencilGirl® Stencils of your choice (I used Open Bare Wisteria Vine, Tall Beach Grass and Thicket Background)
Acrylic Polymer Medium (I use Golden Polymer Medium Gloss)
Parchment Paper
Scissors and cutting mat
Spray Paint (I used Liquitex Acrylic Spray Paint)
Baltic Birch panel (or other painting support)
White Gesso (I used Golden White Gesso)
Paintbrush or sponge brush to apply 2-5 coats of Polymer medium to Parchment paper
 

INSTRUCTIONS:

1)      Coat a sheet of parchment paper with 2-5 coats – depending on how thick you would like your vinyl/acrylic stencil transfers to be. I only used 2 layers in the video and the stencils were thin; if you want them a little heavier, just use a few more coats of the acrylic polymer medium before using the spray paint.

2)      Gather your stencils and place them on the dried sheet of parchment paper with acrylic medium.

3)      Shake up your spray paint and spray over the stencil, taped in place (use low tack tape like blue painter’s tape to hold stencil in place).

4)      Once the spray paint is dry, cut your vinyl/acrylic stencil transfers into any shapes you want!

5)      Peel off the parchment layer, and use polymer medium to collage these pieces onto your painting support. (*Note, if you get air bubbles, you can work them out while the polymer is wet, or cut with a sharp razor blade when dry and brush polymer medium over these areas to seal.)

I hope you will enjoy this fun process of personalizing your stencils
and using them to make stencil transfers as collage material!