When you are creating, do you find yourself wondering "what if?" For example, I love creating mixed media projects on fabric and I also love using clear embossing powder to create resists. A few days ago I was thinking about both and found myself wondering "what if?". What if I did clear embossing on fabric, would I get a resist? Why not try it and find out? You might get what you hoped for or you might find something totally different!
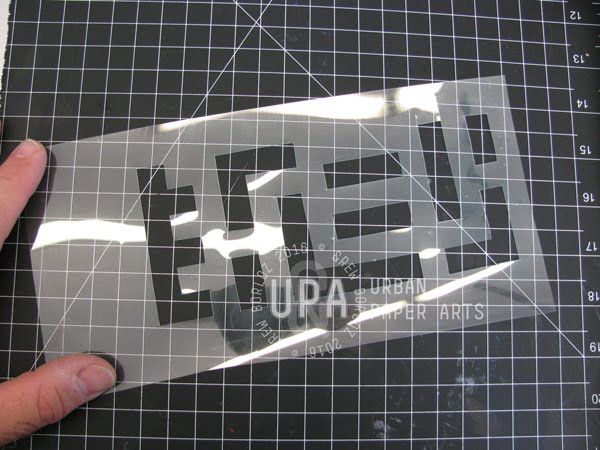
 For my project, I am working on one of my fabric art banners but you could work on any fabric surface. You could also work on paper but the finished effect will be different. Place the stencil on your surface as desired. (Stencil shown- L301 Circles Circles by Traci Bautista.)
 Ink a script background stamp (I am using my Dear Ruby stamp from Spellbinders). I used Gathered Twigs Distress Ink. It is water reactive and run when I add water in an upcoming step. If you would like the script to remain crisp, use a waterproof in and dry before moving on. Stamp your surface with the stencil in place so that it acts as a mask.
 Flip the stencil over so that the side that you stamped is face down on your work surface. Ink the back side of the stencil generously with a clear embossing ink. (I used Ranger's Emboss It Dabber which is embossing ink and a bottle with a dabber top. I felt it allowed my to apply more embossing ink that I could with a pad.)
 Flip the stencil over and place it embossing ink side down onto your surface, matching up the stencil with the stamping.
 Press over the stencil with a dry cloth to transfer the embossing ink onto your surface.
 Sprinkle clear embossing powder over the fabric. You will have extra powder that will stick to the surface. Flick the back with your finger to knock off the excess. After a few flicks, you should see the powder in your stencil patter.
 Use a heat tool to melt the powder well. It will get shiny as it melts like it would on paper and then will almost disappear. Keep your heat tool moving so that you do not scorch the paper. I found it helpful to heat it, let it cool, and heat it again. Keep going until you melt any areas that look or feel gritty.
 Mist the fabric surface with water. Adding water first will help spray inks blend better. When missing with water, you don't need to soak the fabric, just add enough water randomly to the surface to make it lightly moist.
If you used a water reactive ink like Distress for your stamping, you will see that it will run. I like the look of that because if feels very vintage to me.
 Spray the surface lightly with assorted colors of spray ink. I used Distress Spray Stain in Peacock Feathers, Cracked Pistachio, Salty Ocean, and Broken China.
 Allow the ink to set for a moment and then blot with a clean dry cloth.
 The longer the spray ink sets on the surface the more it will soak in. The amount of time it soaks in affects its intensity. Since this is only the first layer of color, I wanted to keep it pretty light so I blotted it pretty quickly.
 Dry the surface with a heat tool. The embossing powder may melt and soak in more. I noticed that as it melted again in created some interesting white dots.
 Use an ink blending tool to apply Distress Ink (shown-Broken China and Peacock Feathers) around the outer areas of your surface. The resist will start appearing with the application of the ink.
Place the stencil back on your surface. You will be matching the stencil with the resist lines. When matched up, you should not see the resist. Use an ink blending tool to apply more color. This color will be in the non-resist areas. I added color mostly along the outer edges and left the center alone.
 I also used some Gathered Twigs (brown) Distress Ink with the stencil in place to really help deepen some of the outer edges.
 Add more random stamping with a script stamp using the same ink as the first stamping. You will now have some stamping that looks like it is behind the circles and some (the crisp new stamping) on the front. It is a great way to add depth!
 To anchor the embellishments and play off of the circle them, die cut a circle (StencilGirl Artist Seth Apter's Spellbinders S3-238 Triplex) from medium weight plain cardstock. Brush the surface with your ink blending tools, using the ink already in the foams. (I used blue and brown.)
 Ink the die cut with clear embossing ink. Sprinkle Clear embossing powder over the die cut.
 Use a heat tool to melt the embossing powder.
 Adhere the die cut the surface. Layer fabric flowers and leaves (my Pinwheel Posies and Pom Pom Posies Die), a ribbon bow, vintage buttons, and a Frayed Tabs with a sentiment.
Are you interested in learning how to make fabric flowers like these? Check out the tutorials on my blog: Tammy Tutterow Fabric Flowers.
 The fun thing about asking "what if" is that you just never know what you might get- it could be what you imagined, a craft fail, or a new discovery. You won't know until you try! On this project I wanted to try embossing powder on fabric. I found that the powder really sunk into the fabric and didn't create the sharp resist I imagined. But I did get a resist and I think it might be even better than I what I was hoping for. It is so subtle and batik-like. I thought it was kind of ghosty, clear and cloudy, soft and fading in and out. And that, I am going to consider a new discovery!
Tammy
Supplies:
- Stencil: L301 Circles Circles by Traci Bautista
- Stamp: Tammy Tutterow Spellbinders Dear Ruby
- Dies: Seth Apter Spellbinders- Spellbinders S3-238 Triplex; Tammy Tutterow Spellbinders- Pinwheel Posies, Pom Pom Posies, Frayed Tabs
- Surface: fabric art banner
- Embossing: Ranger Ink Clear Emboss-It Dabber; clear embossing powder
- Distress Ink: Gathered Twigs, Cracked Pistachio, Broken China, Peacock Feathers
- Distress Spray Stain: Salty Ocean, Broken China, Cracked Pistachio, Peacock Feathers
- Embellishments: Fabric Flowers; Tim Holtz Small Talk; vintage buttons; stick pin
- Adhesive: Therm O Web Mixed Media Adhesive
- Tools: Ranger Ink Non-stick Craft Sheet, Ink Blending tool, Distress Sprayer; Tim Holtz Tiny Attacher; embossing heat tool