Greetings from Geri Beam.
Family has always been very important to me. As I contemplated making a wearable article for someone in my family, I thought about how much I have missed being near my grandchildren. I thought about the missed hugs and laughter. I am not alone with these feelings because we all face being isolated at some time in our lives. Then turning my thoughts away from sadness, I turned to the joy from my many blessings.
The phrase “bluebird of happiness” came as my inspiration. The song of the bird and colorful feathers are truly amazing gifts. As often happens, StencilGirl had just sent me a collection that was perfect for this project. Two stencils are from Stencil Club and one was a perfect border stencil.
In recognition of the passing of Kristie Taylor, one of our talented artists, her Textured Sheet Metal mini 4x4 stencil was used to represent little bird tracks across our hearts. She will be truly missed.
Stencils Used
February 2021 - Feathered Tribe - Gwen Lafleur
Leafy Doodle Verge
November 2020 - Shaw-Taylor Mash-Up - Mary Beth Shaw & Kristie Taylor
For a list of all supplies used in this project please see the end of the article.
The beginning – a blank white canvas. This can be the most intimidating part of starting a new project. I used a white 100% cotton t-shirt sized 3. To make it more interesting, I wanted to create a background that was varied and slightly tinted. I also wanted to inspire people who have never used dye to try a simple technique that always works well for me – tea stain.
As you may have guessed this uses tea and your fabric of choice. Using cotton or natural fibers like silk works when doing tea staining.
Here are the ingredients:
- 3 cups of water
- 10 Lipton tea bags
- 12 Raspberry Zinger tea bags
- One small cotton t-shirt
I boiled the water, placed in the tea bags and steeped for 10 minutes. I then placed the t-shirt into a plastic container and strained the water (to remove tea bags) over the shirt. I used a glass cup to keep the shirt immersed in the water. I let the shirt soak for 24 hours.
I wanted to have a little bit of red tint not just tea color on the shirt and that is why I used the Red Zinger tea. Not all teas will stain the shirt the expected color, so try experimenting with swatches to get the color you want. The amount of fabric, the number of tea bags, and the time you soak your fabric all affect the outcome of the color.
After soaking, I rinsed out the shirt in hot water then cold water with soap several times to remove excess tea water. I let the shirt dry in the sun on my porch rail.
Pictured below is a comparison of a white t-shirt and the tea-stained t-shirt.
Note that the color coverage is not a solid color. I like the added interest and depth this method gives.
To add more interest and depth, I wanted to do a pattern that resembled bird tracks. I knew that the bird was going to be blue so I chose burnt orange as a contrast color for this design. Below is a picture of just a few of the colors I used (for the complete list see the supply list at the end).
Prepare the t-shirt for painting. You do not want the paint to soak one side and through to the other. I used a cereal box between the layers to prevent that from happening. I used either a makeup sponge or makeup brush to apply ink through the stencil.
I placed the Textured Sheet Metal mini 4x4 stencil on the back left shoulder of the t-shirt. I used a cosmetic sponge to dip into burnt orange iZink Pigment Ink and pounced through the stencil.
I then randomly placed the stencil and pounced the ink. Once I felt comfortable with the method, I turned the shirt over and did the same thing on the front and sleeves.
Here is what the first layer of ink looked like on the t-shirt:
An important method to use when layering on fabric is to stabilize each layer before applying the next layer. I use a hot iron to “set” each layer before starting on the next layer. I run the iron over parchment paper which is placed over the painted area. This also helps protect the iron. I heat the paint/ink until it is very warm to the touch.
Now it was time to put the bird and feathers on the shirt so I could paint them. I wanted to do something quick and non-permanent to provide the outlines. During my quilting experience, I came across a product called Magic Marking Spray. It is used to mark stencil pattens onto fabric to be quilted. It is a spray powder that comes in white or grey.
I masked off the bird by placing baby wipes around the bird image.
I shook up the can and sprayed about 8 inches from the fabric. This is what it looked like. You can see that the masking really helped contain the spray area.
I brushed off any areas that I didn’t want and let the product sit for a minute while I wiped off my stencil with a baby wipe. It comes off very easily from the stencil. The nice thing about this product is that it sticks to the fabric allowing you to sew without it flaking off or hurting your sewing machine.
I did the feathers using the same product and mask process. Another good thing about this product is that if you don’t like what you’ve done you can wipe it off with a baby wipe or wet paper towel and try again.
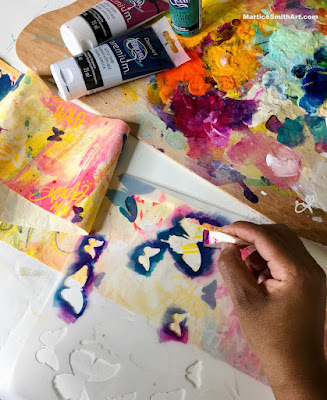
Coloring is fun and relaxing. I took the iZink Pingment inks and watered them down slightly with water on my pallet. I used a synthetic round brush to paint the ink onto the t-shirt.
Here is what the bird looked like after painting with iZink Pigment Ink. I didn’t worry about the outline, because I knew that I would be using another product later to make the lines more distinct.
When painting the feathers, I wanted to show how you could be very careful and stay in the lines or how to make a watercolor bleed effect.
If you want distinct inside the line painting, then do not wet the fabric first. See feather on the left.
If you wet the fabric first and then paint with ink, the ink will bleed. I used a spray bottle to mist water onto the t-shirt. See feather on the right. There is no right or wrong way – it is a personal choice. Having both styles make it more interesting.
To draw attention to the neckline, sleeves, and bottom of the t-shirt I added some color and slight texture. I didn’t want to distract from the main bird and feather images, so it needed to be subtle.
This is where I used the Leafy Doodle Verge stencil.
On the collar, I sprayed water to wet the fabric. I diluted the Lychee iZink Pigment ink with water. I used the cosmetic sponge to add a ring around the front collar. I then placed the stencil on top of the ink and used a baby wipe to remove the ink.
This created a very subtle texture and allowed me to blend the color down from the collar.
For the sleeves and bottom of the shirt, I wanted more contrast. I mixed the Lychee and Cotton Candy iZink Pigment inks to get a lighter color. I placed the border stencil onto dry fabric and dabbed color through the stencil using a cosmetic sponge. Of course, I heat set all of the places I had applied the ink.
Now it was time to add some sparkle and definition to the bird and feathers. I used Aladine iZink 24 Carat Diamond Glitter paint to get results.
I used the black around two of the feathers and pearly on the center feather. I laid the stencil on top of the painted images and used a credit card to spread the paint through the stencil.
Since the bluebird was the main focal point, I combined the pearly in the center and black on the outside to really make her shine.
I waited overnight for all of the glitter paint to dry before I set it with my iron.
I hand-washed the t-shirt to remove any Marker Magic. I didn’t notice any color change to the ink or glitter paint after washing. These products are both all-purpose mediums.
This is what the t-shirt looked like at this point:
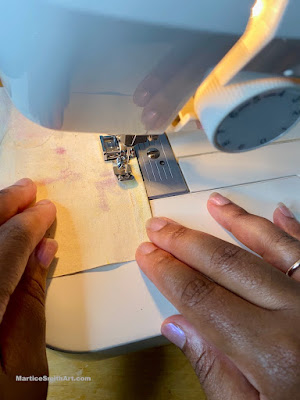
The last touch I wanted to add was hand stitching to the collar. I consulted one of my favorite books for ideas. Sue Spargo’s Creative Stitching 2nd Edition.
I found the perfect stitch to mirror the little bird footprints. It is called the Fly Stitch. Sue does a wonderful job of explaining exactly how to create the stitch and creative ways to alter the stitch.
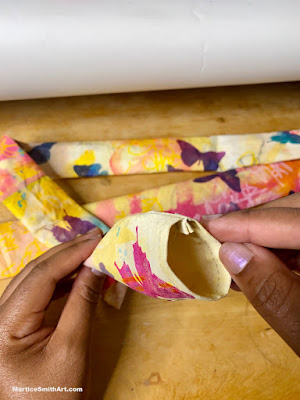
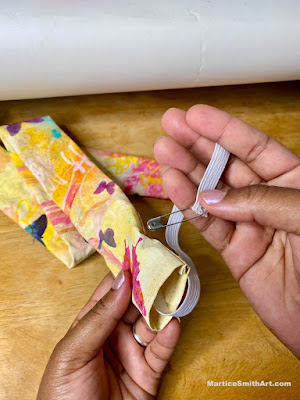
To select the perfect thread, I always audition the tread on top of the fabric to see how it will look. Here are two pictures of the thread auditioning process.
While the colors in the first thread were the same used all over the t-shirt, I felt the second choice did a better job of being subtle.
I used three strands of 100% cotton hand-dyed thread. I use beeswax on my string to keep it from tangling. I sewed from left to right all around the collar.
The final result:
My wish for you is that you find or create your own bluebird of happiness to lift you in times of loneliness or sadness. Creating has always lifted dark clouds from my mind. In this case, seeing my granddaughter wearing this creation is a blessing indeed.
Supply List
Stencils from StencilGirl
February 2021 - Feathered Tribe - Gwen Lafleur
Leafy Doodle Verge
November 2020 - Shaw-Taylor Mash-Up - Mary Beth Shaw & Kristie Taylor
iZink Pigment Ink from Seth Apter / Aladine
• Burnt Orange
• Avalanche
• Lychee
• Cotton Candy
• Roast Chestnut
• Wet Meadow
• Ultramarine
• Thundercloud
• Stratosphere
Aladine iZink 24 Carat Diamond Glitter Paint
Other supplies
- 100% cotton t-shirt
- Cardboard from a box to place between front and back of t-shirt
- Synthetic round paint brush
- Pallet
- Water spray bottle
- Cosmetic sponge
- Cosmetic brush
- Credit card or pallet knife
- Creative Stitching, \a book by Sue Spargo
- 100% cotton thread
- Needle and beeswax
- Tea – Lipton and Celestial Seasoning Red Zinger
- Marking Magic Gray spray made for Quilting Creations International https://www.quiltingcreations.com/shop/accessories/marking-magic/marking-magic-gray/