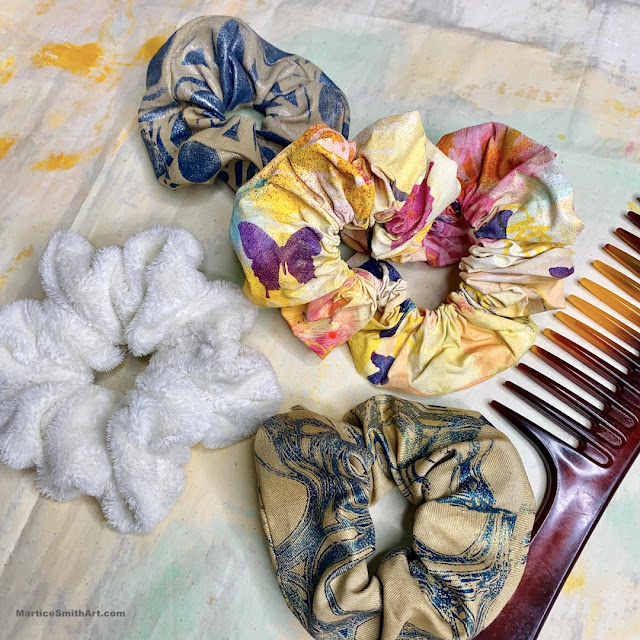
Hello there! It’s Martice, back with another stenciled fabric project! Here’s a fun fact for ya: back in the day - in the late 90s, - I would never wear scrunchies. It’s true! Not because I didn’t like ‘em...somehow, scrunchies would always find a way to slide out of my hair. I could never wrap them tight enough around my ponytails.
I was a chica who was more into wearing neon barrettes and glitter butterfly clips. Yes, I was that little girl with the noisy click-clack barrettes swinging on the ends of my long braids. I’ve always loved decorating my naturally curly hair with fun hair accessories!
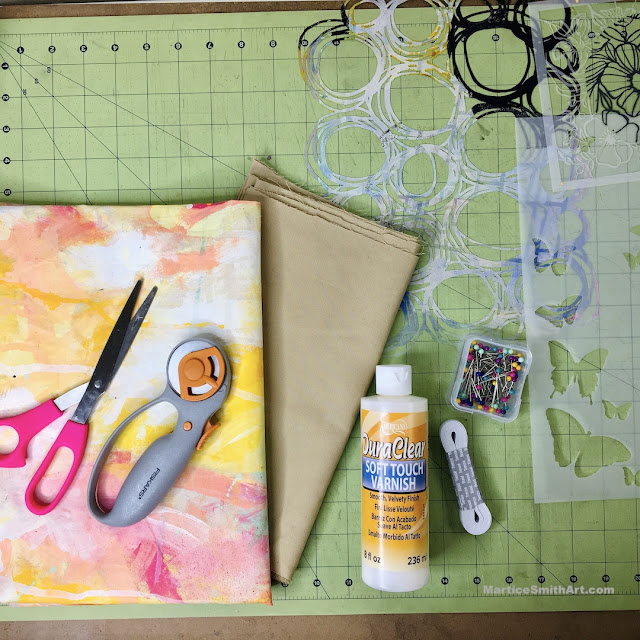
Supplies:
Stencils:
Butterfly Journeys by Carolyn Dube
Circles Circles by Traci Bautista
- Cotton or polyester blend fabric (I cut mine 31 inches long x 5 inches wide) *this size will vary, depending on your desired scrunchie size
- DecoArt Soft Touch Varnish (optional)
- Acrylic paints
- Large, flat paintbrush
- 3/8” wide elastic
- Safety pin
- Sewing Machine
- Rotary cutter / Scissors
- Ruler / Quilting ruler
- Gel Plate (optional)
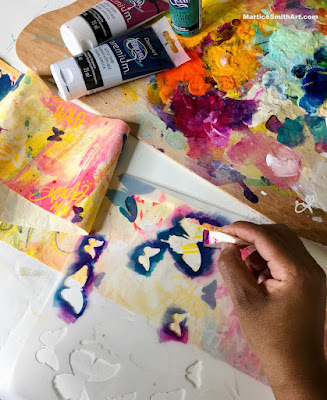
STEP 1: STENCIL YOUR FABRIC
I had some scrap fabric from another project but any cotton blend fabric will be just fine to use.
I experimented with cutting the fabric in different widths to figure out how to get more of the beautiful stencil designs to show. I quickly discovered that the smaller I make the scrunchie, the less I’ll see the stenciled design. So, for that reason, I had to increase the width to at least 5 inches wide.
Use a cosmetic sponge and a small amount of paint. Dab off excess paint before applying it to your fabric.
Apply a variety of colors to add more visual interest.
STEP 2: APPLY SOFT TOUCH VARNISH (optional step)
Use a large, flat brush to apply an even coat onto the right side of the fabric. Soft Touch varnish creates a velvety feel on your fabric.
When the fabric is completely dry, you can move onto sewing it to make a scrunchie!

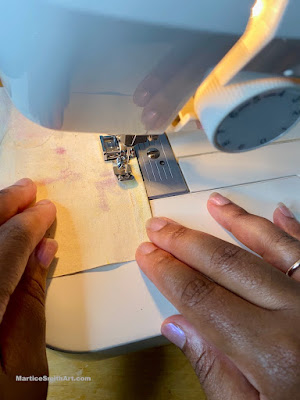
STEP 3: MAKE THE TUBE
The "tube" will become the actual scrunchie once we insert the elastic.
Fold the short edge 1/4" and stitch near the folded edge.
Next, fold the tube in half with right sides together.
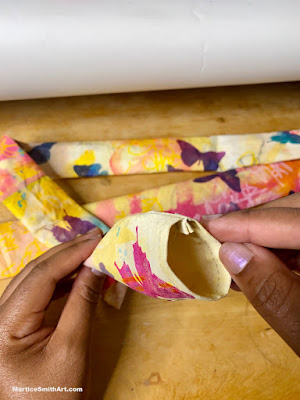
STEP 4: TURN THE TUBE RIGHT SIDE OUT
Here's what it looks like...

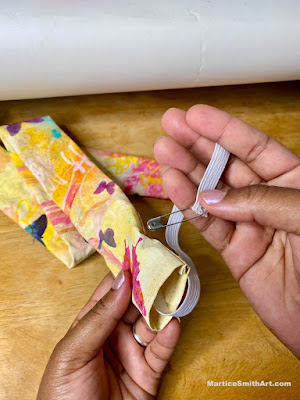
STEP 5: INSERT ELASTIC
Next, we'll need to feed a strip of elastic through the tube. I cut a 10 inch piece of elastic to make a large scrunchie. (To make a mini scrunchie, just cut a smaller piece of elastic.)
Next, I attached a safety pin to both ends of the elastic, being careful not to pull the opposite end through. I found it helpful to pin one end to something sturdy (like my pant leg) to keep it from going inside the tube. Grab onto the head of the safety pin and gently move through the tube until you reach the end.
When the elastic is through the tube, secure the ends with two knots then clip off the excess elastic.
STEP 6: TUCK ENDS AND STITCH
Next, tuck the end with the raw edge into the opposite end that was folded over and sewn in step 3.
Secure it with a straight stitch and you’re done!


Thank you so much for stopping by today. Happy stenciling!
-Martice

Very fun project - and good idea for granddaughter presents, too! Thanks, Martice!
ReplyDeleteSo cool! These would make beautiful and unique gifts!
ReplyDelete