Hi, everyone! Christa
Forrest here! Want to explore creating expressive portraits but a bit fearful
of drawing a face? Try using stencils!
I love using stencils and
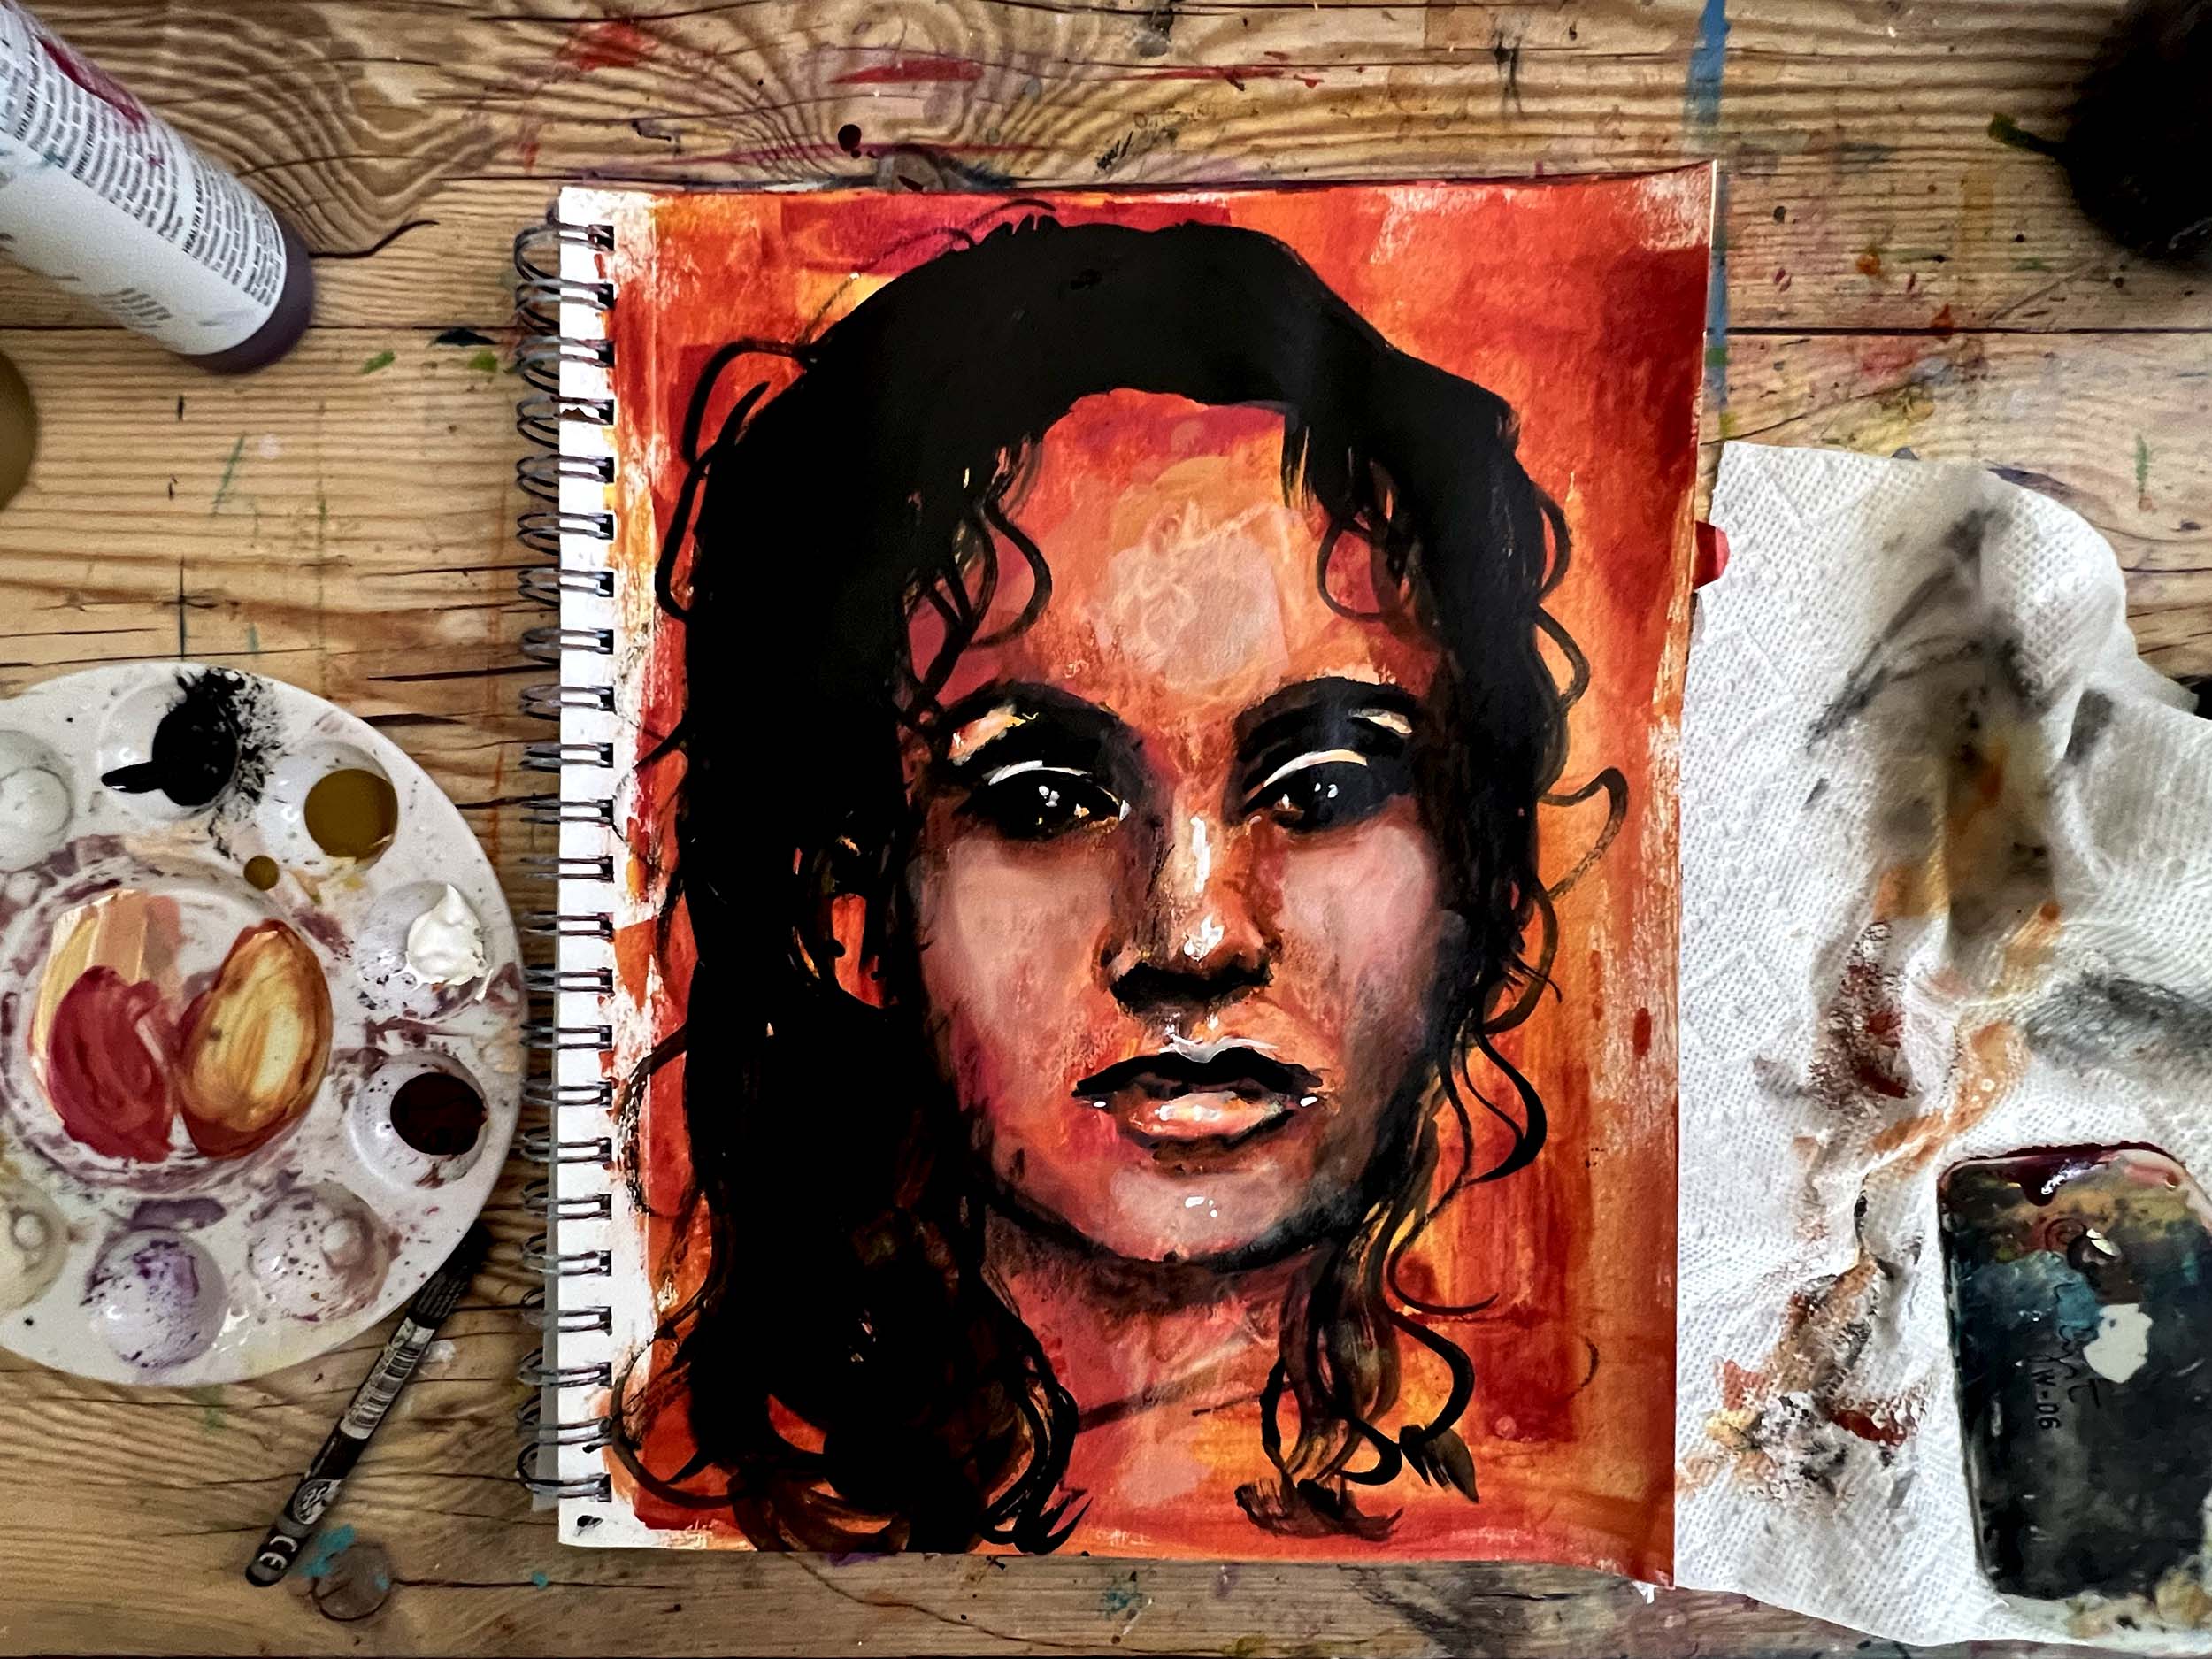
about 6 years ago I wanted to paint faces but wasn’t too great at it. Plain
and simple I was scared. I found these amazing face stencils
from StencilGirl® and
decided to explore. I was immediately hooked! I could
experiment with mediums, mixed media and not get caught up in struggling to
draw a half-way decent face. I learned along the way.
The stencil made it
easier for me to understand the basic structure of the face. The
eyes, nose and mouth were where they needed to be. I could then open myself up
to playing and practicing. This eventually built up my creative
confidence to start actually drawing a face.
Do I still use a face
stencil?
I have come a long way
since the beginning. The face stencils allowed me to feel
comfortable with exploring faces in my work. The more confidence I
gained, the more comfortable I became. Now it feels like second
nature. I still bring out the stencils every once in a while, to
play and practice AND show others that they too can incorporate expressive
portraits in their work with ease.
Here is a quick video of
how I can utilize a face stencil to create a fun expressive portrait.
I
love creating collage with an assortment of paper bits. Finding, cutting and
gluing the perfect element in the perfect spot makes me giddy!
I
also love monoprinting. Over the years I’ve used hundreds of items to create
texture on my prints. Some of my favorites include stamps, magazines, and of
course, my StencilGirl® stencils.
Recently
I’ve had the urge to combine both my love for collage and monoprinting into one
project. There are many ways to achieve this, one of the most common is to
create a background on your monoprinting plate, create an image transfer on
your plate and then add the transfer to the top of the print you created. I
wanted more elements in my collage, and so I began by cutting my focal image
out and adding elements around it. This would encourage me to pay attention to
all the elements and how they work together.
Below
is my way of achieving this “collage” look on my monoprinting plate.
Amsterdam Acrylic Paint Ranger 9 x 11 Monoprinting Plate with
Brayer Magazine Images (I used a Vogue Magazine) Scissors Baby Wipes/q tips StazOn Ink Pad Kassys Parlour Stamp Set
It's no secret by now that the seasons effect my color mood. Summer is in full swing now, so I am feeling the bright, warm colors.
This spread started out as an exploration of a color palette - purple, deep blue, green, and turquoise- and evolved as I went along.
This may come as a surprise, but I do not always know what I am doing when I am creating. Sometimes I have a plan - I know what I want to do, I do it, and it comes out relatively similar to what I thought in my head. But most of the time, I am just winging it!
This spread is an example of one of those times. I had colors in my head I wanted to play with, but the rest was just experimentation.
As things kind of got a little out of hand, I was grateful for the gesso to tone everything down a little bit. Even though I was feeling the bright, there was just a LOT happening and the gesso helped me keep in in check.
I hope you enjoy this spread, and feel inspired to play around in your art journal!
Hi everyone! Elizabeth Tichvon here! I’m so excited to be a Guest
Designer today on StencilGirl® Talk. As most of you know, StencilGirl® carries
some of the most beautifully unique stencils created by some very talented
artists for artists like you and me. If you haven’t visited the StencilGirl®
shop, I encourage you to!
I’m really excited about this project because it’s a fun way to create
something beautiful out of just a few art and vintage supplies, and I know
you’ll love it too...so let’s create!
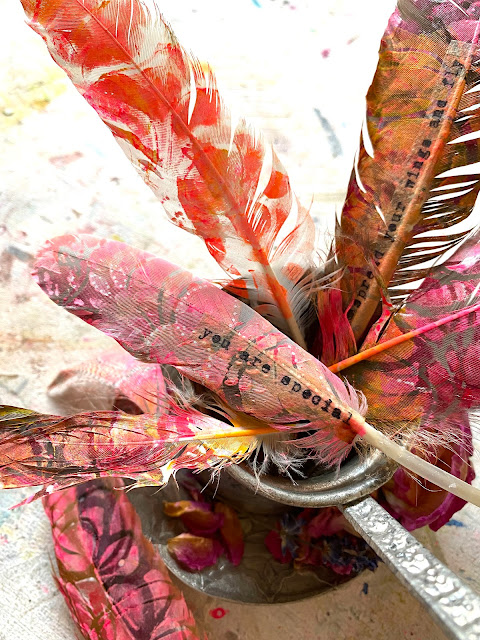
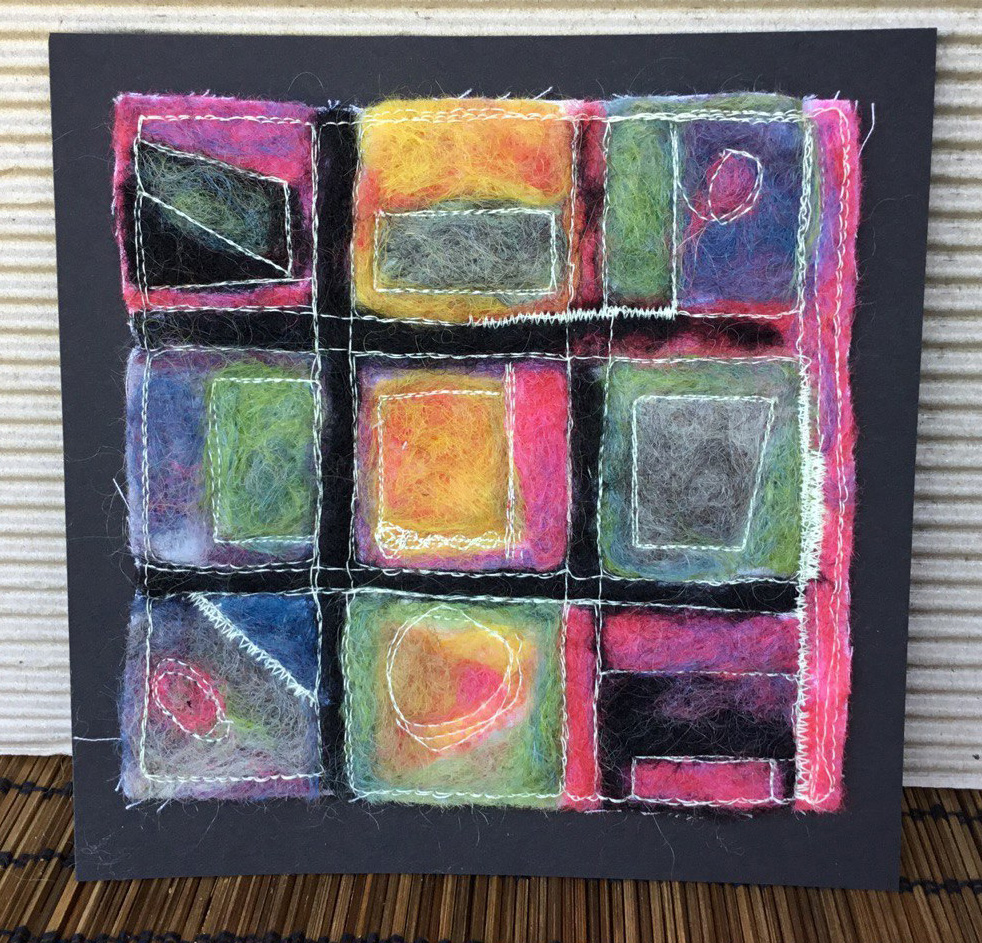
Hi, everyone! Cynthia Silveri here! What I love so much about stencils is that they give me a much-needed start to design, no matter what type of craft I’m working at; that blank page or canvas can be so intimidating! In the case of needle felting, I’ve always wanted to explore it, but I always thought of it in three dimensional terms (which is so hard in my opinion). But after seeing other needle felted flatwork pieces, I finally I bought a felting kit and ventured into 2-D needle felting. Of course, I reached for stencils for inspiration—to overcome blank canvas paralysis! These two finished pieces stemmed from stencils as a starting point, a “prompt” if you will, and I really like the end results. I had a lot of fun doing these and I hope you will consider giving it a try!
Canvas or other heavy cloth to felt onto; slightly larger than your stencil
Marker or pencil
Wool roving in various colors
Needle felting needles (size did not matter for this project)
Needle felting “pad”
Sewing machine
Method:
1.Gather
your materials and begin by tracing the stencil design onto the fabric with a
marker or pencil. The design will be fully covered with wool, so don’t worry
about how dark the tracing is, it won’t show when you are done. I added a few
connecting lines to the design to complete the shapes but depending on how you
freely you want to work with your design, this is not necessary.
2.Before
you begin felting, also trace the stencil on paper and experiment with colored
pencils to define a color palette. Then, using fairly small pieces of wool
roving, start working it into each area of the design until the entire piece is
covered completely. Mix colors as desired and consider adding colors on top
too.
3.Once
you are satisfied with the felting results, take the piece to your sewing
machine to add some stitching for depth and, I think, a nice finishing touch. I
am not that great at free motion stitching, but I like the way my wobbly
stitches look organic. I think that the stitching helps define the design. If
you don’t have a free motion foot, you can use a straight or zig zag stitch
with a regular machine foot instead. (PICTURE 6 and 7)
In my mixed media work
I use whatever works for a piece…bubble wrap, oil pastels, hand made papers,
stamps and often times stencils to name just a few. While I’m not a
stencil artist, I find stencils offer details I can’t achieve simply with a
brush. I like the precise abstract and representational shapes I can add
into my work with stencils.
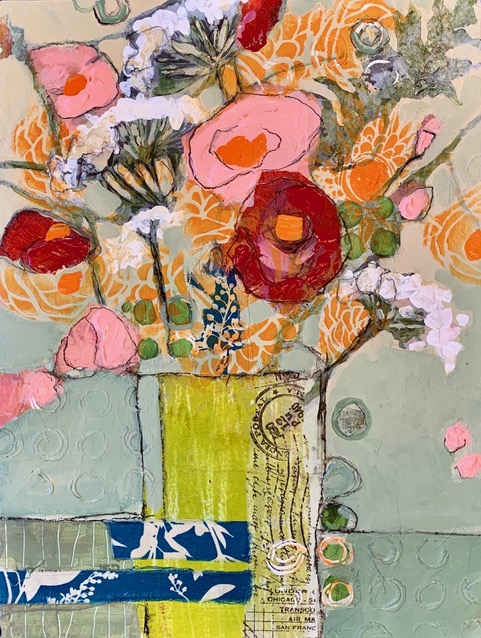
I most often create
pieces with flowers because…I like painting flowers! On this piece I
started with a cradle board that had once been another painting, my favorite
painting surface because it already has layers and history. I added a
coat of Venetian plaster colored with acrylic paint and smoothed it out to
create a perfect base for papers, paint and stencils to adhere to.
Once the surface was
dry I selected a color palette of papers and started laying them down to create
a floral bouquet. I give myself plenty of paper designs to play with as I
wanted this to be a wild flower arrangement…more is better!
Once all my papers are
glued down using liquid and gel mediums, I negative paint around the papers to
find my design. I usually use a cream or gray house paint for this,
something neutral that my colorful flowers will show up on.
Time to add some
stencils in with StencilGirl® stencils Bare Wisteria, Deconstructed Floral Bouquet
and Inky Circles. I used the Inky Circles to create a dimensional relief
texture and the other two stencils will add volume to my floral arrangement to
give it a wild flower fullness. I really love the added dimension they
lend to the piece.
I finished up with my
favorite marking tool, a Stabilo black water soluble pencil and a few more
color adjustments. Actually, rather than tell you all about it, I think
you might like to see the piece come together through the WIP video I took of the
whole process. Check that out along with the library of StencilGirl®
stencils…so many fun patterns and designs to add to your mixed media art…oh the
possibilities!
Denise Cerro’s background
includes parallel careers in both visual presentation and as a faux finish and
mural artist. Mural work eventually led her to painting on canvas, and her
merchandising eye for putting things together stirred an interest in mixed
media and assemblage art. Originally a self-taught artist, once Denise began
painting on canvas, she learned as much as she could about painting techniques
by taking countless classes and workshops in both representational and abstract
painting.
Along with creating in
her Southern California home studio, Denise teaches mixed media painting
classes and is a founding member of the art collective, F1VEart Studio, in the
Arts District Liberty Station in San Diego.
My current mixed media
work merges my art and craft family influences, my use of layered papers and
textures serve as a ground upon which my semi-abstract paintings are
built. I paint what I like and what I know…still life, flowers,
landscapes, figures, faces, textures…while pushing them into abstracted places.
My inspiration is life around me and my curiosity of how I can convey that onto
canvas.
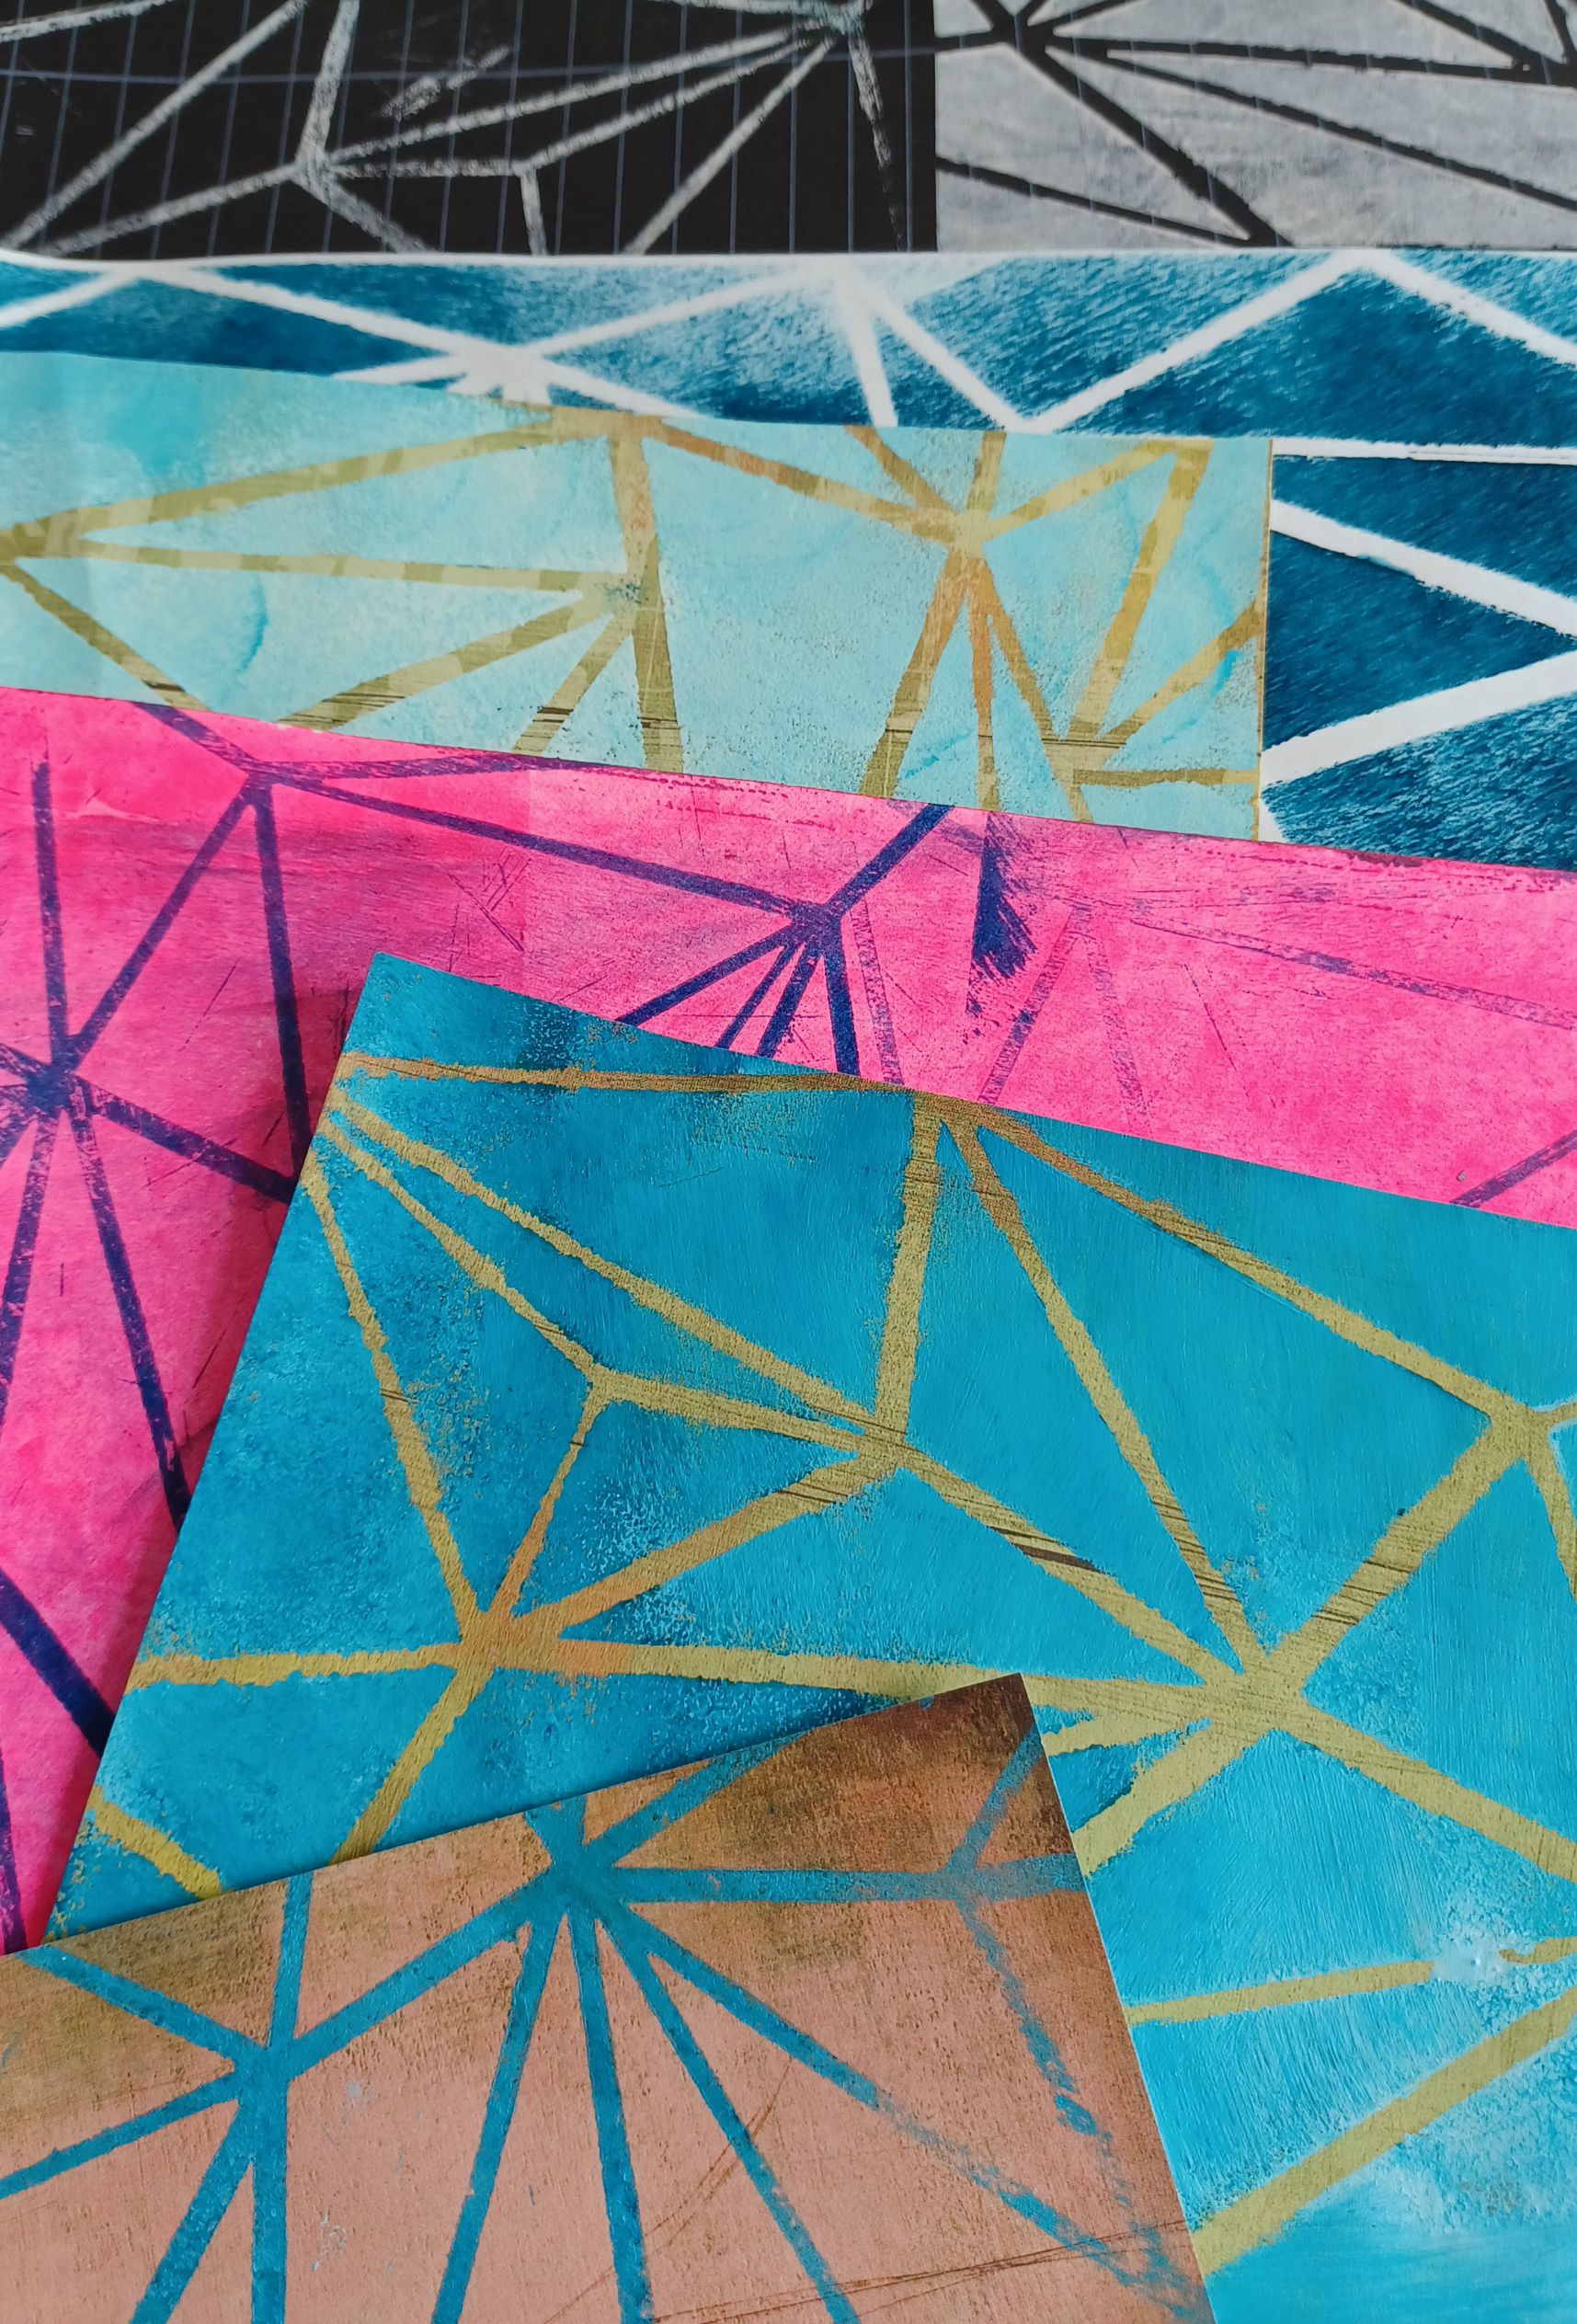
Join Guest Designer Roxanne Padgett as she demonstrates how many ways you can use one stencil! Roxanne is using Geometric Sky Stencil by Mary C. Nasser.
Roxanne
Padgett is a mixed-media artist, with a passion for painted papers,
mark-making, textiles, collage, book-making, journaling and how to explore
methods to connect these separate media through the art-making process. Roxanne
teaches a variety of art classes for adults throughout the Bay Area and at art
retreats around the country. In addition, Roxanne is the Creative Director for
the Museum of Children's Art in Oakland, California. Is the author of “Acrylic
Techniques in Mixed Media” published by North Light books. She lives in
Hayward, CA with her husband and one rowdy pup. Follow her on Instagram @roxpadgett.
How
Trish McKinney Brings An Old Painting Back To Life
Using Her StencilGirl Stencils!
Hey Everyone!
Trish McKinney here today to share with you a fun process using my stencils and
ask an important question - Are you like me and have thousands of
half-finished, tired, and broken down paintings?!
One of my
favorite things to do is to go when things are slow in the studio, is to go
through my stacks of old paintings that for whatever reason are not quite
working. I lovingly refer to this area in my studio as, where these
paintings rest, as “the dead zone”! This is where paintings go to die - @ left below.
I love this
process of bringing a painting back to life as it causes me to think outside of
the box and shake things up! This is because I have no commitment to these old
paintings and I am not afraid to risk doing something new - something
different- something unexpected - experiment, asking "what if?"! Often, I learn more and discover new techniques from this exercise
than taking a 3 day workshop!
One way I like
to revamp, rejuvenate, and restore my unfinished paintings is by using my
stencils. And for the painting I selected, I used my newly released
StencilGirl stencil designs - Lacey Leaves and Leafy Weaves (gosh,
I love those names! :) - and my Branches Giant stencil. Here is my
process...
I began by
going through my many stacks of paintings, but because the leaves were probably
on my mind, I gravitated towards the many unfinished paintings from my Nature’s
Palette Collection.This is a painting
process where I use real leaves, and many other natural, nature-inspired
materials to create a painting. So my leaf and branch StencilGirl stencils were
a perfect fit!
Assessing The
Painting...
Once I settled
on a painting, I began the assessment part.I started by picking out the areas of the painting I loved which leads
me to selecting my focal area - the area I want to emphasize. This will help me
to not get lost once I begin to stencil.
I began this part of the process, by
remembering what my dad always told me - “before you can fix something you
first need figure out what is broke!”. Even though he was talking about
cars, it is a profound but simple truth about how to fix a painting!So I looked for all of the areas that were
not working in this painting and why they did not work. I always go down my
checklist of principles of design to figure out what is “broke” and usually
find many - ie, value, negative spaces, color harmony, line quality, etc... -
this gives me a direction and road map that gets me to the next step.
Selecting The
Stencils...
Since I
already had my newly released leaf stencils on my mind and the painting was
nature-inspired, the stencils I used were easy to select. However, I often love
to use stencils to fix paintings that are not as literal or predictable.Like the paintings below.
Many of my
stencils are designed without framed edges for this purpose - to give artists
the option to use them either in a more abstract way - creating rhythm and movement
through varying line and shapes - or a more literal interpretation.
Time To Start
Stenciling!
I like to get
2 palettes going with sponge rollers to apply the paint.One palette is for gesso and the other is for
dark values these are always colors already in the painting - 2 cool darks –
Permanent Violet Dark and Turquoise Phthalo - and 1 warm neutralizer color -
Quin. Burnt Orange. I also have Quin Nickel Azo Gold to tint gesso areas once
it dries.
Since I had
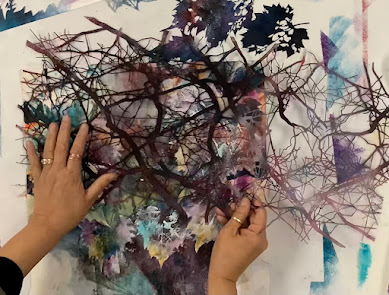
lost some of the edges of the leaves, I begin by using the “bump outs” for the
leaf stencils switching between light & dark – ie, light edges against dark
backgrounds and dark edges against light backgrounds. Then I use my brush to
refine them out even more. I tint the white gesso once it is dry, with thin
glazes of warm & cool colors.
Then I begin
to connect the leaf shapes with my Giant Branch stencil – 12” x 24” which will
give harmony and added texture.I move
all around the painting, making sure I place the stencil in impact areas
leading the eye towards the focal point leaf in the lower right quadrant. This
will also give added depth too.
Finishing…
I knew I was
finished when all of the “broken” problem areas were fixed and the problems
were resolved.
Here is my final painting alive & restored! And I am very pleased how it turned out!
Leafy Wonder - 22" x 22" - mixed media on paper
This process
is so satisfying to complete and I hope you will be inspired to try it yourself! Solving the problems of an unfinished painting by making it new again, teaches us all so much and you will learn so much about design along the way!The joy of this project is that you will have no
commitment since you are not in love with the painting to begin with – so a perfect
atmosphere is set up for bold, wild creativity! In other words - what have you got to
lose?!
I hope you have fun
trying this technique!
To learn about
Trish McKinney - the paintings she creates and workshops where she teaches
these techniques and more - go to her website @ trishmckinney.com
Follow Trish’s
shenanigans on FaceBook, Instagram, & her YouTube Channel to be inspired…&
sometimes laugh!(find
links on her website home page)
Stencil Links...
Stencils Used
are designed by Trish McKinney and sold online @ StencilGirlproducts.com
-Lacey
Leaves- 9”x12StencilGirl Stencil
Mask with Bump Out
-LeafyWeaves- 9”x12StencilGirl Stencil
Mask with Bump Out