Showing posts with label Andrea Matus DeMeng. Show all posts

Wednesday, September 14, 2022

Expressive Portraits with StencilGirl® Stencils

Hi, everyone! Christa Forrest here! Want to explore creating expressive portraits but a bit fearful of drawing a face? Try using stencils!

I love using stencils and about 6 years ago I wanted to paint faces but wasn’t too great at it.   Plain and simple I was scared.   I found these amazing face stencils from StencilGirl® and decided to explore.   I was immediately hooked! I could experiment with mediums, mixed media and not get caught up in struggling to draw a half-way decent face. I learned along the way.

The stencil made it easier for me to understand the basic structure of the face.   The eyes, nose and mouth were where they needed to be. I could then open myself up to playing and practicing.  This eventually built up my creative confidence to start actually drawing a face. 

Do I still use a face stencil?

I have come a long way since the beginning.  The face stencils allowed me to feel comfortable with exploring faces in my work.  The more confidence I gained, the more comfortable I became.  Now it feels like second nature.  I still bring out the stencils every once in a while, to play and practice AND show others that they too can incorporate expressive portraits in their work with ease.

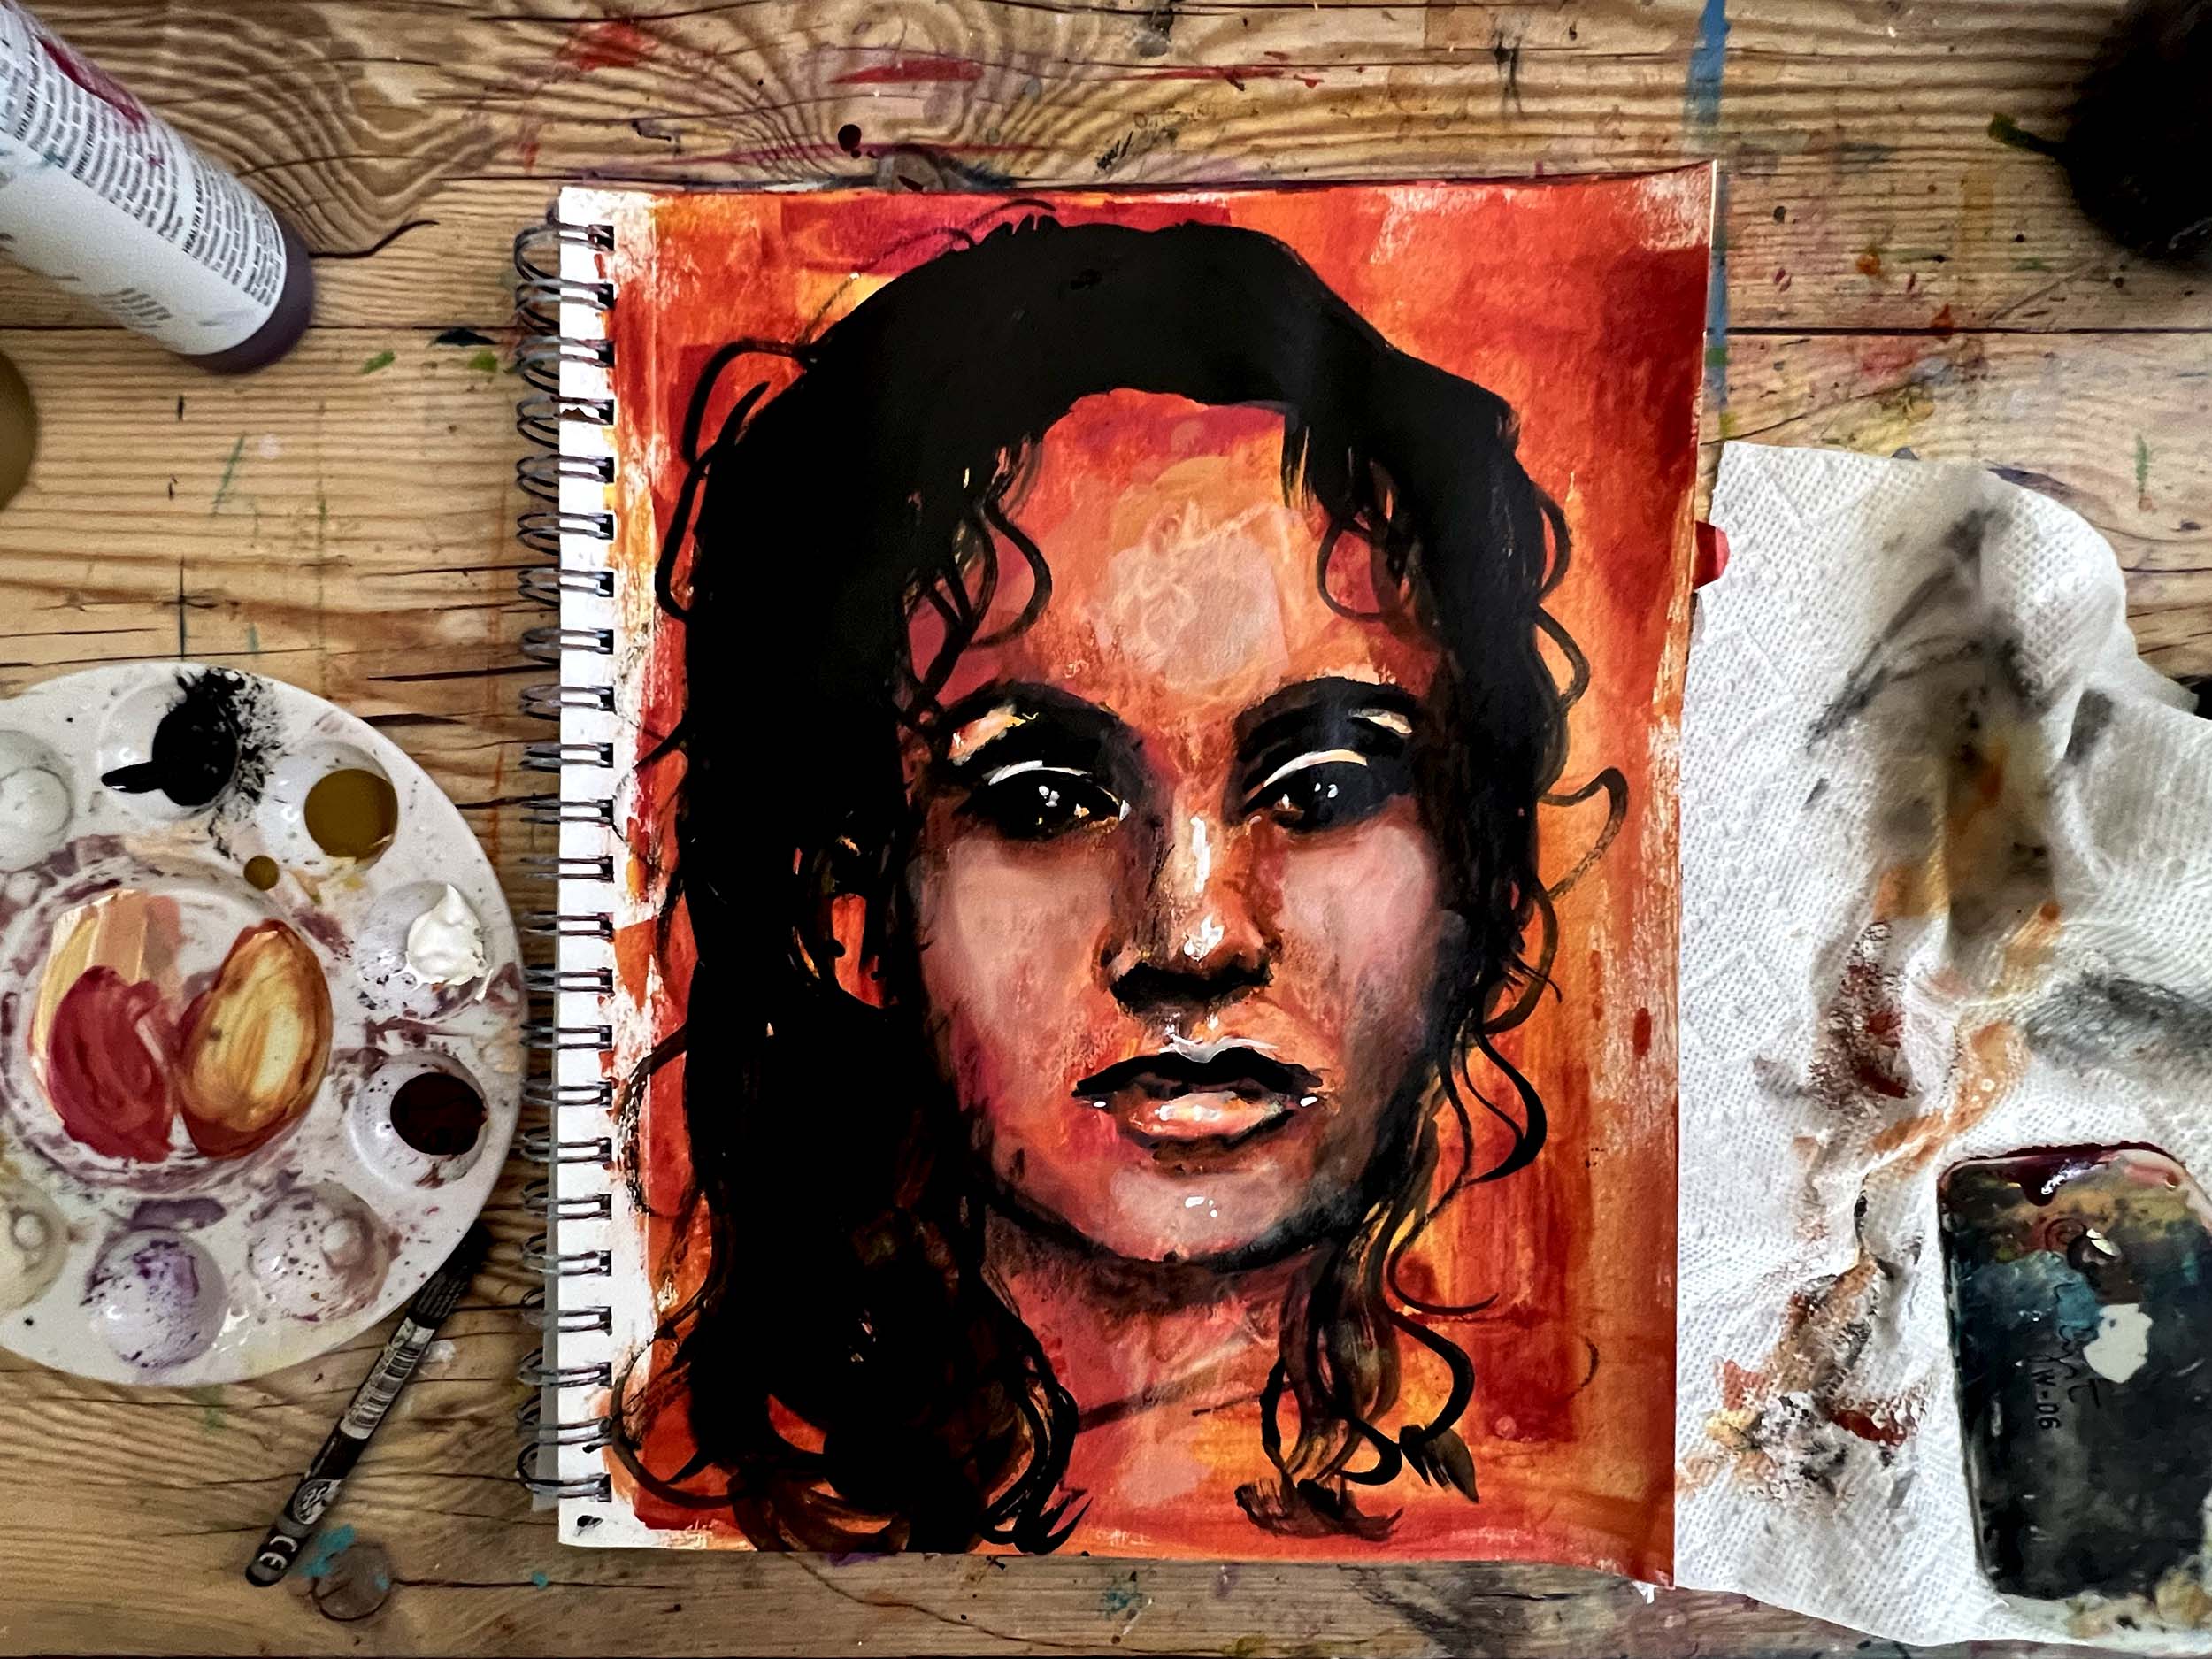
Here is a quick video of how I can utilize a face stencil to create a fun expressive portrait. 


Materials:


StencilGirl® stencils:

Talaya Goddess of Rain Large

Eve a Modern Woman Large

Abigail, A Timeless Woman Large 


Acrylic Paint:

Golden’s Quinacridone crimson

Golden’s nickel azo yellow

Titanium white

Black


Assorted brushes 

Spray bottle

Paper towel

Princeton catalyst scraper tool

Caran d’Ache Neocolor II crayons

Mixed media sketchbook 9x12 


Christa Forrest

Creative Souls Art

https://www.facebook.com/ChristaForrestFineArt

https://www.instagram.com/christaforrestfineart/

https://www.youtube.com/Christaforrest

Friday, November 12, 2021

Frieda Oxenham: Art Journaling with StencilGirl® Stencils

We have reached the penultimate line of Ben Okri’s poem and it reads: “Wake up to what you can be”. In our September project we illustrated the line Wake up to who you are”. To me this new line means that there is always room for improvement and it is up to us to continue to work towards becoming who we want to be. It is never too late!

Here is the tutorial:

1.      Using watercolours and a water brush, randomly add colour to 2 facing 8 x 11.5” pages and use water spray to let them merge into each other.

2.      Continuing with the watercolours and water brush using contrasting colours to step 1, add pattern through the large stencil from the May 2021 StencilClub.

3.      Using an 8 x 10” gelli plate, brayer on white acrylic paint. Put stencil Circles Overlapping Filled on top and take a full page print on both pages.

4.      Repeat step 3 but now with red acrylic paint and taking only partial prints.

5.      Add focal face of your choice to the right hand side page with soft get medium.

6.      Using green paint and one of the patterns from stencil Art Deco Borders add a border to the top and bottom of both pages, missing out the figure.

7.      Stencil on the flower border from the large stencil from the July 2017 StencilClub with red acrylic paint. Also paint the clothing of the figure red.

8.      Colour in the centre of the flowers from step 7 with a yellow Sharpie Poster Paint marker

9.      With black gesso stencil on part of the page from stencil Delicate Face to the edge of the left hand page

10.  Stencil on words as shown, again using black gesso. I used stencils I get to choose, A conversation with Matisse and Emotions and Feelings 1.

11.  Outline the flowers and little circles in green borders with a permanent black marker and add the centres of the flowers while also colouring in the little circles with a white marker. Outline the figure with a black Stabilo All pencil smudging the edges. Colour the hairband of the figure with a red Stabilo Woody.

12.  Glue on the text by Ben Okri to the right hand page and outline with a black marker

13.  Spray on copper mica spray paint randomly through the medium stencil from the June 2021 StencilClub.

14.  Edge the pages with a gold ink pad.

© Frieda Oxenham 2021. To see more of Frieda's work, please visit her BLOG.

Tuesday, April 6, 2021

"Break the Rules" T-shirt by Sue Plumb


Hello Stencil Lover! It's Sue Plumb here today to share my Creative Team project for our "Wearables" theme. I love these sort of themes that push me to create something different to what I would usually do. I am sure we all have lots of amazing stencils in our stash that can be used for purposes beyond our normal use, and creating an item that can be worn is definitely one for me. 

Having thought about this theme, my decision was to create something for my (almost) teenage daughter. When she isn't in her school uniform she tends to live in shorts or jeans and t-shirts. (A bit like me, really.) When I considered what item she would get the most use out of (because I am all about practicality) I decided to do a t-shirt. I knew I could also easily match my design to her personality.

So I began with a plain white t-shirt, placed a sheet of cardboard inside it, and then clipped the t-shirt around it. I then used my 2" wide paint brush and the dry brush method to apply two different colours of acrylic paint to the focal area of the shirt.


Once I had some background colour down, it was time to whip out my stencils. I chose the Not Calling You Back stencil designed by Andrea Matus deMeng. This stencil was inspired by Hollywood legend Lauren Bacall, and it was the sassy look she has that drew me to it immediately (and made it perfect for my daughter!) I used black StazOn ink and a sponge dauber to stencil the image onto the shirt.


I also wanted the shirt to feature some text, so I paired the image with the If You Break All the Rules You Miss All the Fun stencil by Carolyn Dube, which was from the StencilClub release back in August 2018. (The entire set was called The Playtime Collection and was an exclusive for StencilGirl Club members.) I used the same ink and technique as I did for the focal image.


Next it was time to liven up my design, with some additional background detail. I drew on the theme of Hollywood star, and chose the Military Style Star stencil by June Pfaff Daley to add some stars to my background. I used the same ink technique, but this time switched to a teal ink, so that they would coordinate with the paint colour I had used. 


For my next step, I pulled out a white Posca paint pen and used it to add a few highlights to the face and hair. Although they don't really show up in my photos here, it allowed me to colour over some of the paint on the background to help the image pop more from the background.


At this point I thought my design was slightly lacking something, and decided to add some extra background detail in a different colour (purple). I knew my daughter would like the addition of the purple, but I didn't want to add it in such a way as that it would overwhelm the focal point of the design, so I chose one of my all-time favourite stencils - Organized Chaos by Cat Kerr to add the random style dots in amongst the structured shapes of the stars. 


Now I was finally happy with my design and I knew my daughter would be too! It turned out to be the  perfect custom t-shirt for my girl. 


I hope I have inspired you to look at the stencils in your stash a bit differently to see what else you could create to make the best use of them. Sometimes it is fun to get out of our comfort zones, isn't it?

Thanks so much for stopping by today so I could share this with you.
Happy stencilling!

Thursday, October 8, 2020

Thirteen stencils from 4 designers; You'll want them all!

Just imagine the possibilities!

A little love, a little vintage... strong women, and a starlit path. Yeah, you want fresh, artistic stencils, and StencilGirl designers Cecilia Swatton, Jennifer Evans, Andrea Matus deMeng, Kathryn Costa, came through splendidly!

Cecilia Swatton's LOVE Stencil is up first. This small 6" x 6" stencil is in your face yet made delicate with a sweet posy.


Cecilia had a good time creating in different styles and is sure you will too!


VINTAGE BEE, LEDGER SCRIPT, NUMBERS, & GENERAL STORE LIST

Bees are little task-masters and signify organization, process, structure, community, and pollination. It's Jennifer's new mascot and thus inspired her the create this small 4" x 4" Vintage Bee Stencil.


Jennifer wanted to experiment with letters and numbers from old ledgers from 1916 through 1921. She loves using vintage papers in collage as a layer in her artwork. 

Jennifer writes, "The historical nature of letterpress or financial ledgers is a unique element. If I'm lucky enough to have something handwritten, I feel that's a bonus -- to honor the hand of someone's everyday communication and make it special. I also find it mindboggling with these ledgers that the script was written 100 years ago. 100 years! In one of the stencils, the Grocery Store list, I was interested in learning the variety of items customers would put on their running account: coffee, eggs, sugar, bacon, soap, flour, wire, socks, and fruit (the original ledger also included things like fuses, fish, powder, and shoes). By enlarging the penmanship and overlapping numbers and words, I created these stencils that give a nod to the past. I think they can be utilized as great texture and line work in any art, but specifically for fine art, the Vintage Ledger Script Large 9"x12" lends a renaissance feel."

The Vintage Ledger Script Stencil is available in 2 sizes: Large 9" x 12" L814 and a small 6" x 6" S827. Note that the text is a bit different on each one.


Vintage Numbers is a 6" x 6" stencil.


Vintage General Store List is a 6" x 6" stencil.


JOCELYN, SELENE, & FLOWER THROUGH FLAME

Andrea Matus deMeng designed the Selene Stencil, an elegant woman in her Many Faces Series. Selene is available in 2 sizes: a 6" x 6" small S813 and a 9" x 12" large L806.


Other stencil used: French Lace

Other stencil used: French Lace

Reminiscent of an Art Nouveau Era woman, Andrea Matus deMeng's Jocelyn Stencil is available in 2 sizes: a mini 4" x 4" M317 and a small 6" x 6" S810.


Flower Through the Flame is a small 6" x 6" stencil. Use this regal blossom alone or to enhance a portrait.


ZODIAC CHART & CELESTIAL BODIES


The Zodiac Chart Stencil by Kathryn Costa includes an astrological wheel and the symbols for the 12 zodiac signs. The wheel is a generous 8-inch circle with space for adding notes and your creative flair to your astrological charts.


The 12 zodiac symbols (also known as glyphs) include Aries, Gemini, Taurus, Cancer, Leo, Virgo, Libra, Scorpio, Sagittarius, Capricorn, Aquarius, and Pisces.


Use this stencil to make astrology wheels, birth charts (also called natal charts, horoscope charts), in art journals, and mixed media. This stencil makes studying astrology fun. Explore the various relationships of the zodiac signs making charts for each of the four elements (fire, earth, air, and water), the qualities (cardinal, fixed, mutable), polarities, and more!


There is a reference sheet you can download that provides quick facts about each of the zodiac signs, celestial bodies, and ruling planets. Download: http://bit.ly/zodiac-stencil


The Zodiac Chart (L816) and Celestial Bodies aka Planets (S813) Stencils are perfectly paired.


The Celestial Bodies Stencil by Kathryn includes the luminaries and planets in astrology. This stencil includes the symbols (also known as glyphs) for the Sun, Moon, Mercury, Venus, Mars, Jupiter, Saturn, Uranus, Neptune, Pluto, Earth, and Chiron.


Use these stencils in art journaling, mixed media, and more. It’s a fun tool for exploring the ancient study of astrology and exploring your horoscope.


Head over to StencilGirlProducts.com for all the latest stencils designed by Cecilia Swatton, Jennifer Evans, Andrea Matus deMeng, and Kathryn Costa.


Friday, September 25, 2020

Mixed Media Art Journaling with StencilGirl® Products


I have been a long-time fan of StencilGirl® Products and it's an honor to be a guest blogger here, today.

I treat my stencils as prompts when I use them in my art journal. In this video, I'm sharing my thought process as I add elements to this journal spread: from the choice of colors, to picking specific affirmations, to why I blend some things back into the background vis-a-vis others.


As much as I love knowing more about the technique artists use, I find it even more intriguing to learn about their vision as they create their works of art. I hope this gives you some insight into mine.
I used acrylic inks, distress inks, gesso, glass bead gel, tar gel, acrylic paints, color shift paints, wax-based water-soluble color pencils, reinkers and pens for this spread.
In addition, here are the specific stencils I used:
Pretty as a Peacock Stencil
Segments Small Stencil
Succulents Stencil
Doodle It Layered Circles and Squares Stencil
I hope you enjoy these closeups that really accent the various textures, the color shift paints I used and the symbolism.


To see more of my work, please follow me on Instagram, Facebook and YouTube.
Happy creating!
Mansi.