A blog for the StencilGirl® Product line owned by Mary Beth Shaw for people who love stencils like we love stencils.
Thursday, December 14, 2023
Adorn Your Art with this New Design by Jennifer Evans
Monday, December 4, 2023
Guest Designer Frieda Oxenham
A bit of sparkle never goes amiss at this time of year and I love taking a peek in all the lighted windows as I’m passing, admiring the decorations. That was the inspiration for this spread. Here is the tutorial:
1. In
your art journal (I used the large one by Dylusions) brayer white gesso onto a
spread.
2. While
the gesso is still wet brayer on small amounts of 3 different colours of
acrylic paint (I used blue, red and green) and spread the paint out across the
pages.
3. Remove some of the paint with a baby wipe through stencil L027 Fade Horizontal.
4. Brayer
on more white gesso randomly and take it away with a baby wipe through the same
stencil used in step 3
5. Repeat step 4 but this time using blue acrylic paint.
6. Repeat
step 4 but with green acrylic paint.
7. Stencil on the page still using the same stencil, green acrylic paint and a cosmetic wedge.
8. Spray onto the pages through stencil L600 Mosaic Flowers Repeat using gloss spray (mine was by Dina Wakley Media).
9. Using red acrylic paint and the same stencil as in step 8, stencil flowers onto the spread.
10. Using blue acrylic paint and the same stencils as in step 3 and step 8, stencil more flowers and small dots on the pages.
11. Repeat
step 10 using green Stencil Butter.
12. Stencil on green leaves using the same stencil as in step 8.
13. Using
stencil L163
Window Ledger 9 roughly mark out (in pencil) the window shapes on metallic tissue
paper with gold dots, cut out the shapes and glue them with matte medium, onto the right hand page using the stencil as
a guide.
14. Stencil onto the right hand page using the same stencil as in step 13 and using dark blue/green acrylic paint , making sure the metallic dot tissue paper appears in the windows.
15. Stencil on the left hand page using stencil S954 Solitary tree as shown, using the same paint as in step 14.
16. Add
the text (quotation by Don Shapiro), using your preferred method. I did it with
a Dymo Writer using self adhesive tape.
17. Outline
trees, windows and text with a permanent white paint marker and outline the
leaves with a sparkly green gel pen.
18. Stencil
on text to the left hand page using white acrylic paint and stencil
L318 Wall of Words.
19. Spray sparkling bronze spray paint onto the windows through the stencil used in step 3.
© Frieda Oxenham 2023
Tuesday, August 22, 2023
Field Desk UpCycle
Thursday, July 27, 2023
Fabulous New designs From Jennifer Evans and an In-person Workshop!
Tuesday, July 11, 2023
New Art Tutorial by Frieda Oxenham with StencilGirl® Products
While cleaning up my studio (yes, I do occasionally do this!) I found a blank Seawhite A5 Concertina sketchbook. No doubt I bought it for a reason, but I had no idea what that could have been, so I decided to use it for my own purposes. And I have made a start with this project. In this tutorial I’m only working on the first 6 pages or so and l will continue to fill it up so expect to see more of it in the future. Whenever I had left over ink on the stamps or paint, I spread it around on future pages in order to avoid blank page syndrome.
Here is the
tutorial:
1. Gesso
about 6 pages with white gesso, spreading it about with a large brush and a
brayer for texture.
2. Select some of your favourite rubber stamps and a permanent black inkpad and stamp randomly over all the pages you’re working on.
3. Using a selection of acrylic paints brayer the randomly over the pages. Also use baby wipes and your fingers to add paint.
4. Using a variety of different colours of Distress Crayons, rub it on the pages and then remove it again through stencils S942 Reflecting Rainbow, S943 Rows of Reflecting Rainbows and S952 Past Lumber Cross Section using a cosmetic wedge.
5. Add
some washi tape with text on it here and there.
6. Using different colours of IZink dye spray, add it to the pages you’re working on through stencils S951 Small Tree Cross Section and M086 Techno Insiders Circle Stencil.
7. Drip acrylic ink onto the pages and let it drip.
8. Brayer on more white gesso.
9. Using
stencils
L960 Big Tree Cross Section, M076
Let Yourself Bloom.
S948 Cosmos and S947
Hydrangea Bouquet with black acrylic paint and a cosmetic wedge.
10. Colour in the flowers with watercolour markers.
11. Glue
on the vintage text and outline with a black pencil
12. Edge the papers with a permanent black marker.
©
Frieda Oxenham 2023
Tuesday, March 21, 2023
Parsley, Sage, Rosemary and Thyme
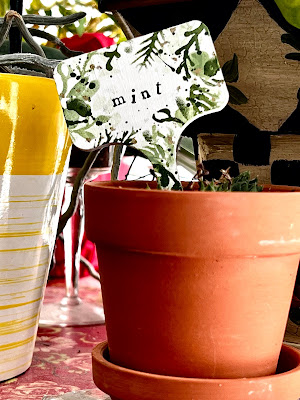
It's March in St. Louis and I, Nancy Curry, am all about the next seasons coming. Apologies to those reading this who are approaching the colder times of year, or are still in the cold now. The only season I really don't like is winter, but I really enjoy spring into early summer when things seem all new again. I enjoy the spring holidays of Easter and Mother's Day especially, and always try to find interesting ways to share what I do with family members. To that end, I plotted this project starting in January. Luckily, the big box stores seem to be ready to move on to spring quickly so I was able to find what I needed easily. I'll list materials and stencils here before you watch the video.
Materials:


