Showing posts with label mixed media art journaling. Show all posts

Thursday, April 14, 2022

Rae Missigman: Art Journaling with StencilGirl® Products

Hi, everyone! Rae Missigman here! Happy to be back on StencilGirl® Talk to share a video from my studio!
I hope you enjoy this flip through of one of my miniature journals in which I used a mix of my favorite StencilGirl® stencils to create interesting backgrounds that I take with me while traveling!
Thank you for joining me today!
And happy stenciling!
Rae Missigman
raemissigman.com

Friday, November 12, 2021

Frieda Oxenham: Art Journaling with StencilGirl® Stencils

We have reached the penultimate line of Ben Okri’s poem and it reads: “Wake up to what you can be”. In our September project we illustrated the line Wake up to who you are”. To me this new line means that there is always room for improvement and it is up to us to continue to work towards becoming who we want to be. It is never too late!

Here is the tutorial:

1.      Using watercolours and a water brush, randomly add colour to 2 facing 8 x 11.5” pages and use water spray to let them merge into each other.

2.      Continuing with the watercolours and water brush using contrasting colours to step 1, add pattern through the large stencil from the May 2021 StencilClub.

3.      Using an 8 x 10” gelli plate, brayer on white acrylic paint. Put stencil Circles Overlapping Filled on top and take a full page print on both pages.

4.      Repeat step 3 but now with red acrylic paint and taking only partial prints.

5.      Add focal face of your choice to the right hand side page with soft get medium.

6.      Using green paint and one of the patterns from stencil Art Deco Borders add a border to the top and bottom of both pages, missing out the figure.

7.      Stencil on the flower border from the large stencil from the July 2017 StencilClub with red acrylic paint. Also paint the clothing of the figure red.

8.      Colour in the centre of the flowers from step 7 with a yellow Sharpie Poster Paint marker

9.      With black gesso stencil on part of the page from stencil Delicate Face to the edge of the left hand page

10.  Stencil on words as shown, again using black gesso. I used stencils I get to choose, A conversation with Matisse and Emotions and Feelings 1.

11.  Outline the flowers and little circles in green borders with a permanent black marker and add the centres of the flowers while also colouring in the little circles with a white marker. Outline the figure with a black Stabilo All pencil smudging the edges. Colour the hairband of the figure with a red Stabilo Woody.

12.  Glue on the text by Ben Okri to the right hand page and outline with a black marker

13.  Spray on copper mica spray paint randomly through the medium stencil from the June 2021 StencilClub.

14.  Edge the pages with a gold ink pad.

© Frieda Oxenham 2021. To see more of Frieda's work, please visit her BLOG.

Friday, October 15, 2021

Frieda Oxenham: Art Journaling with StencilGirl® Stencils

We will be working on the part of Ben Okri’s poem that reads: You are a sun, you are a star”. I interpreted this as an incentive to us all not to put ourselves down but instead to celebrate who we are and what we are capable off. We all need reminding of that as much as possible!

Here is the tutorial:

1.      Cover both sides of 2 vintage book pages with fluid matte medium (to make them more sturdy)

2.      Glue these vintage pages to 2 mixed media sheets sized 8 x 11.5” and stitch around the sides with a sewing machine and black thread. Go around a few times.

3.      Stick on washi tape randomly. I used washi tape inspired by Vincent van Gogh’s paintings.

4.      Colour the pages using a gelli plate by brayering on colours and taking prints. Add several layers this way. I used warm colours on one page and cool ones on the other.

5.      Cover most of the pages with titanium white using the gelli plate again, and then remove paint through stencil L458 Toledo with a baby wipe.

6.      Dribble on acrylic ink in colours matching each page. Spray with water to spread.

7.      Again using stencil L458 Toledo stencil on stars randomly using shimmer paints again using warm colours on the warm page and cool on the cool one.

8.      Yet again using colours matching the pages rub on Tim Holtz’s Distress Crayons and then remove using a baby wipe through stencil L661 Hamilton

9.      Using the same stencil as in step 8 spray the pages randomly with Perfect Pearl Mists (or any other mica spray of your choice).

10.  Using the figure from stencil L620 Inspired by Frida, but not the head, and using Radiant Gel Dimensional Paint and a palette knife, add it to the pages as shown using a different side of the stencil for each figure. I used gold for one figure and Guatemalan Green for the other. Let this dry thoroughly.

11.  Add a head to both figures using a palette knife and gold embossing paste. The warm page received the head from stencil L783 Alchemy in the shape of the sun, and the other cool page received a star as head from the large stencil of the August 2017 StencilClub.

12.  Add more stars to both pages with the gold embossing paste and the large stencil from the August 2017 StencilClub set.

13.  Fill in the figures with matching colours using Sharpie poster paint markers or any other markers of your choice. Outline the figures, sun and stars with a permanent black marker. Add eyes to the star face.

14.  Stamp on the quote from Ben Okri using an alphabet stamp set and a permanent black stamp pad. Outline the letters with a white marker.

15.  Drip white and gold acrylic ink to the pages

16.  Add little turquoise circles to the orange page and orange ones to the blue pages using stencil S216 Timeless

17.  Edge the pages with a matching permanent stamp pad.

© Frieda Oxenham 2021. To see more of Frieda's work, please visit her BLOG.

Thursday, April 29, 2021

Guest Designer Anouk Karssen (Creanouk): Intuitive Art Journal Page

Hello you beautiful artist!

One thing I love about art journaling is that it can be very intuitive. It took me a lot of time to let my inner perfectionist go and to create without thinking too much about the result. 
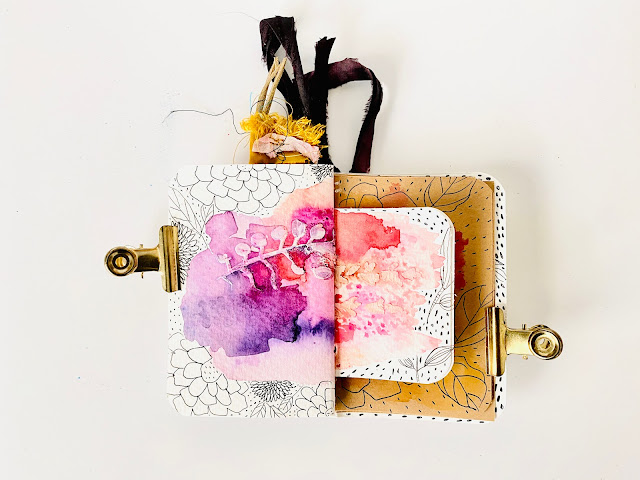
Today I'm going to show you step by step how I made this intuitive art journal page. You can use this as an inspiration, a guideline, or as a tutorial. It’s up to you! If you decide to play along with me, grab a nice cup of tea, play your favorite song, meditate for a little bit and try to keep an open mind. Let your hands tell you what to do instead of your head because that's when the magic happens!

Using collage is one of my favorite ways to start an art journal page. Tearing and gluing stuff down can feel so satisfying don't you think? It's also great to add texture and layering to your page. For this page, I collaged old book papers with washi tape and some tea bag scraps that were laying around on my desk.

While I was working on the collage I got the idea to make a layer of modeling paste with the Tapestry stencil by Kristie Taylor that I would paint over with acrylics once it dried. I definitely prefer doing to technique with watercolor, but since I'm working on craft paper I decided to do it with acrylics.

This is what I mean by working with your hands instead of your head. My head told me that I should do this on mixed media or watercolor paper. But my hands already applied the modeling paste. No turning back here.

To paint over the pattern with any type of paint, your modeling paste has to be completely dry. Just leave it be for a while or use a heat gun to speed up the process.  Always clean your stencil asap when you are using modeling paste, it dries faster on your stencil than on your page and your stencil will become less usable over time. 

For my first layer of paint, I mixed some Amsterdam Naphthol Red Deep acrylic with a little bit of white gesso for a more transparent and matt look. If this was a pre-planned page I probably would have done this step first. But since I’m following my intuition, mixing your gesso with paint is a great way to prime and adding color at the same time.

In this stage I don't wait for my paint to dry, I like how they blend when they are still a bit wet. I find painting backgrounds very relaxing so I just keep adding tiny bits to the page with Naples Yellow Red Light and Venetian Rose until I’m happy. Sometimes I use a baby wipe to blend in the colors a little bit more and to remove paint on places that I used too much. If your modeling paste pattern is under too much paint you can also use a baby wipe to dab it away.

As you can see I like to work in layers and layers. Especially layers of paint. So for my third layer of paint, I patched up some areas that didn't blend well for my linking with White, Naples Yellow Red, and Naples Yellow Red Light.


I think hidden journaling is such a lovely element in a journal background. Especially when it's all messy and scribbled. Sometimes I use my art journal as my diary and I just write and write until my page is all covered in words. Then I like to paint over it a little bit just so the words are still peeking through. When I was working on this page I was listening to a song that kept repeating the same words. So I wrote it down with a pencil in an almost vintage kind of handwriting.

My obsession with using teabags in my art is real! I just love how it gives your page so much texture and how it blends everything together.


While the tea bags are still wet from the glue I splashed down some gold ink and let everything dry for a little bit.

If you want to you can leave it like this. But I was feeling a little brave when I made this and I stepped out of my comfort zone. Normally I would just add some marks with a black pen, but the Repetition Stencil by Rae Missigman was winking at me on my desk, so I just went for it!


I probably should have gone for a Naples Yellow Red instead of black, because after I applied it my immediate thoughts were: “Where is my white paint? I need to make it soft again.” Your hands are not always right, I can tell you that!  But as I said before: this is where the magic happens! Because after I applied my white paint through the  Interesting Dots stencil by Jennifer Evans everything came together so beautifully.

I finished this page off with some black ink splatters and glued down the word confident with a little tea bag underneath.

I chose the word confident because I wanted to remind you to be confident in your art. Just have fun and enjoy the process. Be confident! You can do it!

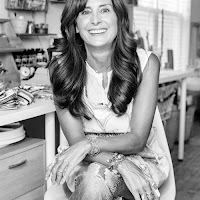
My name is Anouk, Creanouk on Instagram, and I’m so excited to be back on the blog today. I hope you enjoyed this step by step tutorial and that I’ve inspired you to get creative today.

Wednesday, March 24, 2021

Carolyn Dube: Art Journaling with StencilGirl® Stencils


There is such freedom in play, especially in that first layer. The papers don't have to be carefully placed. You can use whatever leftovers are on your counter. No plan is required.

Carolyn Dube here from aColorfulJourney.com and I'm so honored to be sharing my art journal play with you today. Below is where this page started. Random bits of gel printed papers, torn book paper, and leftover paints just smeared around.

That big purple circle was printed using a 6" round Gel Press plate then loose painting all over the page and that led to an O.O.P.S., an Outstanding Opportunity Presenting Suddenly.

When that blue bit went over the middle of the circle, it was an O.O.P.S., What was the opportunity? The next layer. Mary C. Nasser's The Ancient Mariner stencil fit that spot just perfectly.
That purple was big and bold but can you see the subtle stenciling in the center of the page? That's my Iron Grate Layer Me stencil. It has two patterns that you can layer one on top of the other (you can see an example of that here) or you can use it just as two different patterns as I did today. I love that stencils give you the flexibility to use them the way you want!
I'd love to tell you that I purposely chose the small Ankhs from my Egyptian Ankh stencil for some deep meaning around the breath of life. But nope. I was just playing around and love the shape in the space.

So that's why when I thought about what words I wanted to use, play was the first thing that popped into my head. But these words aren't any of the exact quotes on my It's Time to Play stencil. I Frankensteined it by taking a couple words from different quotes and combined them together.


The last step was secret scribble journaling. I wasn't writing a secret, but when you write in black ink on a dark color, nobody knows it's there. Well, unless there's a photo of it happening.

Thanks so much for stopping by today and hope you enjoyed the play!