Showing posts with label Jessica Sporn. Show all posts

Wednesday, January 11, 2023

StencilGirl® Pamphlet Book by Frieda Oxenham

Most of us like surprises and the season for them has just gone, but that’s no reason not to continue with them a bit longer. I sometimes like to surprise myself too, and this project provides a perfect opportunity. To start off, you work on one sheet and play around with it. Then you make it into a one sheet booklet, and you’ll be surprised what ends up on every page. You have the choice to leave it as is or to add more to the pages as I’ve done.

Here is the tutorial:

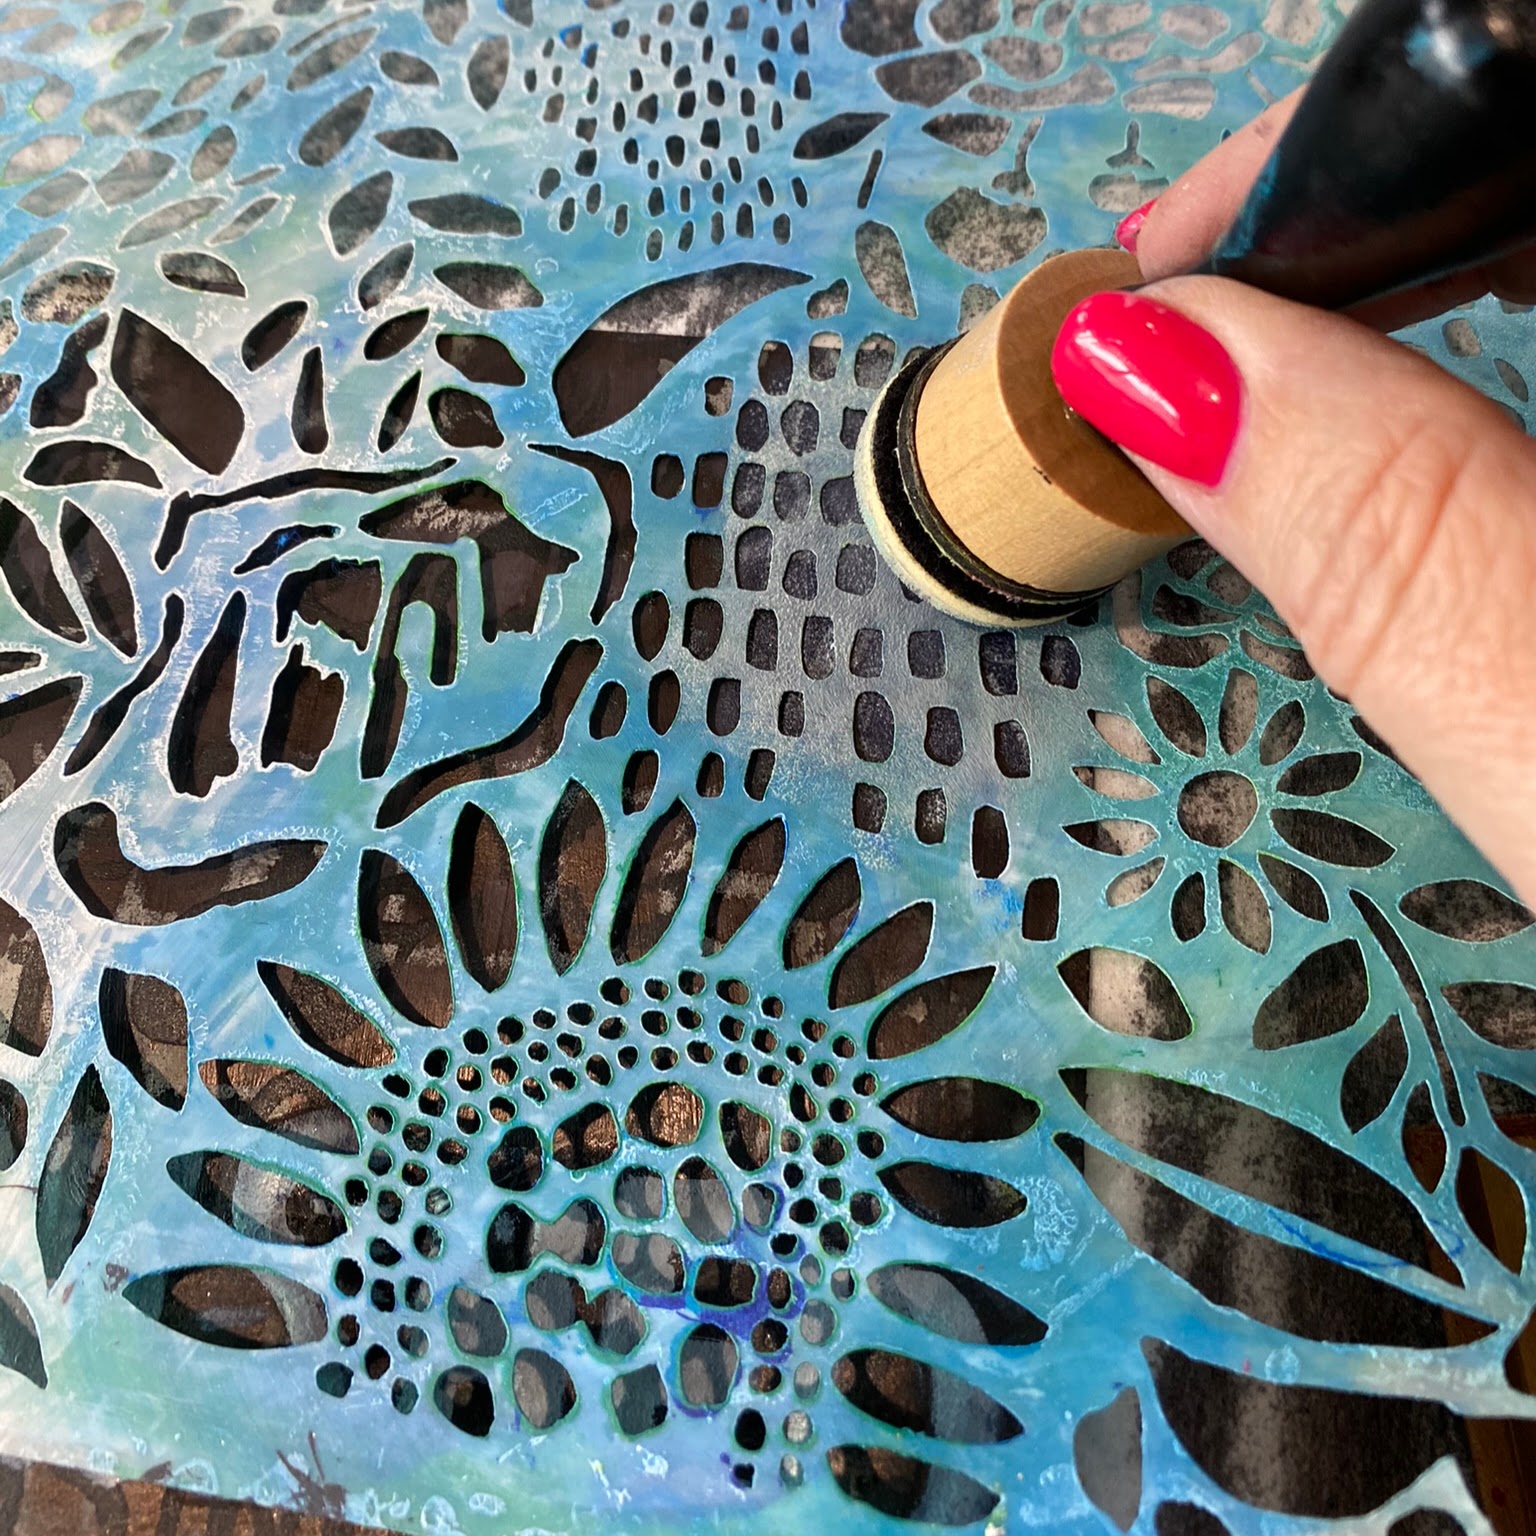
1.     Take a large sheet of A3 300grm watercolour pager (size 11.69 x 16.54”). I used a sheet by Crawford & Black. Use a 9 x 12” gelli plate and add acrylic paints to the plate. I used Fresco paint by PaperArtsy. Make marks into the paint with a comb or any other mark making tool. Take prints from the plate onto your sheet till all the paint is gone.

2.     Step 1 turned out to be a bit brighter than I wanted so I put some Titan Buff acrylic paint on my gelli plate and pulled it off on my sheet.

3.     Using a variety of coloured inkpads stencil on circles using stencil Fade Horizontal. 

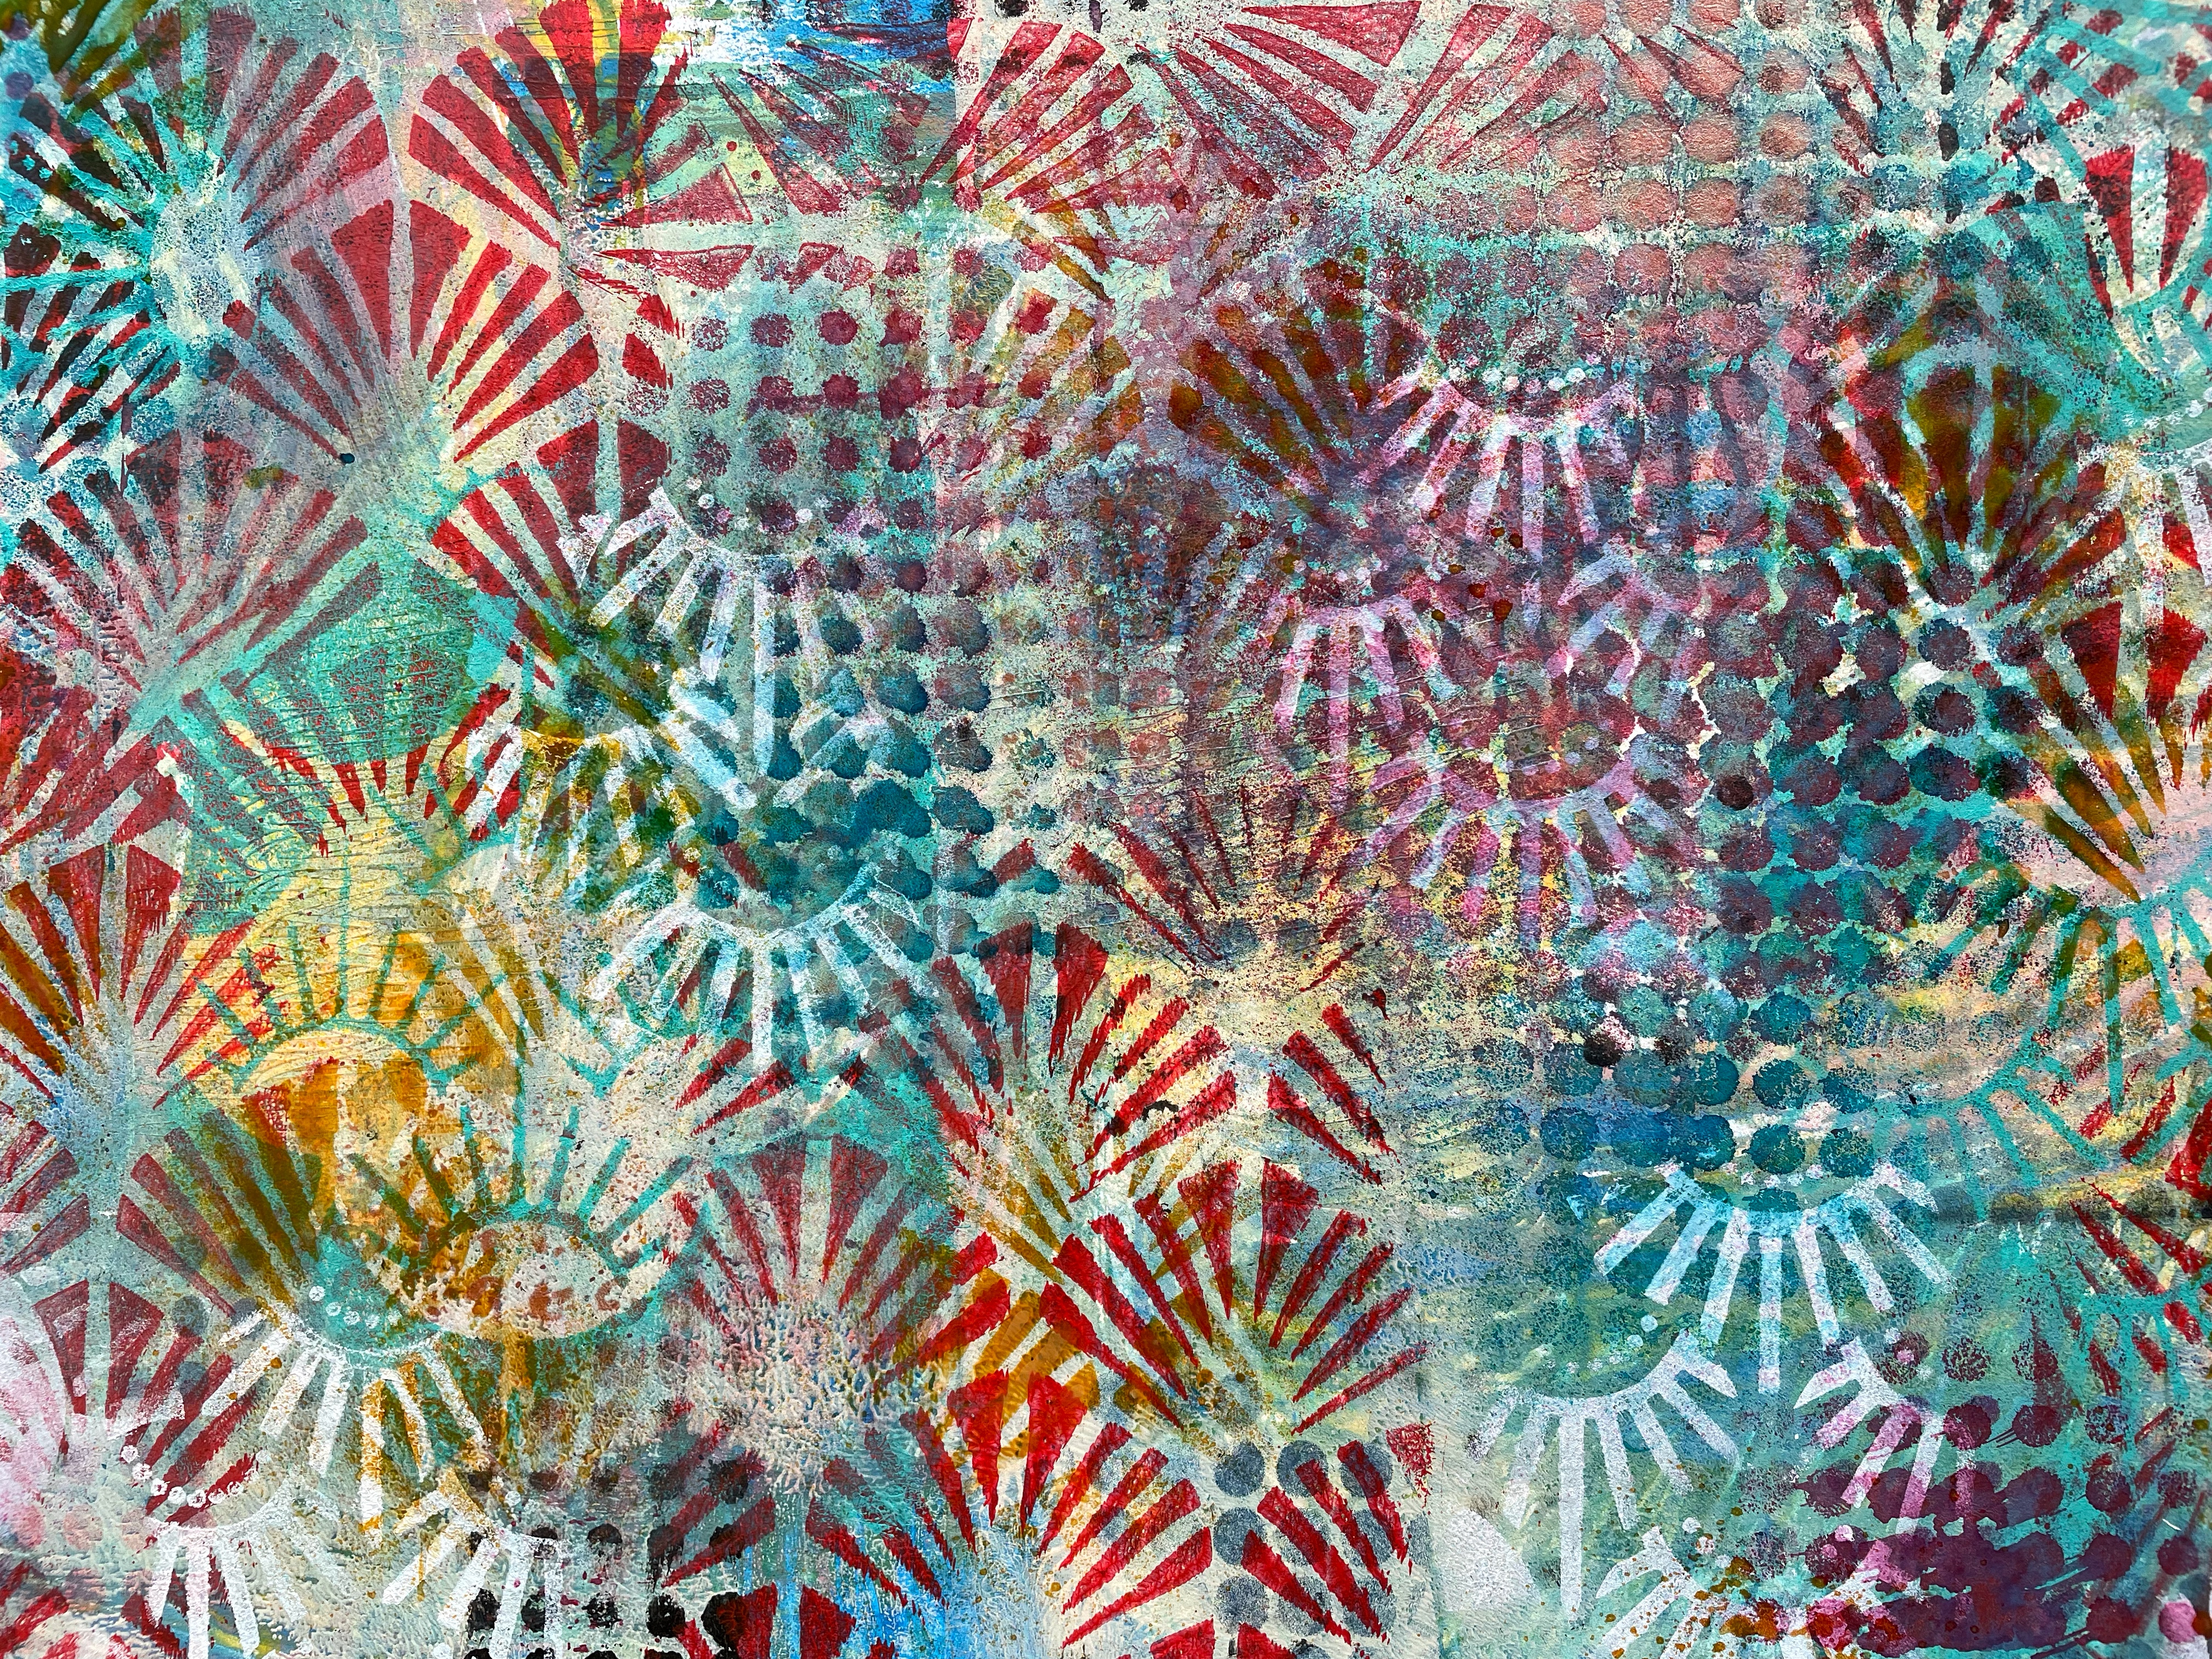
4.     Back to the gelli plate and brayer red acrylic paint all over it and put stencil Art Deco Wallpaper on top of the paint. Take prints on random areas of the sheet. Make sure you have some extra pagers on standby to clean up your plate. 

5.     Repeat step 4 but use teal acrylic paint with stencil Art Deco Summit.

6.     Use glimmer spray paint and spray through Art Deco Wallpaper onto the page.

7.     Use Titanium white paint and stencil Art Deco Summit add more random pattern to the page.

·       Once you’re happy with your page and it’s dry, we’re going to make it into a booklet. To do this first fold the page in half length wise. Open it up and now fold it width wise. Keep it folded and gold one edge of the paper to the previous fold and do the same on the other edge. Then keeping the sheet folded width wise, cut with scissors on the lengthwise fold as far as the next fold you encounter. Open up the sheet which now has a slit and fold to the lengthwise original fold and pull the cut sections away from each other. You will see the booklet emerging. It’s easier to look up a YouTube video than reading it in this description so search YouTube for how to make a one sheet booklet.

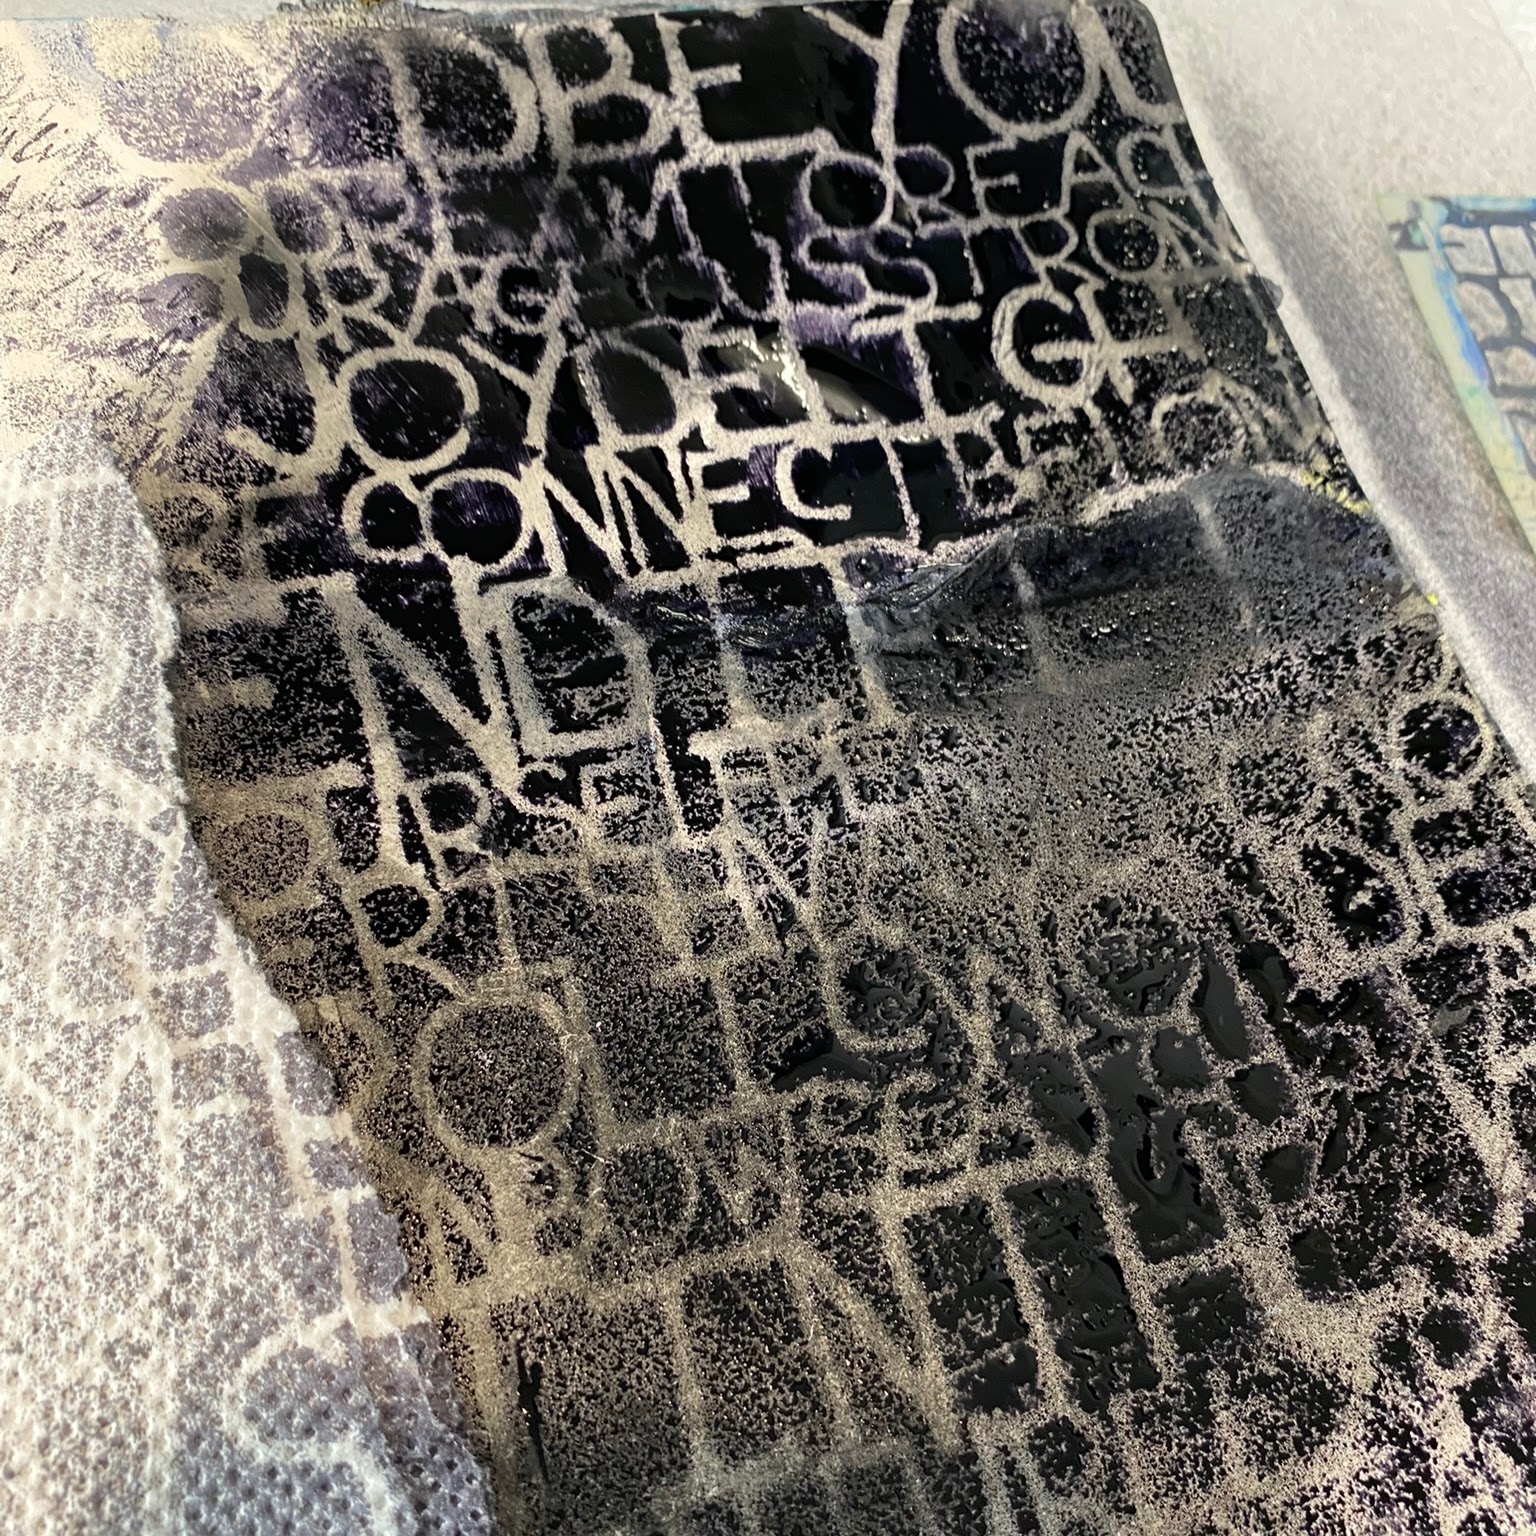
8.     Add doors and windows to the pages of the booklet with black acrylic paint and a cosmetic wedge, using stencils Doors and Windows and the small stencil from the December 2018 StencilClub and outline with a white paint marker.

9.     Add colour to the windows on all the pages with metallic water-soluble pencils (used Derwent ones).

10.  Add on the text from the stencil in step 9 using a permanent black marker

11.  Spray on some sparkle to the pages (I used some of Lindy’s Starburst Sprays.

12.  Add some sparkly stars to the pages using gold acrylic paint and the medium stencil from the December 2018 StencilClub.

13.  Outline the pages with a gold marker

14.  Wind a gold ribbon around the booklet as a closure.

© Frieda Oxenham 2023

Tuesday, April 26, 2022

Moody Unfinished Art Journal Page

Hey Stencil Fans!

Natalie here today with a little Art Journal page for you!

This one is all about layers - but layers of Moody black and layers of words.


Last month here in Australia, I released my very own range of Collage Papers so I thought I'd build on one and create a deep and dark page.

I started with a gessoed page and then used gel medium to adhere the collage paper to the page.


I then used a random script stamp to add some words with black archival ink followed by a stabilo stubby black pencil to add a wash across the top of the page.


Next I used the Words to Live Stencil by Carolyn Dube and a Black Spray ink to add a layer of words over the black wash. I masked off the face detail with paper towel so I didn't get any over spray.


Once dry, I used a black shimmer paint over the Sacred Words and Marks stencil by Jessica Sporn to create a new layer of words. Using the shimmer paint made the letter and words stand out and give it a bit of a shine.


For the focal point word on the page, I used a pale grey paint through the Seth Apter Unfinished stencil and then used a grey brush tip paint pen to add detail.


I finished by adding a few marks from the Floral Frolics Stencil by Wendy Brightbill around the page to tie in some of the colour I used in the title.


I am loving the moody feel to this page and love the layered letters and words!


Something a little different for your day.

Thanks for stopping by!

Natalie May


PRODUCTS USED

Friday, November 12, 2021

Frieda Oxenham: Art Journaling with StencilGirl® Stencils

We have reached the penultimate line of Ben Okri’s poem and it reads: “Wake up to what you can be”. In our September project we illustrated the line Wake up to who you are”. To me this new line means that there is always room for improvement and it is up to us to continue to work towards becoming who we want to be. It is never too late!

Here is the tutorial:

1.      Using watercolours and a water brush, randomly add colour to 2 facing 8 x 11.5” pages and use water spray to let them merge into each other.

2.      Continuing with the watercolours and water brush using contrasting colours to step 1, add pattern through the large stencil from the May 2021 StencilClub.

3.      Using an 8 x 10” gelli plate, brayer on white acrylic paint. Put stencil Circles Overlapping Filled on top and take a full page print on both pages.

4.      Repeat step 3 but now with red acrylic paint and taking only partial prints.

5.      Add focal face of your choice to the right hand side page with soft get medium.

6.      Using green paint and one of the patterns from stencil Art Deco Borders add a border to the top and bottom of both pages, missing out the figure.

7.      Stencil on the flower border from the large stencil from the July 2017 StencilClub with red acrylic paint. Also paint the clothing of the figure red.

8.      Colour in the centre of the flowers from step 7 with a yellow Sharpie Poster Paint marker

9.      With black gesso stencil on part of the page from stencil Delicate Face to the edge of the left hand page

10.  Stencil on words as shown, again using black gesso. I used stencils I get to choose, A conversation with Matisse and Emotions and Feelings 1.

11.  Outline the flowers and little circles in green borders with a permanent black marker and add the centres of the flowers while also colouring in the little circles with a white marker. Outline the figure with a black Stabilo All pencil smudging the edges. Colour the hairband of the figure with a red Stabilo Woody.

12.  Glue on the text by Ben Okri to the right hand page and outline with a black marker

13.  Spray on copper mica spray paint randomly through the medium stencil from the June 2021 StencilClub.

14.  Edge the pages with a gold ink pad.

© Frieda Oxenham 2021. To see more of Frieda's work, please visit her BLOG.

Monday, August 9, 2021

What I do with my gel printed papers by Marsha Valk


Hi there! 

Recently I had the privilege to watch Mary Beth Shaw's fab and inspiring new online workshop: Painted Paper Party!

In one of the lesson intros, she says something along the lines of being addicted to creating painted papers. Mary Beth has a lot of them, and she uses them in all of her art.


Now you may know that I gel print a lot. So I don't have a collection of painted papers like Mary Beth does; however, I have an ever-growing gel printed stash.

And, unlike Mary Beth, I'm much less inclined to use those gel prints in everything I create.

So whenever people ask me what I do with my gel printed papers, I honestly never really know what to answer.

Because in the ideal world, I would only have finished monoprints, or I would have a stash of gel printed papers that I know I need and use.


The gel printed papers that I use fall into two categories: thin pieces, like computer paper (or similar weight), go into the collage bin. And even lighter papers, like deli paper or tissue paper, go in another collage bin.

The problem is that I tend to pull the majority of my prints on paper that's around 200 gsm. This weight is perfect for finished prints, for making cards, and for using the prints as a base for mixed media art pieces.


Unfortunately, I've learned over time that I'm not a substantial 'background prints' user. And I'm not a vast cardmaker either.

I do like to make little journals. However, not all of my prints are suitable for the purpose. So that's where I run into trouble…

In a final attempt to make a dent in my (gel printed) paper stash, I've started to cut all of my remaining painted papers down to postcard size. Not just the gel printed papers, but all promising looking brayer clean sheets, misprints, practise pieces etc. too.


These papers can be pasted onto a card base; they can be turned into books or pasted into journals. And, whenever I feel like doing something other than working in a journal, I can dive into my box of 'postcards' and work on top of what's already there.

Is this the be-all, end-all solution? My box of postcard-sized printed papers is already overflowing, so the jury is still out on that one. However, I can see the potential. So let me show you how I use some of these gel printed postcard-sized papers to create a little book!

Until next time!


Marsha.


StencilGirl® stencils used:
S874 Terrazzo Stencil by Lucie Duclos
S869 Abstract Botanical Grid Stencil by Jennifer Evans
S770 Snakeskin Repeating Pattern stencil by Jennifer Evans
S730 Brilliant Start by Mary Beth Shaw
S677 Stone Tilings stencil by Valerie Sjodin
S383 Sea of Grapes by Rae Missigman
S374 Stone and Mortar Version 1 by Mary Beth Shaw
S172 Runes Stencil by Jessica Sporn
S094 Slices 6 Stencil by Terri Stegmiller
L661 Hamilton stencil by Nathalie Kalbach
L659 Exchange Place by Nathalie Kalbach
L652 Garden Montage by Cecilia Swatton
L591 Vintage Typewriter Numbers by Carolyn Dube
L467 Amsterdam stencil by Nathalie Kalbach
L458 Toledo stencil by Nathalie Kalbach
L446 Kunst Masken 1 by Andrew Borloz