Showing posts with label portraits. Show all posts

Wednesday, September 14, 2022

Expressive Portraits with StencilGirl® Stencils

Hi, everyone! Christa Forrest here! Want to explore creating expressive portraits but a bit fearful of drawing a face? Try using stencils!

I love using stencils and about 6 years ago I wanted to paint faces but wasn’t too great at it.   Plain and simple I was scared.   I found these amazing face stencils from StencilGirl® and decided to explore.   I was immediately hooked! I could experiment with mediums, mixed media and not get caught up in struggling to draw a half-way decent face. I learned along the way.

The stencil made it easier for me to understand the basic structure of the face.   The eyes, nose and mouth were where they needed to be. I could then open myself up to playing and practicing.  This eventually built up my creative confidence to start actually drawing a face. 

Do I still use a face stencil?

I have come a long way since the beginning.  The face stencils allowed me to feel comfortable with exploring faces in my work.  The more confidence I gained, the more comfortable I became.  Now it feels like second nature.  I still bring out the stencils every once in a while, to play and practice AND show others that they too can incorporate expressive portraits in their work with ease.

Here is a quick video of how I can utilize a face stencil to create a fun expressive portrait. 


Materials:


StencilGirl® stencils:

Talaya Goddess of Rain Large

Eve a Modern Woman Large

Abigail, A Timeless Woman Large 


Acrylic Paint:

Golden’s Quinacridone crimson

Golden’s nickel azo yellow

Titanium white

Black


Assorted brushes 

Spray bottle

Paper towel

Princeton catalyst scraper tool

Caran d’Ache Neocolor II crayons

Mixed media sketchbook 9x12 


Christa Forrest

Creative Souls Art

https://www.facebook.com/ChristaForrestFineArt

https://www.instagram.com/christaforrestfineart/

https://www.youtube.com/Christaforrest

Monday, December 27, 2021

Crosshatched Ink Portrait with StencilGirl® Products


Self-portrait (at 13) by Albrecht Durer, using hatching to establish values

               There are a lot of elements that go into making a portrait come alive, and perhaps one of the most important is modeling - making the face appear dimensional.  The human face is a complex arrangement of shapes and forms - curving, casting shadows, jutting forward or dipping in - and it takes a lot of practice to get comfortable with how to use tone, line, and color, to recreate those three-dimensional contours on a two-dimensional surface.  If you also have to work on getting the proportions right, it can feel like a pretty daunting job.  Fortunately, the face stencils from StencilGirl® provide a wonderful framework for establishing the features of the face.  They are great templates for practicing shading and modeling.

                One of my favorite techniques for adding depth and dimension in a sketchy portrait is hatching (patches of lines in one direction) and crosshatching (patches of lines crossing one another).  It's almost magical to watch the build-up of parallel and crossed lines bringing a face to life by building up the values from light to dark.  It can be tedious to do, however, and can be very tiring to the hand.  Enter this clever makeup hack I learned from illustrator Henrik Drescher.  The Tattoo Studio Brow Tint Pen has a soft, flexible nib that draws four parallel lines.  It's not hard at all to remove the nib with a pair of pliers, and remove the makeup inside (there isn't much, anyway - according to the package, this pen contains only .037 ounces of product.)

    I managed (with a dropper) to add bit of a beautiful ink from Noodler's called American Aristocracy.  It's a deep purplish brown that I find really great for portraiture - I use it in a fountain pen and with dip pens, usually.  It's water soluble, and can be diluted and brushed to beautiful effect.  (At the end of this blog post I have added another portrait using one of Pam Carriker's face stencils.  It was done entirely in American Aristocracy, using both brush and dip pen, plus a bit of white pastel.  The pinkish and brown tones have a tendency to separate, which is lovely. )

    Whatever color ink you choose to put into the eyebrow pen, it's a good idea to practice drawing lines with it.  Press too hard and you'll get a solid line, but with a light touch, you will get the parallel lines.  It's also a good idea to practice simply to accustom your hand to drawing lines consistently and steadily. Fountain pen ink is very fluid, and will not dry out or gum up the nib.


            Using Pam Carriker's Create Face stencil (S646) I established the base layer of the features with the brow pen.  You'll see that I have cut away pieces of the stencil so I don't have a hard, square border.  I also penciled in a hair line as well as the cheek and jawline on the left side of the face use as guidelines during the hatching process.


            When that's all done, this is the result.  As you can see, my lines sometimes wobbled, sometimes went out of parallel.  However, the beauty of this technique is that there will be so many additional layers of hatching that the imperfections of the first layer will disappear.  But you can pretty quickly establish the start of the crosshatch this way.  To be honest I think there is probably still some brown eyebrow makeup in the pen mixing with the ink, but that's why I chose a purplish brown - and I don't think it matters if I'm drawing with makeup at this point!


                Now the magic begins.  This stencil (in this orientation) clearly indicates the light source from the upper right.  This means that all parts of the left side of the face will be darker than the right side.  Wherever the contours of the face curve away (into the eye socket, down the side of the nose, the corners of the eyeballs, the side of the jaw, etc. ), it should appear darker; wherever contours bring a feature forward (cheekbone, brow bone, tip of the nose, etc.) the values should be lighter.  With a variety of colors, line widths, and by varying the spacing of the lines, you can begin hatching to create these contours and changes in value.  Hatch perpendicular to your first set of lines, then switch colors and hatch straight up and down, then hatch straight across.  Use the typical palette of skin tones, or get more dramatic with some unexpected colors, keeping the lines in each layer as parallel as possible.  Experiment to see which direction is most comfortable for you and turn the paper or journal if it's easier to switch direction that way.  Take your time, keep checking where the shadows should be, and have fun!  Remember, it is the nature of stencils to have quite a few broken lines as a way of preventing whole chunks of Mylar falling out.  Where there are interrupted lines (for example, around the eyes) feel free to complete them with hatch lines.


        As you can see, I filled in the background with a wash of the American Aristocracy ink, and then hatched over that with a white gel pen.  To be honest, I may have gone too far and too dark, but I had gotten into the hatching rhythm, I was listening to a good podcast, and I just didn't want to stop!  It's a wonderfully meditative process.  I've used this face stencil with this technique a few times, and it really is a fun technique for practicing the modeling of the face.  

        And here, as promised, is the ink wash (not cross-hatched) portrait in American Aristocracy with Pam Carriker's Strength Face S653.  Using water soluble fountain pen inks with stencils always turns out great - especially with a gorgeous color like this.


stencils used: 

Create Face, by Pam Carriker


Strength Face, by Pam Carriker


Wednesday, March 31, 2021

Using StencilGirl® Stencils in Portraiture


Hello from Sue Ann “Swan” Hum! I'm a full time artist working in Colorado, USA. It's pure happiness to be a StencilGirl® Talk Guest Designer sharing my love of using stencils in Mixed Media Portraiture.

Stencils used in “Come True”:
 Floral Lace by Kristie Taylor
Delicate Face by Andrea Matus deMeng
Streamers and Dots Layered Pattern by Kristie Taylor
Ginkgo by Cecilia Swatton 

Stencils used in “Give Up”:
Soulful Scribbles Dot -Dash by Traci Bautista
Soulful Scribbles Flourishes by Traci Bautista
Peruvian Grid Mask by Cynthia Silveri
Swallows Take Flight by Valerie Sjodin


Stay in touch with Sue Ann
WEBSITE
INSTAGRAM
FACEBOOK


Tuesday, July 2, 2019

Inner Goddess by Linda Edkins Wyatt


I've always been fascinated by faces, but they're a bit tricky to draw from scratch. I admire the courtroom sketch artists who can capture a moment, and an emotion, with a few strokes of the pen. Fortunately, for those like me who can't always get the features exactly right on the first try, there's a lot of StencilGirl® face designs to help create a foundation for a portrait.

There's an ongoing conflict inside my head between my inner critic and my inner goddess. The inner critic tries to tell me that I'm boring and ordinary, a nervous wreck, and an artistic fraud. The inner goddess wants me to breathe deeply, channel the emotions from my brain into my fingertips, and just paint. And while on the outside I'm kind of an average-looking, all-American woman next door, on the inside I'm an exotic and daring soul, a world-traveler and feisty spirit.

I decided to paint my inner goddess, so I started with a big sheet of 12" x 18" watercolor paper, coated it with white gesso and let it dry. I chose a fairly large size paper because I wanted to have plenty of room for crazy hair and some interesting clothing.

After the gessoed page was dry, I used sepia archival ink with a fingertip dauber through the Mystique stencil by Andrea Matus deMeng to get the eyes, nose and mouth in the right position on the page. Then I sketched a circular face shape and added lines for the neck, shoulders, and hair.


A lot of people are afraid of ears. They are a little tricky to draw, and many people just paint long flowing hair so that they don't have to worry about the ears. My goddess wanted big ears for good luck, like Buddha has, so I used Pam Carricker's Hear Journal Sense stencil, positioned it on the right, and stenciled it with sepia archival ink. I flipped it and added the left ear.


Once I had the facial features in place and the hair, neck, and shoulders sketched in, it was time to paint! I mixed up some flesh color and got to work.


For the hair, I wanted something wild and flowing, but more interesting and textural than plain brush strokes. 

I decided to paint in a dark color for the hair shape, then use Gwen Lafluer's new Turkish Bronze Boho Blend through Jessica Sporn's Lacy Lotus repeat stencil. I taped off one perfect lotus shape and repeated it around the page. The embossing powder has flecks of bronze and added a beautiful shimmer to the hair texture.


It needed a background, and a contrast with the hair, so I chose a stencil that resembled tile, Maltese Mix by Michelle Ward

To add even more contrast and texture, I used white crackle paste through the stencil. I strategically placed tracing paper and painters tape over the areas that would not be stenciled.

With the golden brown skin color and flowing hair, she began to have a feeling of a Gauguin woman, yet the addition of the crackled white tiles gave a feeling of North Africa too.


My goddess was shaping up nicely. Here's a detail shot that shows the many textures.


I debated about what to do for the very bottom of the painting: should I add a dress? A necklace? A neck tattoo? Leave it as it is? Finally, I settled on creating yet more texture. 

I wanted to suggest delicate lace, so I combined several stencils and applied them with fine white Wow brand embossing powder. 

I used a paisley shape from Laurie Milka's Pilgrimage to India stencil along with Gwen Lafluer's Art Deco Corner Medallion and an older favorite faux smocking design from the April 2013 StencilClub. I added a few white painted dots to fill in the empty spaces and also suggest sheer dotted Swiss fabric. I strategically taped off the space as I stenciled to maintain the crisscross effect in the bodice.


Last, but surely not least, I added a crown. I experimented with quite a few crown ideas and finally settled on a triangular stripe from Laurie Milka's Pilgrimage to India, applied with hampagne-colored embossing powder. It was the perfect finishing touch for my Inner Goddess.


Instagram


Thursday, November 1, 2018

Her Story ~ The Stencil Club Set for November 2018!

Pam Carriker envisions you creating your own story with these stencils she designed for StencilClub 2018.

The large stencil is one of her classic faces and the small and mini stencils came from elements off her own art journal pages.

The mini stencil is one she adores, home.

The small stencil represents steps and says: "One step at a time you'll get there."


In Pam's tutorial, she will share how she combines the 3 stencils into a piece of art. She will be working with watercolors on watercolor paper. 

Pam hopes you will tell your own story using these exclusive StencilClub stencils and adding ephemera, collage papers, and other stencils that depict things that are meaningful to you. 


The only way you can own these stencils is to become a member of StencilGirl's StencilClub. In addition to the 3 exclusive stencils, you can access the secret group on Facebook where members share art and Mary Beth Shaw pops in to answer questions, receive a coupon code each month, and get advance notice of StencilGirl sales. Find out more and sign up here.

Art by Pam Carriker

Friday, September 7, 2018

Guest Designer: Karen P. Johnson

Hi, everyone! Karen P. Johnson here! I’m a Mixed Media Illustrator and Graphic Designer.
And it’s my pleasure to be here today to show you a technique using my StencilGirl® Products.
Art Journaling with StencilGirl® Products by Karen P. Johnson
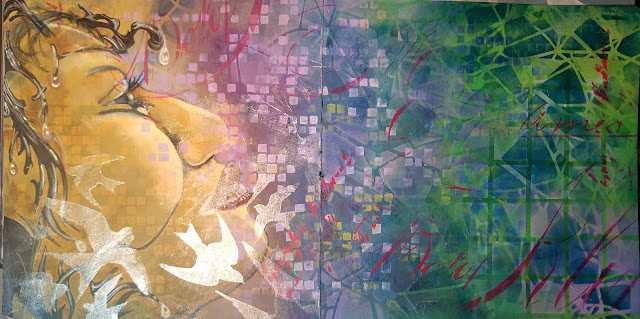
I was a freelance designer for 16 years. During that time, I used a lot of airbrush and I cut my own stencils using an X-Acto knife and poster board. You can only imagine how excited I was to find so many different stencils on the market and how happy I am to have my own line of stencils with StencilGirl® Products. It has been my goal to bring diversity to the craft and hobby industry, and I am grateful to StencilGirl® Products for the opportunity to bring them to you today in the Karen P. Collection. Today I’m going to take one of my stencils and create for you step-by-step a Tip PiC. A Tip PiC will show a hidden image as the angles are changed when you tip it towards the light. It is based on an old printing process called lenticular printing used to make baseball cards in the 60s.
Art Journaling with StencilGirl® Products by Karen P. Johnson
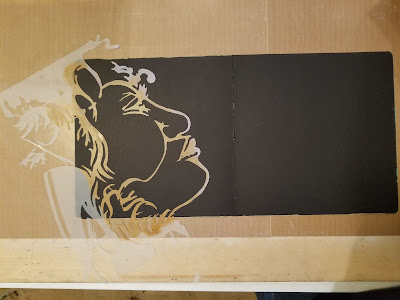
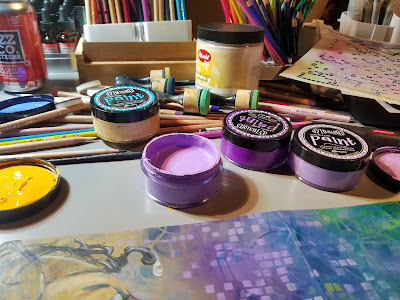
First pick your substrate and your stencil. I will be using pages from my Dylusions Creative Journal
with black cardstock and my Fulfillment Large Mask stencil.
Art Journaling with StencilGirl® Products by Karen P. Johnson
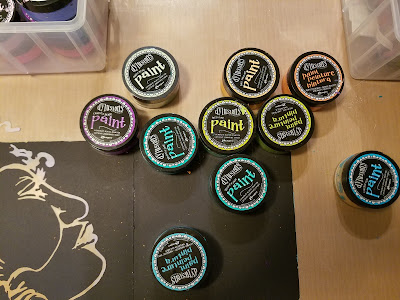
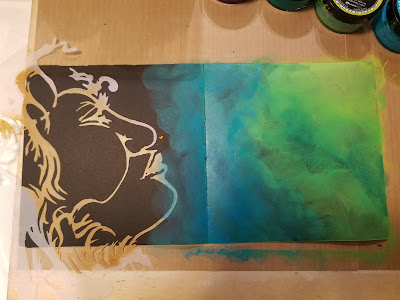
The paints I used were also from the Dylusions Acrylic Line in
Fresh Lime, London Blue, Crushed Grape and Squeezed Orange.
Art Journaling with StencilGirl® Products by Karen P. Johnson
Once the background was completed, I began breaking up the space using
more stencils from StencilGirl® Products.
Art Journaling with StencilGirl® Products by Karen P. Johnson
The first stencil is from Julie Snidle's Lost Languages collection.
I used Laid Back Lilac and Periwinkle Blue along with Squeezed Orange through the stencil.
The second stencil is the 6" x 6" stencil from Mary Beth's Private Collection 15.4.
I used Laid Back Lilac through the stencil.
Art Journaling with StencilGirl® Products by Karen P. Johnson
Then I used Cecilia Swatton's Prayer Flags stencil. If you do not have it, you should get it, because when you need it, this stencil covers a multitude of sins. And I really like it. I used StazOn solvent ink in Midnight Blue through the stencil. And to add dimension, I used Laid Back Lilac.
Art Journaling with StencilGirl® Products by Karen P. Johnson
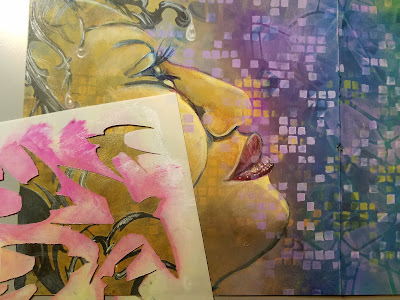
I removed the Fulfillment Large Mask stencil revealing the face
along with the background and dimensional patterns.
Art Journaling with StencilGirl® Products by Karen P. Johnson
In order to create the browns of the skin tone, I used the complementary color of blue on the orange.
Due to its transparent quality, Distress Ink Broken China is the perfect complementary color.
Art Journaling with StencilGirl® Products by Karen P. Johnson
I used Pomegranate Seed to color the lips and to begin the process of adding detail to complete the face.
For those of you who are into the coloring book craze, my stencils offer numerous possibilities for coloring and drawing. Just choose your Weapon of Mass Creation. Here are a few of mine:
Art Journaling with StencilGirl® Products by Karen P. Johnson
Once you are happy with the details it’s time to add the magic that turns this into a Tip PiC.
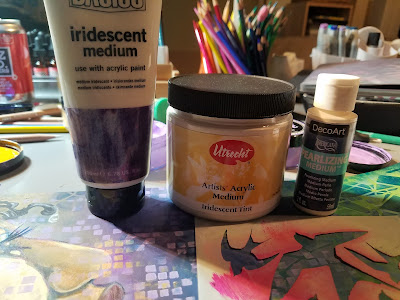
You will need an iridescent or pearlescent medium with no color. This is a colorless medium you add to other colors to change them into an iridescent or a pearlescent.
Art Journaling with StencilGirl® Products by Karen P. Johnson
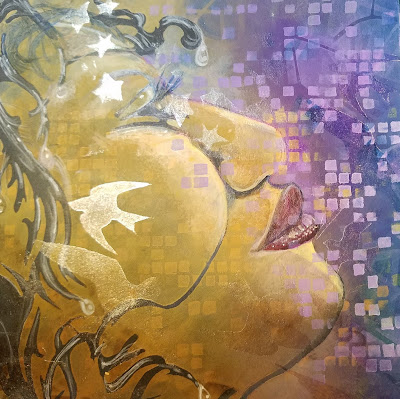
After placing the iridescent through Swallows stencil designed by Tracie Lyn Huskamp and Starlight Starbright stencil by Cat Kerr, you will have the hidden image of your Tip PiC.
Art Journaling with StencilGirl® Products by Karen P. Johnson
When lying flat, you will not be able to see the hidden image.
Art Journaling with StencilGirl® Products by Karen P. Johnson
I finished up this piece with stencil Cecilia Swatton's Vintage Script Stencil,
another favorite of mine, using Cherry Pie paint.
Art Journaling with StencilGirl® Products by Karen P. Johnson
When you tip these pages towards the light, hidden figures will be revealed
and birds appear to fly across the page.
Art Journaling with StencilGirl® Products by Karen P. Johnson
Thanks so much for visiting today! I can’t wait to see what you do!