Showing posts with label Tracie Lyn Huskamp. Show all posts

Monday, April 8, 2024

The Suprise Inside


The Faberge Eggs


  For three decades - from 1885 until the Russian Revolution - the imperial jeweler, Peter Carl Faberge, produced the now-famous Faberge Imperial Eggs as Easter gifts from the Tsar to his wife and his mother. With each passing year, these bejeweled masterpieces became more and more elaborate, inventive, and breathtaking.  Each egg took at least one year to create - sometimes two! - with an entire team bringing a suite a skills to the task, from watchmakers to enamelists, gem cutters to goldsmiths and more. When the Romanov family fled from the Bolsheviks in 1916, the collection of fifty magnificent eggs was left behind in the palace, where they were subsequently looted in the chaos.  Some were lost, possibly destroyed, many ended up in private collections, and the rest are on display in St. Petersburg. 

Some of the Imperial Eggs from the workshop of Faberge


An example of the ornate "surprise inside" that was standard on most of the eggs

             Each egg is very different from the previous egg, since Faberge intended to outdo himself each time, both in design and fabrication.  But one thing that almost all have in common is that they open up and contain a surprise, and it all began with the simplest egg of all, known as the Golden Hen Egg.  This first of the Imperial Eggs has a simple, white enamel shell, and opens to reveal a golden yolk, which then opens to reveal a golden hen.  I took this elegant masterpiece as my inspiration for my project, a sweet little Easter gift.

The Golden Hen Egg, the first of the Imperial Eggs


             Tracie Lyn Huskamp has designed two 6x6 stencils of speckled eggs for StencilGirl® Products:  S021 Speckled Eggs has two larger eggs on it, and I used the larger of those two eggs to trace out onto a pale green cardboard.  I cut out two, and used the speckle patterns to add brown and blue splotches on both sides. A couple of sprinkles of white paint gave them a little more brightness. I then cut narrow strips of the same cardboard (one narrower than the other) and cut them to match the perimeter of the eggs, softened the fibers by curling the strips around the edge of my desk, and then glued them in place with PVA glue to make a little box with a snug-fitting lid.


            Now I had a little speckled egg box.  But what could the surprise inside be?  It had to be something more than just a little candy or a message.  Could I somehow replicate the golden yolk or golden hen?  And then I remembered my bird guts!  Stencil guts are sometimes available from StencilGirl® Products, and at one point when a set of “bird guts” was available I put them right into my shopping cart without delay (and you should not delay either if you see them make another appearance).  These guts are the mylar scraps left over from the stencil cutting process.  Tracie Lyn Huskamp also has a 6x6 Songbirds stencil S034, and I had some of the birds that were the by-products of cutting that stencil.  A little bit of gold leaf, and I had a golden bird!   All that remained was to add some white jelly beans, and I had a perfect little gift to send to my daughter.  (Full disclosure: I did snip off the bird’s tail so it would fit inside the box!)


Adding gold leaf to the bird


            This is my last Master Pieces column.  I’ve really enjoyed researching the artists and using them as inspiration for my own art exploration.  I hope you have enjoyed reading these columns as much as I enjoyed writing them!  If you want to see any more of my art going forward, feel free to look at my Instagram @jennitoga.


Eggs Speckled Stencil by Tracie Lyn Huskamp


Friday, July 21, 2023

Judge a Book by its Cover - by Claudia Neubacher


Yes, yes...I know...the actual quote says the exact opposite, but I am talking about real books here and I had some at home where the covers didn't do the content any justice...so I decided to change that and give them new covers.


I am talking about these little fellas.


The Reclam series is (greatly feared by pupils and) meant to provide literature classics (like "The Nibelungenlied", Ovid's "Metamorphoses" or poetry collections for example) at a very cheap price (so they were affordable for use at school) and their signature look has always been this bright yellow and a pocket size paperback format with very thin paper, so you can carry them with you easily and at any time. Most people I know associate these books with boring High School German lesson reads...but there were some works I and my husband liked so much that we kept the books until today as we still love the content. If only the covers looked a bit more inviting and did its contents justice...


Much better now, aren't they? 

I indulged in some happy playing around with stencils, layering and using various tools to apply paint and create different marks. 


I mixed different kinds of paints and inks as well and from the pre-selected pile of StencilGirl® stencils these were the ones that I used in the end: 


by
Valeri Sjodin


by
Tracie Lyn Huskamp


by
Pam Carriker


by
Mary Beth Shaw


the smallest stencil from the 
StencilClub set 


and the smallest stencil from 
June Pfaff Daley's


I always gather more stencils than I will really use to not only have a wide variety to choose from but also browsing through my stencils often inspires me or helps me define the direction in which I want my project to go. Often I only use a very small section of a stencil design because during the process I find it is the perfect fit. Especially when you want to build layers you often need a bit of texture in a particular corner as a contrapposto (=a contrasting detail that visually emphasizes an already built part of the compostion). 


The picture shows all the tools and paints I had prepared, two water bowls to put the used applying tools in (one for tools I applied black and dark greys with and the other for the brighter colour tools), and a spool with a grey linen ribbon that I planned to put on the books' spines. 


That grey from the ribbon defined the grey base colour to start with. 
I mixed that on my palette using Titanium White and Lamp Black DecoArt Americana acrylic paint and applied it with a sponge paint roller. 


Using another sponge paint roller I applied pure Titanium White right through the stencil onto the prepared book covers. 


That was followed by a little rabbit and a face's half in Lamp Black. This time I used a stipple brush to apply the paint. 


Time to use translucent colours - so I switched to Ranger Distress Stain Sprays (salvaged patina and rusty hinge). I used the 


I used the Circuits Mini stencil like a stamp - I simply misted it with Salvaged Patina, then put it on the cover face down, covered that with a clean sheet of printer paper and rubbed across that with my flat hand. To dry the layers I used a heat tool. 

For my next layer I misted the Stone Tilings stencil with the Spray Stain, then removed the wet stencil and pressed one of the covers partially into the residue on the palette. 


That led to a beautifully smudged layer! Yummily grungy and a great contrast! It also mixed beautifully (layering-wise) with the Golden Straw marks I had applied before that using the specially shaped sponge paint roller (I later used the same roller to create the black right border on the cover...I really love the marks it created!!!). 


But back to the rusty hinge layer - it was the perfect contrasting colour to use and its translucency created great depth!


The left over Distress Stain on the stencil got "stamped" onto the books' back covers (no paint should be wasted, right?). 


As I had covered up part of the rabbit's silhouette during adding more layers, I put the stencil back in place and traced the lost part with a fine tip Faber Castell PITT pen. Afterwards I added some swirls in black using the lovely small stencil from Mary Beth's StencilClub set. 


Final touches (a bit of scribbling and some marks here and there) were added using a white acrylic paint marker and then I sprayed on a thin coat of matte DecoArt Acrylic Sealer to prevent the inks from being reactivated by any moisture. 


The grey ribbon got glued in place using DecoArt matte Decou-Page...


...et voilĆ”!


Finally my beloved collection of Modern Nature Poetry and the Nibelungenlied looked as worthy from the outside as they truly are a read! The ugly (sorry, Reclam!) yellow is gone and I now love having these little gems lying around at home, looking as inviting as possible! Now one can finally correctly judge the books contents by their covers! ;)


Thanks for stopping by (and maybe you also have some particularly loved books at home that have covers that don't do their contents any justice and therefore get misjudged...). Enjoy a lovely summer with some good reads and a lot of creative fun! 

Claudia xxx


Friday, September 7, 2018

Guest Designer: Karen P. Johnson

Hi, everyone! Karen P. Johnson here! I’m a Mixed Media Illustrator and Graphic Designer.
And it’s my pleasure to be here today to show you a technique using my StencilGirl® Products.
Art Journaling with StencilGirl® Products by Karen P. Johnson
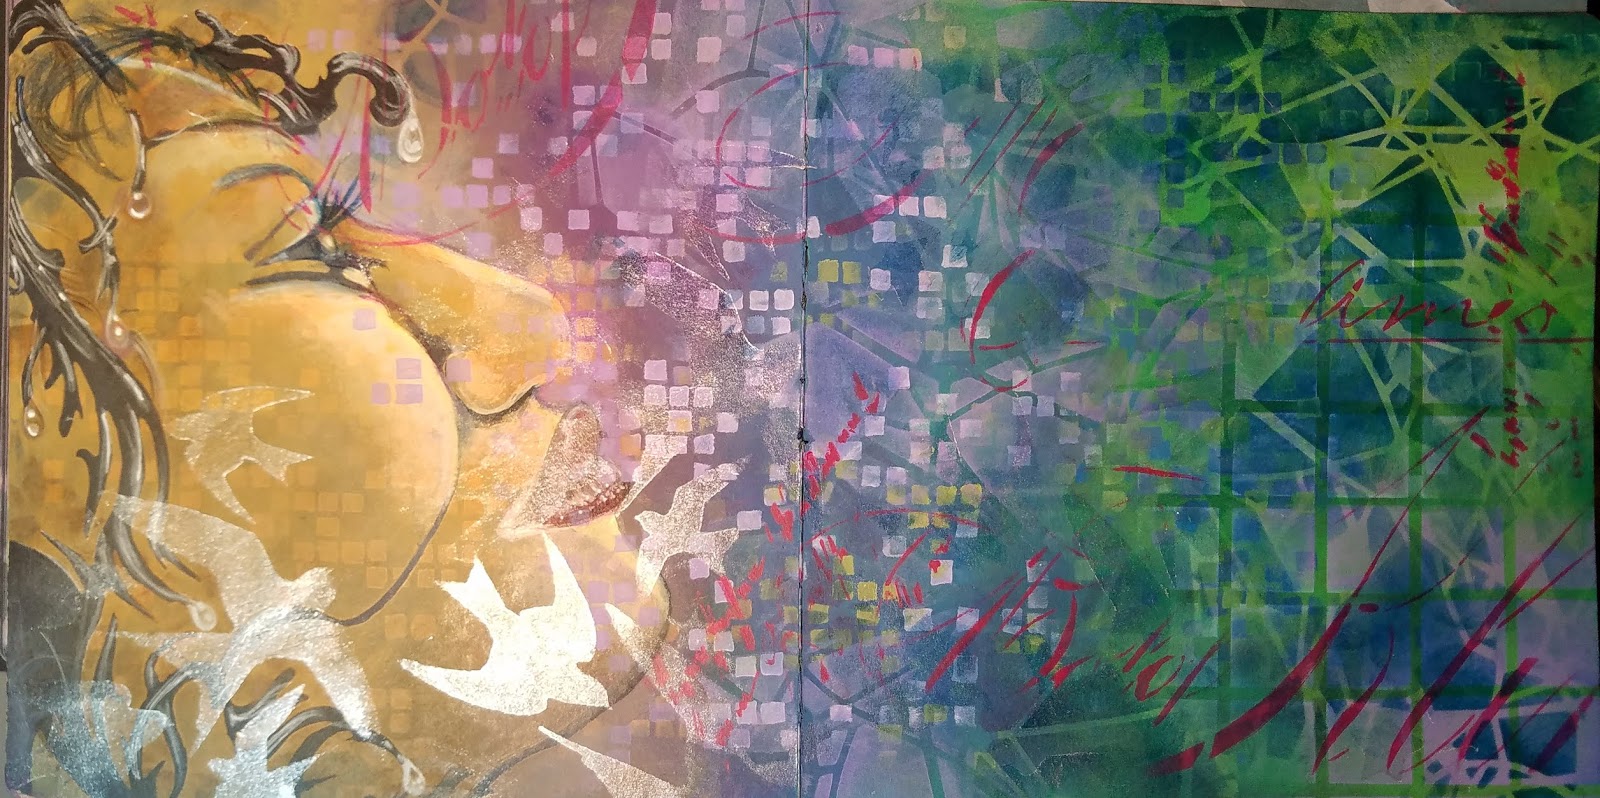
I was a freelance designer for 16 years. During that time, I used a lot of airbrush and I cut my own stencils using an X-Acto knife and poster board. You can only imagine how excited I was to find so many different stencils on the market and how happy I am to have my own line of stencils with StencilGirl® Products. It has been my goal to bring diversity to the craft and hobby industry, and I am grateful to StencilGirl® Products for the opportunity to bring them to you today in the Karen P. Collection. Today I’m going to take one of my stencils and create for you step-by-step a Tip PiC. A Tip PiC will show a hidden image as the angles are changed when you tip it towards the light. It is based on an old printing process called lenticular printing used to make baseball cards in the 60s.
Art Journaling with StencilGirl® Products by Karen P. Johnson
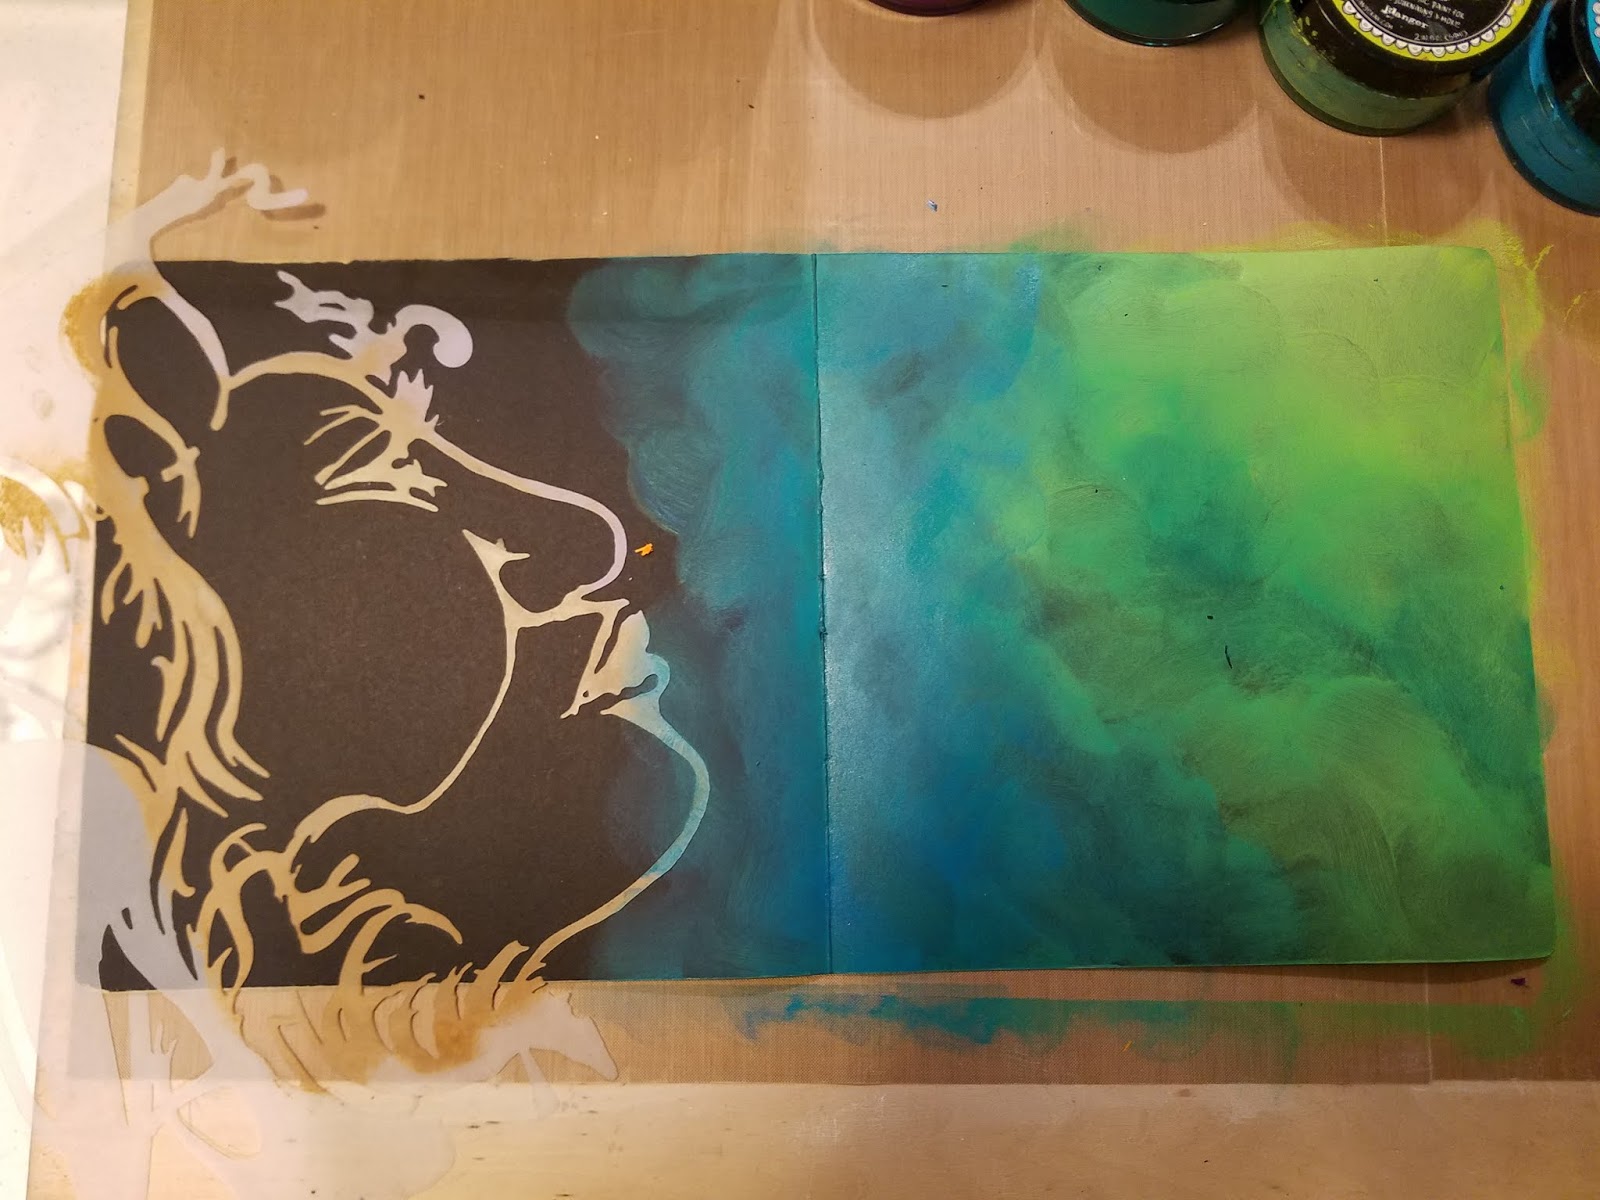
First pick your substrate and your stencil. I will be using pages from my Dylusions Creative Journal
with black cardstock and my Fulfillment Large Mask stencil.
Art Journaling with StencilGirl® Products by Karen P. Johnson
The paints I used were also from the Dylusions Acrylic Line in
Fresh Lime, London Blue, Crushed Grape and Squeezed Orange.
Art Journaling with StencilGirl® Products by Karen P. Johnson
Once the background was completed, I began breaking up the space using
more stencils from StencilGirl® Products.
Art Journaling with StencilGirl® Products by Karen P. Johnson
The first stencil is from Julie Snidle's Lost Languages collection.
I used Laid Back Lilac and Periwinkle Blue along with Squeezed Orange through the stencil.
The second stencil is the 6" x 6" stencil from Mary Beth's Private Collection 15.4.
I used Laid Back Lilac through the stencil.
Art Journaling with StencilGirl® Products by Karen P. Johnson
Then I used Cecilia Swatton's Prayer Flags stencil. If you do not have it, you should get it, because when you need it, this stencil covers a multitude of sins. And I really like it. I used StazOn solvent ink in Midnight Blue through the stencil. And to add dimension, I used Laid Back Lilac.
Art Journaling with StencilGirl® Products by Karen P. Johnson
I removed the Fulfillment Large Mask stencil revealing the face
along with the background and dimensional patterns.
Art Journaling with StencilGirl® Products by Karen P. Johnson
In order to create the browns of the skin tone, I used the complementary color of blue on the orange.
Due to its transparent quality, Distress Ink Broken China is the perfect complementary color.
Art Journaling with StencilGirl® Products by Karen P. Johnson
I used Pomegranate Seed to color the lips and to begin the process of adding detail to complete the face.
For those of you who are into the coloring book craze, my stencils offer numerous possibilities for coloring and drawing. Just choose your Weapon of Mass Creation. Here are a few of mine:
Art Journaling with StencilGirl® Products by Karen P. Johnson
Once you are happy with the details it’s time to add the magic that turns this into a Tip PiC.
You will need an iridescent or pearlescent medium with no color. This is a colorless medium you add to other colors to change them into an iridescent or a pearlescent.
Art Journaling with StencilGirl® Products by Karen P. Johnson
After placing the iridescent through Swallows stencil designed by Tracie Lyn Huskamp and Starlight Starbright stencil by Cat Kerr, you will have the hidden image of your Tip PiC.
Art Journaling with StencilGirl® Products by Karen P. Johnson
When lying flat, you will not be able to see the hidden image.
Art Journaling with StencilGirl® Products by Karen P. Johnson
I finished up this piece with stencil Cecilia Swatton's Vintage Script Stencil,
another favorite of mine, using Cherry Pie paint.
Art Journaling with StencilGirl® Products by Karen P. Johnson
When you tip these pages towards the light, hidden figures will be revealed
and birds appear to fly across the page.
Art Journaling with StencilGirl® Products by Karen P. Johnson
Thanks so much for visiting today! I can’t wait to see what you do!