

Materials:

StencilGirl® Stencils
(chose simple and/or large shape designs, unless you are very patient!)
I used
my Hi-Rise Window Shades S680 (abstract) and my Prairie Style Window L709
(figurative) stencils.
Canvas or other heavy cloth to felt onto; slightly larger than your stencil
Marker or pencil
Wool roving in various colors
Needle felting needles (size did not matter for this project)
Needle felting “pad”
Sewing machine
Method:
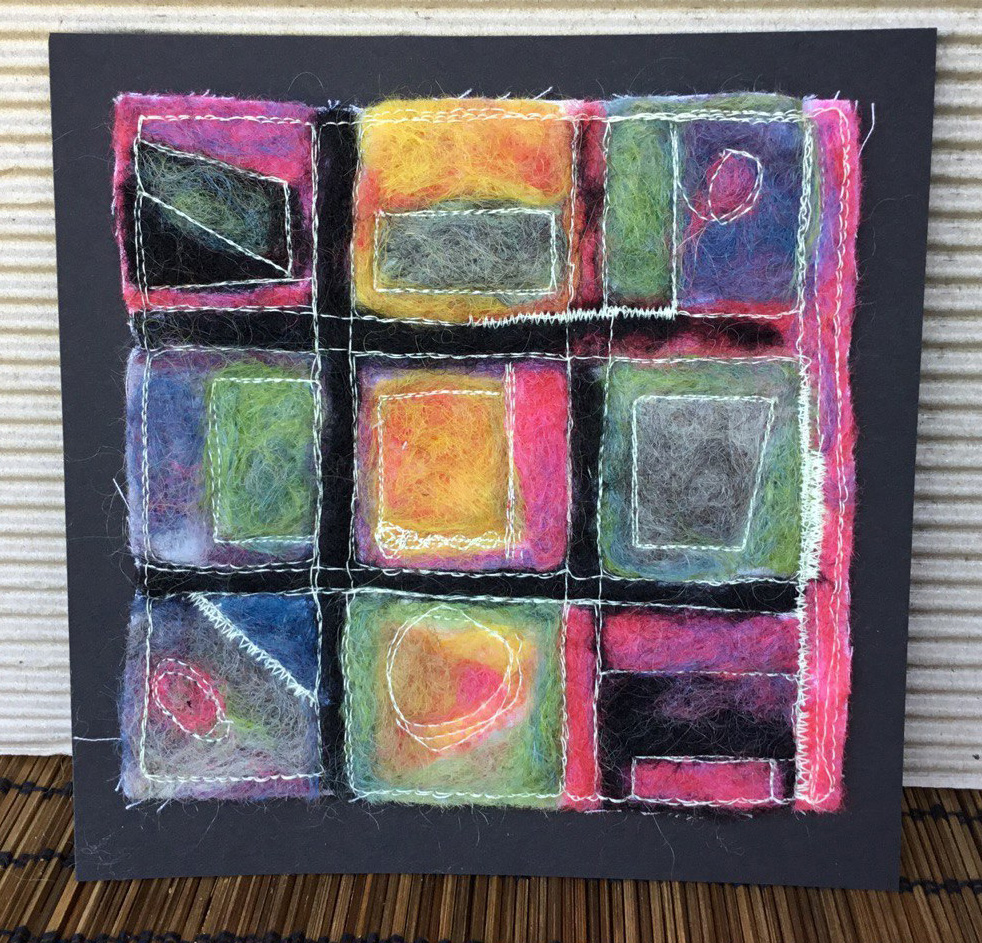
1. Gather your materials and begin by tracing the stencil design onto the fabric with a marker or pencil. The design will be fully covered with wool, so don’t worry about how dark the tracing is, it won’t show when you are done. I added a few connecting lines to the design to complete the shapes but depending on how you freely you want to work with your design, this is not necessary.

2. Before you begin felting, also trace the stencil on paper and experiment with colored pencils to define a color palette. Then, using fairly small pieces of wool roving, start working it into each area of the design until the entire piece is covered completely. Mix colors as desired and consider adding colors on top too.

3. Once you are satisfied with the felting results, take the piece to your sewing machine to add some stitching for depth and, I think, a nice finishing touch. I am not that great at free motion stitching, but I like the way my wobbly stitches look organic. I think that the stitching helps define the design. If you don’t have a free motion foot, you can use a straight or zig zag stitch with a regular machine foot instead. (PICTURE 6 and 7)


Thanks for this charming project, Cynthia!
ReplyDeleteI have been interested in felting. The projects I've seen done by felting are dolls or small animals. Your post inspired me to give felting another look.
ReplyDeleteIt isn't like I need another craft to do. I thought I've tried them all. Who knew!
Thank you so much, I am in a no man's land with felting at the moment and you have given me a frsh idea to explore.
ReplyDelete