
Hello and Happy Tuesday. Tina Walker here today with the latest StencilGirl Team Tuesday. I cannot wait to share my latest project with you, as I got to try to new techniques and products with Stencils. It doesn't get more fun than that!
Today, I will show you how to take a blank, ready to DIY silk scarve into something unique and beautiful, using Ice-dying, deColourant, and your favorite StencilGirl stencils.
Sit back, grab a cup of coffee and enjoy!
Step One
Bundle blank scarf randomly, using rubber bands to hold it together. (similar to tie-dying)

Step Two
Make a 'well' to hold the silk bundle and ice. I used scrap bubble wrap, taped into a cylinder.

Step Three
Place ice into the well, on top of the silk bundle.

Step Four
Add dye. I used a combination of natural dyes plus several shades of Color Burst. Having never used natural dye, I wasn't sure if the color would be bright enough, so I tried the Color Burst. The end result was subtle and soft, which was perfect!)

Step Five
Allow ice to melt naturally. The dye reacts with the melting ice to dye the fabric. Easy Peasy! Once the ice has all melted, un-bundle the scarf and rinse. Dry per fabric instructions.
Here are several close-ups of the subtle pattern and color. Gorgeous!


Step Six
Press scarf (per fabric instructions) removing all creases and wrinkles.
Ready a space to apply the deColourant. Apply the deColourant to the scarf with a favorite StencilGirl stencil and a cosmetic sponge. The deColourant is a thin consistancy and a little goes a long way. Once one section was completed, I rotated the stencil 90 degrees to vary the stenciled shape. Allow the deColourant to dry per instructions.
(StencilGirl Stencil used: Trees Stencil)


Step Seven
Remove the deColourant per instructions. The deColourant removes the natural dyed areas where the medium was placed, leaving the natural color behind.


To be honest, when I finished this step, I couldn't kept smiling. It's that feeling of when an idea actually works as planned. :) Many ideas never work as expected, but this technique is so easy and fail proof, I wonder why I never tried before.
Step Eight
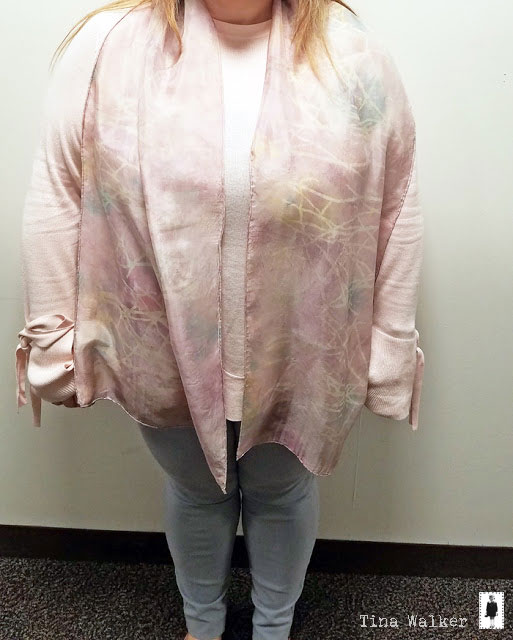
Wear and enjoy!
It's hard to get a good picture of the subtle pattern and coloration, but hopefully you get the idea from these pictures. (Thank you to my model Angie)


Here you can see the stencil image through the sunlight.


I loved this technique so much, I tried the technique with another scarf. The same steps were following above, except I used PaperArtsy Infusions as the colorant. I wasn't sure if the powder would create a permanent dye, but tried it anyway.
Using the Scattered Flowers stencil, here's my results. (I was happy to see that the Infusions worked). The Infusions created a brighter dye, so the deColourant applied areas are more visible.


I am really lovin' this technique! Thanks for stopping by! I hope you enjoyed my project today! Have a wonderful day

Tina
How cool! Have never seen ice used like this!
ReplyDeleteWonderful Tina!
ReplyDeleteThe subtle look and the brighter colors look are both terrific! Thank you, Tina, for doing a great demo on Ice Dying. I appreciate you doing the experimenting and taking the leap into the unknown to show us what Ice Dying is and showing us how simple and easy the process can be. This would be a great project to do with a friend or a small group of friends.
ReplyDeletethanks for the tips and information..i really appreciate it.. Saueskinnsluer
ReplyDelete