
Hi Everyone,
It's Jill McDowell here with you today and I'm really excited to share a stenciling project I made to honor my Dad. I used the back of a vintage dovetail dresser drawer, a print that I pulled from my own Linocut, and four gorgeous stencils from StencilGirl® Products to set the stage. The barn and the weathervane represent how throughout my life, my Dad's love, encouragement, and steady belief in me has both grounded and kept me moving in the right direction.

My Dad, a retired aeronautical engineer, is in his heart a craftsman. Like me, he enjoys working with his hands on DIY projects around the house. One of those project was this shed that he designed and built in our backyard in Portland, Connecticut in the 70's. It was outfitted with recycled french doors, flower boxes, Hex signs, and a cupola that was topped with a copper weathervane. It was quite the talk of the neighborhood back then. Looking back, I think that my Dad was actually far ahead of his time. I wish I could have his shed in my backyard now to use as my own "She-Shed" / Art Studio.
 |
| The shed my Dad designed and built in our backyard in Portland, CT |
I felt lucky when I found this jewel of a piece of wood hidden in a scrap pile. Once it was the back to a dovetailed dresser drawer, now it is a serendipitous substrate for my mixed media piece. As an engineer, my Dad marvels at the time and craftsmanship involved in making furniture with dovetail joints. Their tensile strength is resistant to being pulled apart, much like my family living now living 900 miles a part.


Meanwhile, I made a print from a Linocut I had carved on a linoleum block. The block was originally designed to be printed on a printing press, but I've found that I can also use it to print at home by hand.
I inked the block with black StazOn and then gently placed SUMI-E Painting Sketch Paper, (a relatively inexpensive Japanese rice paper) on top.

The wood only needed a light sanding to ready it for the project. For the first layer, I adhered squares cut from vintage wallpaper with matte medium.

Which I then proceeded to cover completely with gesso that I scraped on with a Catalyst blade.

Using a make-up sponge, I pounced Titan Buff paint though the 9X12 stencil from the June 2013 stencil set designed by MaryBeth Shaw. In the back off my mind, I was thinking how funny it was that I was using a stencil inspired by wallpaper to cover up actual wallpaper.

I tinted a glaze with Golden's Quinacridone Nickel Azo Gold and applied it with a baby wipe to add depth and color.

When it dried I added a final layer of stenciling using the same stencil in Quinacridone Burnt Orange.

I inked the block with black StazOn and then gently placed SUMI-E Painting Sketch Paper, (a relatively inexpensive Japanese rice paper) on top.

I burnished the entire page with a baren using a lot of pressure.

Then I pulled the print.

The sky area was cut off and discarded, leaving only the structure of the building to work with. Then I began adding color with washes of acrylic paints.


I used Golden paints to create the look of copper and patina on the roof of the cupola, (more information on the colors I used follow below). I'm really happy with the results.

MaryBeth Shaw knows that using repetition is an excellent way to strengthen the overall design of any composition. I was delighted to find that she had included a proportionately miniaturized version of her Wallpaper stencil in her ATC Mixup #2 Stencil.

I started playing with the stencil on piece of scrap paper and I found that the smaller design reminded me of a Pennsylvania Dutch hex sign, much like the ones hanging on either side of the French doors of my Dad's shed. Another, serendipitous moment!

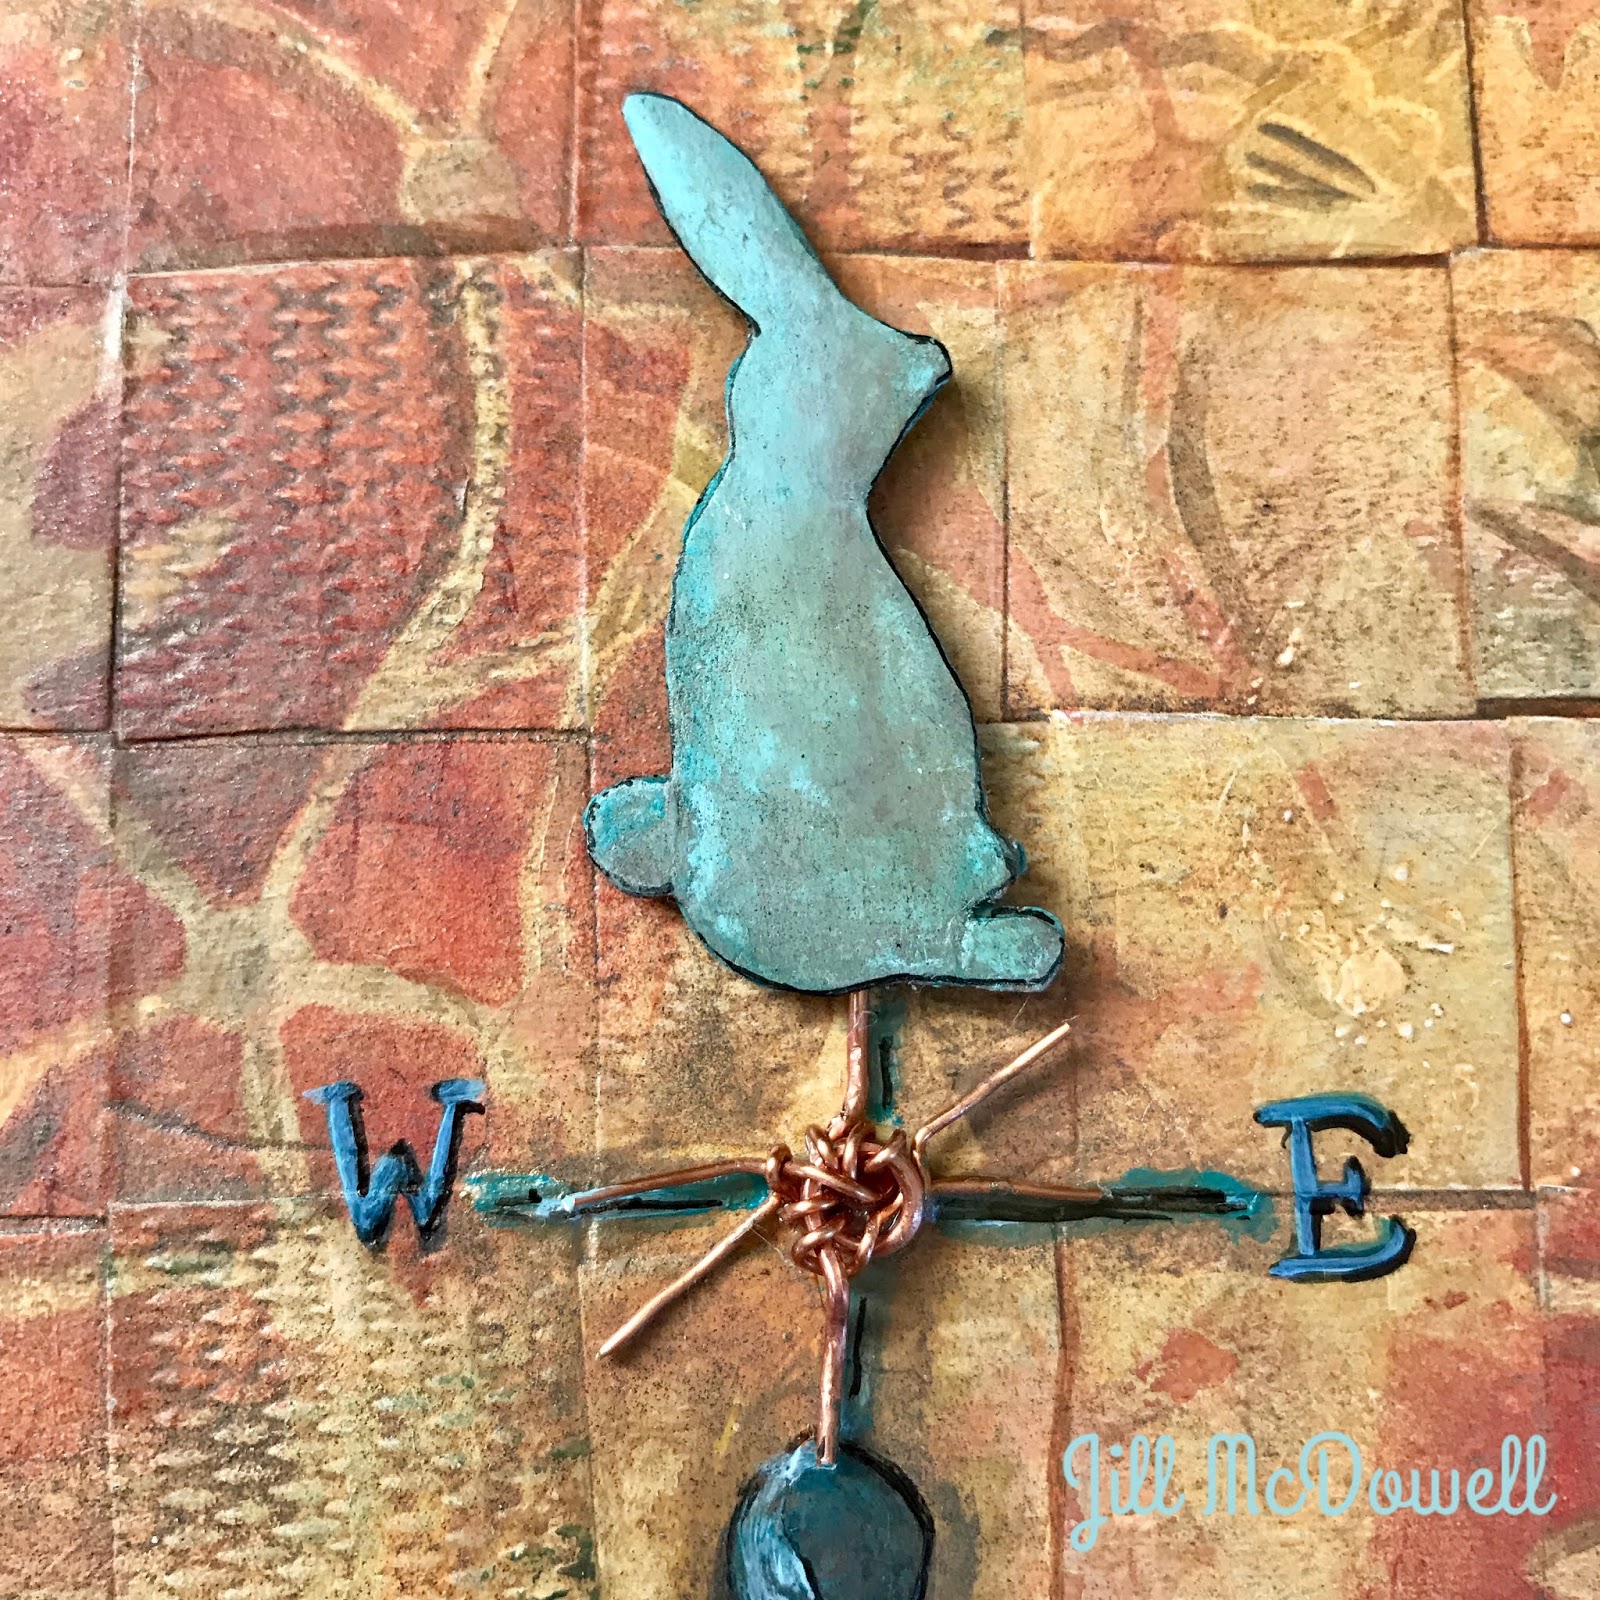
Time to create the weathervane. I knew from the start that I wanted to use a character from Carolyn Dube's Little Figments of Imagination Stencil. Carolyn's characters are just the sweetest, just the right size for my project. I choose to work with the Bunny as it reminded me of the nickname of a dear, old family friend.

I painted a piece of card stock to look like copper and patina. Working wet on dry, I laid down my first layer of paint with Iridescent Copper followed by a layer of a Paynes Grey wash.

I let those layers dry and then added a Quinacridone Burnt Orange wash followed by more Iridescent Copper to create the third and fourth layer. I topped it off with a wash of Cobalt Teal. (Note: all paints are Golden brand). I think the result is gorgeous.

I used the stencil to trace bunny onto the back of the "Copper", aka painted card stock, and then cut him out. Unfortunately, the copper and patina colors were a bit too strong for the little guy. But, that was easily remedied with washes of Cobalt Teal, Light Phthalo Blue, and Light Phthalo Green, (three of the newest in the Golden color family) that I tapped on with the tip of my finger until I got the effect I was looking for.

After he dried I polished him up a bit with a not-so-moist baby wipe, and Voila...

Side note: You'll laugh when I tell you that I actually made quite a few bunnies but they kept disappearing. What can I say? They were small and blended in with the surroundings really well... The funny thing is that they didn't disappear all at once. I'd make one, leave it to overnight to dry but it would be gone the next morning. So then I'd make another one, only to have the same thing happen again. But I perservered on and finally captured one. I'm sure the others will turn up at some point, just probably out of some magician's hat...
I used a piece of wrapped copper wire for the spokes of the weathervane and directional elements from Mary Nasser's Map Symbol Mini Stencil. Mary's stencils were proportioned perfectly for my weathervane!


When honoring your Dad with a piece, I think its appropriate to have a dedication on the back.
I learned something fun when I used Mary Nasser's Map Symbol Mini Stencil on the dedication. If you use a dark color to stencil the design;, and then flip it over and position it so that the openings and the stenciled areas just slightly overlap and stencil using a lighter color, then you get a 3-D effect. Pretty Cool! (Hmmm, I wonder if you can do that with any of her other stencils? I'm going to have to try that.)


StencilGirl® Stencils Used:
 |
ATC Mixup #2 Designed by MaryBeth Shaw
Little Figments of Imagination Designed by Carolyn Dube
Map Symbols Mini Stencil Designed by Mary C. Nasser
I love it and all the symbolism behind the piece, very thoughtful! Beautiful work and I wonder where those bunnies hopped off to? lol
ReplyDeleteLol Sandy, only one has showed up so far! They are hiding somewhere, perhaps platting?
DeleteDelightful project and results! Thanks for sharing your inspiration!
ReplyDeleteI’m so glad that you liked it Terry. Thanks for commenting.
DeleteOne word: exquisite! Love your explanation and tips. And thise bunnies! Probably hiding in the garden gnawing on baby veggies😆
ReplyDeleteLol! I’m afraid that they will all show up at the same time and overwhelm me in some Saturday Night Live parody...
DeleteJill, what a beautiful tribute to your father! This is a great project!
ReplyDeleteThanks Cathy. I do love using old items in my art. Nothing is safe around me.
Delete