Hi
everyone! Cynthia Silveri here! I'm honored to be back on the blog today sharing an art journal page
with you. Last fall I enrolled in Wanderlust 2020 (can't wait for Mary Beth's
lesson!) which has been very insightful for me. By way of sharing some of my
inspiration, I decided to combined ideas and techniques that I've experienced
so far using my Japanese Influence stencil. As Mary Beth has so often reminded
us to make stencils our own, I decided to extend the way I use this stencil. To
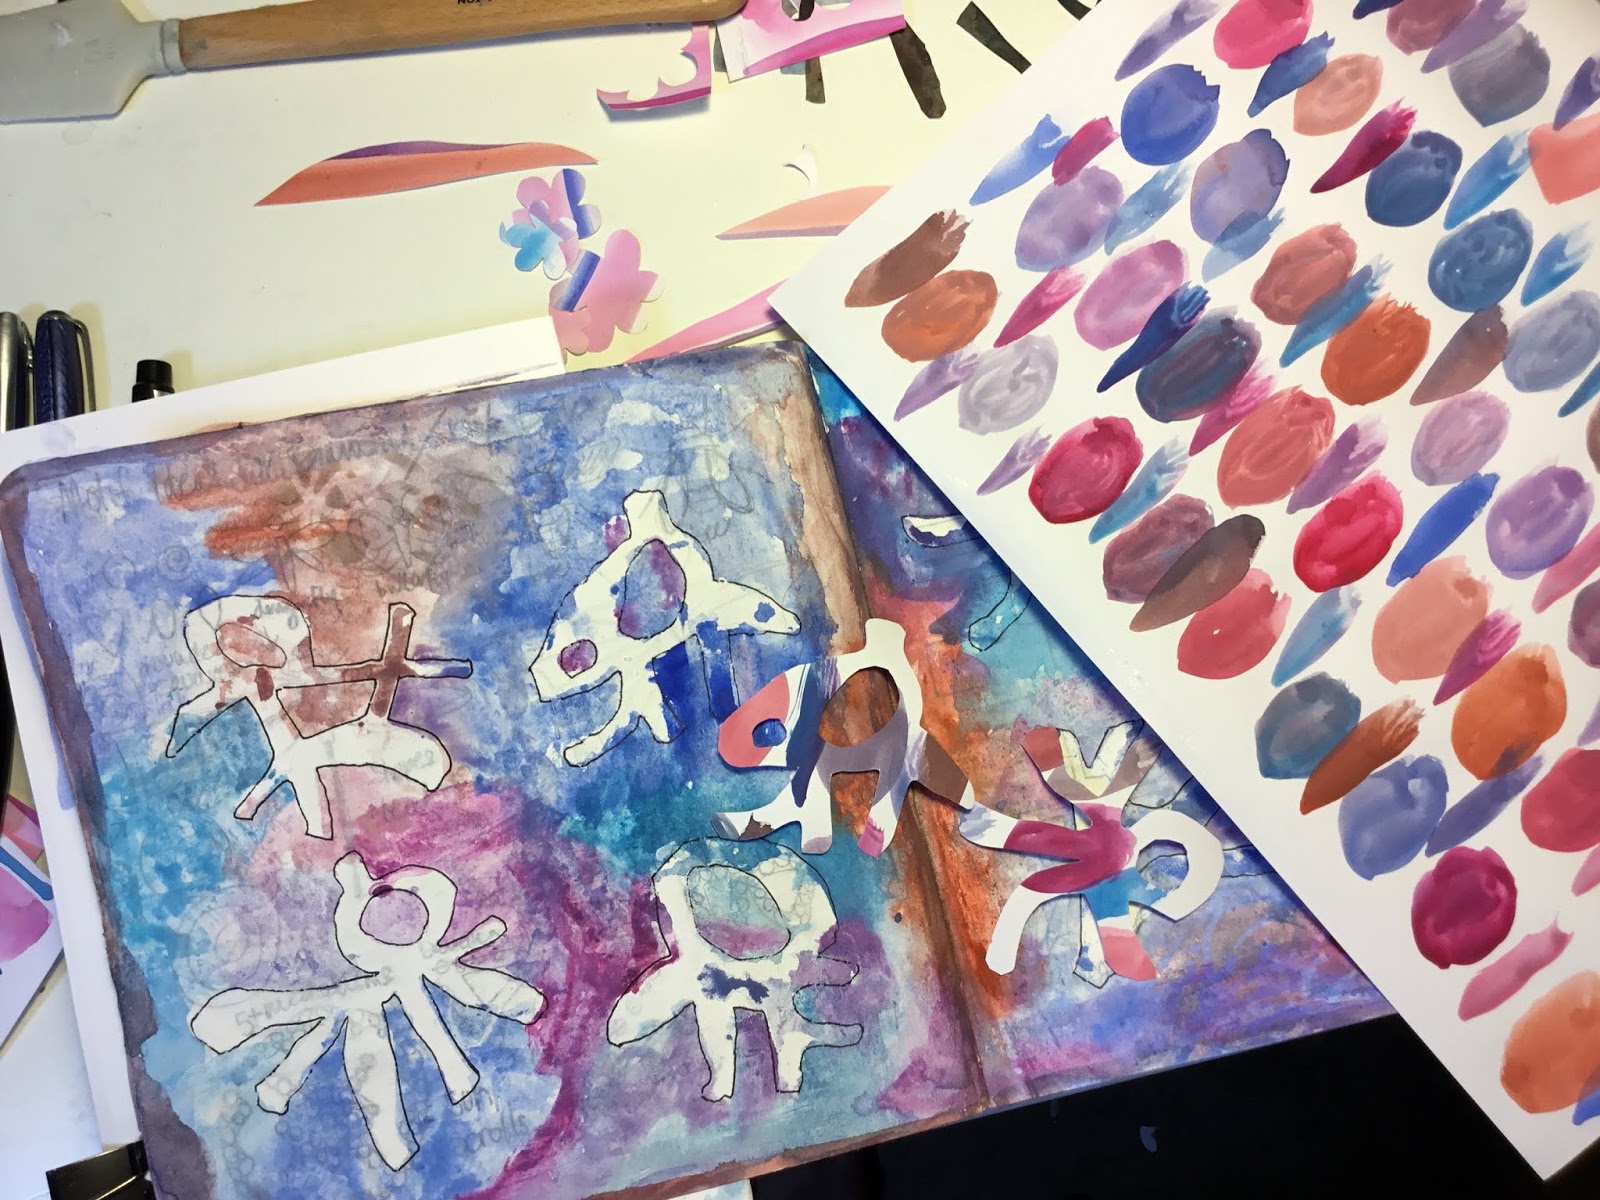
do that, I (boldly!) cut each symbol out of the frames to make twelve “mini”
masks. I kept the rest of the stencil (“empty frames”) to use on a different
project. Here's what I did:

Materials:
Art
Journal
Acrylic and/or Gouache Paints, any colors (keeping them analogous to avoid
“muddy” colors)
Japanese Influence stencil L669
Pixie Spray (optional)
Round paint brush
Paper for making collage
Uni-ball pens in white, silver, gold
Fountain pen and black ink (India ink) or other black pen or marker
Stabilo Woodies and/or colored pencils
Stamps
Stazon Ink (black, stone gray), Ranger Distress Ink (weathered wood, walnut)
Clear gesso
Scissors
Matte medium or other glue
Technique:
1.
Cut apart the stencil to make
mini-masks.

2.
Arrange artfully on journal page.

3.
Loosely apply watery gauche around
each of the masks. (Use Pixie Spray if desired to help hold them in place.)
After everything is dry remove the masks and outline the shapes with black
waterproof pen.

4.
Use up any remaining paint to create
painted collage papers that will “match” the colors already applied to the
page.

5.
On the dry painted paper, trace
around several of the stencil masks and cut them out to add as collage
elements. Cut out other shapes as desired to make a pleasing composition.
6.
Glue down with matte medium or other
glue. Add a layer of clear gesso all over the collaged page and let dry
completely.

7.
Using stamps, add more layers and a
focal point. For my focal point, I used this owl stamp that I carved based off
an image that my daughter created in third grade.

8.
Using Uni-ball pens and fountain
pen, woodies, etc. make more marks and doodles on and around the collage
elements, stamps and base layer stencil designs. I also used Ranger Distress
Inks around the edges of the art journal pages to help “frame” the entire
spread. Have fun and keep going to create a lot of color, texture and interest.
Sometimes the smallest details add in ways that are not readily apparent!

9.
Finally, add a quote. I used an
anonymous quote “Observe and reflect...become a little wiser each day.”

I love this spread, and loved the innovative way you used the stencil. Thanks for sharing your ideas and technique!
ReplyDelete