Hi, everyone! Helen Shafer Garcia here! The word Nourishment plays a big role in my designs based on growing things and gardening. I gently coax my plants to grow and thrive. Likewise, these StencilGirl stencils will give you the power to “grow” plant shapes with ease. My 3 stencil designs give you so many possibilities for succulent shape images that can be repeated and arranged in beautiful ways.
Here’s a great way to create papers and cloth designs for book structures, collage, and stitch substrates.
1. Start out by
stenciling with acrylics on different surfaces. I found the linen set of
cocktail napkins at an antique store.
The paper I used is
called Masa paper. It’s a rice paper which can be painted on. Stencil on the
fuzzy side of the paper.
This side of the paper has “tooth” for the paint to grab onto.
I
also used some text papers from a 1950’s Westinghouse TV manual with bold
illustrations.
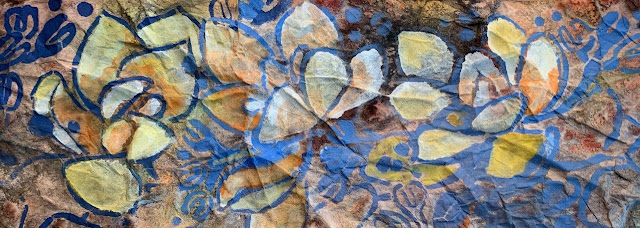
Stencil layers of acrylics on some of the
papers, using different colors from a limited palette
(I used Cadmium Orange, Ultramarine Blue,
Black and Titanium White.) This is an opposite
color combo which gives you some beautiful grays.


2. Masa paper
Take the Masa paper and
crumble up into a ball. Soak in cool water for about a minute.
Take the Masa paper out
of the water and carefully unwrap.
Use an up and down motion
to lay the paper flat on the table. I like multiple wrinkles in my works. Don’t
be tempted to spread and press the paper sideways with your hands. You’ll
damage the fibers of the paper.
There are endless ways to add color to this paper. For this approach I used India ink, Seth Apter’s Izink dye ink sprays, and watercolors to achieve this antiqued look.


Hint: Rather than paint strokes with your paintbrush, drop the paint using lots of water to the surface. If you brush too much on the wet paper it will fall apart. Just touch the surface with your brush.
3. Linen and print paper
After stenciling the designs, add watercolors and color pencils to embellish! Here are a couple of different techniques to try.
While stenciling, I added a bit of water to my stencil brush and let the acrylic paint flow through onto the surface. It created softer edges. Then I flipped the stencil to create a monotype. This makes a perfect start for color pencils.
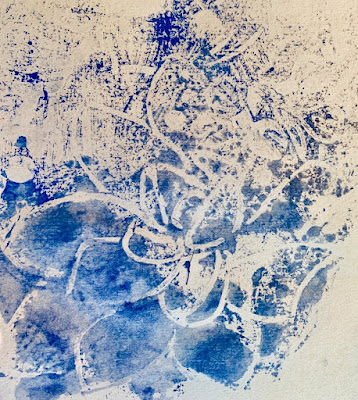
I was surprised at how nicely the unwashed linen accepted watercolors and dyes. I used a bright turquoise dye spray on the linen napkin, let it dry, and then painted with watercolors. The dye ink bled beautifully with the watercolors, creating soft edges.


4. These designs just beg for more embellishment after stenciling. I could spend hours playing with colors and textures. I also love Book Arts and decided to tear each design page to smaller pieces to create a book structure.


I have a story behind the name of this project and will continue the book making process and story on my own blog. Take a look.

Materials:
Helen Shafer Garcia
stencil designs - Echeverias, Echeveria Ballet, and Filigree Sprigs
Professional grade
watercolors
Acrylic tube colors-
Cadmium Orange, Ultramarine Blue, Black, Titanium White
India ink
Seth Apter’s Izink dye
ink sprays- Turquoise, Tea
Premier Prismacolor
Pencils
Masa paper
Linen napkins
Ephemera papers
Hi Helen! Your artwork is always so beautiful! I just love your style. Going to visit your blog now. I loved being a student in your workshops.
ReplyDeleteTake Care and Stay Positive!