It’s Jill McDowell here with you today wishing you a very happy and healthy New Year. It’s hard to believe that 2021 has come and gone and now we’re knocking on 2022’s door. Like so many if you, I’ve traded in my New Year’s resolution for a Word of the Year. Selecting a Word of the Year takes some thought as it requires you to think about your goals for the future and identify what you need to do to make them a reality. A good word will be your umbrella, summarizing your intentions underneath it and protecting them throughout the year.
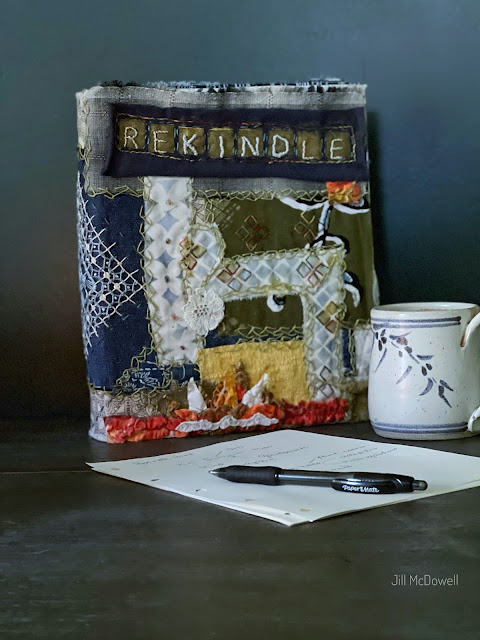
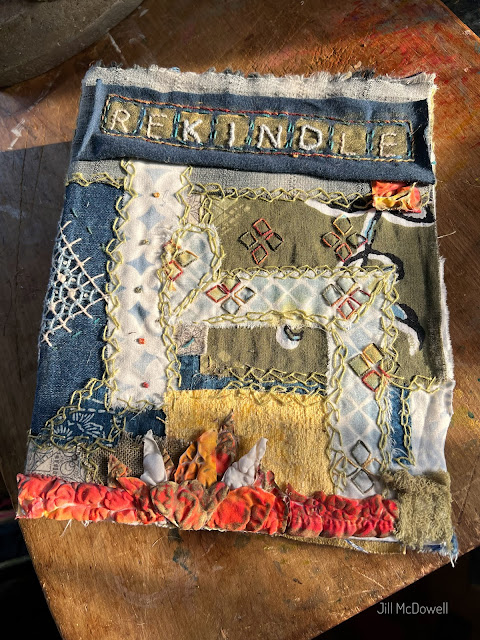
This year I chose Rekindle as my Word of the Year. As someone who’s recently retired it embodies my desire to reawaken, renew, revitalize, and reactivate my spirit, (all rekindle synonyms) as I transition into this new and exciting phase of my life. It also appeals to me because embedded within are two additional words that are important to me:
- Kin - since I’ve recently become a Grandmother for the first time and am expecting a second grandchild in just a few weeks this takes on even more importance this year,
- Kind - being kind is a trait that I’ve always strived to embody.
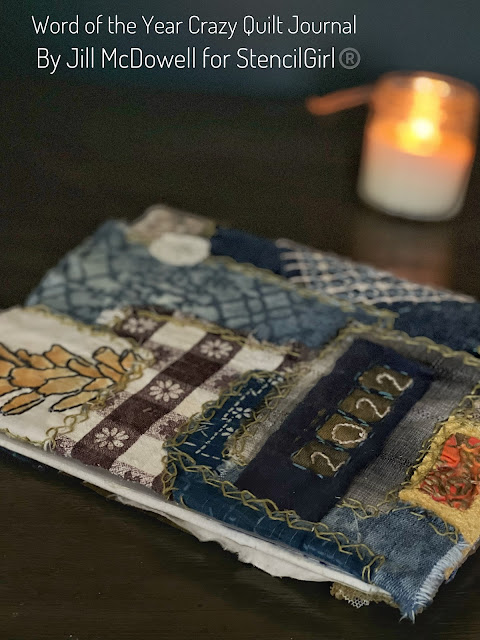
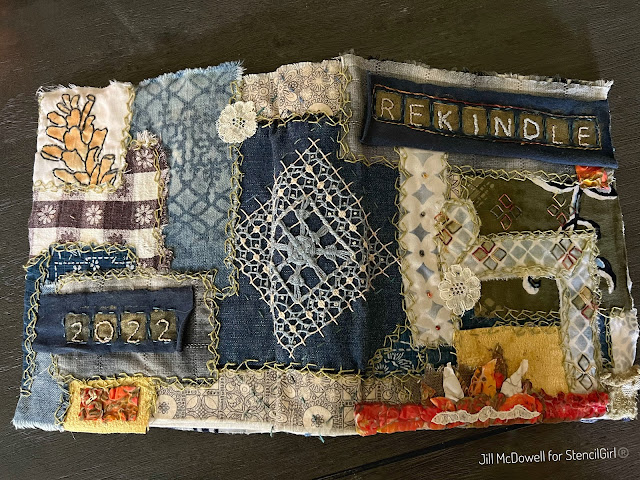
This year I was inspired to turn my Word of the Year into a living, breathing notebook-styled journal to organize my thoughts and to house the inspirational pics, lists, and other related ephemera I collect. Inspiration for covering the journal struck me while watching a You-Tube video by Mary Beth Shaw. In the video she demonstrated how she covered her art journal with fabric scraps. Her eclectic styled books reminded me of a Crazy Quilt that I made in Junior High. (As I look back, it occurs to me that that quilt was probably the first collage I’d ever made… unfortunately I have no idea where it is now.)
Crazy Quilts are made from a hodgepodge of irregularly shaped fabric scraps randomly hand stitched together. The quilts that I have seen have top stitches ranging anywhere from the simple line of a running stitch to stitches that form elaborate patterns. I find that the repetitive stitching is easy and relaxing, providing me with plenty of time to contemplate my goals and intentions for the year. But I’m getting ahead of myself. First lets talk about the book I choose to upcycle into my 2022 Word of the Year journal.
The Journal Base
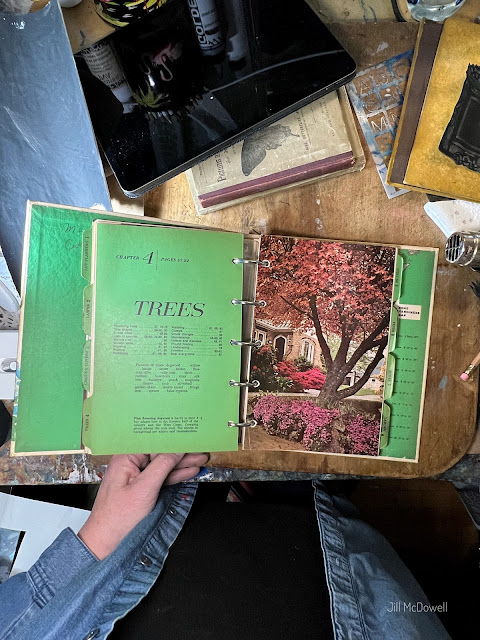
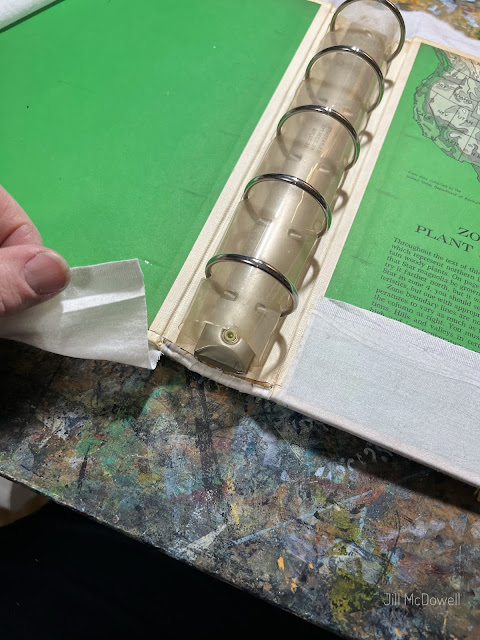
Visit any thrift shop, library sale, or your mother’s bookshelf and chances are good that you’ll find a ring-bound book in the stacks. Cookbooks and and other how to books are frequently published in this style. I chose an old gardening book for my journal base. While I could easily have just used a new three ring binder, I liked the idea of saving an old book from the landfill. It brings good karma.
There is usually a good sturdy binder inside these books as well as tabbed dividing pages that will help you to organize and document your intentions. Eventually I plan to cover and label the tabbed pages with categories consistent with my Word of the Year intentions and goals.
And while the binder holes probably won’t coincide with your everyday, run of the mill three-ring binder, most of us have punches we can use to make holes in the found papers we choose to fill the binder with. Think junk mail envelopes, greeting cards, paper cut from shopping bags, etc…. Fill it with whatever you have that would otherwise go into the landfill.
Then I quickly drew some squiggles onto the cover to represent fire flames and wrote my thoughts in them. I intentionally wrote in my worst handwriting to keep my thoughts to myself.
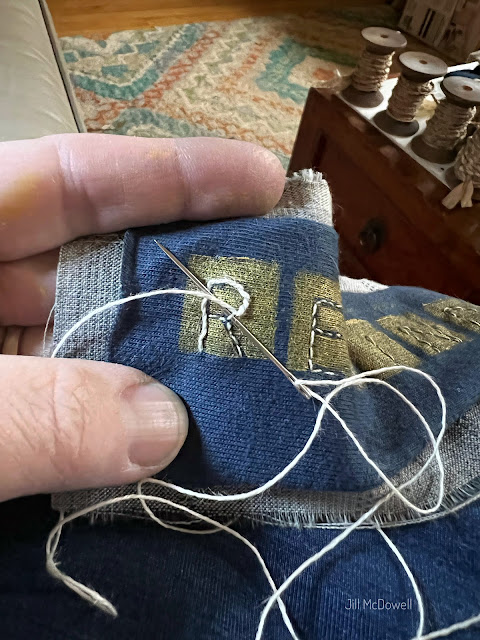
Work in progress. Wrapping the stitches really does make a big difference in making the letters pop out. Am]nd it covers up any irregular stitches.
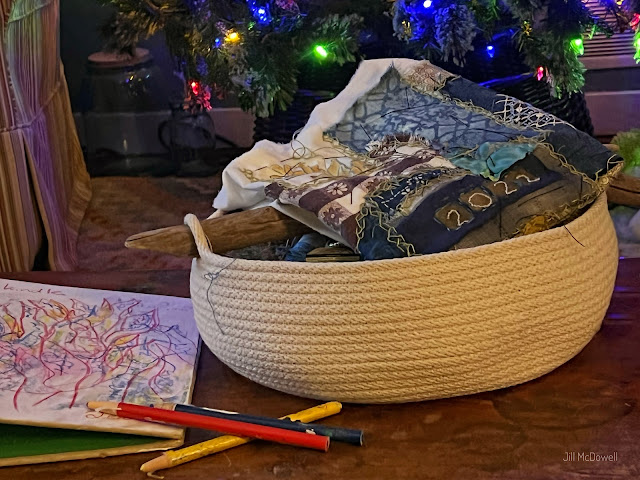
I kept a sewing basket on my coffee table so that my stitching project was close at hand whenever I watched t.v.
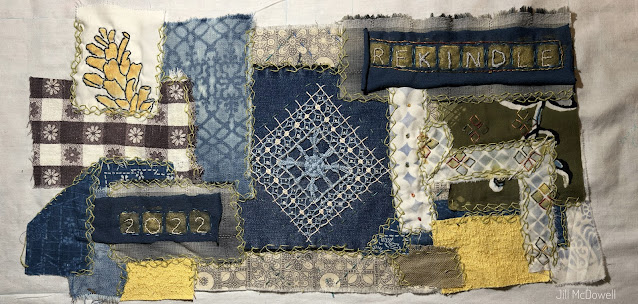
Once the scraps down were all stitched down, I removed the thread used to baste it. Then my little Crazy Quilt was ready to be glued onto the book.
Then I carefully positioned the front (right hand side) of the crazy quilt cover over the front cover, paying attention that the top, bottom, and sides of the fabric were positioned where I wanted them to be. I tackled the binding section next followed by the the back cover.
For the inside back cover I used my own stencil design from the December 2020 StencilClub collection, some Japanese fabric and a cyanotype photogrammetry that I printed on vintage linen fabric.
Lastly I wrapped the covers in waxed paper (front and back), leveled each over a book, weighted them down, and let the dry overnight. (I’m kind of in love with those brass frog bookends…)
No changes needed for this tabbed page, it’s already perfect for this project.
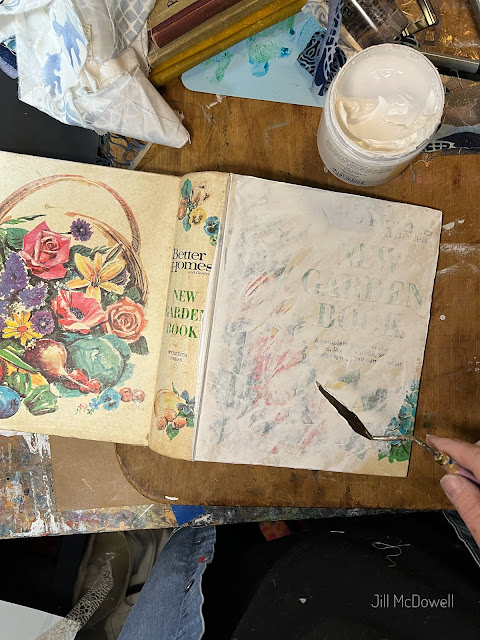
While I don’t plan on using the books pages in this project, I’m keeping them for collage parts and other junk journal pages. The ink that they are printed with is rich and gorgeous, so I’m thinking about trying to experiment with them on my Gelli plate. They may just make wonderful transfers.
My plan was to encapsulate some of my intentions underneath the crazy quilt cover. So I gesso’ed the front cover.
I placed the book on an old sheet and traced around it to create a backing for the crazy quilt and then I cut it out, leaving a 2 or three inch border on each edge. (I cut the fabric the same way as if I was covering a schoolbook.) Then I put the book aside until the cover was finished.
Crazy Quilt Journal Cover
I scoured my stash for fabric scraps to incorporate into my crazy quilt journal cover. Anything was fair game including stitching samples, linen cyanotype prints, pieces of table cloths, cut offs from jeans, t-shirts, and other clothing, satin ribbons, and of course stenciling that I had done on old bed sheets. Anything made of fiber can be used. I also gathered up yarns and threads that I thought might work to stitch with. These are just a few of the scraps I considered.
Stenciling Fabric Scraps
Once I had gathered my collection, I started stenciling on some of the fabric scraps.
Carolyn Dube’s Hip to be Square Stencil by StencilGirl® is my absolute favorite stencil for stenciling words. Each letter is uniformly sized with regular spacing between the letters so stenciling words is a breeze. And the stencil includes letters too. This stencil comes in two sizes. I have the small stencil in my collection, but after seeing how easy it is to use, I’ve moved the large one to the top of my wish list.
Not sure if you’ve got enough room to fit the whole word? Have issues centering them? Here’s a tip for you. Before committing to the placement of the letters on your fabric, make yourself a template on tissue paper. Then cut it out and audition it on your fabric. This will give you an opportunity to make sure that there is enough room for to your design and to work out the best placement.
Whenever I plan on stitching on stenciled fabric, I mix one part acrylic paint (I used Golden Iridescent Gold Deep (Fine) for this project) with one part GAC 900 fabric painting medium and apply it through the stencil with a stiff brush. Then I heat-set the design following the directions on the fabric medium. This will keep the paint from getting too stiff to stitch through.
I choose fabric reclaimed from an old t-shirt to stencil my Word of the Year on. I really enjoy the feeling of stitching on t-shirts. The edges of the fabric will roll back onto itself rather than fraying.
Then I pinned the stenciled t-shirt fabric onto a piece of vintage Japanese cloth and began stitching. I used a Holbein stitch, (a.k.a. double outline stitch) to outline the letters and to join the two pieces of fabric together. The Holbein stitch, used frequently in Blackwork embroidery, is an easy stitch to learn. First you use a running stitch to outline the letter.
When you get to the end, you turn the fabric around and use the same running stitch to fill in the blank spaces. It’s a “neat” stitch since if you do it precisely, the stitches on the front of the fabric will be the same as the stitches on the back. This stitch was frequently used to decorate collars and other items that could be seen from both sides.I like to finish my Holbein stitch up by wrapping the thread around each stitch. It evens out any imperfections and adds bulk to the stitch.
Constructing the Crazy Quilt
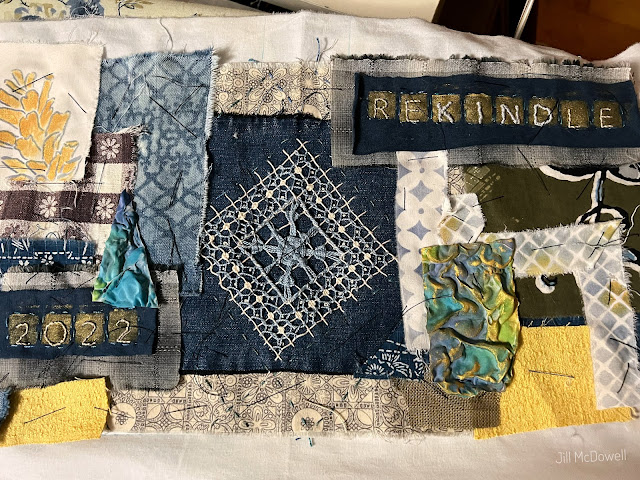
Next I constructed the actual Crazy Quilt. First I pinned my fabric scraps onto the backing that I’d cut previously from an old sheet. When I pinned the scraps I made sure that every scrap overlap another scrap. I continued to add scraps until the whole area was covered.
It’s very faint, but if you look closely you can see markings t that I made in the border showing me the the beginning and end of the binding. This is helpful to use as a placement guide since you need to think about the placement of the fabric on the bend. It’s also important note that the left side of the quilt will cover the back of the journal and the the right of the quilt will become the front cover.
I kept a sewing basket on my coffee table so that my stitching project was close at hand whenever I watched t.v.
I used an open stitch (yellow/green linen thread/yarn in the pic below) to outline each of the fabric scraps, join them together, and bind them onto the backing. (I was taught that this stitch was called Turkey Tracks but I think that may have just been a nick name.) But you should pick a stitch that you are most comfortable with for your first crazy quilt.
Then I outlined some of the stenciled images in dark grey DMC #8 Peale Cotton Thread. StencilGirls® Pinecone #4 stencil, designed by Jane LaFazio was used to create the design in the pic below.
I took Mary Beth’s advice and glued the fabric to the journal with PVA glue thinned with water. In her video, she recommended using a white glue that dries clear with a matte finish.
I worked in sections, applying the glue to the front cover of the book first with an old glue brush. I loved the idea of sealing my intentions into the book cover itself. No one will ever know that they are there,(except of course, you and me).
Here’s a pic of the binding. I choose a stitching sample on reclaimed denim as the focal point.
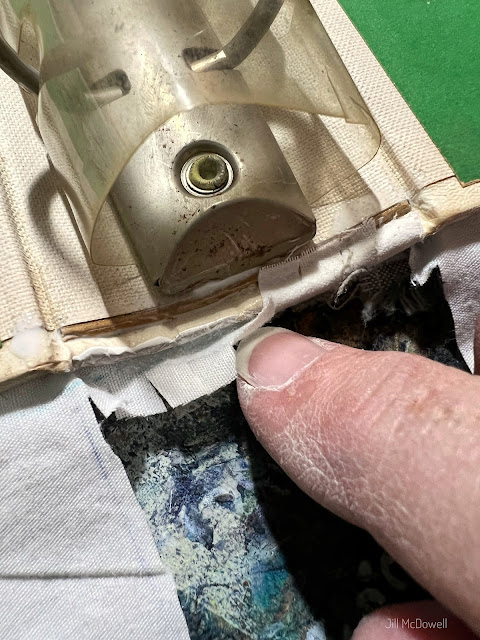
Finally I opened up the book and worked on gluing the crazy quilt borders to the inside covers. I worked on the binding area first. Since this area was rounded, I cut the excess fabric away, clipped the fabric edges closely, and then applied the glue to the book, careful to cover the book’s edges with the glue. Then I used my fingers to roll each section up and over the edge onto the binding. The PVA held the fabric in place without too much fiddling.
Finally I wrapped the top and bottom edges on both the front and the back inside covers followed by the ends. Since I planned on covering the inside covers with more scraps I didn’t worry much about being neat and precise.
To finish the inside covers, I glued more fabric scraps onto the inside covers. I used Terry Stegmiller’s Layered Salad Stencil by StencilGirl® on the front inside cover.
I think the back cover is my favorite section.















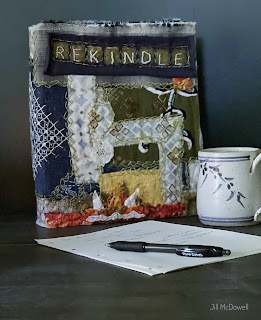
What a beautiful and inspiring creation! Thank you, Jill!
ReplyDeleteThis is a stunning, delightful creation! I love it, thanks so much for sharing!
ReplyDelete