Merry Christmas and Happy Holidays from Down Under! While we are sweltering in the summer sunshine, my Irish bones misses the Northern Hemisphere Christmases - dark and cold, snuggled up by the fire. I think this is why every Christmas I create snowy scenes in my art journals to recreate the Christmases of the past.
This page is inspired by the talented Claire Stead (art journal love on Youtube and Instagram) and her amazing lace cut alphabet pages. It is such an easy technique, but a really effective framing tool for a page or a card. If you don't like cutting, try using a die cut machine to cut out the letters and adhere them on a piece of transparency or vellum to re-create to look easily.

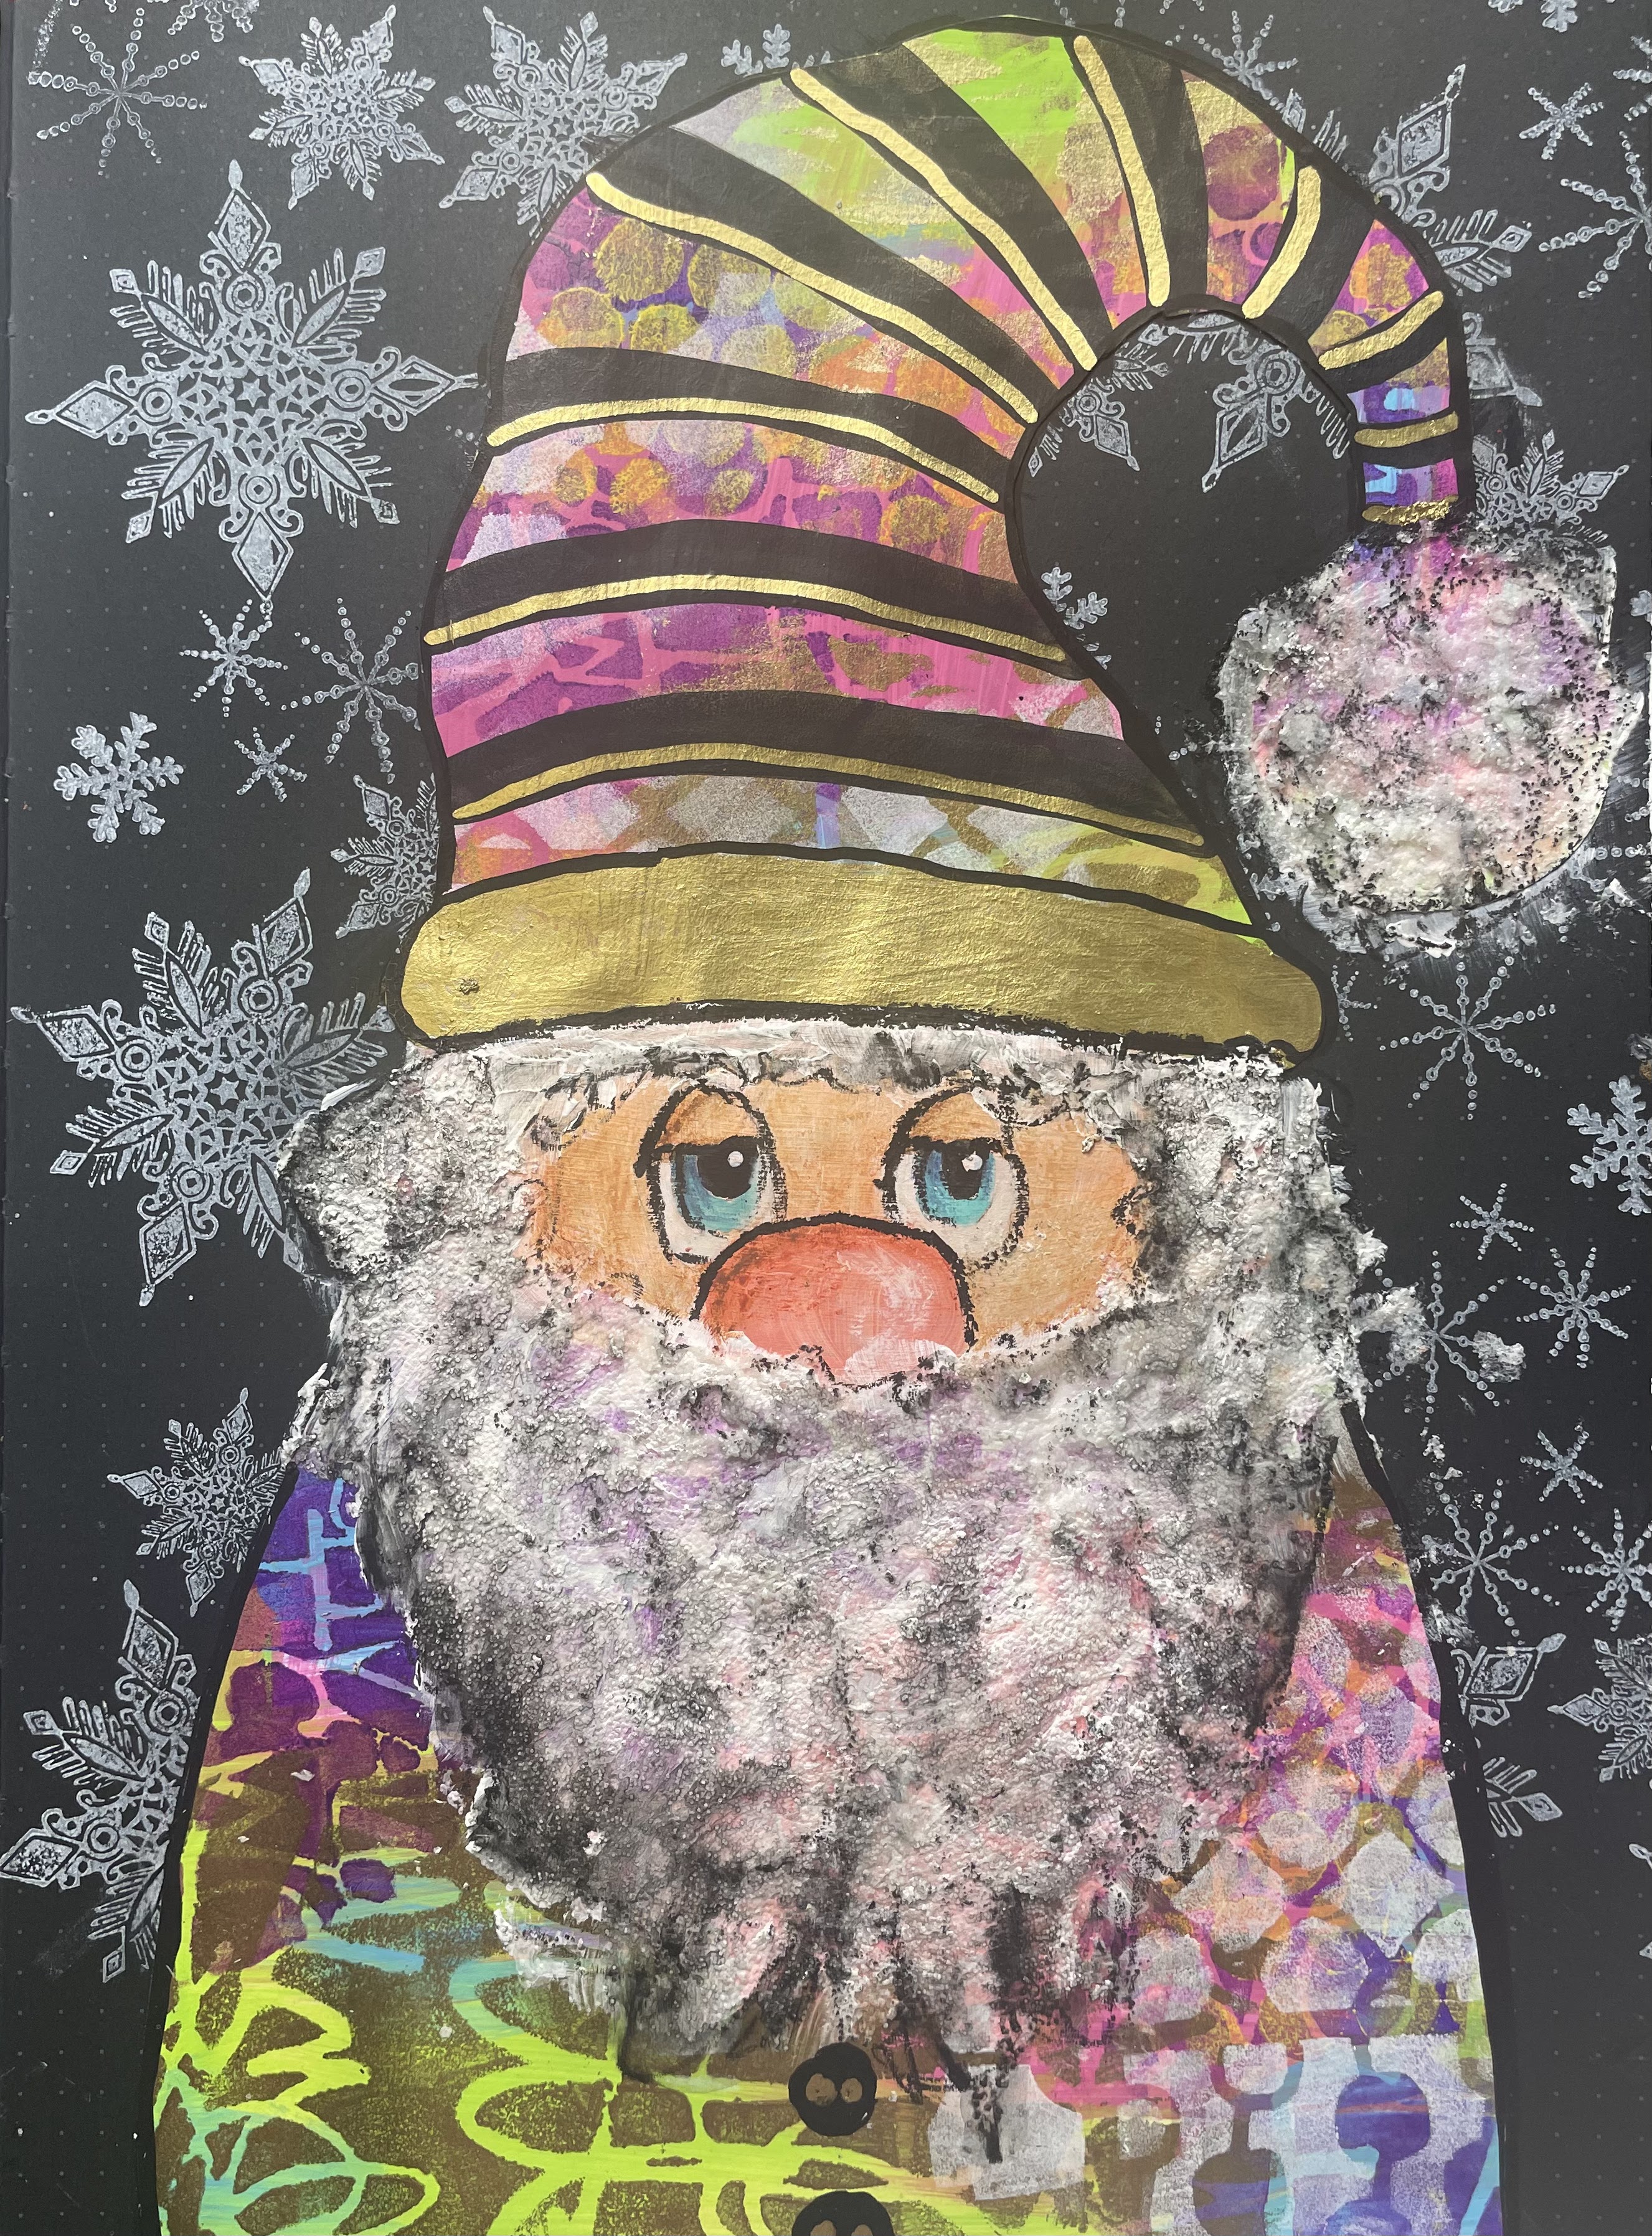
To start I created a colourful background with acrylic paints and layered over lots of stencils with different patterns. None of these stencils are ' Christmassy' but choose whatever you have at hand. I also used a very bright colour palette with a gold metallic thrown in - you choose whatever colour palette suits your Holiday aesthetic.


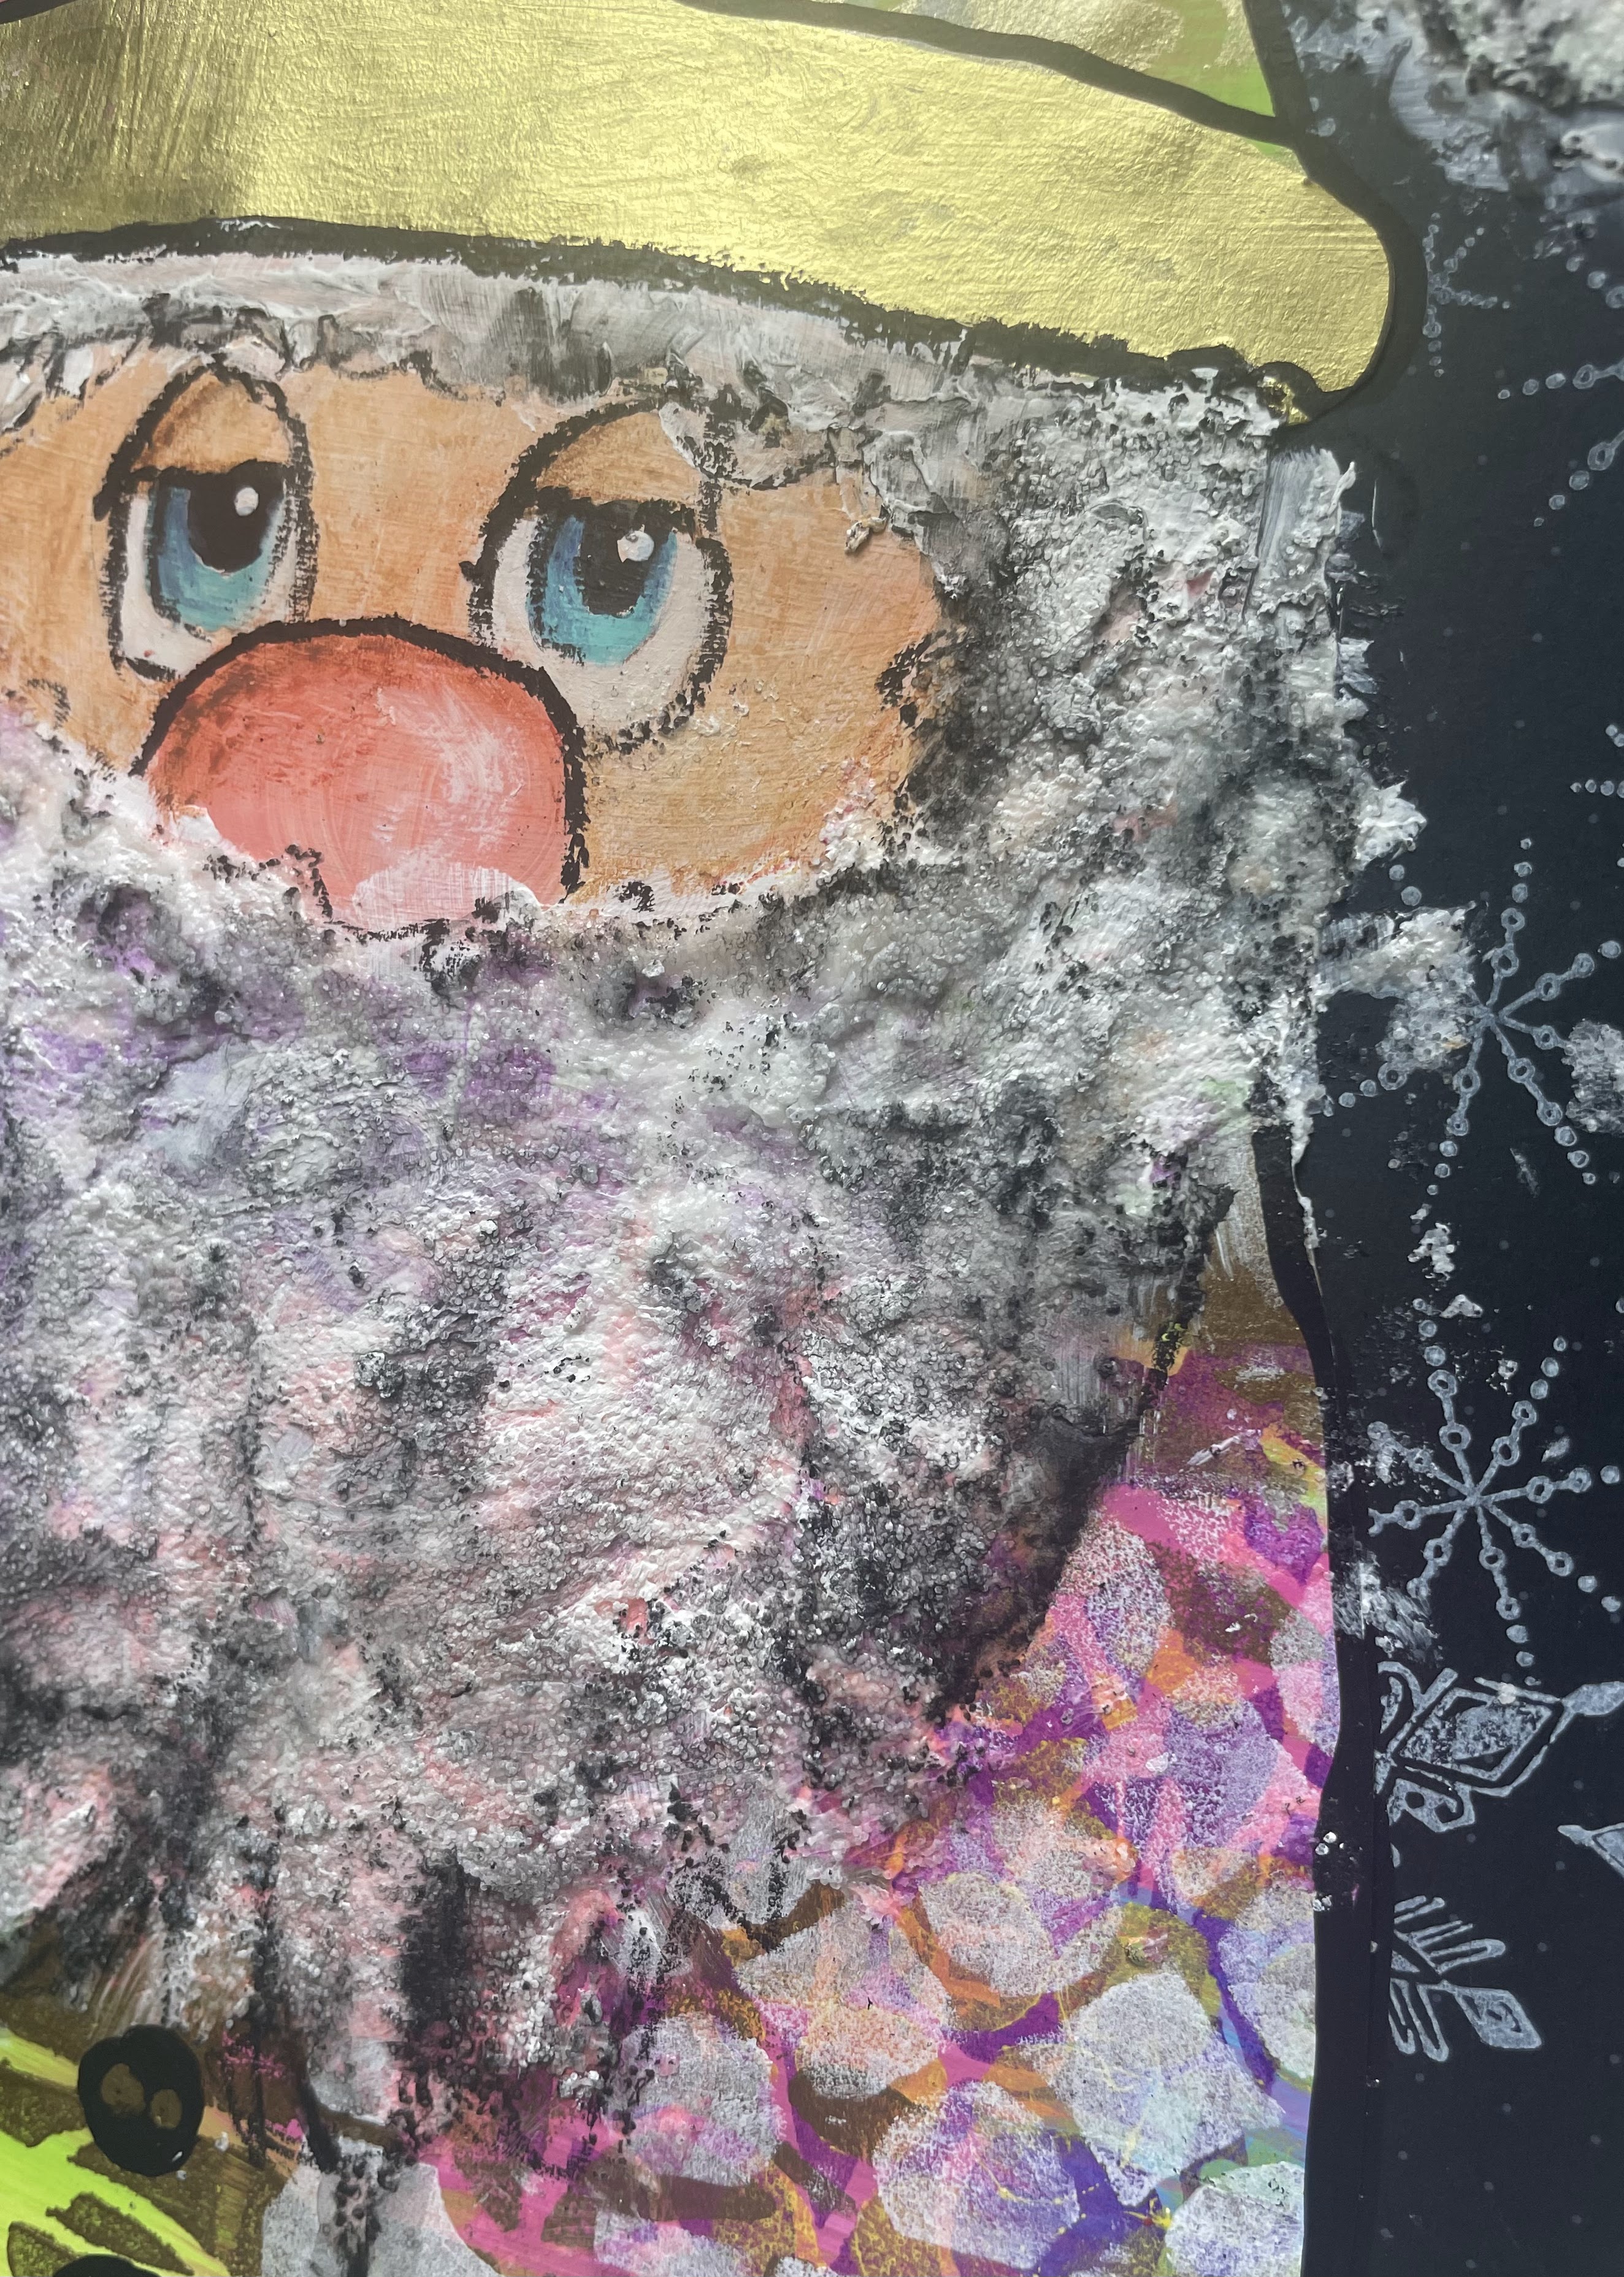
Once I was happy with my background I sketched out the rough shape of a Christmas Gnome (I used Pinterest to find a guide) and cut it out. I then used some skin tone paints to paint a rough oval face shape. I then used white to paint in a beard loosely with a lot of texture. I also added some glittery texture paste to add to the texture. It you would rather use a white surface to do this than the heavily coloured/patterned background you can - and just cut the clothes out of the patterned paper like a patchwork. I added in details to the face, hat and clothes using paint pens, water colour pencils and a stabilo all pencil.


The stencils I have used on this page are the following, but remember - use any you like as they are just to add pattern and interest into the backgrounds.
Free class: Oh Christmas tree - part two
Happy Creating,
Niamh
@niamhbaly (Instagram/Youtube)
@niamh's art journal (Facebook)
No comments:
Post a Comment
If you are entering a GIVEAWAY, please add your email address in the event we need to contact you.
To avoid SPAM, please write it like this:
marybeth (at) stencilgirltalk (dot com)
Thank You!