Hello artists! Nicole here, and today I’m playing in my art journal by layering six different stencils from StencilGirl® Products!
I am determined to finally fill the pages of this journal I’ve worked on for many years (Check out my previous blog post for more information on that!), but most of what I have left are single pages, really awkward spots, and pages I’ve done some clean off on and need to figure out what to do next.
Flipping through my journal, I settled on a page that was next to one previously created on. I used that page as inspiration and a starting point, because I have this weird thing that pages next to each other need to somehow match or look good together. (Do you do this??)
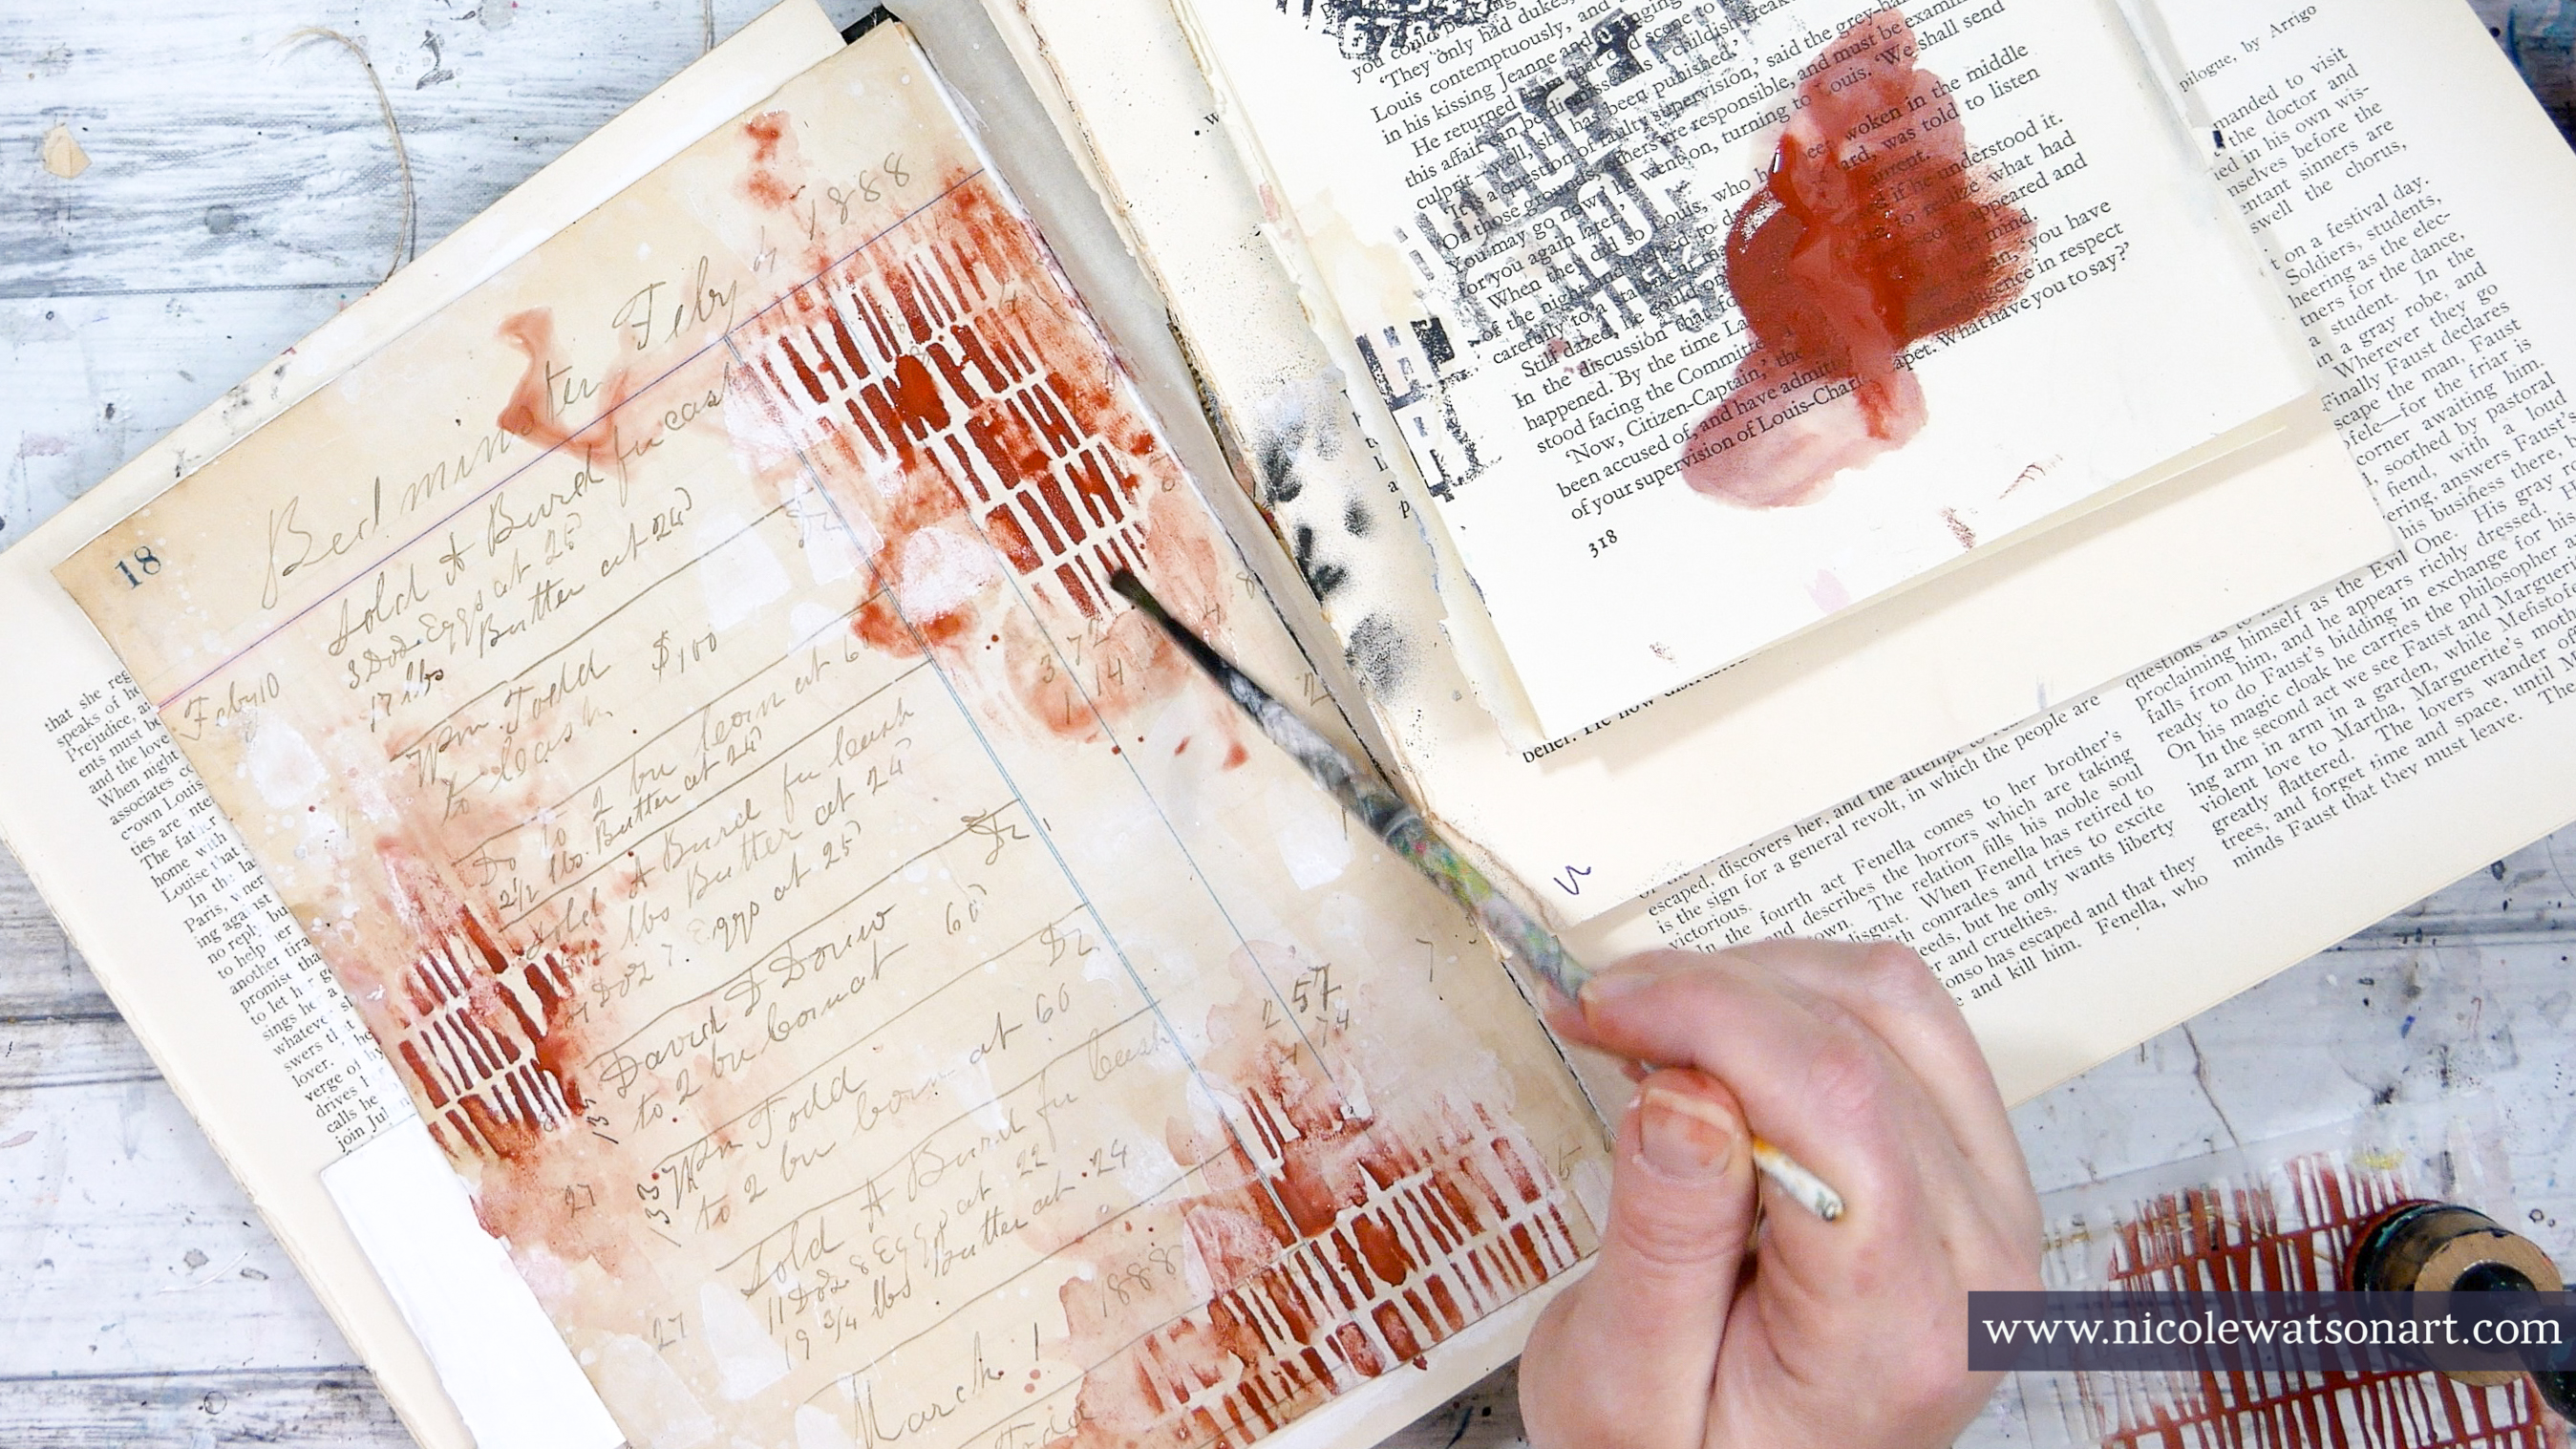
After adding gesso to the page, I decided it needed to go from stark white to something with more of a patina or aged look to match the burlap to the right. Since I wanted the background to look cohesive (The burlap is a strong cohesive statement, and I wanted this page feel the same.), I completely covered it with a single ledger page. If you don’t have an old ledger sheet, a book page would also work wonderfully! You could even stamp the journal page with ledger looking stamps, and patina the page yourself.

Once that ledger page was fully dry, I added some watered-down gesso in a few spots, because I just love how gesso looks on old book pages. Then I grabbed the Fort Hill Mini stencil to make some intentional marks with the gesso.

I pulled my color palette from the page to the right and began to layer more stencils. First, I used red-oxide with the Broken Line Columns stencil and a foam applicator. Before the stencil marks dried, I used a paint brush and water to “scruff” up a few of the marks and also spread some of that watered-down paint around. This gives the stencils not only a watercolor look, but a bit more personality and adds my own voice to them.

I continued this process with turquoise and the Abstract Color Mixing Swatch stencil. I like to be intentional with my stenciling, often times in groups of three or in odd numbers if they are larger designs. I take my time, and allow my eye to move around the page to see where the next mark or color is needed.


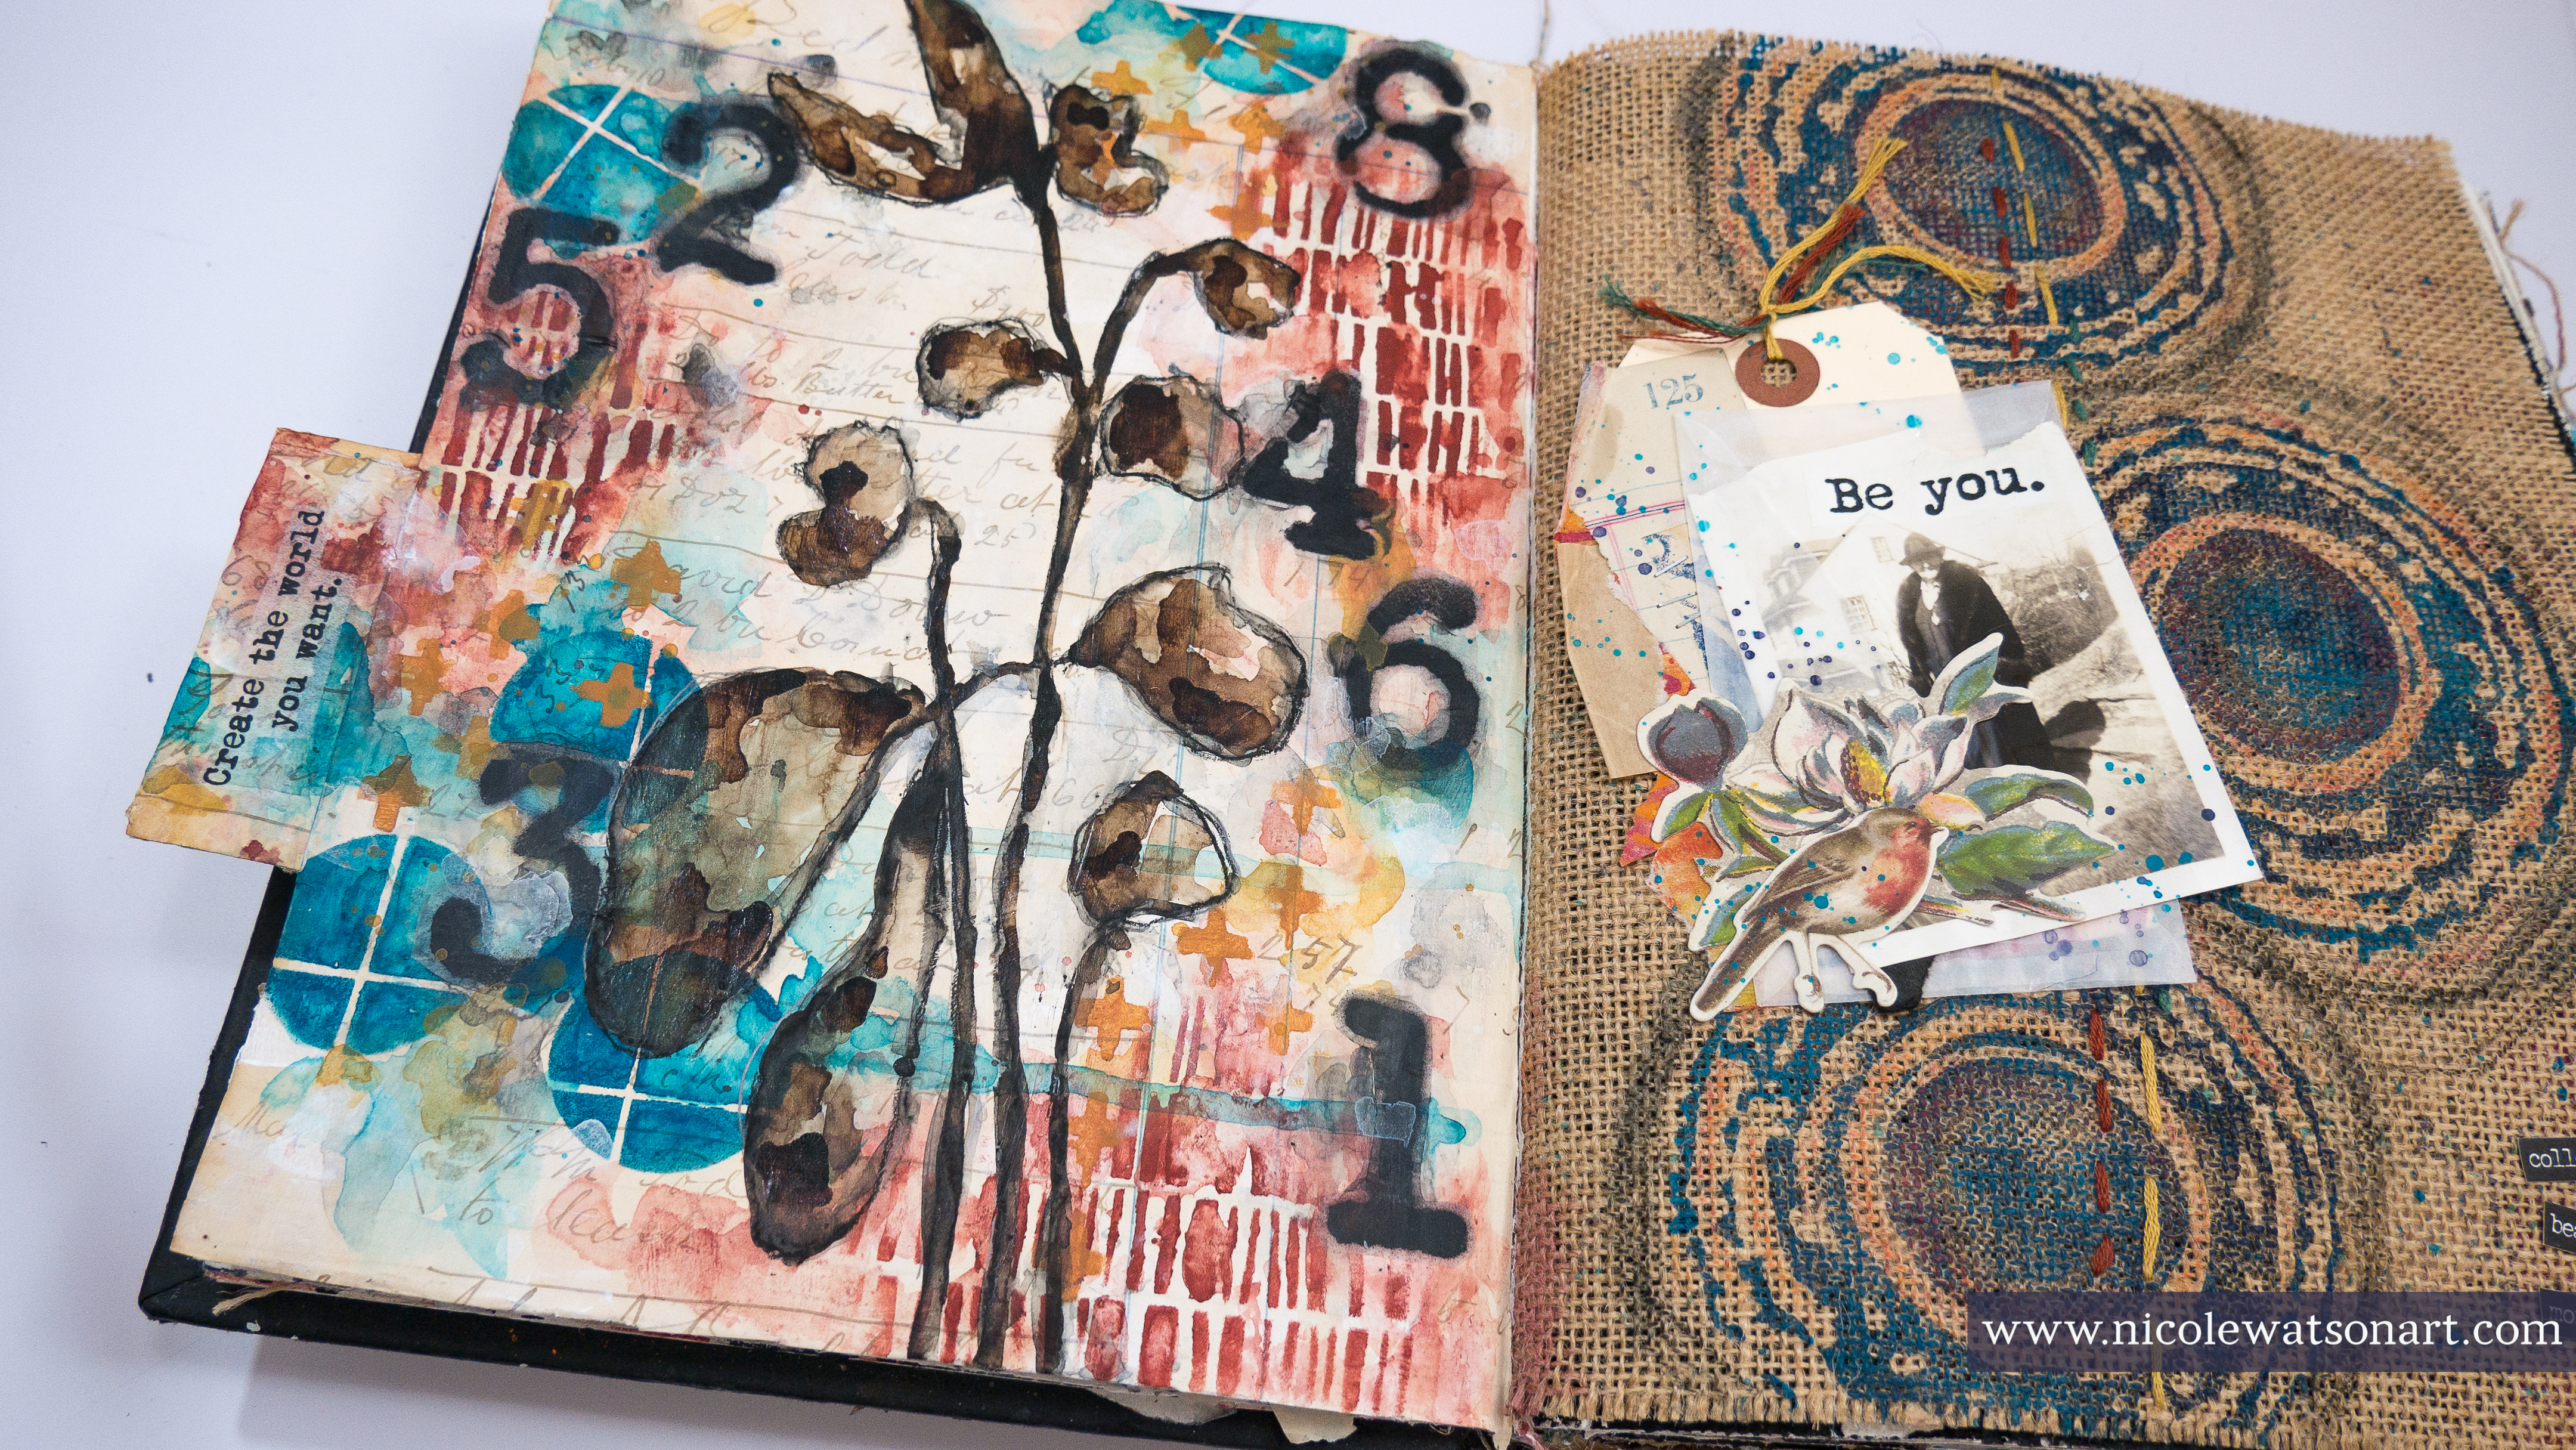
Since the right side of my journal has a pretty strong message in a typewriter font, I knew the Vintage Typewriter Numbers stencil would be the next perfect layer. I was way too nervous to spray directly in my journal, so I spray painted the numbers onto some patty paper (similar to deli paper), cut them out and placed them on the pages with matte medium. They are almost invisible, but I also added some extra black to help with that. I simply sprayed some spray paint on my palette, watered it down and added some around the numbers to help camouflage them more. I also eventually added some of the red, turquoise and yellow paint on the numbers later in the process.


When the numbers were dry, I looked at the two pages together and decided my StencilGirl® page needed some yellow. So, I grabbed mars yellow deep and added marks with the Grunge Marks Collection - Symbol Grid stencil using the same process again.

I forgot to mention, but maybe you’ve noticed in the photos, I kept the center pretty empty, because I have a plan for it. And, now it’s time to execute that plan!
The page on the right has a strong industrial feel in the background, with the soft floral collage of die cuts. My background on the StencilGirl® page now has that strong industrial feel, so it’s time to add the soft florals. Enter the Botanical Stem stencil.
This stencil has a mask and a stencil with it, but I am only using the stencil. I placed the stencil on my page, flipping it over and moving it about to find the perfect spot. Once I had it in place, I used my stabilo all pencils to trace the inside very loosely with graphite first, then the black.
One thing I love to do with stencils to also make them my own is to subtract parts and add more parts. Because the largest leaf covered a significant part of my page, I decided not to trace it. Next, I activated the stabilo with a little water and evaluated the floral centerpiece.

It needed a few more pieces to fill the page, so I added three more stems and another leaf using parts of the stencil with the same process.

To finish off my florals, I added some walnut ink inside the leaves.

After letting this walnut ink dry completely, I decided the page needed just a little bit of light, so I added some watered-down gesso in a few spots and around the florals.

Finally, I needed to deal with that little tab to the left of my page. This tab is part of the spread on the other side, but I think it’s perfect with my page! I didn’t add ledger paper to it initially, but that white gesso on the back was just too bright. So, I covered it with leftover ledger paper, added the watered-down red, turquoise and yellow paint so it matched the rest of the page and also a bit of waterey gesso. Then, I topped it off with the same tissue paper sayings from Dina Wakley that I used on the right side.

Watch the entire process on my YouTube channel!
I just love how layering these six different stencils from StencilGirl® along with a few simple supplies came together to create this page. Honestly, I was a bit nervous as I added each layer, because this was a new color palette for me along with a few new stencils.


Art journaling is experimental play time. Even though I was nervous, in the end, I think I just might have a new favorite color palette to experiment with (especially for fall/winter). Even better, I now have a few new favorite stencils to play with, too!
Grab a few colors, a bunch of stencils, and have fun playing in your journal!
-Nicole

Connect with me on

Stencils:
- Fort Hill Mini
- Broken Line Columns
- Abstract Color Mixing Swatch
- Vintage Typewriter Numbers
- Grunge Marks Collection - Symbol Grid
- Botanical Stem
Supplies:
- Dina Wakley Media Black Journal
- Matte Medium
- Gesso (white)
- Golden So Flat Acrylic Paint (red oxide, turquoise, mars yellow deep)
- Liquitex Acrylic Spray Paint (black)
- Patty Paper (or deli paper)
- Stabilo All (black and graphite)
- Walnut Ink
- Dina Wakley Media tissue paper words

Phenomenal layers!
ReplyDeletethanks, Seth!! - Nicole :)
DeleteLove this! Thank you :)
ReplyDeletethank YOU!! :) -Nicole
Delete