Hello friends,
Tina here, and I’m so thrilled to share this project with you.
Today I will be creating and assembling a little journal and some tags using a main stencil that brings me back to childhood and the endless moments I spent playing with my first set of Matryoshka Dolls/Nesting Dolls. To my delight both of my daughters relished in the same joy and I hope you do as well.
Before I start lets talk about the stencil: Nesting Dolls was designed by Valerie Sjodin and it comes with 6 nesting doll stencils and masks. For more ideas on how to use and cut these little beauties refer to the item description in the StencilGirl shop.
I love that each doll has it's own unique little face and embelishment identity, but please feel free to stray and mix it up. As you will see below I did just that.
Step 1
Grab the Nesting Dolls stencil and remove the masks. Trace the outline with a gel marker or pencil and then cut. For the journal cut a front and back cover as well as filler pages (all the same size) and as many as you like!

Step 2
Working on the front and back covers~
With a pencil or gel marker outline the dolls face and dress outline.
For the facial features I used black paint.
Reapeat so that there are now 2 Nesting dolls~ one front cover and one back cover.
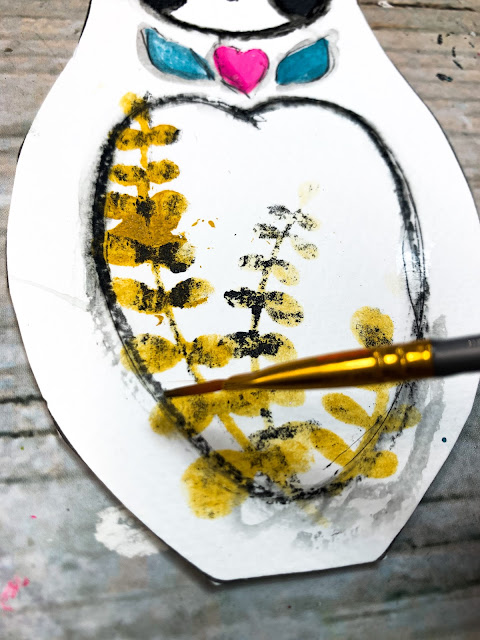
With the Lemon Button Fern stencil I used yellow oxide and some black to add some stems to her gown and with markers or paint fill in the heart and leaves.

Step 4
With a watercolor pencil ( I am using Stabilo aquarellable) outline the facial features and the body.
With a wet brush trace over the outline to give it a soft watercolor effect.
Once dry I outline around the head, face and body with a gel marker creating loose lines.
Step 5
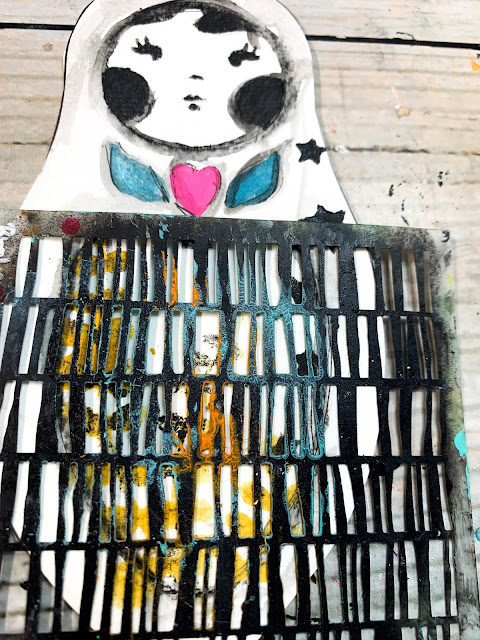
I selected bits from the Nesting Doll stencil for extra embelishment and used the Broken line column stencil to create some contrasting marks.
Step 6
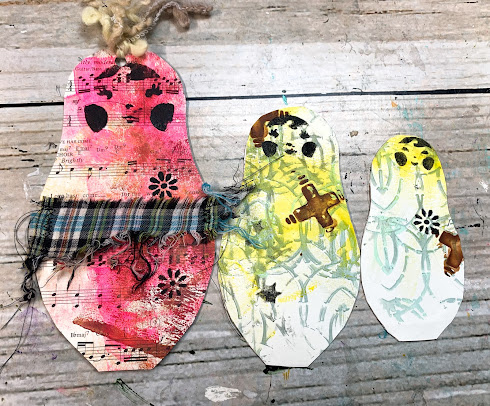
On the reverse side of each doll I am gluing some hand made papers and stenciling on the face and some flowers that can be found on the Nesting doll stencil.
NOTE: I am not adding the body mask on the inside pages. The pages will hold art and images.

Repeat step six to all your inside pages or smaller tags
Step 7
Attach a piece of fabric or paper strip to any inside pages you would like to have dolls nesting.
I added fabric and ran it though the sewing machine (feel free to used gle or hand stitch).
Step 8
For the nesting doll tags I puched a hole on the tallest doll and added some fibres.
Step 9
The dolls are now ready for your art!!
Note: To create a Nesting doll journal follow all the above steps, add as many pages as you prefer.
Add a hole to each page and secure with a key ring.
Attaching a little video flip through of my little journal for inspiration. Nesting Doll Journal Inspo
Supplies
Stencils:
Lemon Button Fern designed by Rae Missigman
Broken Line Columns designed by Cynthia Silveri
Nesting Dolls designed by Valerie Sjodin
Acrylic paint
Scissors
Gel marker
Watercolor pencil
Small paint brush
Small sponge
Patterened papers
Fabric
Glue
Needle and thread or sewing machine
Let's Connect;


.JPG)


Beautiful!
ReplyDeleteThanks for using my stencil!
DeleteI love it!
DeleteThank you Tracy
Delete