Hello creatives, Carol Ponsford on the blog today to share a journal page I created using
Pam Carriker's "Create Face" #S646 and an alphabet section of #L60 stencil.
I used several other stencils for the background which I will have listed at the bottom of this post.
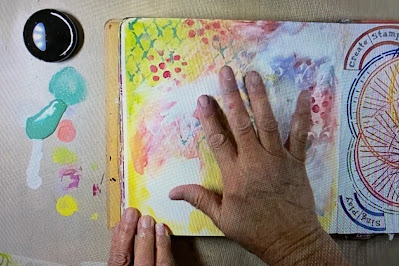
To start I spread a layer of Dina Wakley Media White Gesso on the journal page with
an old gift card. After the gesso is completely dry, I used my fingers to loosely
spread and blend a variety of PaperArtsy Fresco acrylic paint colors all over the page except
where I planned to put my focal point on the page. (for this page it was in the bottom left)
sNext (while the paint is still damp), I laid a stencil on top of the paint and using a baby wipe,
I rubbed through the stencil to remove the paint and leave the stencil pattern on the page.
I then started layering some paint on top of the page by dabbing paint through a
different stencil. I repeat this process using several paint colors with an assortment
of stencils. Once I had the look I wanted I set this aside to dry.
Then I went back into areas with some white gesso and lightly covered some of the areas
(as shown below), I added an additional layer of color in some areas. This process of
layering creates a great deal of depth that I like because I feel it gives more interest to the page.
I also used the edge of the gift card to add some vertical lines by dipping the
edge in some paint and lightly placing it on the page and swiping it downward. I let
this dry before going back to do some stenciling as a top layer as shown below.
To add the face I first lightly outlined where I wanted her hair to go since I
wanted it to go beyond the edge of the stencil. I laid the stencil
down and sponged the reddish paint for the hair and lips of the girl.
I then took the black paint and sponged the eyes, nose, and neck areas. I wasn't sure if
I wanted to have the diamond on both eyes or just one so on a separate piece of scrap paper
I sponged on the eyes and took a black Posca marker and drew the diamonds
around them as shown in the picture below. I auditioned one, then both on the face to see how
I wanted to finish the face then proceeded to add the diamond on the left eye only.
I also added some additional width to the neckline because it looked a little wonky,
so I just continued the black lines as far to the left as needed to be in proportion.
I used a Micron pen to trace the letters from the alphabet stencil to say
"Send in the clowns" and then filled them in with a black Posca marker. I
ended up using a fine white pen to add highlights to the lettering.
To finish off the page I took an empty tape roll and dipped it into black
paint and added some rings around the page. I also took a black Posca marker to
outline the hair and face and sketched some lines around the edge of the page.
Here is a list of all of the stencils and PaperArtsy colors I used on this page:
Stencils PaperArtsy Paint
S646 - Create Face Snowflake Blueberry
S003 - Repeating Fleur de Lys Little Black Dress Blew
M160 - Organic Roots #1 Zesty Zing Wisteria
M031 - Journal Texture #6 Slimed Electric Violet
L651 - ATC Mixup Green Patina Cerise
L601 - Alphabet Smurf Scottish Salmon
Jan 2022 StencilClub Pattern Party Peach Nectar Cherry Red
Thank you so much for joining me today on the blog. I hope you
will find some of the techniques I shared helpful to jump start work
in your journal or artwork. Until next time, happy creating!
To see more of my work please visit my Instagram page.


Any coupons this month?
ReplyDeleteIf you belong to StencilClub the coupons come in your email on the 15th of each month when the designer video is released. Be sure to check your Spam folder also. Hope this helps.
ReplyDelete