Sometimes my quilting background insists on popping up when working on mixed media projects and this is one of those occasions!

Here is the
tutorial:
1. Paint
white gesso all over a sheet of A3 sized watercolour paper
2. Paint the sheet with a variety of different coloured acrylic paints.

3. Add imperfect stamping with a text stamp and a permanent black inkpad.

4. Stencil on the sheet with white acrylic paint using a baby wipe and stencil LL1018 Urban Rhythm Matrix.


5. Glue on pieces of vintage text and images.

6. Outline
some of the above with pencil
7. Drip a variety of acrylic inks onto the sheet and spread by spraying with water.

8. Stencil on more shapes using some of the acrylic paints from step 2 as well as white, using stencil LL1020 Line Up and a cosmetic wedge.

9. Repeat step 7 but without the water.


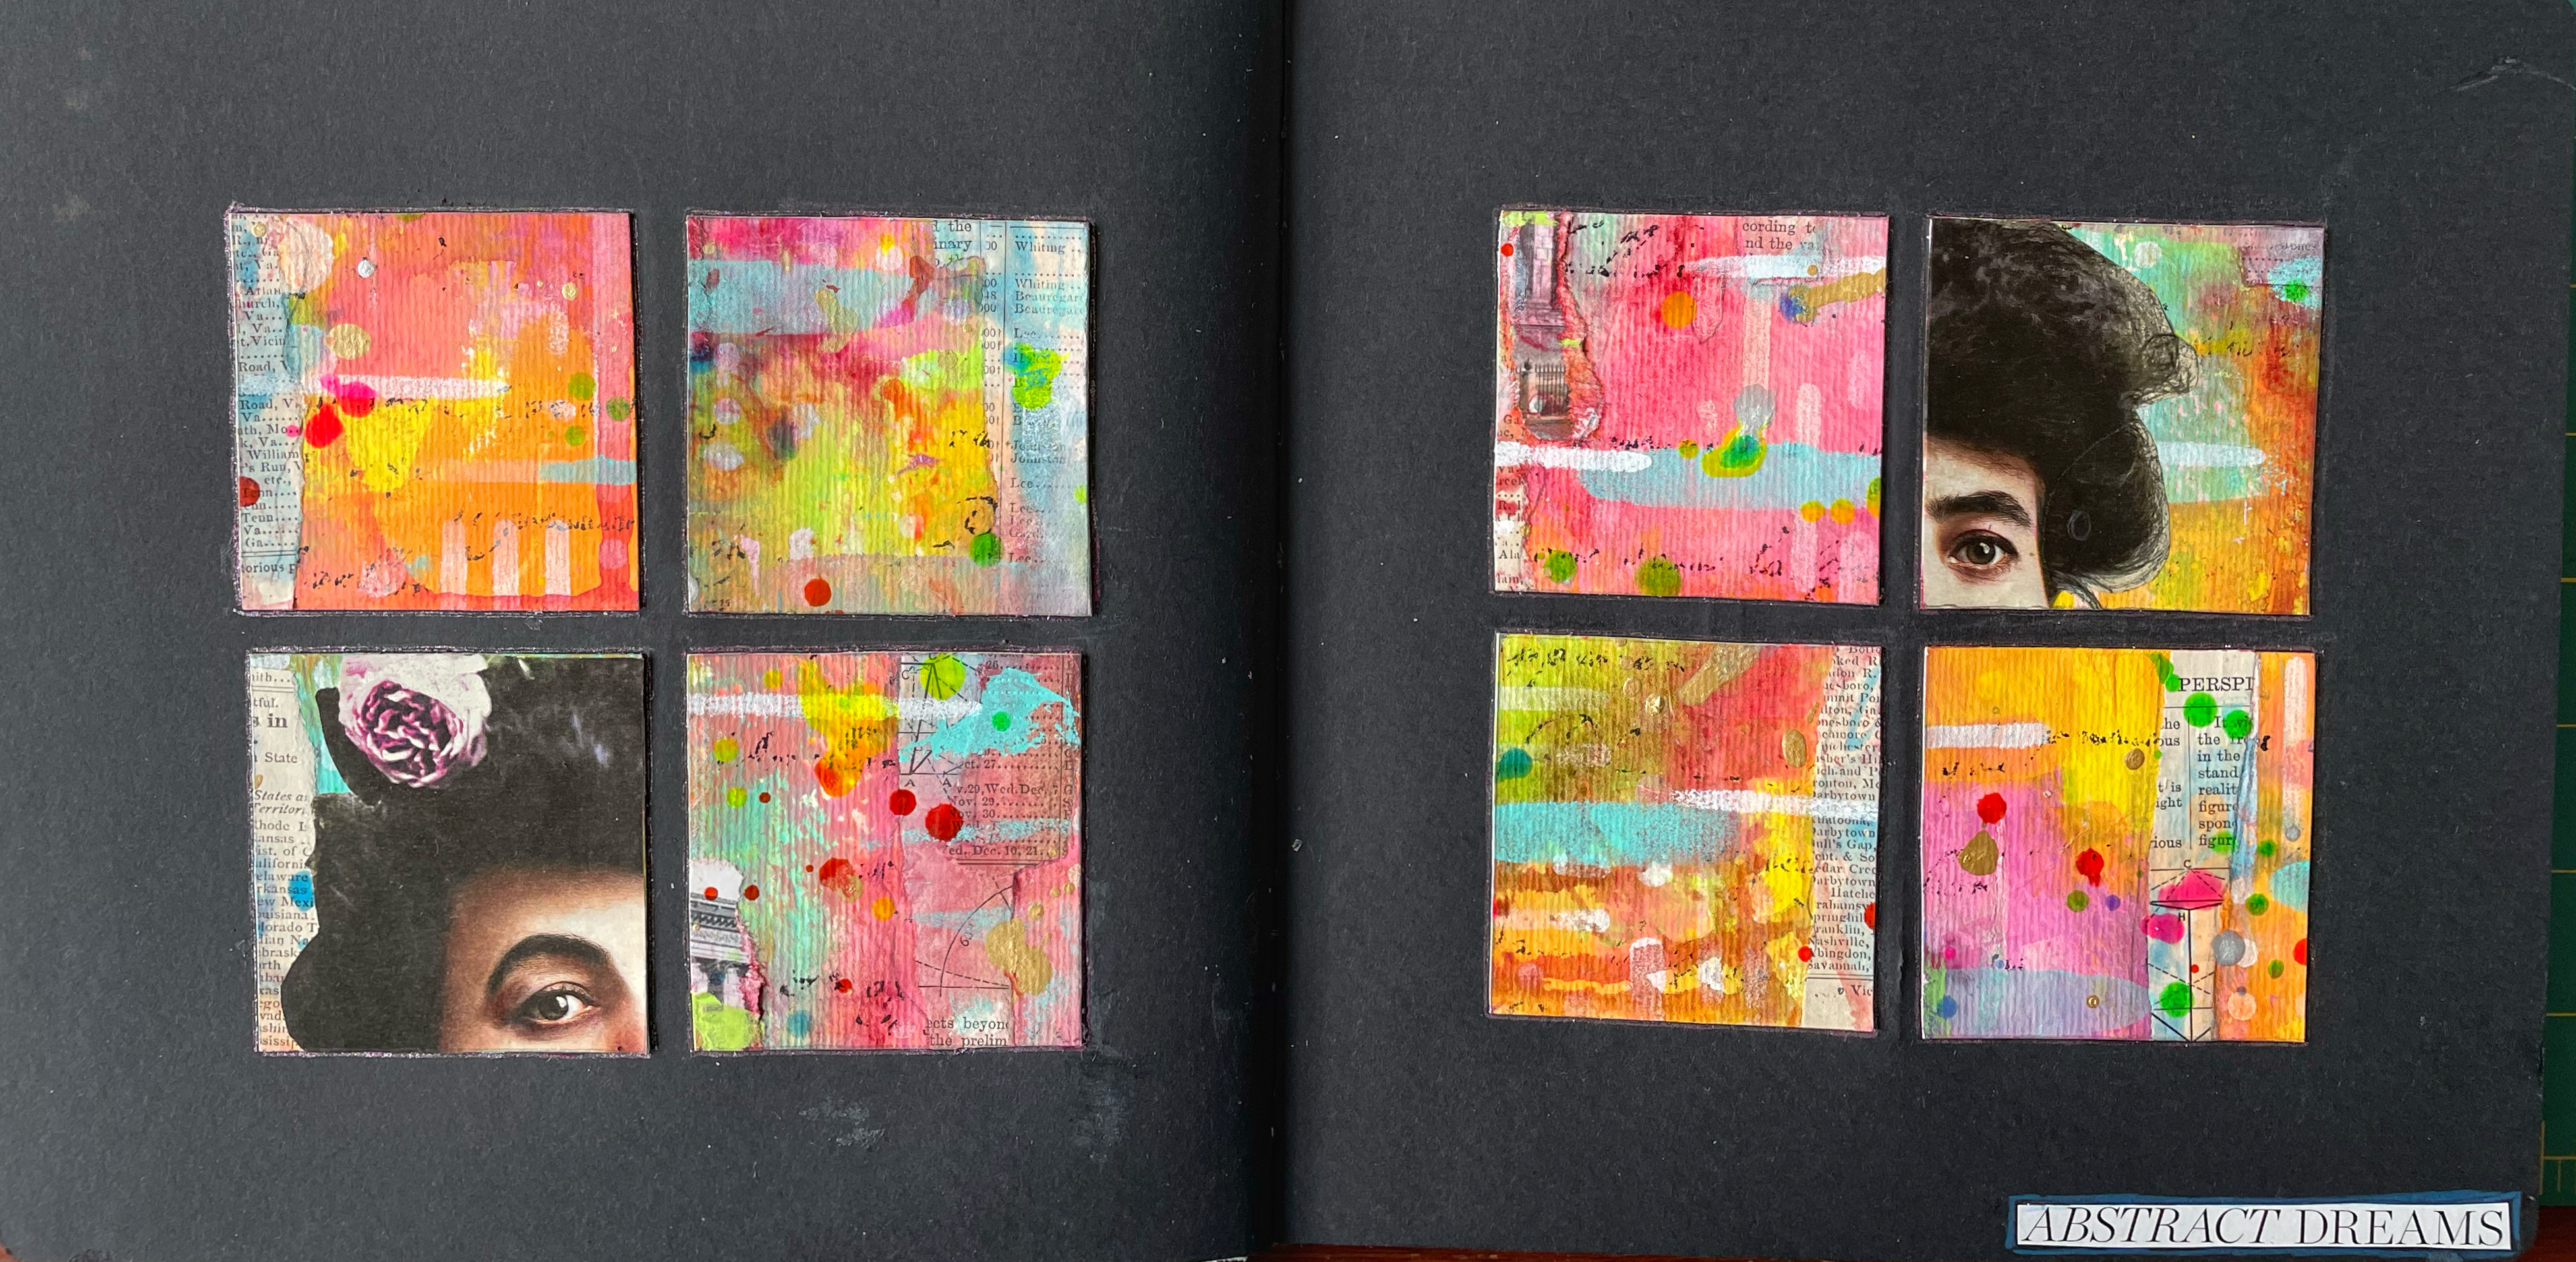
10. Using
one
of MB’s Grid Stencils (the one with the 2.5” squares), mark out (in pencil)
4 of the squares in the centre of each of 2 facing pages in an 8 x 8” art
journal with black pages
11. Use the same stencil as in step 10 to mark out 2.5” squares on your big sheet, selecting areas you like best, and adhere these onto the squares marked out in step 10. I used soft gel medium for this.

12. Find
a vintage image you like and cut out parts of it. I selected a face. Glue these
onto 2 of the squares.
13. Outline the squares with a sparkly gel pen.

14. Glue on text from a magazine.
15. Afterwards I still had lots left of the original sheet so I added another spread in my journal, this time using 1” squares and stencil S404 Grid Outline 4 by 4.

©
Frieda Oxenham 2024
Frieda please know this is exciting and inspiring to me, thank you for sharing, happy holidays!
ReplyDelete