I am a happy YaYa to four (4) Granddaughters aged 10, 8, 6, & 4. I became a stepmom to 10-year-old twins (boy/girl) when I married their father over 25 years ago. Their families have each blessed us with two (2) girls, resulting in our stair-step grands.
A couple of years ago, I started a tradition with the older girls called “YaYa’s Art Camp,” and it is something that they ask for when summer rolls around. Missing out on raising young children, I remain fascinated by the enthusiasm a kid has for making, getting messy, and learning new ways to create. Plus, a couple of hours together in the Studio leads to all kinds of wonderful conversations and memories. I work best 2:1, so I had the younger ones one week and the older ones the following week.
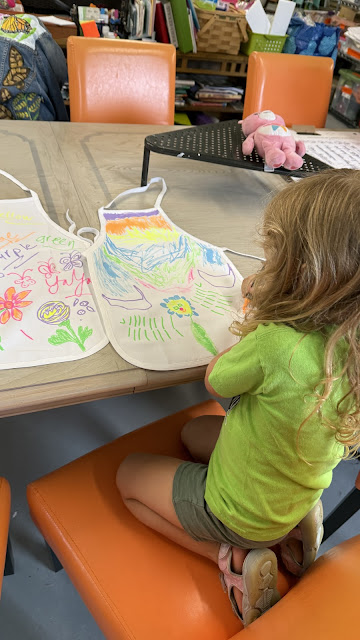
The little ones enjoyed lots of painting projects and got a big kick out of mixing paints to make “their own” colors. My 6-year-old grand mixed a blue she called “Serene” and was very proud of her creation. They painted their first name letters, stools for their room, and used fabric markers on aprons.
In past years, when the older ones were their ages, their favorite activity (aside from painting their first name letters) was melting crayons on rocks. Super fun, satisfying, and easy. Simply find some rocks about as big as your hand and put them on a baking sheet at 200 degrees, roughly 30-45 minutes. Create a nest of kitchen towels in front of each kid and place a hot rock in it. Grab some crayons and let them go to town melting crayons on one rock at a time. The rock will stay warm for loads of experimentation.
This year, for the older ones, I took inspiration from a couple of StencilGirl Designers!
Kristin Peterson has a terrific tutorial for making fabric scrap bowls! These were a huge hit with the girls, and YaYa has a ton of fabric scraps! Kristin has a tutorial for making them here: Altered States Fabric Bowl
As you are probably aware, Carolyn Dube is a wizard at Gel Plate Printing. They ADORED making prints, and I was thankful that I had taken a couple of Carolyn’s workshops when I had Ephemera Paducah. The technique that made the girls gasp with glee was this one:
Step 1 - Spread acrylic paint all over your plate and put a stencil on top of it. It’s easiest with a more open stencil rather than one with little bitty openings.
Step 2 - Put a piece of paper on top of your stencil and rub the paint through the stencil onto the paper. You may have to use more than one piece of paper to essentially clear out the openings.
Step 3 - Leave your stencil in place and choose a different color paint. Brayer over the stencil and get paint down into the openings you have just cleared out.
Step 4 - Lift your stencil
Step 5 - Put a piece of paper down on your gel plate and lift your print
Step 6 - Ooooohhh and Aaaaahhhh over your print. I got a “YaYa, you are brilliant!!!”
Step 7 - Repeat
With Carolyn’s permission, here is a quick video I made of this technique. YaYa's Art Camp Gel Plate Printing
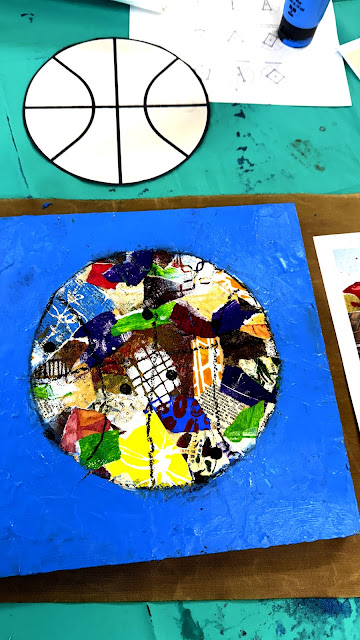
We spent about 2 hours making gel prints, as one does! I gave them each a color wheel, and we talked about using complementary and analogous colors in our prints. We then made a collage using torn-up pieces of our prints, and stenciled on top. When that was done, we painted the negative part of a simple image.
 |
| The Stars come from a great StencilClub Stencil 05-2025 |
 |
| Carolyn Dube's word stencils are always on point. L923 & L924 |
 |
| Linda Edkins Wyatt has a great ATC stencil L852 |
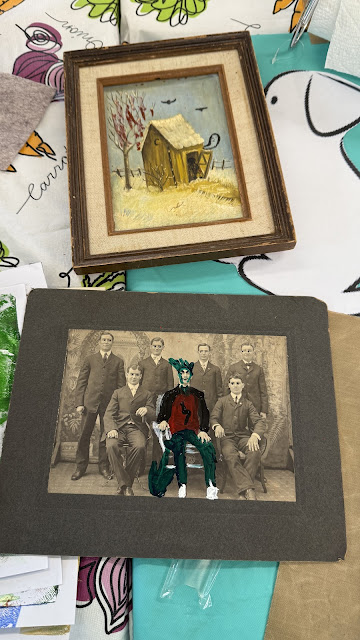
Finally, we created some spooky art for Halloween, transforming thrift and antique store finds into terrifying scenes! They are so excited to decorate for Halloween this year.
I hope this gave you some ideas for crafting with your grands or neighborhood kids. Make some memories!!


Oh this is divine! What memories you made! Thank you, I know my grandson will love the rock melt, thanks Kristin.
ReplyDeleteThank you! Enjoy your art play time!
ReplyDelete