Showing posts with label #art. Show all posts

Friday, May 10, 2024

Up~cycled tin can containers


Hello creative friends, 

How my spirit is lifted when spring arrives.  
The sun is out, the birds are singing and it’s also the time of year we celebrate Earth Day.

In honour of Earth Day today we will be creating a little project that has so many wonderful possibilities ~ yes the tin can up~cycle! 

So gather your tin cans plus the supplies from the list below and let’s begin transforming. 

Today I am using Wheel in the Sky stencil designed by Kate Pea. 
Check out this blog post for more inspiration with this stencil https://www.stencilgirltalk.com/2023/07/heal-grow-art-journal-page.html


The Process:

Paint tins with gesso or acrylic paint of your choice and set aside until completely dry.


Transfer stencil pattern onto tissue paper


Measure the height and diameter of the can and cut the tissue paper


Apply some ModPodge or matte medium to the can or the tissue and adhere until the entire surface is covered.


TIP: Cut a piece of plastic wrap - (enough to cover the can)and wrap it around the can. This will ensure we don’t overwork the tissue and allows us to press it into the grooves.
Once you are satisfied place the can aside to completely dry.

Once the container is dry seal it with a coat of ModPodge and allow to completely dry.


The containers can be left as is or embellished further.
I used my crop-a-dile to punch holes and added a wire handle one one.  Some string, fabric and glued wood legs for height variety.
I will be creating a few more with live succulents for the front porch.   Just love how they turned out.


Enjoy and let’s connect!


Supplies:

Tin cans
Tissue paper
Acrylic paint
Paint applicator 
Scissors
Modpodge
Plastic wrap
Paint brush 


Tuesday, September 19, 2023

Four Stenciled cards~ one technique


Hello Creative Friends,

I am the first to tell you that a good challenge always stirs my creative soul!
So getting my head around this technique, the stencil choices and then the decision on colours!
Need I say more!

Today I will be guiding you through a technique that was inspired by a fellow creative  Jennifer McGuire.
Love the fact that with one technique we end up with four individual art pieces that can be used for cards, tags, journal inserts, banners or simply framed and gifted.

I did alter the process abit and that means more options!
Check it out below 

*Paint was used vs  ink pad
* Gel Plate vs tape


Cut four equal pieces of paper (use any paper that will work well with the medium you will be applying)
Here I am using mixed media paper that I tore out of a journal 7"x10" (98lbs) cut into four


Place the papers on the gel plate  so that the seams are all touching.
I found that becasue the papers stick to it, it makes for easier adjustment.


Center the stencil over all four pieces of paper 
Apply your favourite colours (paint or ink)


With a light touch apply a different colour sparingly on top of the base colour.
I used three colours.


Remove the stencil


Rotate all four pieces so that there is a void in the center.
Repeat the same technique as in step 1 and continue on all four corners.


Note: Due to my paper size selection I opted to stencil only three corners.

The cards most certainly can be left as they are with a sentiment added but I am going to keep going with two more layers. 


I will be making this batch the same.
A variety of focals can be added to the cards. I reached for the Feathers 6 Stencil. 
I love this nature inspired stencil. It's perfect for focals and backgrounds. 

Position the stencil and apply black acrylic paint with an applicator.


Loving the crispness of the black against the pastel background.
Once again feel free to stop here or continue on to the next layer with me.


For the final layer I am using another favourite and well used stencil CrossStitch-Two Step Stencil.
With the remaining paint on my applicator I stencil random marks so that there faint enough to see but strong enough to ground that gorgeous feather.


I love the end result and that I have four individual cards!

Check out the process on YouTube.


Supplies


Stencils:

Puddles  S331 designed Rae Missigman was inspired by the art in our everyday environment.
Feather 6 Stencil S178 designed by Cecilia Swatton is a soft stencil offering many arty options
Crossstitch two step stencil designed byTammy Tutterow is a definate go to for backgrounds, marks and even stitching.

Paint:
Liquitex Basics~fluorescent pink
                        ~ cadmium orange hue
                        ~ light olive green
                        ~ black

Paint aplicator
Mixed media paper
Gel press plate
blank cards


Hope you enjoyed the process and that you found inspiration to create your versions.

Stay Creative ✨


Tina

Monday, June 15, 2020

Balance


As we enter the second half of 2020, it doesn't appear that life is going to switch back to the "before" that we are all more comfortable with. In fact, it seems that a huge reckoning is in action at the moment and Mother Nature is at the helm of it all. The theme for June is typography and I wanted to create a project that best represented where I believe I need to focus and how I suspect everyone wants to feel. The project evolved considerably but it always revolved around the idea of creating balance. The world is navigating disease, political strife, unnecessary deaths, racism, gender bias, and so many other oppositional areas that it has become difficult to remain balanced. So, my desire was to create a piece that I could use to become more mindful, focus on what I can personally achieve, and balance my part in the world. 

You will find that the project begins with a very linear piece of board and then is cut away to reveal only the part that will best serve me. I hope that the idea of cutting away the unnecessary and striving to reveal the inner truths of yourself is compelling enough for you to make your own piece, whether a personalized version of my piece or an entirely alternative piece that serves you in your own need. Remember that the intent is to create a vintage arched piece that has a homey and handmade feeling to it--one that reveals the "getting back" to a simpler time, one that allows us to represent ourselves through natural tendencies. Resist the urge to make your lines precise. Instead, embrace the wholeness of existing in the space and time in which you create. While the project is titled Balance, the intent is to create inner balance not the outward type that requires linear acts and thoughts. And isn't that what art asks of us anyway?

Stencils:


S710-Chinese Garden-Lotus (Gwen Lafleur)


L169-Crackle Stencil (Nathalie Kahlbach)

L758-Kyoto (Nathalie Kahlbach)

L696-Floral Waterfall (Kate Thompson)

L636-Fly Away Home (Roxanne Evans Stout)


Craft Materials:

MDF Board or similar (18 x 24 to make this project but you can use a smaller size)
Paper Clay
Acrylic Paints (Anita's: Classic Gold, White, Hot Pink, Bark Brown, Espresso Bean, Hunter Green, Heather Gray, Rivera Tan, Antique Nickel, Crocus, Medium Blue, Sunshine Yellow, Taffeta Pink; Paper Artsy: Cerise, Slimed; Golden: Iridescent Pearl, Permanent Violet Dark)
Glitter Glue (Stickles: Grape Crush or Nuvo: Orange Soda)
Brass Shapes (Vintaj)
Large Open Jumprings (Vintaj)
Recycled Silk Sari Ribbon (Check with Ephemera Paducah)
Wax (I used  Finnabair's White Gold, Mint Sparkle, and Vintage Silk)
Embossing Powder (Seth Apter's Baked Texture in Chunky Rust and Ancient Amber)
White Gesso
Uniball White Pen
VersaMark Clear
Distress Mini Stamp Pad in Black Soot
Marker (Tombow)
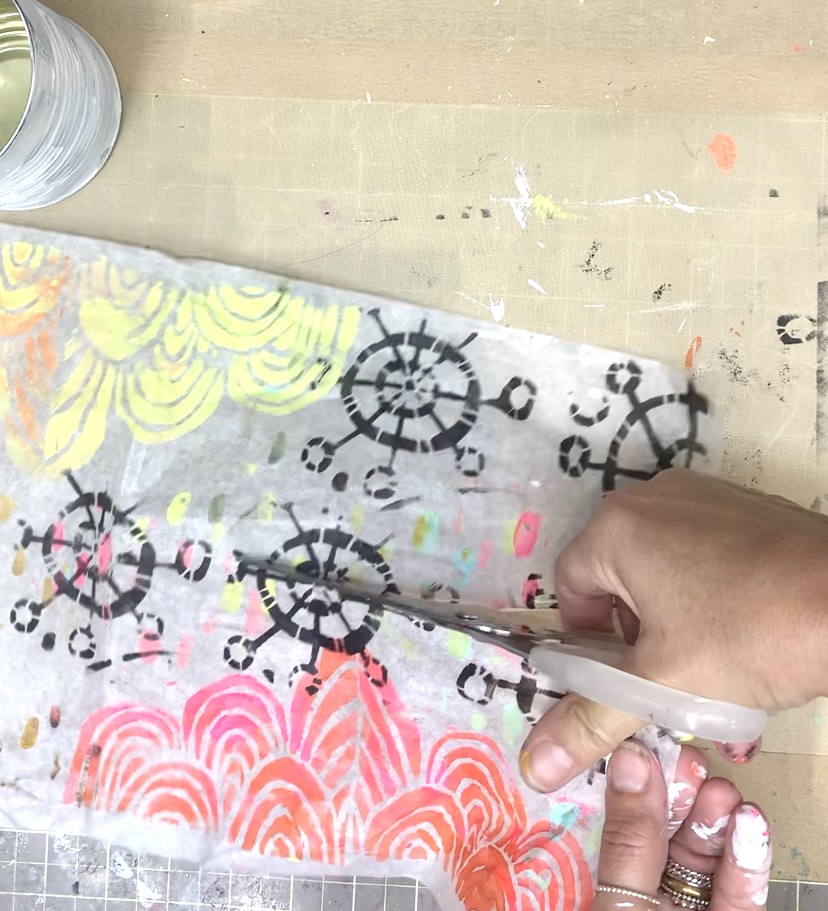
Rice Paper or Tissue Paper
Brushes
Xacto Knife
Clay Roller or Small PVC Pipe
Pencil
Aleene's Tacky Glue
Weldbond
Sanding Block
Baby wipes
Heat tool
7/8 Spade bit and drill
Jute Twine that is 1/4 inch to 3/8 inch in diameter

Let's get creating!

Start by applying gesso to an 18 x 24 MDF board on front and back. Stencil using the Kyoto stencil randomly all over the board and then the Plum Blossom stencil in the lower left and right corners.

Next, prepare the paper clay and roll out flat to about 1/8 inch. You can, of course, make it thicker if you desire. Lay the Buddha stencil on top and press the stencil into the clay using the clay roller. Use the Xacto knife to cut around the impression. Complete the same process with the Lotus stencil and the dragonfly element on the Fly Away Home stencil. While the paper clay dries, return to the MDF board and paint in the flowers and leaves with the acrylic paint.

Note that the edges of the clay may lift a bit as it dries. To help prevent this, as one side starts to dry on the edges, turn the piece over and continue this throughout the drying process. When you are gone from the piece for more than an hour, place something light and flat like a notebook on top. However, I like the slightly lifted look and find it more visually appealing. The thickness of the piece and the humidity in the air will determine drying time, which can be as long as several days or as short as overnight.
After the flowers have dried, sketch out the arch top on the left side. Place a piece of rice or tissue paper over the sketch and copy it. Cut the edge out, flip it over, then lay that piece on the right side and draw the line to create the other part of the arching top. Use a jigsaw or a sabre saw to cut the non-usable side pieces off and smooth the edges with a sanding block.


Lots of fun coming up!


Using the acrylic paints colors, paint the lotus so that you have an ombre effect from darkest to lightest. Use wax to highlight the piece. Use glitter glue to enhance your piece, especially the dots and the veins.
You will want to do the same thing with the dragonfly and the Buddha. The dragonfly is developed more by using layers of acrylic paint to denote its body sections. Use the wax and the glitter glue to further enhance it. Paint the Buddha antique gold, add the wax, then add the glitter glue. Allow to dry overnight. For the Buddha, use acrylic paint to more fully develop the eyes, nose, and mouth areas. Use a Tombow marker in dark grey to highlight shadows.
For the bottom of the final piece, you want to include something that jingles. While I used jewelry components in this project, you could also use Noah bells and highlight them in pretty much the same way. Take the sanding block and lightly brush it over the brass pieces to highlight the design. Emboss the inner areas of the medium and large pieces. Glue the pieces together with Aleene's Tacky Glue and allow to dry overnight completely.

Drill a 7/8 inch hole at the top and three at the bottom using a spade bit. Stencil the word "balance" using green acrylic paint and the Chinese Garden-Buddha stencil. Dry with a heat tool. Take the new arch piece and place a glaze on top of it using dark brown acrylic paint and a bit of water. Mix the paint and water then liberally apply the glaze to the piece. Allow the glaze to sit on top of the arch piece for about a couple of minutes. Use baby wipes to remove the excess glaze. Your piece should be browned with no white showing. Dry with a heat tool. Using either the same glaze or a new glaze made of a slightly darker brown, flick droplets of various sizes onto the arch piece. Allow to dry naturally or by using a heat tool.
On the bottom right, you will see a set of sketch lines that mimic what a window or an arch might have. Remember, avoid linear drawing. Freehand this! Use various acrylic paints to create depth and design. Using a variety of colors will give the appearance of a well-used arch or window. Use the Floral Waterfall and Crackle stencils to create an aged design around the edges and at the bottom. Lay the stencils down and use a baby wipe to wipe away the design from the slightly wet paint.

Once this is all dry, take your paper clay pieces and lay them out on the arch piece to get a sense of how the piece is coming together.
While you have your paper clay pieces on the board, determine where the Chinese characters from the Chinese Garden-Buddha stencil best fit. Use the dark gray Tombow marker to stencil these characters; paint may be too thick and opaque for this. The marker will create a softer more vintage mark. Create detail and highlights with the Uniball White Gel Pen.

Take the sari silk ribbon and wrap it around the arch piece at the bottom. Alternatively, you can wrap the ribbon in and around the holes. Tie the ribbon through the holes and on top of the other ribbon piece. Place the metal bits onto the large open jump rings then attach them to the ribbon. Loosely wrap the sari ribbon around a piece of twine about a foot long and then tie to the top hole. Glue additional metal pieces at the top using Weldbond. One dry, use the Distress ink pad to run along the outer edges of the piece and give them a "sooty" look.

~

Hang your piece outside, in your reflection room, or as the backdrop of an altar.
Just remember that the piece is wood and paper clay and should not be left in wet conditions.


It's all ZEN in the garden!

Anne Marie

WANT TO CONNECT WITH ME? CLICK ON THE LINKS BELOW. 👇
MSS Blog 
Twitter 
Pinterest
or email me at annemarie.mysticspring@gmail.com.


Monday, December 16, 2019

En pointe in the World


It's the time of the year where reflection and contemplation happen, and rightly so. Nature has paused to rest and re-energize for the new year and what is to come. As I thought about my final project for 2019, I wanted it to reflect on the dichotomies that exist that we all should consider when dealing with each other. I wanted it to signify the beautiful and the ugly aspects of life. This piece uses three main elements. The first is the wreath of frosted greenery. This represents the frostiness that we face that can easily be removed by the opportunity for growth as represented by the green layer underneath. The second is the barbed wire that is interspersed in the greenery. It represents the pain, those little pinches that can revolve around us in such a way as to stunt our growth. The final element is the ballet slippers, which represents the reach for grace and beauty. These three elements are supported by the beautiful tone-on-tone stencil in the background. I used white on white to illustrate that at our core, color is irrelevant to who we each are as humans. Instead, it is the canvas of our spirits that matter.

As I considered the elements used, I was presented with several thoughts regarding the compilation. First, the pointe shoes and the barbed wire represent the secular and religious aspects of the winter holiday. The pointe shoes are a reminder of the decadence of the season, specifically the decadence of ballerinas floating across the stage in a traditional ballet such as The Nutcracker, while the barbed wire represents the Christian belief of the birth of Christ. Next, the pointe shoes represent pleasure and happiness while the barbed wire represents pain and sadness. I am reminded of how some are able to celebrate the season with many parties and gifts while many more are unable to exist much less be able to celebrate any holiday. Likewise, the pointe shoes represent child-like innocence, the possibility of hope and future gifts where the barbed wire reminds us of the past and the challenges that we have had to overcome. There are certainly many more comparisons that can be made.

In creating the background, I auditioned for a while. I had several tapestry stencils that I thought I wanted to use. In the end, however, I decided that keeping the background fairly simple would be a better choice. I wanted to have it create a pensive and relaxed effect. I wanted it to be gentle and soft but supportive. It occurred to me that the stencil I chose actually represented the very personality of its creator, dear artist friend Kristie Taylor--gentle, sweet, and supportive. The stencil used is a lotus, which signifies rebirth, so relevant to the overall idea behind this piece. It can be seen as a lotus, a star, or a snowflake--such a beautiful stencil!

MATERIALS

Wooden frame
Frosted greenery wreath
Barbed wire
Dark Copper Wire
Dead (or used) ballet pointe shoes with ribbon
Mini Rhinestone chain
Gesso (affiliate link)
White paint (optional)
Light green paint (I used Golden's Titan Green Pale (affiliate link)
Gold Mother of Pearl Acrylic Paint (Martha Stewart)
Light modeling paste
Microfine Snow Glitter
Clear Gorilla Glue
Aleene's Fabric Fusion
Metal Corners
Metal reliefing block
Nailless Sawtooth Picture Hangar (optional)
Wooden Candle Cups 
Paintbrushes
Palette Knife or old credit card
Basic Pliers
Ribbon (optional)

MAKING THE PROJECT

The base 
  • Paint the entire wooden frame with gesso, at least two layers. Dry completely.
  • Paint the back Titan Green Pale. Allow to dry.
  • Paint the front with Gold Mother of Pearl acrylic paint. Allow to dry.
  • Stencil with modeling paste in the interior and along the edges. While the paste is still wet, sprinkle snow glitter on it. Allow to dry completely.


  • Use the reliefing block to bring out the highlights on the top of the metal corners. Add glue to the inside of the corner and add to the corners. If there are edges hanging over, use a pair of pliers to fold them down. Be sure to place a piece of material between the pliers and the corner to be sure that you don't scratch it.


The wreath
  • Make two circles with the barbed wire just slightly larger in diameter than the bottom of the frosted greenery wreath. Intersperse the barbed wire into the wreath and wire the two pieces together at three different points to help secure them.
  • Use the Gorilla Glue to adhere the wreath to the wooden frame. Place heavy items on top to ensure that the entire piece is flush against the wood. Allow to dry at least eight hours. The glue is completely cured in 24 hours.


The ballet pointe shoes
  • Use the Fabric Fusion to glue the rhinestone chain to the pointes of the slippers. Allow to dry completely.


  • Paint the candle cups with gesso and sprinkle with the snow glitter. Let dry. Your candle cups should be as high as you need them to be so that the slippers sit on top of the greenery, not above. Mine were about an inch and a half.
  • Iron the ribbon on the pointe shoes. Wrap the ribbon around the top third of the pointe shoe just below the heel area and tie a bow.
  • Glue the candle cups to the bottom of the pointe shoes. To best determine where to glue them, situate the cups on the wooden frame and place the pointe shoes on top so that they don't lean. Allow the glue to dry completely overnight.

  • Glue the pointe shoes to the frame. Place some type of balance on top to ensure that the bottom of the cup seals tightly to the wooden frame. I used a jar of modeling paste. Allow to dry completely.
  • If you wish to hang it, you have some options. The first is to hammer the sawtooth picture hangar into the back center top. You can also nail triangular picture hangars to the top two corners on the back and then tie ribbon to use as the hangar. Be sure to also place a bead of glue on the ribbon where it is tied to the triangular hangar to help it stay intact.

And you are done! Here's my version. Be sure to share yours!


Anne Marie

WANT TO CONNECT WITH ME? CLICK ON THE LINKS BELOW. 👇
MSS Blog 
Twitter 
Pinterest
or email me at annemarie.mysticspring@gmail.com.