Trish McKinney: Embrace Your Hot
Mess!
My Supplies – step 1
-
An Old Rejected Painting

-
StencilGirl
Stencils by designer artist, Trish McKinney – Bare Wisteria Vine Collection:
o
Open Bare
Wisteria Vine
o
Looped Bare
Wisteria Vine
o
Bare
Wisteria Vine
-
Golden Fluid Acrylics – various colors
-
Golden White Gesso
-
Sponge Rollers, various sizes
-
Sponge Dabbers
-
White China Marker or Pencil
-
Good Reference Photo
Steps….
1- Select
your reject painting & select your reference photo
2 – Select your
reference photo & draw it out. Make a good drawing – use a white china marker if the painting is mostly darker
values – use a pencil if the values are lighter
3 - Select your stencils – let the shapes in your
painting inspire your selection
4 - Begin painting – first -
prepare one styrofoam tray with white gesso & one tray with darker value
colors - then use your stencils and move
around the painting working around your subject matter, but sometimes
overlapping lines too.
5 - Build up values
gradually until your subject matter is distinguished & well-defined
6 - Finish by using
stencils to integrate areas that need some pattern – be sure to leave a visual area
of rest where there are no texture or patterns
Embrace Your Hot
Mess!
How I Revive,
Reinvent, & Rejuvenate
Old, Rejected Paintings With Stencils
Old, Rejected Paintings With Stencils
“Embrace the
glorious mess that you are!”
Elizabeth Gilbert,
Big Magic

True
confession – I’m the President of the Hot Mess Club. Shhh… One thing that means
is that I have an unlimited supply of rejects – what I call, “hot mess
paintings”!! I have 3 to 4 times more rejected paintings than I do perfected
paintings (perfection is way over-rated)!
This is the sad, sad truth. I
happen to adore my piles and piles of imperfect paintings – they are like the
wrinkles on my face and lumps on my body – I have earned every one of them the
hard way! By that I mean simply that I
believe in embracing my hot mess of a
self and my hot mess paintings!
These paintings represent a tangible, physical, and visual road map of
where I have been on my artistic path.
But then
one day your excessively neat husband crosses the threshold of your messy
studio and gets that look in his eye and mumbles something about a bonfire
happening next time you leave town to teach. Eeeek! Well that
got my attention! Rather than throw these
rejects out or use them for kindling, I thought– “What if I upcyle and reinvent
these pieces of paper?!” “What if”
is always the beginning of something creative for me and my favorite 2 words to
put together. Because this began the
start of something magical and a metamorphosis….
1 – Selecting a hot mess!….

Take
a deep breath & go through your reject pile.
Choosing
the perfect imperfect painting is not that easy. If you are a hoarder (like me) you will
always say to yourself “I will finish
this piece later” and you will be tempted to save it back. So I have found it very useful to look at my
pieces upside down. This helps me to
look at the piece more objectively and not get emotionally attached.
Things
to look for…when you are looking at the piece upside down, look for great
lines, shapes, colors, and/or value – anything that looks intriguing. Do not
look at the subject or the emotional value – ie, a failed portrait of your
child, a place where you have fond memories, your favorite flower, etc… will be
very difficult to push past and paint over.
So be objective and don’t get too attached.

2
– Select a great reference photo & draw it in….
Turn your hot mess painting in all
different directions, usually one way will speak to you and seem more pleasing.
Turning it sideways or upside down helps when painting over it to no be
influenced by existing shapes.
This part of the process is mostly
intuitive - go through your reference photos and select something that you are
are passionate about, comes to mind when viewing the hot mess painting, maybe a
reference photo that has similar colors or shapes. Be sure to select a subject
that is very simple.

Complex
subject matter does not lend itself to this technique. Sometimes it is fun to draw out something
arbitrary or abstract.
Once
you select your subject matter draw it out.
If the painting has mostly darker value colors, I like to use a white
china marker so I can see my lines.

3
– Selecting your stencils….
So
now you have your hot mess of a painting with a great drawing. Look through your pile of stencils and
select 2 to 3 different ones that go together.
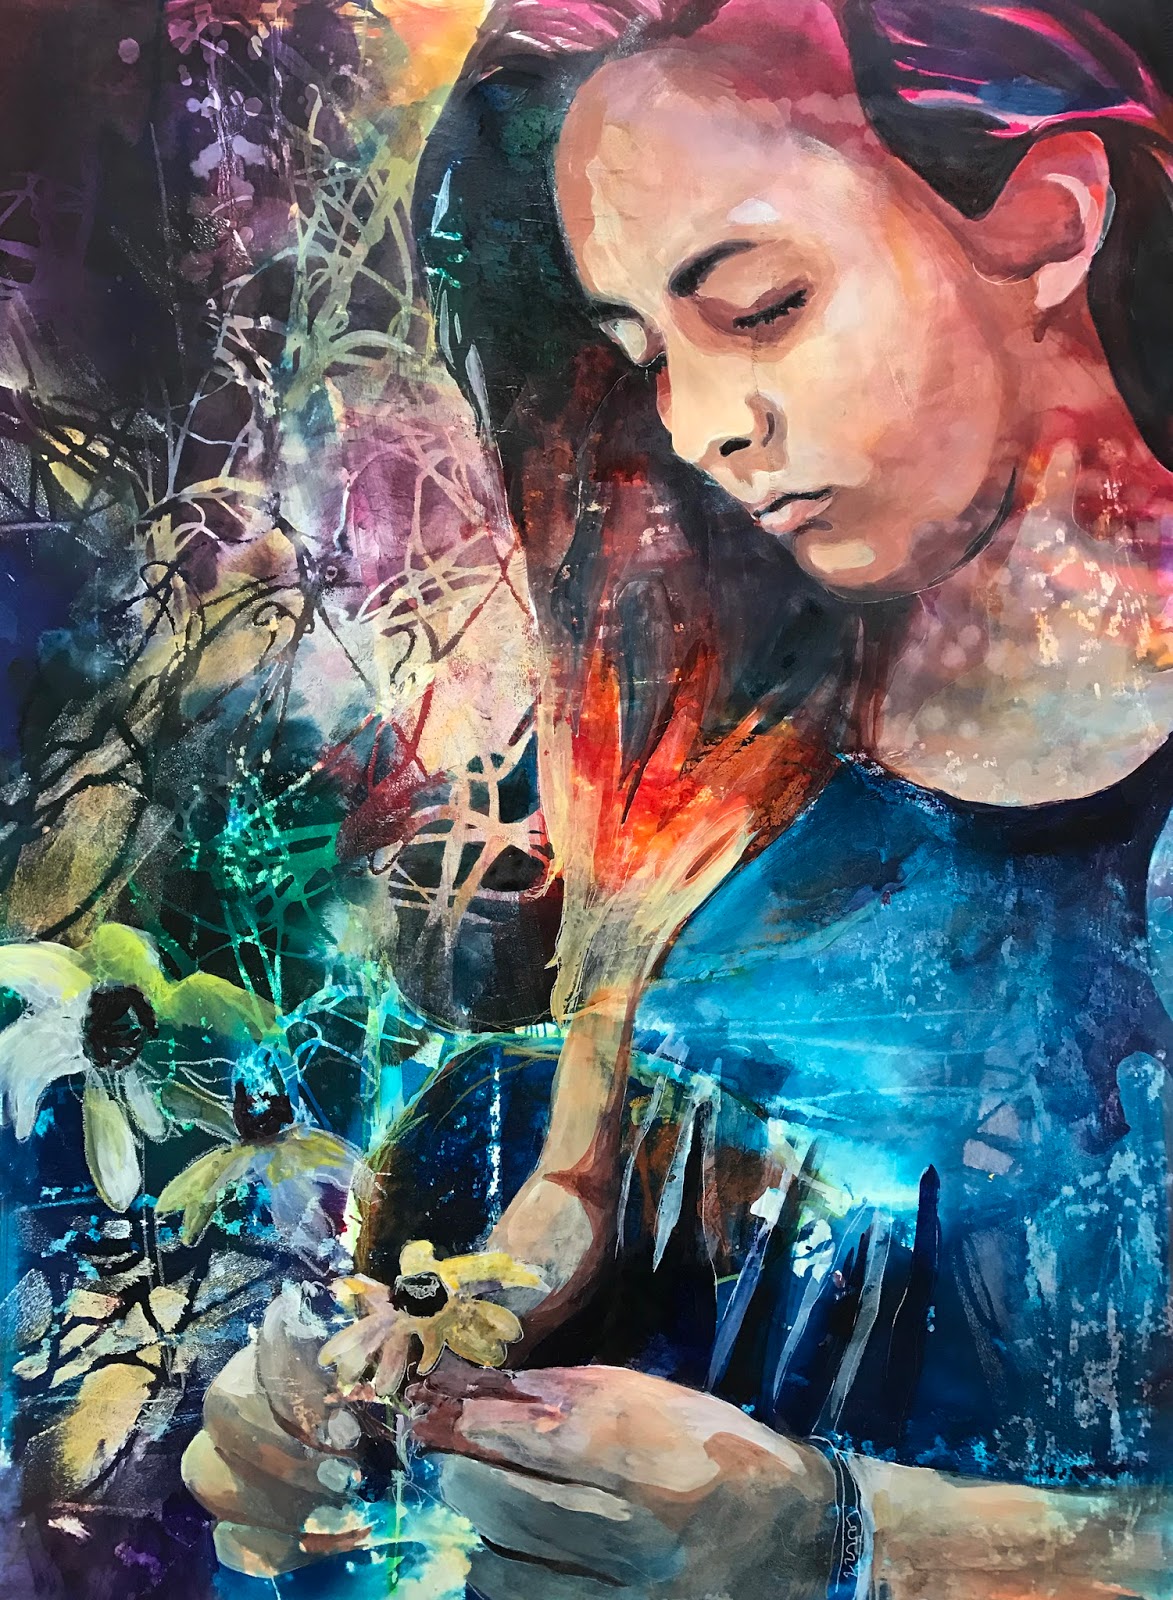
Be sure to select organic or abstract shapes. For my example, I used the
3 from my Bare Wisteria Vine collection of stencils at StencilGirl. I chose them because they reminded me of the
way the hair was flowing and the shapes in the drawing – it also mimicked the
pears’ shapes in the original hot mess painting.
4 – Begin to paint….
This part of the process should intuitive
and spontaneous! You have done all of the planning out, drawn out your subject,
etc… now comes the fun! Creativity never lives in predictability or excessive
planning for me. So after planning out the composition, I don’t plan too much
from this stage on. Next, I begin to use my stencils. I will have 2 Styrofoam mixing trays – one with white gesso, the other with darker value colors and a
neutralizing color to make them gray. I
use Golden Fluid Acrylic paint for this tray. I have several sponge rollers and
paint dabbers close by as I like to mix my colors and use them dry. Now it is time to begin painting. I will use my sponge rollers like my paint
brush, alternating between using white gesso & dark values. I call this “pushing & pulling” and playing
with color value. Have fun with this
part of the process and be sure to work around the focal point in your composition – don’t overdue the pattern and allow it to flow around the
painting.
Note:
while it is true I began this project with a planned out composition, many
times I just start covering up and let the painting tell me what to do next and
working completely abstract and intuitively.
That is fun as well.
5 – Build
it up….
Now it is time to build up the values until
your subject matter or composition is well-defined. I will take my brush working around the
painting to pull out my lights and darks.
6 – Finish…

Integration
of all of the areas of a painting is important.
I like to finish the painting by using the stencils to make sure all of
the areas of the painting are connected.

Have
fun embracing your hot messes and remember….
“Creativity is making marvelous out of
the discarded!” Anonymous
Love!!! 😁👏
ReplyDeleteYou made something glorious out of what you deemed a mess. I have to say that what you call a mess, most people would probably be proud to display.
ReplyDeleteWow! I ♥️ your process and results of your piece! So many delicious, interesting layers! Take care and STAY POSITIVE!
ReplyDeleteFabulous
ReplyDeleteThis is a fabulous tutorial! I love the finished painting!
ReplyDelete