Showing posts with label helen shafer garcia. Show all posts

Monday, January 10, 2022

Helen Shafer Garcia's StencilGirl® Products

Hi, everyone! Helen Shafer Garcia here! The word Nourishment plays a big role in my designs based on growing things and gardening. I gently coax my plants to grow and thrive. Likewise, these StencilGirl stencils will give you the power to “grow”  plant shapes with ease.  My 3 stencil designs give you so many possibilities for succulent shape images that can be repeated and arranged in beautiful ways.

Here’s a great way to create papers and cloth designs for book structures, collage, and stitch substrates.

1. Start out by stenciling with acrylics on different surfaces. I found the linen set of cocktail napkins at an antique store.

The paper I used is called Masa paper. It’s a rice paper which can be painted on. Stencil on the fuzzy side of the paper.

This side of the paper has “tooth” for the paint to grab onto.

 I also used some text papers from a 1950’s Westinghouse TV manual with bold illustrations.

      Stencil layers of acrylics on some of the papers, using different colors from a limited palette

     (I used Cadmium Orange, Ultramarine Blue, Black and Titanium White.) This is an opposite

      color combo which gives you some beautiful grays. 

2.  Masa paper

Take the Masa paper and crumble up into a ball. Soak in cool water for about a minute.

Take the Masa paper out of the water and carefully unwrap.

Use an up and down motion to lay the paper flat on the table. I like multiple wrinkles in my works. Don’t be tempted to spread and press the paper sideways with your hands. You’ll damage the fibers of the paper.

There are endless ways to add color to this paper. For this approach I used India ink, Seth Apter’s Izink dye ink sprays, and watercolors to achieve this antiqued look.

Hint: Rather than paint strokes with your paintbrush, drop the paint using lots of water to the surface. If you brush too much on the wet paper it will fall apart. Just touch the surface with your brush.


3. Linen and print paper

After stenciling the designs, add watercolors and color pencils to embellish! Here are a couple of different techniques to try.

 While stenciling, I added a bit of water to my stencil brush and let the acrylic paint flow through onto the surface. It created softer edges. Then I flipped the stencil to create a monotype. This makes a perfect start for color pencils.

I was surprised at how nicely the unwashed linen accepted watercolors and dyes.  I used a bright turquoise dye spray on the linen napkin, let it dry, and then painted with watercolors. The dye ink bled beautifully with the watercolors, creating soft edges.

4. These designs just beg for more embellishment after stenciling. I could spend hours playing with colors and textures. I also love Book Arts and decided to tear each design page to smaller pieces to create a book structure.

 I have a story behind the name of this project and will continue the book making process and story on my own blog. Take a look.

Cheers and Happy New Year!
Helen Shafer Garcia

Materials:

Helen Shafer Garcia stencil designs - Echeverias, Echeveria Ballet, and Filigree Sprigs
Professional grade watercolors
Acrylic tube colors- Cadmium Orange, Ultramarine Blue, Black, Titanium White
India ink
Seth Apter’s Izink dye ink sprays- Turquoise, Tea
Premier Prismacolor Pencils
Masa paper
Linen napkins
Ephemera papers

Friday, December 10, 2021

Frieda Oxenham: Art Journaling with StencilGirl® Stencils

We have reached the final words of Ben Okri’s poem and by wonderful synchronicity it is also my final project for this year. It has been another eventful one and not always in a good way. We have all had to adjust to the new realities and going forward does not look easy. All we can do is: “Search, search for a new destiny."

I wish you peaceful holidays and I’ll be back with new projects in 2022. A big thank you to StencilGirl® Products for letting me share my art with you.

Here is the tutorial for this month:

1.      Using an 8 x 10” gelli plate, brayer on 3 colours of acrylic paint. Press on a sheet of large bubble wrap and take prints on 2 facing 8 x 11.5”. Also take some prints on copy paper while you’re at it.

2.      Using fluid matte medium glue on circles from a collage sheet (mine is by Dina Wakley).

3.      With gold embossing paste and a palette knife add parts of stencil L822 Filigree Sprigs to the pages.

4.      Using one of the extra prints made in step 1, stencil it all over using black acrylic paint and stencil L844 Duck Nesting

5.      Using a figure out of a magazine, mark around it with a black marker on the paper from step 4 and cut it out. 

6.      Cut out the focal image (I used the sun image from a Fornasetti chair article in a magazine) as well as the letters from the word DESTINY (also from a magazine).

7.      Glue on all images as shown (I used Regular Gel Medium as well as a glue stick). 

8.      Re-colour the letters with a red Sharpie paint marker.

9.      Outline the figure, the letters, and the stenciling done in step 3 with a Stabilo All black marker and smudge.

10.  Add gold to the sun rays with a gold oil pastel and extend the rays into the rest of the pages.

11.  Surround the black circles (from step 2) with water soluble oil pastels using colours of your choice.

12.  Glue on the rest of the quotation to the left hand page as shown and outline all text as in step 9.

13.  Spray on gold mica spray paint through stencil S794 Circle Bubbles, in random areas.

14.  Edge the pages with a blue inkpad.

© Frieda Oxenham 2021. To see more of Frieda's work, please visit her BLOG.

Thursday, May 20, 2021

Watercolor, Gouache, and Acrylics with StencilGirl® Products

Hi Everyone, I'm Brenda Townsend of Brilliant Spectrum Art, and I'm so delighted to be with you as the StencilGirl® Products Guest Blogger today! Honestly, I'm primarily a painter who works in watercolor, gouache, and acrylics. I had used three beautiful stencils created by my awesome teacher, Helen Shafer Garcia (Echevarias, Echevaria Ballet, Filigree Sprigs) to create my series, "Critters Who Will Eat Your Succulents."

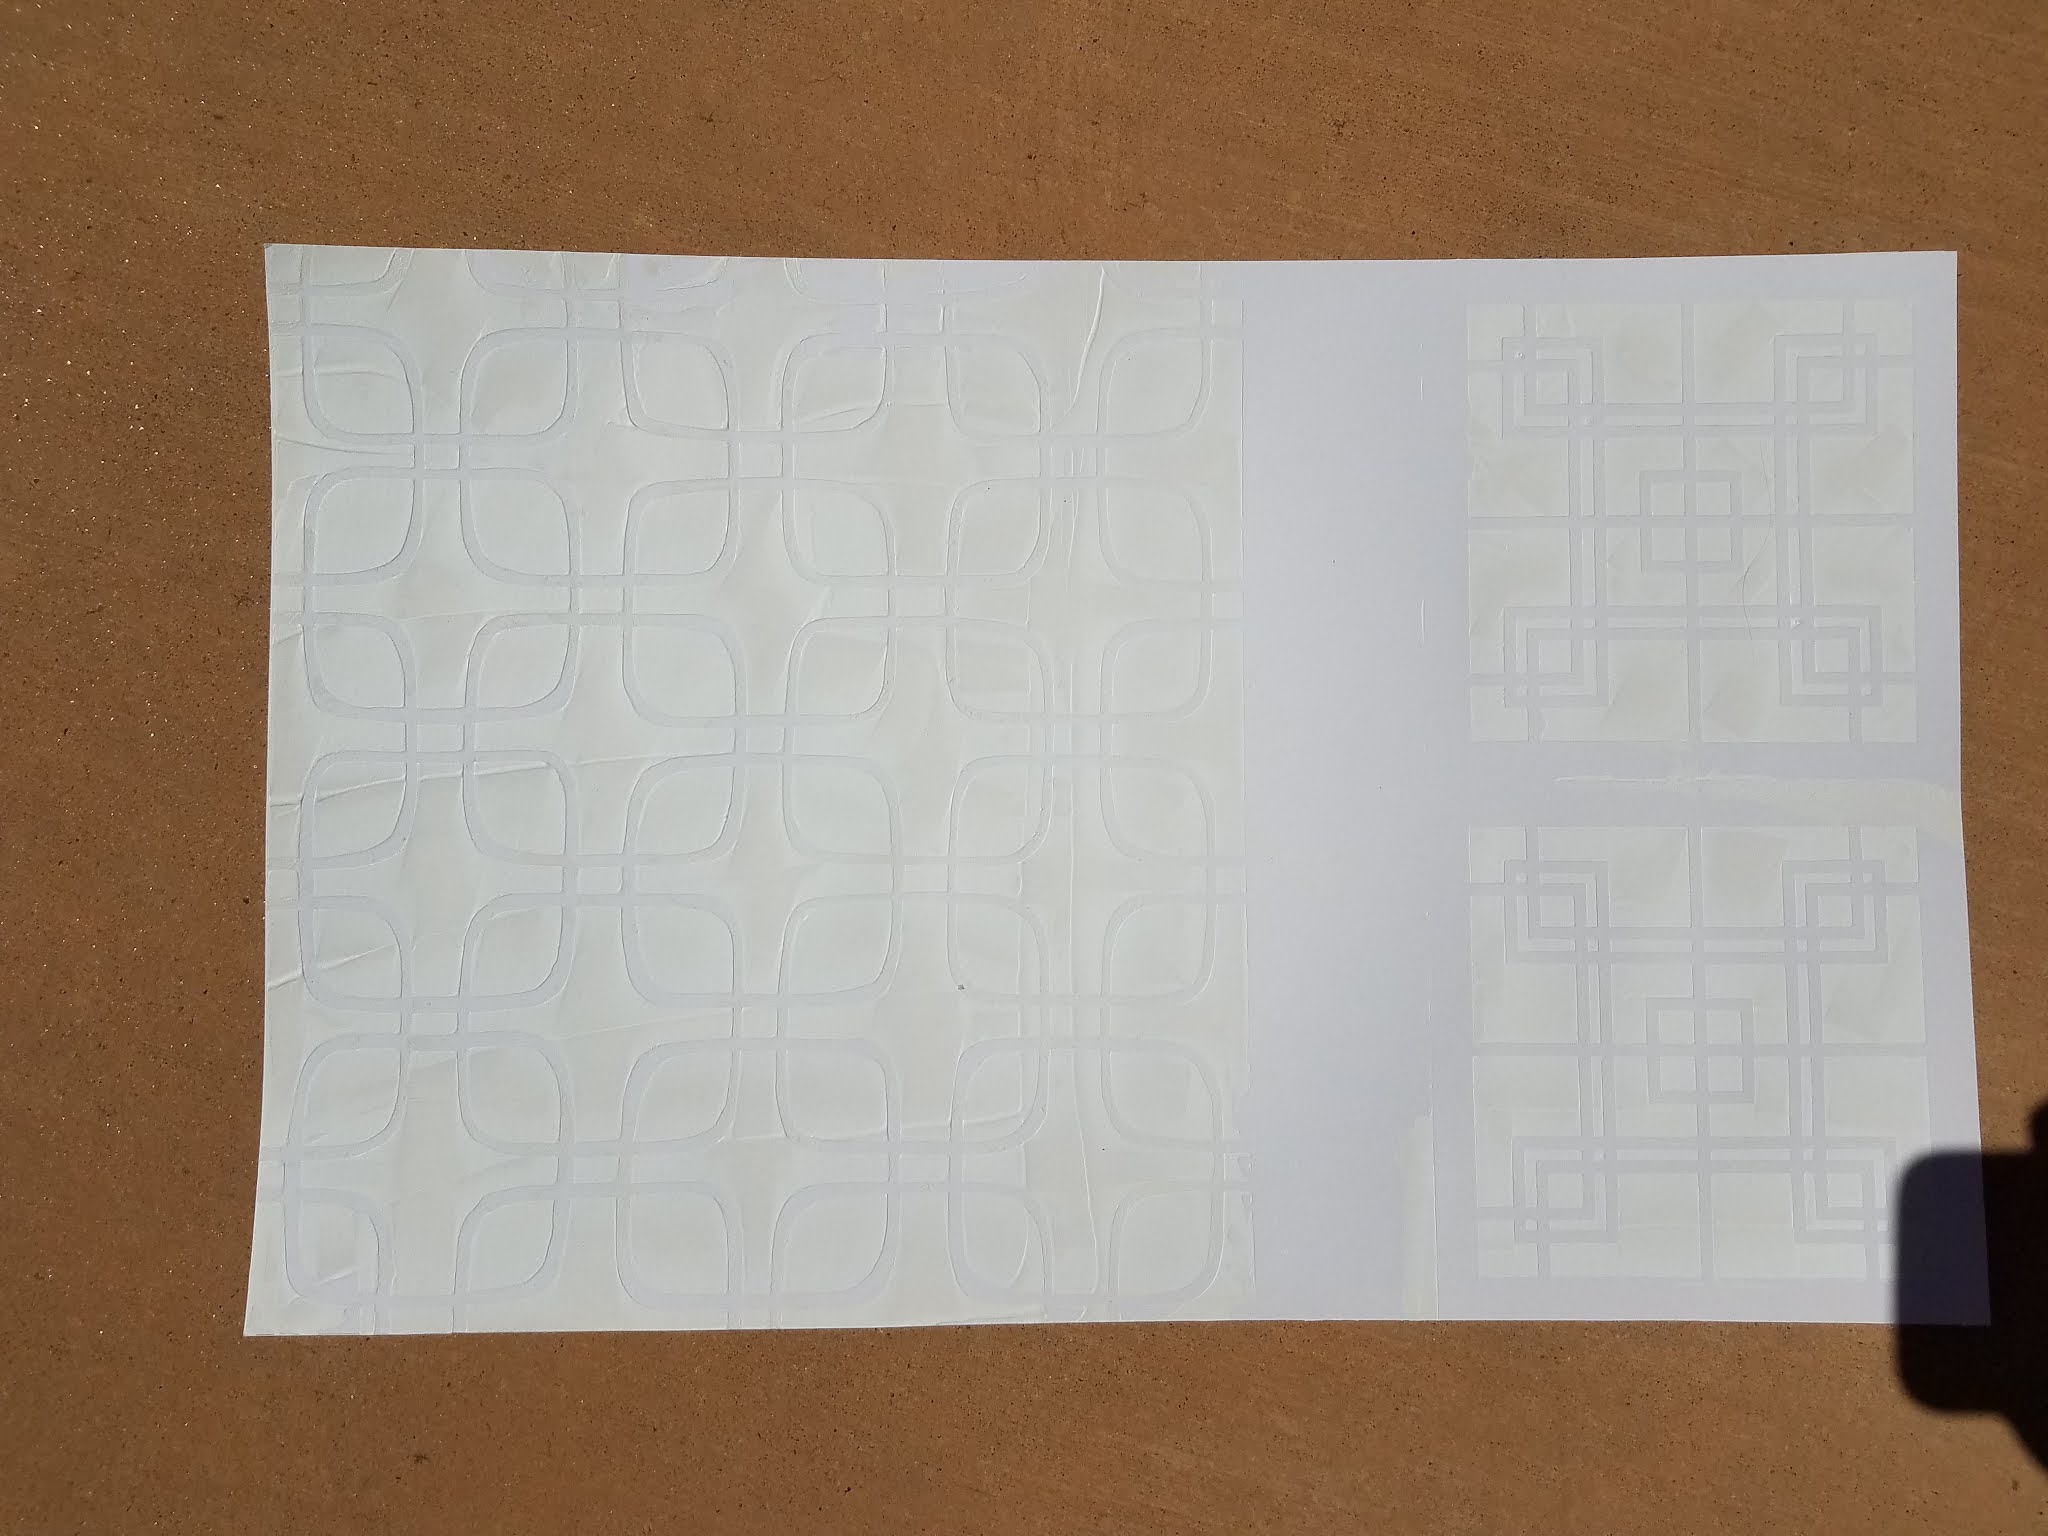
In the two paintings pictured above, I used gesso with the stencils, but needed something to create more contrast between my gouache and the stenciling.  I love to play and experiment, and for some reason, leaf rubbings came to mind.  I scanned my workspace for a suitable material that I could use to rub across the raised surface.  I ended up trying a Conte crayon on its side and was quite pleased with the results!  I began to consider what other materials might also serve the same purpose, and that is the idea behind my blog post today: Experimenting to see which other art supplies could be used to get similar results with stencils and gesso.


If you choose to use this simple technique, here are a few tips for best results:

  • Don't be shy with the amount of gesso you use... The more you use, the higher the gesso will be raised, and easier to capture with the medium dragged on its side.
  • Use a credit card to scrape the gesso through the stencil.  I tried sponging the gesso, and it didn't allow the gesso to create a raised relief effect.  Ideally, you want to be able to feel it underneath your fingertips when dry.
  • I used Golden Gesso bright white acrylic primer. It's a bit more expensive, but it allows you to achieve the best results possible.

Overall, I experimented on cold press watercolor paper, linen-finish watercolor paper, and Bristol Board using acrylic ink, goauche, regular watercolor, and concentrated watercolor for the stenciled backgrounds.  To create contrast, I used Conte crayon, square pastels, soft pastels, oil pastels, and Marabu Art Crayons which are a type of watercolor crayon.


As a fan of all things Mid-Century Modern, I used Square Clover Leaf 6, Lattice Full, and Centered Circle which remind me of the "breezeblock" walls, so prevalent in Mid Mod architecture. 


First, I used a credit card and gesso to stencil the various designs onto the paper.

Next, I layered a variety of mediums and on the backgrounds to see what kinds of effects could be achieved.


Each combination ended up with quite a different feel, depending upon materials used, so the outcomes are nearly endless!  I hope this post inspires you to experiment with this simple technique and discover which styles you like best, to enhance the great work you’re already doing.  It’s an effective technique to pull out when you just want to add some quick contrast to your 3-D piece.


Ideas for further exploration:

·         Colored pencil 

·         Prismacolor Nupastels

·         Crayola crayon


Happy Creating!

Love, Brenda @BrilliantSpectrumArt


I am Brenda Townsend of Brilliant Spectrum Art. I'm a California-Credentialed Arts Educator, working in watercolor, acrylic, colored pencil, pastels and more on paper, murals, and theatre sets. Some of my favorite subjects include lights, tikis, mermaids, birds, flowers, and/or shells in a fantasy setting, with an exotica/retro vibe. Major artistic influences include Disney artist, Mary Blair, The Artist SHAG, Oceanic Art and the Natural World. I work in multi-media, and my process often involves using hand- made stamps and stencils and using found objects to print. I paint my current thoughts and discoveries on top of these backgrounds, in a semi-realistic style, using exciting and surprising color palettes.

I feel passionate about creating uplifting, fun, and beautiful works with broad appeal to provide viewers an emotional respite from everyday life. My work is escapist, joyous, and unapologetic, exuding positive energy which allows viewers to recharge and be transported while experiencing an enhanced reality.

Thursday, November 5, 2020

NEW STENCIL DESIGNERS! Ann Barnes & Helen Shafer Garcia

StencilGirl Products is excited about the six new stencils our two new artists, Ann Barnes and Helen Shafer Garcia have designed. 

We are so happy you are here to check out Ann's whimsical patterned alphabet and Helen's beautiful succulents. Drumroll, please!


The multitude of patterns found among many of the StencilGirl stencil designs inspired Ann Barnes to create the ATC Mixup Alphabet A-I, J-R, and S-Z Stencils. Each letter has a different pattern and may be used to create personalized stationery or gift wrap or to add a monogram. Use the letters to spell out a word, or simply use that pattern itself to create interest in your art journal layouts or designs.

Complete your alphabet now.

L823

L824

L825


Just look at the variety of ways Ann used these stencils!
 

Gotta love a tote full of art supplies.


Layered letters in a nearly monochromatic art journal spread: 


Whoever is getting these darling gifts will be grateful :)


Washi anyone? Yay!


Show that you care: Make and mail a card!


Keep track of Ann's aksbarchitect CREATES blog for upcoming video tutorials with her stencils.


Helen Shafer Garcia says she is always looking for seedling and sprig shapes to include in her paintings and journal. 

Helen says, “I love the upward growth of plants in my garden. I constantly draw and paint succulents and other plants with pencils and paint. I designed these shapes based on seed pods and new growth on succulents. They can also represent ocean plants and seedlings. Now, with the Filigree Sprigs Stencil, you have a great resource to use to explore and grow!”

Filigree Sprigs, L822


Filigree Sprigs Dropped in Color Forest Painting
Step 1: Stencil the design onto hot pressed watercolor paper. I overlapped the images to create a forest.
Step 2: Wet the entire surface with Cadmium yellow watercolor paint.
Step 3: While the paint is very wet and shiny, drop in other colors. I used Quinacridone Rose, Spring Green, and Carbazole Purple. The Carbazole purple was the last color I dropped in under the sprigs to create a “forest floor.”

The Echeverias Stencil design derived from Helen’s fascination with succulent shapes.

Helen says, “These plants have been the main focus for many of my paintings in watercolor. Echeverias have rosette shapes with a large range of colors. Here in Southern California, I have an advantage of living in the best environment for these plants. Needless to say, I have an abundance of succulents on my 1half-acre property. The shapes on the stencil are separated out for you to design your own arrangement. You can add a ceramic pot or go wild and plant them in the ground!”


L815


Blooming Echeverias Painting
Step 1: Stencil the shapes you have selected onto hot pressed watercolor paper using a fairly dark color acrylic.
Step 2: Using a large round watercolor brush, wet the background with plenty of water. While the surface remains wet, drop in colors. I used Carbazole Purple and Ultramarine Blue. Let the colors mingle on their own, allow the water to move the colors.
Step 3: Start painting the succulent shapes separately using the dropped-in color method. Start with a light warm color on the shape and drop-in cooler colors to show the darker areas.
Step 4: Finish up with glazes: paint over dry painted areas with darker colors where needed.

This ballet of shapes will have you dancing in no time. The Echeveria Ballet Stencil design was derived from Helen’s fascination with succulent shapes. Echeverias have rosette shapes with a large range of colors. The seed pods are abstracted in the stencil for you to use as accents.


Echeveria Ballet Stencil, L821

You can see Helen's actual garden of inspiration HERE.


You can add these fine stencils to your collection by heading over to StencilGirlProducts.com.