Hello!
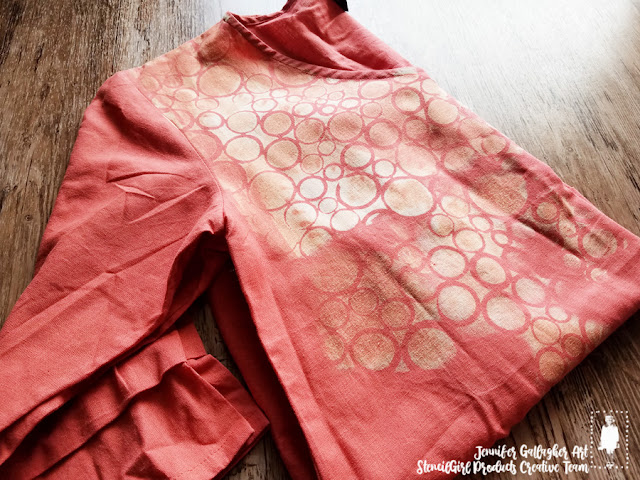
Jennifer Gallagher here again with another post for StencilGirl Products®. This month we were challenged to ‘Dress It or Wear It’ and I’m trying something I’ve wanted to try for a very long time. I’ve been hoarding some Jacquard deColourant for a while now. DeColourant removes areas of color from dyed natural fabrics. This is a fun and easy way to make custom textiles using StencilGirl® stencils. You can create custom fabrics for quilts, wall-hangings, clothes and more. You are going to love this, so let’s get started.
DeColourant is best used on
natural fibers like cotton. I’ve purchased two shirts at a local discount
store. They are 100% cotton and dyed bright colors that are perfect for use in
this project. You will need pieces of cardboard, cheap disposable foam brushes,
deColourant, painters tape, stencils, and the item you want to work on like
fabric or a shirt. I did not use gloves, but if you are particularly sensitive
you may want to use them and work in a ventilated area.
First, I’ve taped down paper
bags to protect my work surface. Then I’ve slipped a piece of cardboard in
between the front and back of my shirt. I’ve taped off any areas I want to
avoid. For the first shirt, I’ve picked the Random Circles Stencil L071. I
taped the stencil down to try to hold it in place.
Next, I dipped my foam brush into the decolourant. You do
not want to soak the brush. I dipped the brush about a third of the way down
and then using the side of the container, scraped the excess of each side of my
brush. Using too much decolourant will cause it to seep under the stencil and
ruin your design. When ready, using the brush, slowly pounce the decolourant
onto the fabric through the stencil. Don’t wipe the brush back and forth; tap
the product on in an up and down motion.
Here you can see the left side has been completed. You
can already begin to see the design appearing. I’ve moved my stencil over to
the right side. I repeat the process the same as before. (Be sure to thoroughly
rinse your stencils after with warm soapy water.)
DeColourant is activated by heat. So if you feel like you’ve
made a mistake, all is not lost. At this point, you can still wash the paste
out of the fabric and start over once it’s dry. If you like what you’ve done,
all that’s left is to heat set it. I used non-steam heat on my iron at a medium
setting. The longer you iron your design, the more of the color will be removed.
In this photo, you can see the spot in the center is the
lightest. I left the iron on that spot the longest.
Here is an example of the other shirt I made with the SpiritSwirl Mask stencil, S578.
After you have completely ironed your design you will
need to wash it with a mild detergent.
I hope you have enjoyed this tutorial. This process is
very easy and a lot of fun. I cannot wait to create my own custom fabrics for
wall-hangings and pillow covers.
Thank you for letting me
share this project with you. If you would like to see more of my work visit
my blog or look me up on Instagram.
Happy Creating,
Jennifer Gallagher


Thank you for sharing, I cannot wait to try this. I am going to try it on an all cotton tshirt which has spots. I only use it for arting.
ReplyDeleteSo glad you've decided to try it. It's really fun and couldn't be easier. Happy creating!
Delete