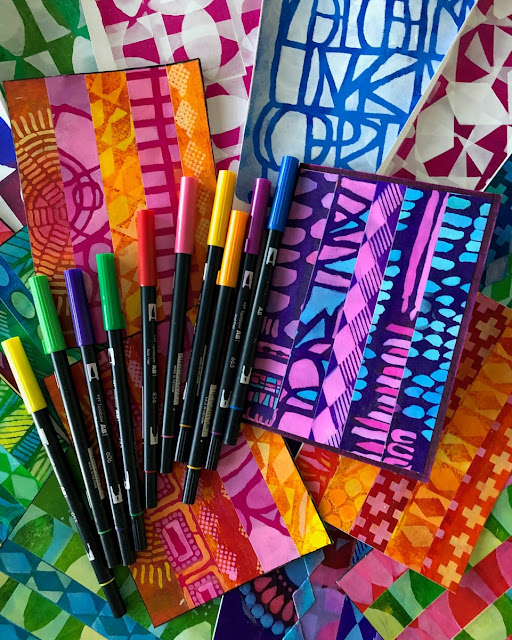
Hi! My name is Becky Holaway of inkstainedlife. I’d like to show you how I use watercolor
brush pens with StencilGirl®
stencils to make collage greeting cards.
Step One:
Brayer acrylic paint onto a gel plate. Darker hues work best for this technique. For paper, I use a 90 lb. index card stock.
Step Two:
Stencil with white acrylic paint. Sponge twice to achieve greater opacity.
I use Liquitex white soft body acrylic and Premium Beauty Sponge Makeup Blenders. The two work well together because the soft body acrylic mimics the consistency of liquid foundation. Gripping the top of the tear drop shape, I lightly “dab, dab, dab” onto the stencil, then gently “squish and roll.” I rinse the sponge once I’m done and let it dry overnight. It’s ready to use again the next day.
The stencil pictured here is Alternating Diamonds. I position the stencil in one direction, then in another, in order to achieve a unique pattern.
I like to have a stash of these “blank” stenciled pages on hand. Stenciled pages, a few markers, and a packet of tissues—I’m good to go! It’s my version of an adult coloring book—meditative and stress relieving.
Step Three:
“Color” with brush pens. Here, I’m using Tombow Dual Brush Pens in colors 665, 723, and 743, on top of quinacridone magenta.
Using color 743, I color in a small section of the white stenciled area. I quickly dab the color with a tissue. Then, especially if it’s a darker color, like 743, I give a quick rub, too. This “dab and rub” technique eliminates the marker brush strokes and blends the pigment into the white acrylic paint for a chalky, seamless effect.
If I find that marker color too dark after dabbing and rubbing the excess color away, I can remove color with the Tombow colorless blender. If it’s a lighter color, I let it sit for a minute, then dab it. And, if I want to achieve subtle shading, I slowly build up lighter colors.
I’ve also had good results using Koi Watercolor Brush Pens, Zig Brushables, and Faber-Castell PITT Artist Pens. Brushables and Artist Pens are waterproof; Koi and Tombow are not.
On the left is Alternating Ovals. I rolled cadmium red hue across the top half of the gel plate and dioxazine purple across the bottom. I used Tombow colors 636, 665, 723, and 743.
On the right is Soulful Scribbles Dots Dash. The background resulted from a thick layer of dioxazine purple pulled from my gel plate. The blues are color 373, 476, and 493. The purples and pinks are 636, 66, 723, and 743.
This is a sampling of
some completed stencil prints. I used Alternating
Diamonds, Alternating
Ovals, ATC
Mixup Dube, Soulful
Scribble Dots Dash, Ladders
Stencil, Aztec
Sun, Scribble
Scratch Handwriting, LetterMania, and Clustered
Leaves.
On several of these, I started with one color, then decided to try
another. Sometimes, my selection of
colors work well together and, other times, they don’t. It’s a fun learning process. I always remind my inner critic, “Imperfection
is perfection!”
Step Four:
Tombow Dual Tip Markers
are NOT waterproof, so the prints need to be sealed. I use two coats of ModPodge Clear Acrylic
Spray Sealer.
Step Five:
Time to get out my paper cutter and make greeting cards!
First, I cut off those parts of the prints that I don’t like and focus on what I do like. Generally, I cut the prints into one-inch strips. But, sometimes, I cut them into wider strips, just depending upon what “lights my wick” and what works with other strips.
Then, I organize the strips according to color.
Finally, I start combining the strips to make cards.
Step Six:
I adhere the strips to Strathmore
Watercolor cards, 140 lb. cold press, 5” x 6 7/8” with
a Scotch Mega Glue Stick.
I lay down a line of
glue, apply the strip, then brayer over it to remove any bubbles.
I finish off the card
with a black border made by running a Faber-Castell PITT Artist Pen Big Brush
around the edges.
If you don’t know what to
do with the results of your creativity, click here
to see a list of wonderful organizations that would love your cards!


I LOVE making greeting cards so I was totally delighted with this, even before I saw your gorgeous results! I noticed that, among all the beautiful StencilGirl stencils, you used Pressed Leaves stencil as well as Clustered Leaves. May I have your permission to re-post a couple of your photos on my blog?--giving full credit to you, of course. If you would first like to check out my blog, here it is -- http://heartworkbycecilia.blogspot.com
ReplyDeleteOf course! Thank you!
ReplyDeleteWhat wonderful brilliant colors you get with this technique! Thanks for sharing!
ReplyDeleteBeautiful work love this idea
ReplyDeleteYour cards are stunning Becky!
ReplyDelete