
Hi, servus and welcome to today's (hopefully inspirational) column! How is everyone doing these days? We're living in crazy times at the moment and even without the pandemic turning everyday life into a challenge in so many ways (sometimes quite unnoticed but nonetheless with a lot of impact on our bodies, minds and souls), mine would be challenging anyway. Gladly not just in a bad way though! But let's start at the beginning of what has led to me needing to reinvent not just myself but a lot of other things as well!

Those who know me or have been following my blog, may have noticed I have gone really quiet during the last months. Menopause set in about two years ago and has been giving me hard times since then (especially when you already have a metabolic disorder, additional hormonal issues are very likely to cause chaos - which is exactly what happened). By now I am stable again on the hormonal side, but the long long struggle until I got to that point has left me with panic attacks and trembling hands and finally also a depression (which got a lot worse during the third Corona lockdown in Austria).
I decided to get me some help and see a therapist (especially as no medication against the panic attacks worked for me).
So far I've learned that obviously I am at a point in my life, where I need to reinvent not only my way of life but also my way of thinking and looking at a lot of things (including things in the past as well). Also my son is grown up now and will go to University this autumn and - another great change - we bought a lovely little house by my favourite lake in the beautiful Austrian Salzkammergut last autumn!
So moving in and exploring our new additional home close to the lake, forests and mountains is something that keeps me going and is a healthy contrast to all the pandemic hysteria, paralysis and uncertainty. I also have my own studio over there - and setting it up really is a challenge - especially as I am also keeping the studio in our flat in Vienna.

I have made a short video to take you on a first tour in my new studio. I am sure a lot of stuff will be rearranged in the future, but for now I have set up a kind of base equipment covering most of my favourite techniques, media and themes. Putting it together made me learn something about myself - I rediscovered a lot of items that reminded me of "forgotten loves" - creatively spoken.
I found long forgotten stamp sets for example that all show my love for nature and texture and I wonder why and how I could forget about these for so long.
I guess it happened during my creative journey which at some point turned more into a "let's try out this new stuff and that new genre" direction than one that would lead me closer to myself and the things I really love and feel related to. - Time to reinvent and get back to the roots and try another road this time. Maybe I will end up in a spot that feels better and more like home than my actual one which in the final stages meant panic attacks and trembling hands as soon as I sat down at my studio desk.
The new studio also means new space for new projects! My first new project to go in it is an altered desk organiser in vintage Bohemian style - of course with my usual dose of grunge and texture!


The desk tidy originally was a cheap dollar store kit that came with designer papers and stickers to add to the MDF pieces, but I decided to create my own vintage Circus version and use old bookpages and collage paper instead.
The StencilGirl® stencils I used for this project were all designed by Laurie Mika and I fell in love with them at first sight.


and

The designs really spoke to me, so the whole project came together kind of by itself. I love it when you get taken on a creative journey like this! No trembling hands, no sweating at my studio desk - just the beautiful designs, my favourite paints and I.

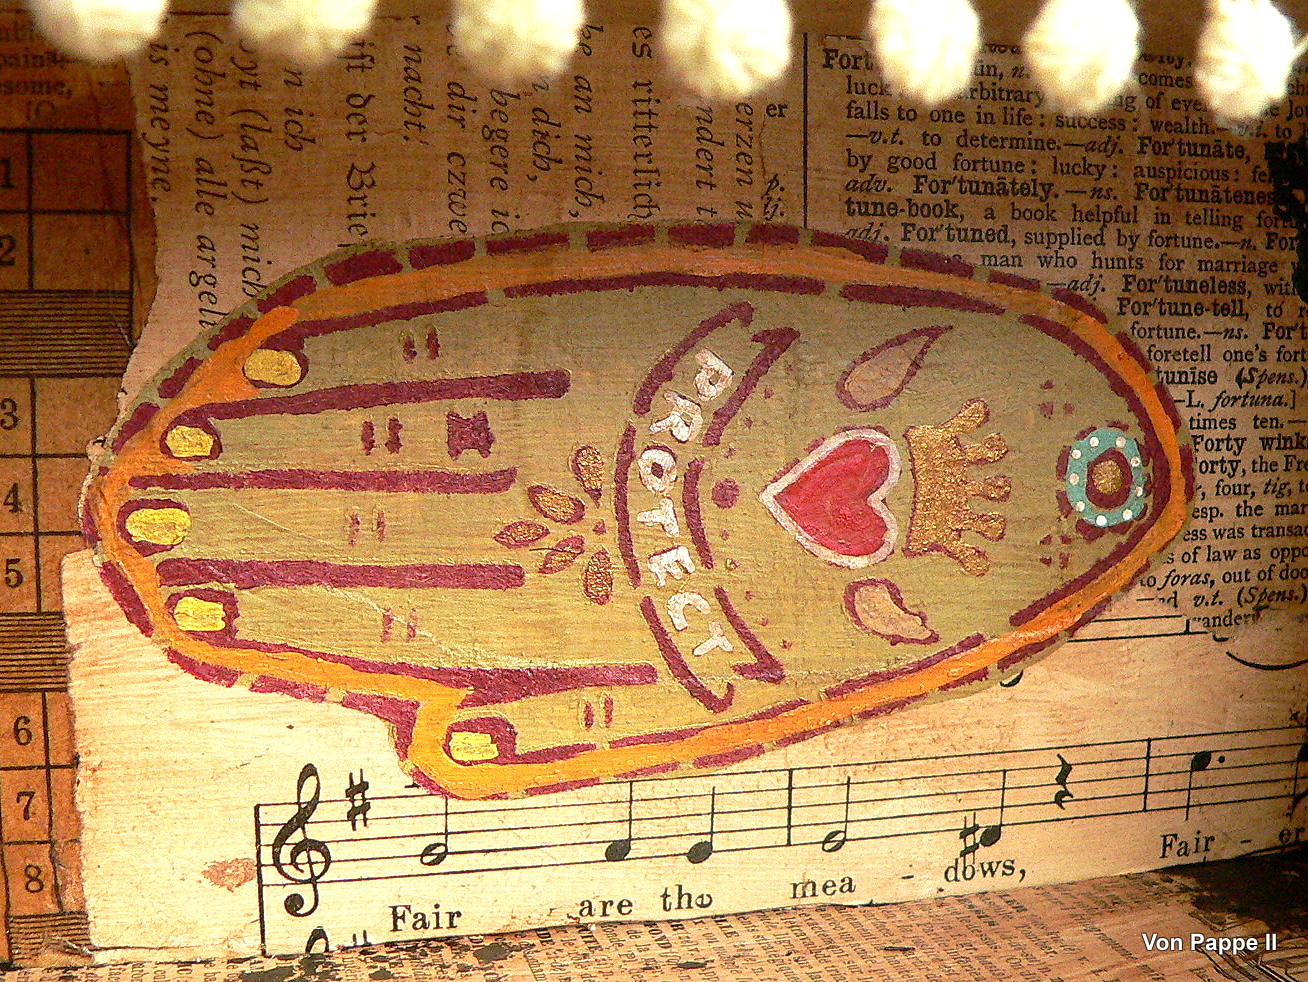
Preparing the MDF pieces took some time - but making your own backgrounds from old dictionary pages and paper scraps is so rewarding!
(for a larger view click on the images)


Time to transfer the cool Laurie Mika designs!

I have an almost emptied pot of "lace" DecoArt Chalky Finish paint with paint that has already started to dry out a little - so it isn't that liquid-y anymore but a bit heavier and therefor perfect for stencilling detailed designs! I used that and a small size stencil brush to transfer the designs to their final spots on the pieces.


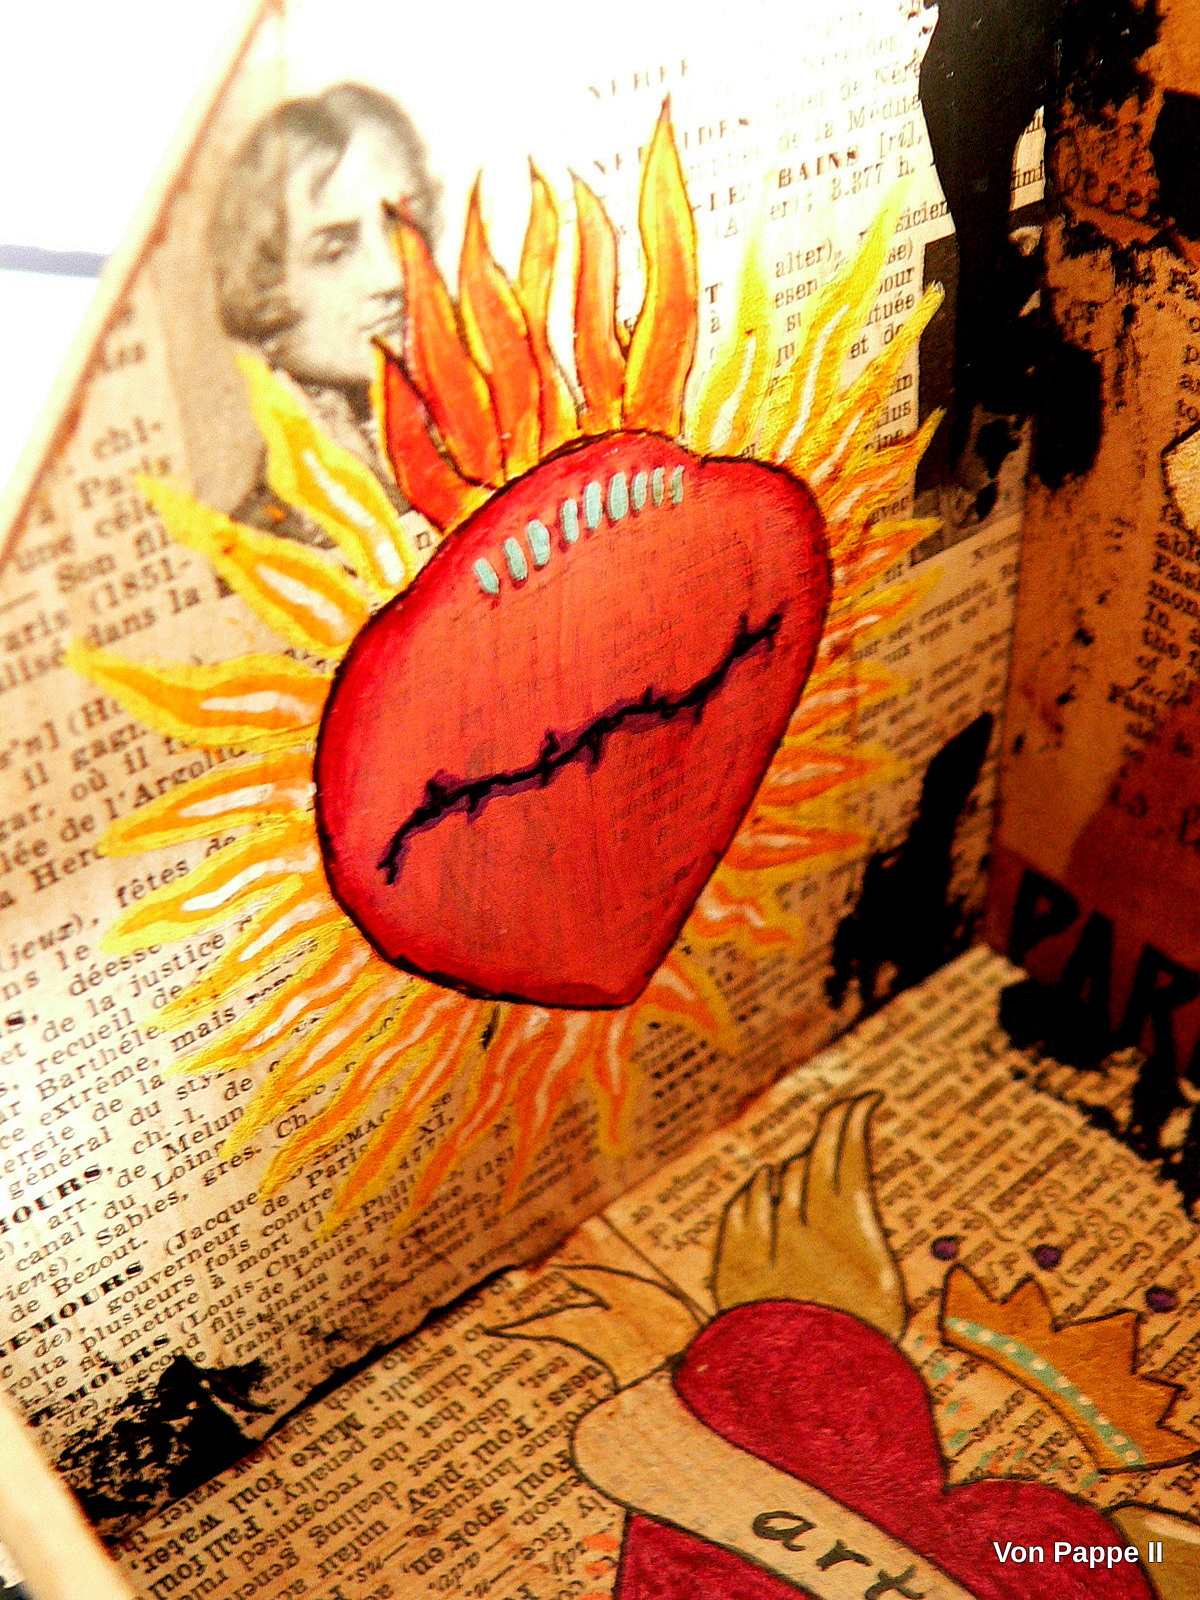
Next I picked a colourful selection of DecoArt Satin, Americana, Vintage Wash and Matte Metallics paints and went for vintage looking tones mainly. The colours I picked were quite bright, but they would get toned down later anyway. Some were more opaque while others were quite transparent (like the Vintage Wash Effect paints) - I like to mix and layer paints with varying opaqueness as it adds a lot of depth to any project.

I added paints to all the designs simultaneously - using the same colours in different spots and also using mixes of them. This way it all slowly came together and all designs matched colour-wise.

I also went back in with the stencils several times (this time using the paints) to re-add detail that I had painted over when I base-coloured some of the shapes I had transferred. This is much easier than trying to paint in and around details with a detail brush!

Final touches and more details were added using a permanent black china ink pen and a white acrylic ink pen.

Time to grunge everything up a little!
I added black crackle paste and also black DecoArt media Gesso with the very tip of my palette knife and created smudges here and there.


Once everything had dried, I went over all the pieces with a layer of slightly diluted DecoArt Walnut Gel Stains - my favourite medium to tone down designs and make them look more vintage and weathered!

Finally I just needed to assemble the pieces with my all-time go-to glue and sealant -
matte Decou-Page.
I also added a self made knob handle (made from a vintage button and some chipboard circles), a
pompom trim and some glittery gem stones for a bit of bling and interest.


Done!

I hope you like it too! Here are some images of the designs close up - I love each and every one of them! These stencils have made it to my group of favourites!


Thanks so much for stopping by! I hope you've also enjoyed the short studio tour!
Stay safe!

Claudia
xxx

Uh wow! What an amazing desk caddy! Love your color / collage paper choices!
ReplyDeleteThank you very much, Sue! :) xxx
DeleteI love your new studio. You have so much space! It will be fun to see it again when you've used it a few months. I can imagine the challenge of having two studios. Good luck deciding which supplies go to each one!
ReplyDeleteI'm glad you're moving out of your challenging days and taking new turns. It sounds like you're getting healthier.
I also love the Lauri Mika stencils and love what you've done with them. That desk organizer is wonderful! Thank you for sharing.
Aw! Thanks so much, Terry! Yes, I am making progress - slowly but steadily ;)
DeleteI hope you are well and safe, too! xxx