Hello there! I’m Kelly Warren, and I’m so excited to be with you here today as a guest designer on the StencilGirl® blog! I’m a life-long Florida native living in North Florida. “Home home” as we call it is Jacksonville, but we are currently in Tallahassee for the school year each year. I create in a variety of mediums, from jewelry design to bookbinding to photography to what I’m here to share with you today, art journaling! I love to use stencils in my journals and was thrilled with the StencilGirl® team asked me to join them for a blog post. So let’s get started, shall we?
I’m working here in a handmade journal created by one of my daughters. It includes Canson mixed media pages in a couple different sizes for variety. I’m usually creating in more than one journal at a time so I can use up leftover paint in one journal while I’m playing in another, and that’s how this spread started out, above. I had used these pages to clean the paint on my brayer while working on another page.
Next, I brayered on some white gesso to tone that background down a bit. When I’m playing in my art journals, I don’t usually have a plan. I tend to just grab what’s near me and go from there. I was lucky the gesso was sitting right on front of me!
Next, I added some tissue paper scraps. Do you save all sorts of random stuff? I know I do. Pretty sure this tissue paper came out of a gift bag one of my daughters’ received.
Next, I added in some sewing pattern paper. I love how you can still see the tissue paper speckles beneath it.
Next, I added in some stamping using a Tim Holtz mixed media stamp with Stazon ink in Saddle Brown.
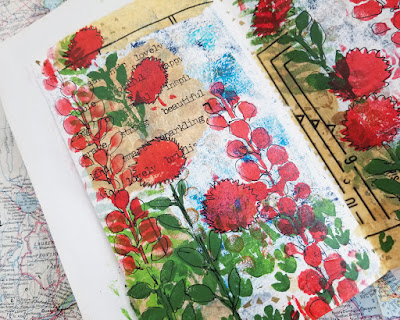
Then I finally grabbed a StencilGirl® stencil! I “try” to keep my stencils organized in scrapbook albums in sleeves. I say “try” because I invariably end up with several stacks sitting around my worktable that I haven’t put away. Because of that, you’ll often see bits and pieces of the same stencil make an appearance in three or four spreads in a row. The stencil I’m using here is Tall Flowers stencil by Margaret Poet. I started laying down a background of lovely green things using two different shades of green Liquitex paint, with the somewhat vague idea of creating a wildly blooming garden.
Next, before adding the first layer of flowers, I added in a bit more tissue paper, some with words, and some with very faint white large floral shapes. The latter was the tissue included in my most recent CauseBox (so again, yes, I save all sorts of stuff!). Then I added two different types of flowers with a rose-red paint, moving the stencil around to start creating my garden. I don’t usually use red very often, but those puffy shapes just screamed red to me.
A little bit of pen work for the back layer of flowers was next. I’m forever in search of the perfect black pen! Open to all recommendations! Here I used the Uniball Eye fine black pen.
Next I added another layer of flowers from the same stencils. These looked like lilacs to me, so I gave them the purple treatment.
I just continued adding layers and pen work from there, using both the black pen as well as a white Signo Gelly Roll pen and a gold Sharpie paint marker.
My spreads tend to be a little chaotic and busy, and this one definitely follows that pattern. Overall, though I didn’t really start with a fully fleshed out goal in mind, I did end up with a lovely little garden thanks to just one StencilGirl® stencil! Just that one was so versatile!
Thanks for joining me here, and thanks again to the StencilGirl® team for inviting me. You can find me on Instagram @kellynwarren, on my blog at http://happyshackdesigns.blogspot.com/ or on my website at www.happyshackdesigns.com. I work full-time in college athletics and activities and I volunteer my photography skills as an animal shelter photographer (see lots of adorable furry faces on my shelter IG @shelterpetsuperstars), so I stay pretty busy. But I find that squeezing in a little time each day, if possible, for a little art play is always worth the time and helps clear my mind. Even if I’m just cleaning up the constant mess in my studio, giving myself that little bit of time playing with art supplies keeps me sane!


I am brand new to stencil work. This piece and your explanation are so inspiring. Beautiful
ReplyDeleteThanks! I'm so glad you enjoyed it!
ReplyDeleteStunning
ReplyDeleteThank you!
DeleteYour layering in this spread is beautiful. Thanks for sharing your techniques.
ReplyDeleteThank you! Glad you enjoyed it!
DeleteSo beautiful and well presented, Kelly! XOXO Sarah
ReplyDelete