Hey everyone, Lorri Scott here to talk about my journey into rust dyeing on fabric using StencilGirl® stencils.
I became interested in rust dyeing several years ago when I was learning how to eco-dye using leaves and flowers. The rusted areas that transferred from the iron pipe used to roll fabric on for eco dye prints intrigued me. I began gathering iron objects such as trivets and gate pieces to create rust on and transfer print onto fabric. The transfer method was to take the rusty metal object, lay wetted fabric on top and then weight the fabric down and let it sit. Warm sunny days are the best to create rust prints!
After several years of rust printing on fabric I wanted to introduce the technique in classes. And I have done that but it became cumbersome to lug heavy metal pieces around with me, let alone enough for students to use! Seemed I would need one of those “Got Junk?” trucks.
One day I was reading a post on Facebook and a woman had mentioned using steel wool and stencils. I could not find that post again and nothing came up when I did a search online.
I knew I could figure it out and just started experimenting. Right away I was hooked and I thought how much easier it will be to take stencils with me to teach workshops rather than super heavy boxes of metal! LOL! And so many choices of stencils too!
This
is a sample of my own private “junkyard” treasure trove. (Well some of
it).

These are samples using StencilGirl® stencils. These will make great background pieces for art. These could become wall hangings, modern day prayer flags, and/or get stitched onto garments and accessories. I use cotton muslin, silk fabrics such as noil and broadcloth and also vintage napkins and placemats, either cotton or linen.


Stencil - Winter Trees Bark (L635) Valerie Sjodin

Stencil – Wrought Iron Gate (L224) Cecilia Swatton

Art Nouveau Rug (L695) Kate Thompson

Protector of the Fields (S407) Roxanne Evans Stout
Here are examples of how these could be used for backgrounds.
Kate Thompson sells images of her paintings printed on organza in her Etsy shop. I have taken one of her prints and laid it over the Basket stencil rust print. I could attach this using Lite Steam-A-Seam 2 fusible bonding. It could be that simple or could be further embellished with paint, stitching, lace, etc.

I made this rust printed fabric image into a simple prayer flag. I printed The Apache Blessing onto organza using an ink jet printer and stitched it onto the rust dyed fabric. I wrapped the stick with some red embroidery thread and attached to the fabric.

The Process
Supplies:

Choose the stencil you will use and be sure to use masking tape to cover the StencilGirl® information at the bottom or else that will appear on your rust print.

Fill a spray bottle with ½ white vinegar and ½ water.
Fill a quart size (or larger) baggie with sand and make sure it is sealed securely.
Take
the piece of fabric and wet it, wring it out until it’s just damp.
Put a towel down and put a piece of plastic down larger than your piece of fabric.

Lay the fabric on the plastic and then the stencil onto the fabric.

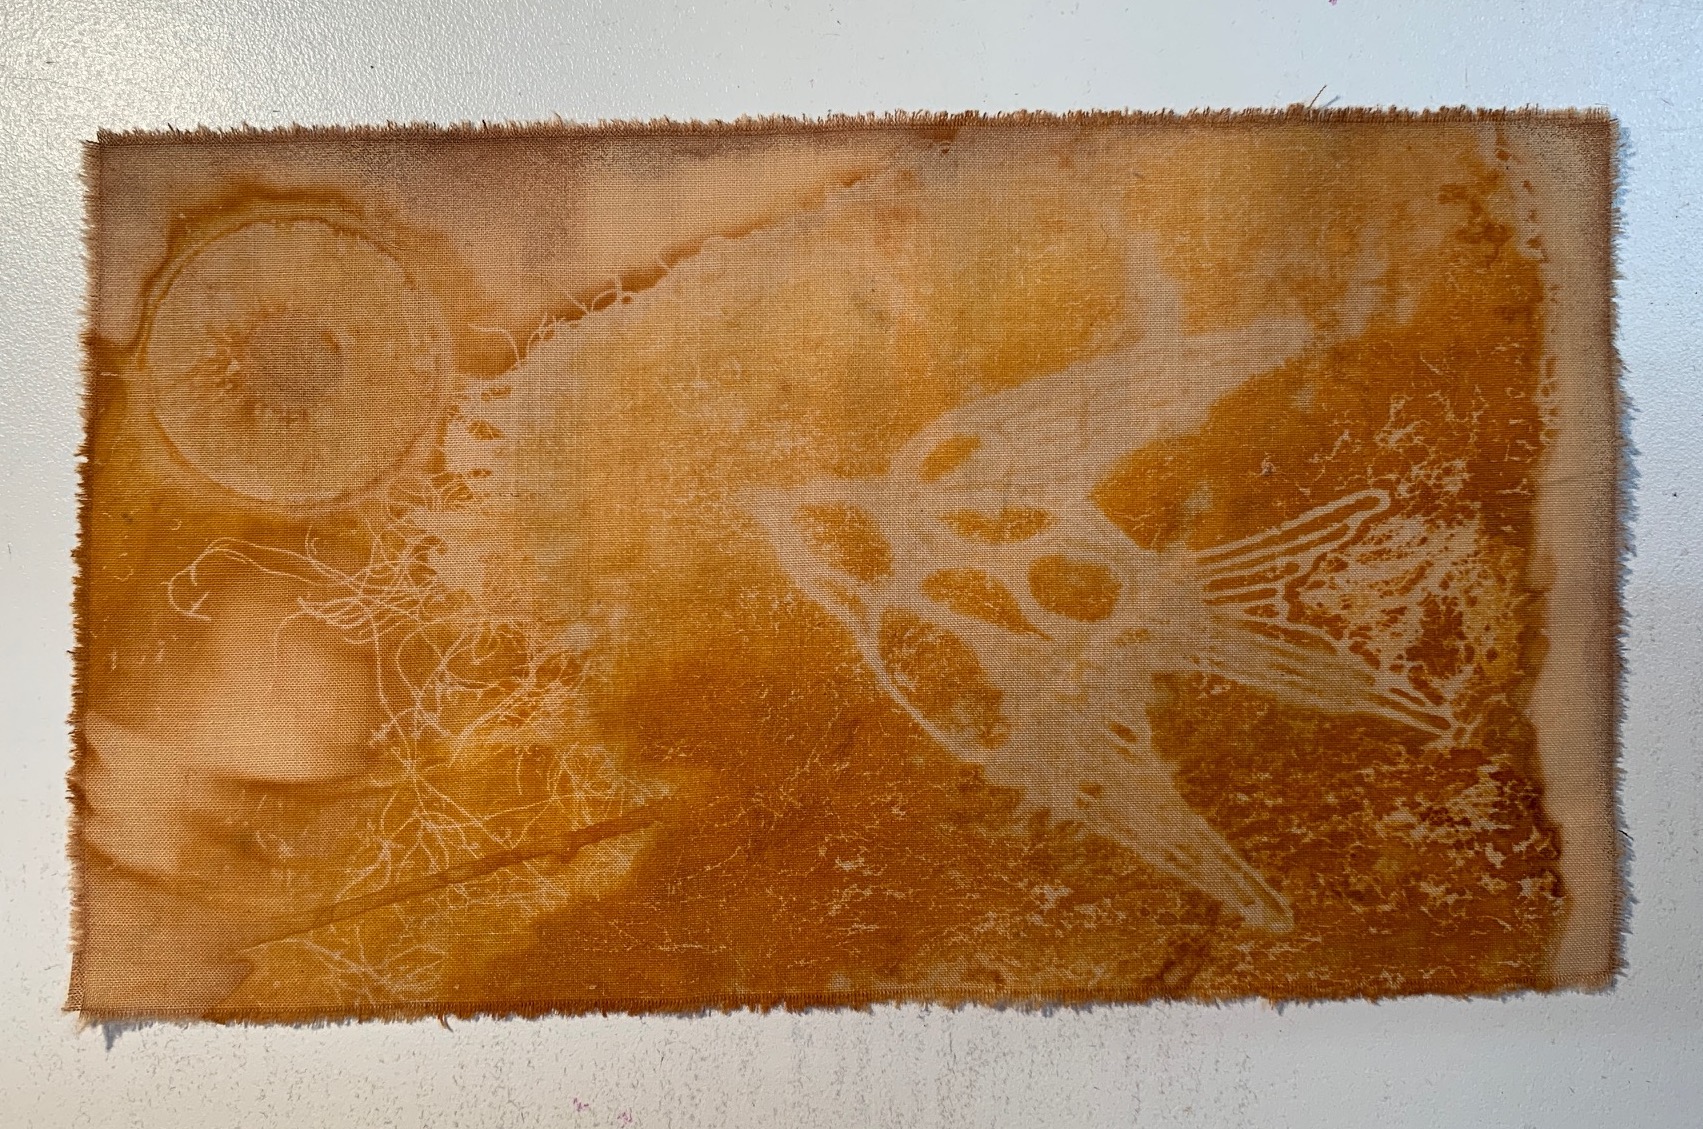
Take a roll of steel wool and unwind it. Stretch it out a bit and tear/cut the size you need to cover your stencil. Lay it over your stencil. If the steel wool exceeds the size of your stencil then the rust will show outside the cut of the stencil. See the image of Roxanne Evans Stout stencil I used for the prayer flag. Those rust areas outside the stencil were because the steel wool overlapped. Be sure to wear a mask when handling the steel wool, you don’t want to breathe the tiny particles, and it’s a good idea to wear gloves too.

Using the 50/50 vinegar water in the spray bottle, wet the steel wool until wet. You do not want it saturated but you need it evenly wetted.

Lay the sand bag on top of the whole “sandwich”. Plastic, stencil, fabric, steel wool, sand bag. The sand bag will weigh the steel wool down onto the fabric.

Now the tricky part is how long? Rust needs, moisture, air, and heat to promote. So if it’s a hot sunny day this could go fast, within an hour or two. Keep lifting the sand bag to make sure the steel wool is moist. If it’s dry spritz it with the vinegar/water. If you have this in a warm room it could be done within 5 – 8 hours. Or leave it overnight.
Gently lift the stencil and check to see if the image is showing yet. If not you may need to wet the steel wool some more and leave a bit longer.
After you remove the layers and have the image on the fabric you need to iron it. Remember that some of the rust is not going to set into the fabric and will rub off so be sure to put down a press cloth on your ironing area and also put a press cloth on top to protect your iron. I buy cotton sheets at the thrift store and tear them up to use as press cloths. Be sure the iron is on the hottest setting, this will help set the rust a bit more.
Fill a tub with ¼ cup baking soda and hot water. Soak your rust piece in that for about 10 -15 minutes. Then wash your fabric using a mild soap and rinse. Let it dry and then iron it again and it’s ready to use.
If
you want to explore rust dyeing techniques further perhaps you would like to
join me and Jen
Cushman
for an intimate gathering in Cottonwood, AZ in a private retreat compound. Oct. 21 -25, 2021. Five days of art and inspiration, sisterhood
and creativity, intention and self-discovery (and rust dyeing). Mundane meets magic … or better known as
“Rust and Stardust”. The perfect balance
of chemistry and creativity with a sprinkling of mysticism.
For more info visit Rust & Stardust — Soul Stir Magic

I love how you've found a way to rust-dye with stencils! Thanks for the great information!
ReplyDeleteYou are welcome Terry!
DeleteThis is brilliant! I’ve tried it and it works wonderfully! Thank you for sharing! I’m
ReplyDeleteSo happy it worked out for you! It really is fun and amazing!
DeleteLove this so much! Thanks for being so generous and sharing!
ReplyDeleteVery exciting! And I agree that it is very generous of you to share your knowledge. I will definitely try it out.
ReplyDelete