
It’s Jill McDowell here with another upcycled project. This time I’m combining decoupage and stencils to give a sad little chest of drawers a make over. It’s a real rags to riches story.
They say hunting for the perfect piece is half of the fun. But I can tell you that upcycling that perfect piece is even more satisfying. Lately I seem to be overrun by art supplies. I’m convinced that they, like Gremlins, have a propensity to multiply if you use them after midnight. On the other hand, perhaps that’s just when I’m at my weakest and the pull of that online shopping cart is the strongest. While I could really benefit from a good old fashioned purge, I’ve been looking for a small chest of drawers to tide me over until I actually get the courage up to do it. I thought that a small bureau slid under my work table would give me some much needed storage and give me more time so I could continue to put off making some really hard decisions. Come to think of it, I guess procrastination does have its benefits.

My search finally paid off when I spied this “flat file cabinet” in an online auction. The auction notice pointed out that the piece had some issues; some pretty big holes where the knobs should have been and damage to the veneer on the side of the chest. But since no one else had placed a bid on it I speculated that I might be able to pick it up at a bargain price. To my delight, I ended up being the only bidder and took it home for just one dollar. Happy Dance!

Once I got the chest home and was able to inspect it, I came to the conclusion that a "flat file cabinet" was somewhat of a misnomer. The piece had probably started life as the top three drawers of a larger dresser. No matter, the size was perfect for my needs. A little paint, decoupage tissue, a stencil or two, and some love was all this piece needed to transform it from and ugly little duckling to a real head turner.
The first thing I did when I got the chest home was to wipe down the entire piece with a little Borax laundry booster diluted in warm water. I used to use T.S.P. to clean and degrease my pieces but I’ve since learned that Borax is a much more environmentally friendly product and it does just as good of a job. Little things do add up.
If you’re going to spend time restoring a piece you don’t want it to develop issues down the road. So I ripped the loose veneer pieces off of the sides to ready the dresser for its repair job. I didn’t want any loose pieces left that could buckle, chip or flake later and ruin my little work of art. On a side note, I’ve since discovered that chunks of old veneer make a great substrate to stencil on. The wood is super thin and it makes an unexpected embellishment for your art journal.

Bondo is a two part product that is non-shrinking, water resistant, sandable after 15 minutes, and paintable after 45. The filler comes in a can that has a tube of hardener tucked under its lid. Making repairs is easy. You just mix the two parts together according to the directions on the can. Be careful to mix only what you can use in 5 to 10 minutes as it will go from the consistency of peanut butter to rock hard concrete rather quickly, (ask me how I know this….)

I used a putty knife to patch the Bondo over the damaged veneer. It felt almost like I was was frosting a cake.


I used a foam roller to apply a coat of primer over the piece. I like to use a shellac based primer to seal the wood and prevent any bleed through.

I ended up applying two coats of paint. It had a really nice consistency, went on smoothly, and gave me good coverage. I would definitely buy this brand again.


I’ve never decoupaged before but after drooling over some gorgeous furniture pieces on Pinterest I found a 30% off coupon from Zazzle, broke down, and ordered a design or two printed on 18 pound tissue paper. (Truth be told, I actually ordered five designs without any projects in mind, proving my point that art supplies really do multiply. It's also further justification that I desperately need more storage space.)
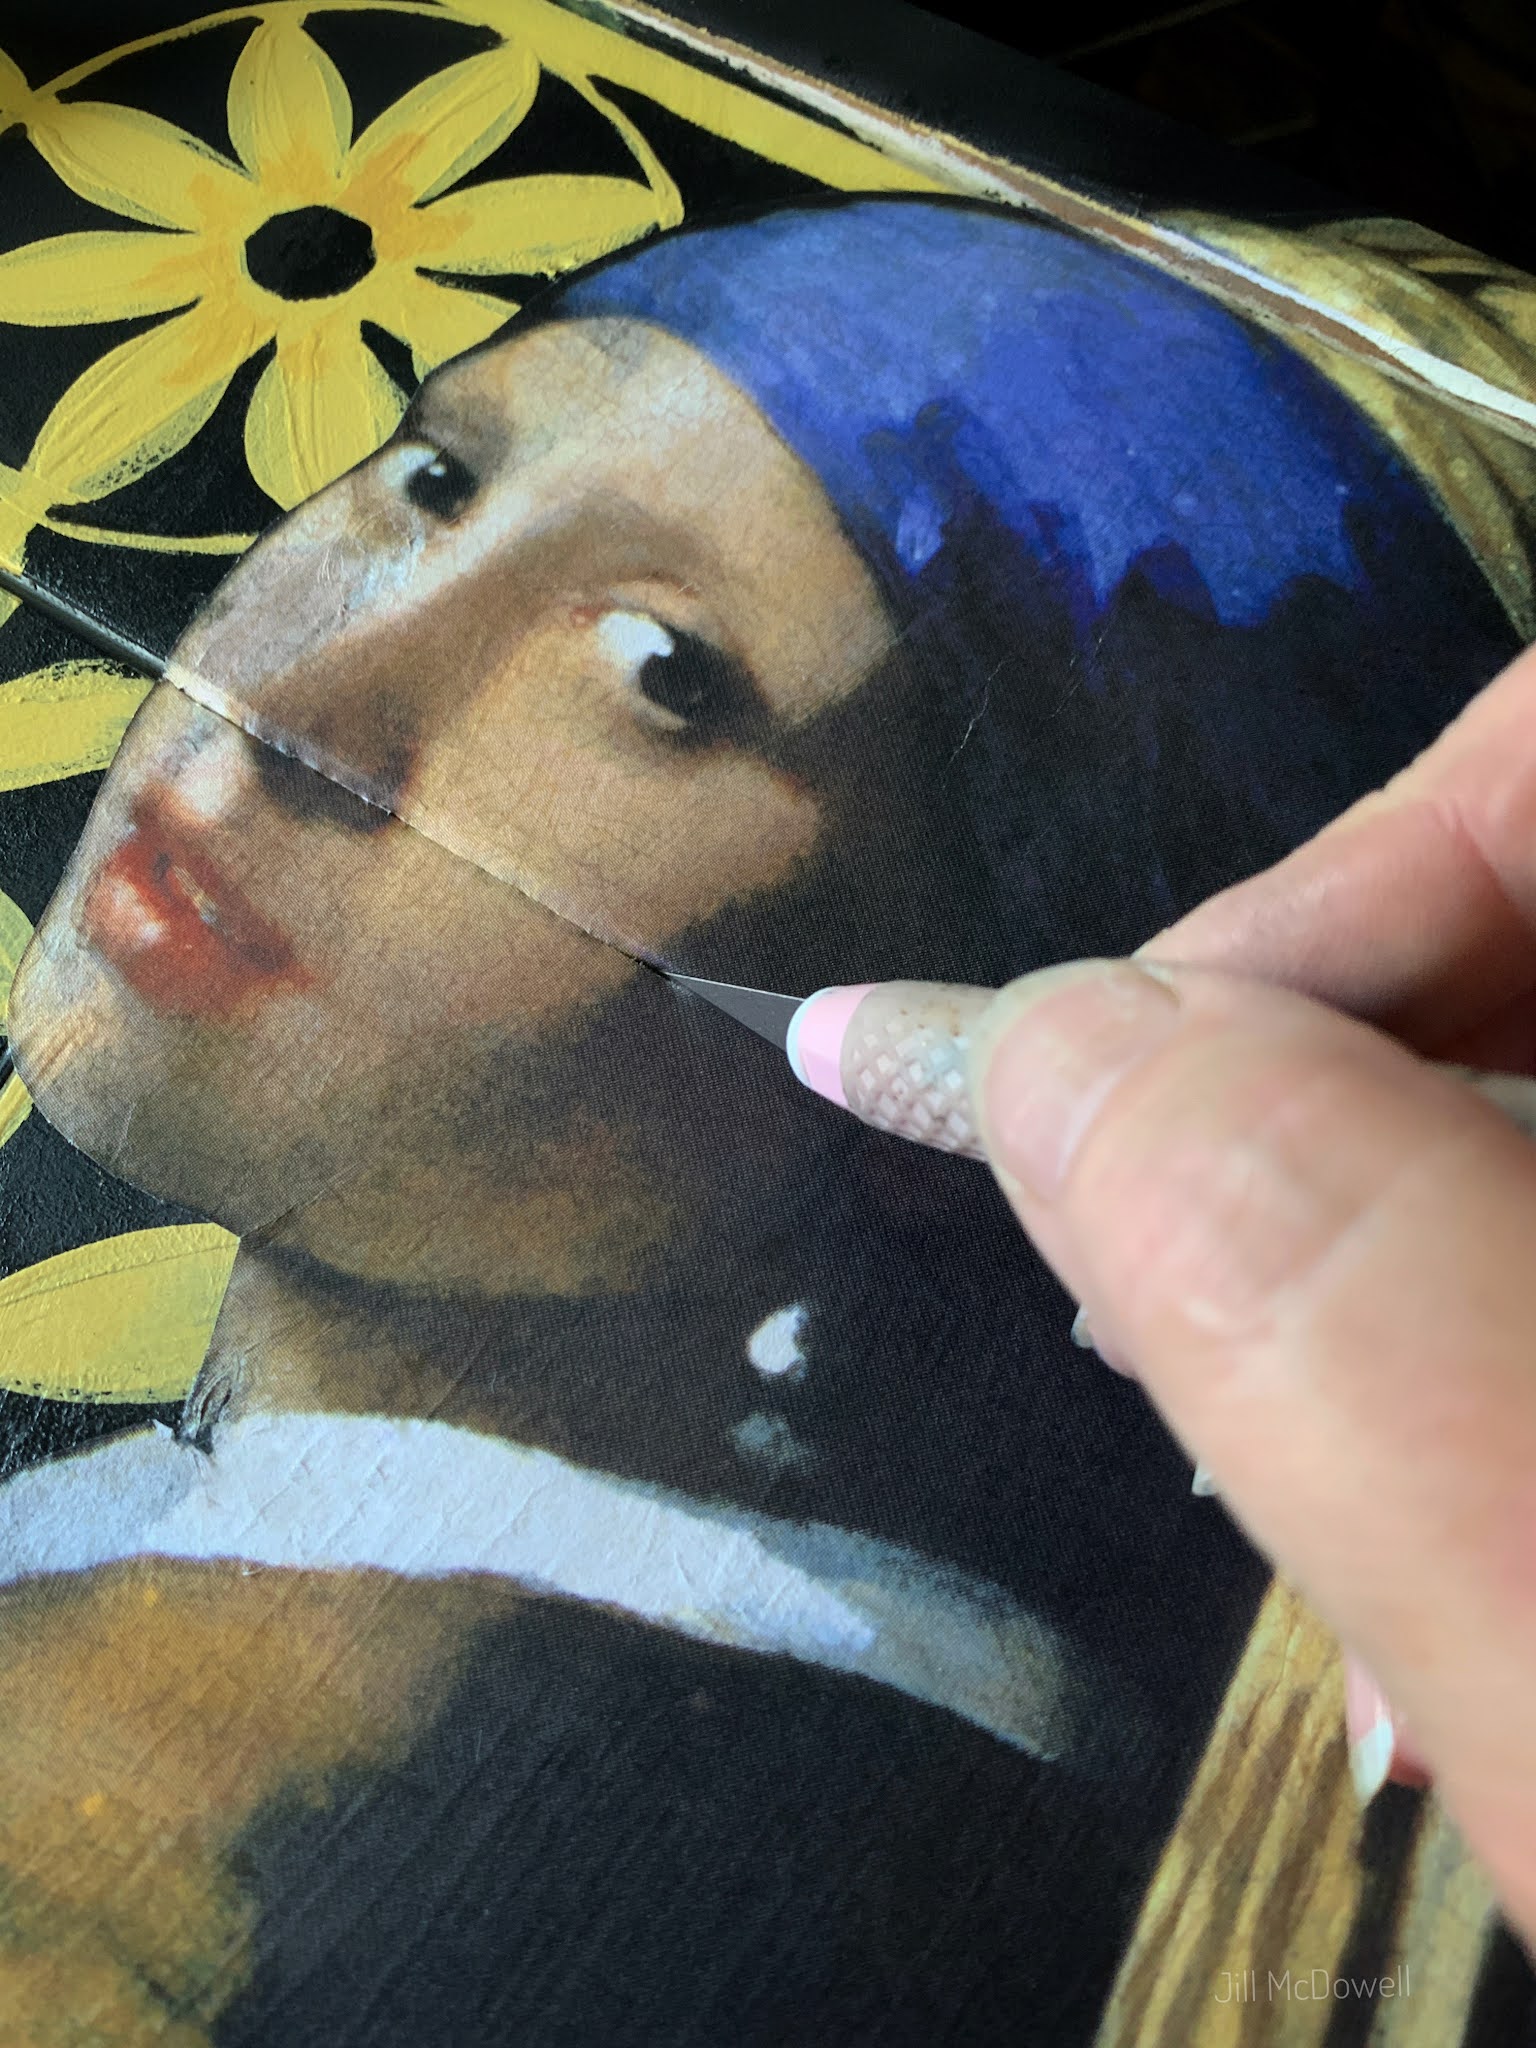
I selected a reproduction of Vermeer’s Girl With a Pearl Earring for this project. I really liked the idea of having her with me in my studio. I used scissors to cut the main image from the tissue background. Then I painted the background behind the image white to keep the yellow from discoloring it. I traced her outline onto the chest with a chalk pencil, used my best freehand to extend the image to the bottom of the chest, and painted the silhouette in with white gesso.

I thought it would be fun to use Terri Stegmiller’s Flower Path (G018) stencil by StencilGirl®️ products as a wallpaper pattern for the background. I’m a big fan of Terri’s designs and I love this stencil. It had a dutch vibe going on that I thought would play well with the Girl. This particular stencil is a giant 12” x 24” repeating stencil designed specifically with home decor in mind. StencilGirl’s®️has a nice selection of large home decor repeating stencils that really make it easy to cover large areas quickly. Now that I think of it, I really need to add a few more of these to my personal stencil collection.

I have no qualms about mixing latex, acrylic, and chalk paints. I like to use whatever I have on hand. In this case I darkened Annie Sloan Graphite Chalk Paint with just a little black gesso. With the drawers in place, I lined the stencil up and rolled the paint directly over the latex base with a somewhat dry sponge roller. I got as close as I could with the roller to the white silhouette and then finished off the edges with a makeup sponge.


There’s no need to cut the image to fit the drawers before decoupaging it in. You can just gently lay down the image right on top of the drawers while they are in place.
I used Annie Sloan’s Image Transfer Gel for my decoupage medium. I lightly brushed the gel onto the gessoed silhouette with a chip brush and then onto the back of the tissue image. I never would have tried coating the back of an image printed on regular tissue paper but the 18 pound paper held up beautifully without any tears.

Tissue paper is delicate. But placing a piece of deli paper on top of the image will help keep it from tearing while you smooth out the wrinkles. Just work from the center outwards and gently burnish the image onto the drawers with your fingertips, smoothing out the wrinkles as you go.
I top coated the tissue with the Image Transfer Gel and let it dry for about 2 hours.

I glued the loose edges down with the Transfer Gel and applied four more coats of the Gel over the drawers, letting them dry approx 2 hours in between each coat. After each coat I lightly sanded them. I added the blue accents to the center of the flowers between the second and the third coat.
I followed up with two coats of Annie Sloan Matte Varnish over the entire dresser to give it a beautiful finish. Then I drilled new holes for the door knobs.

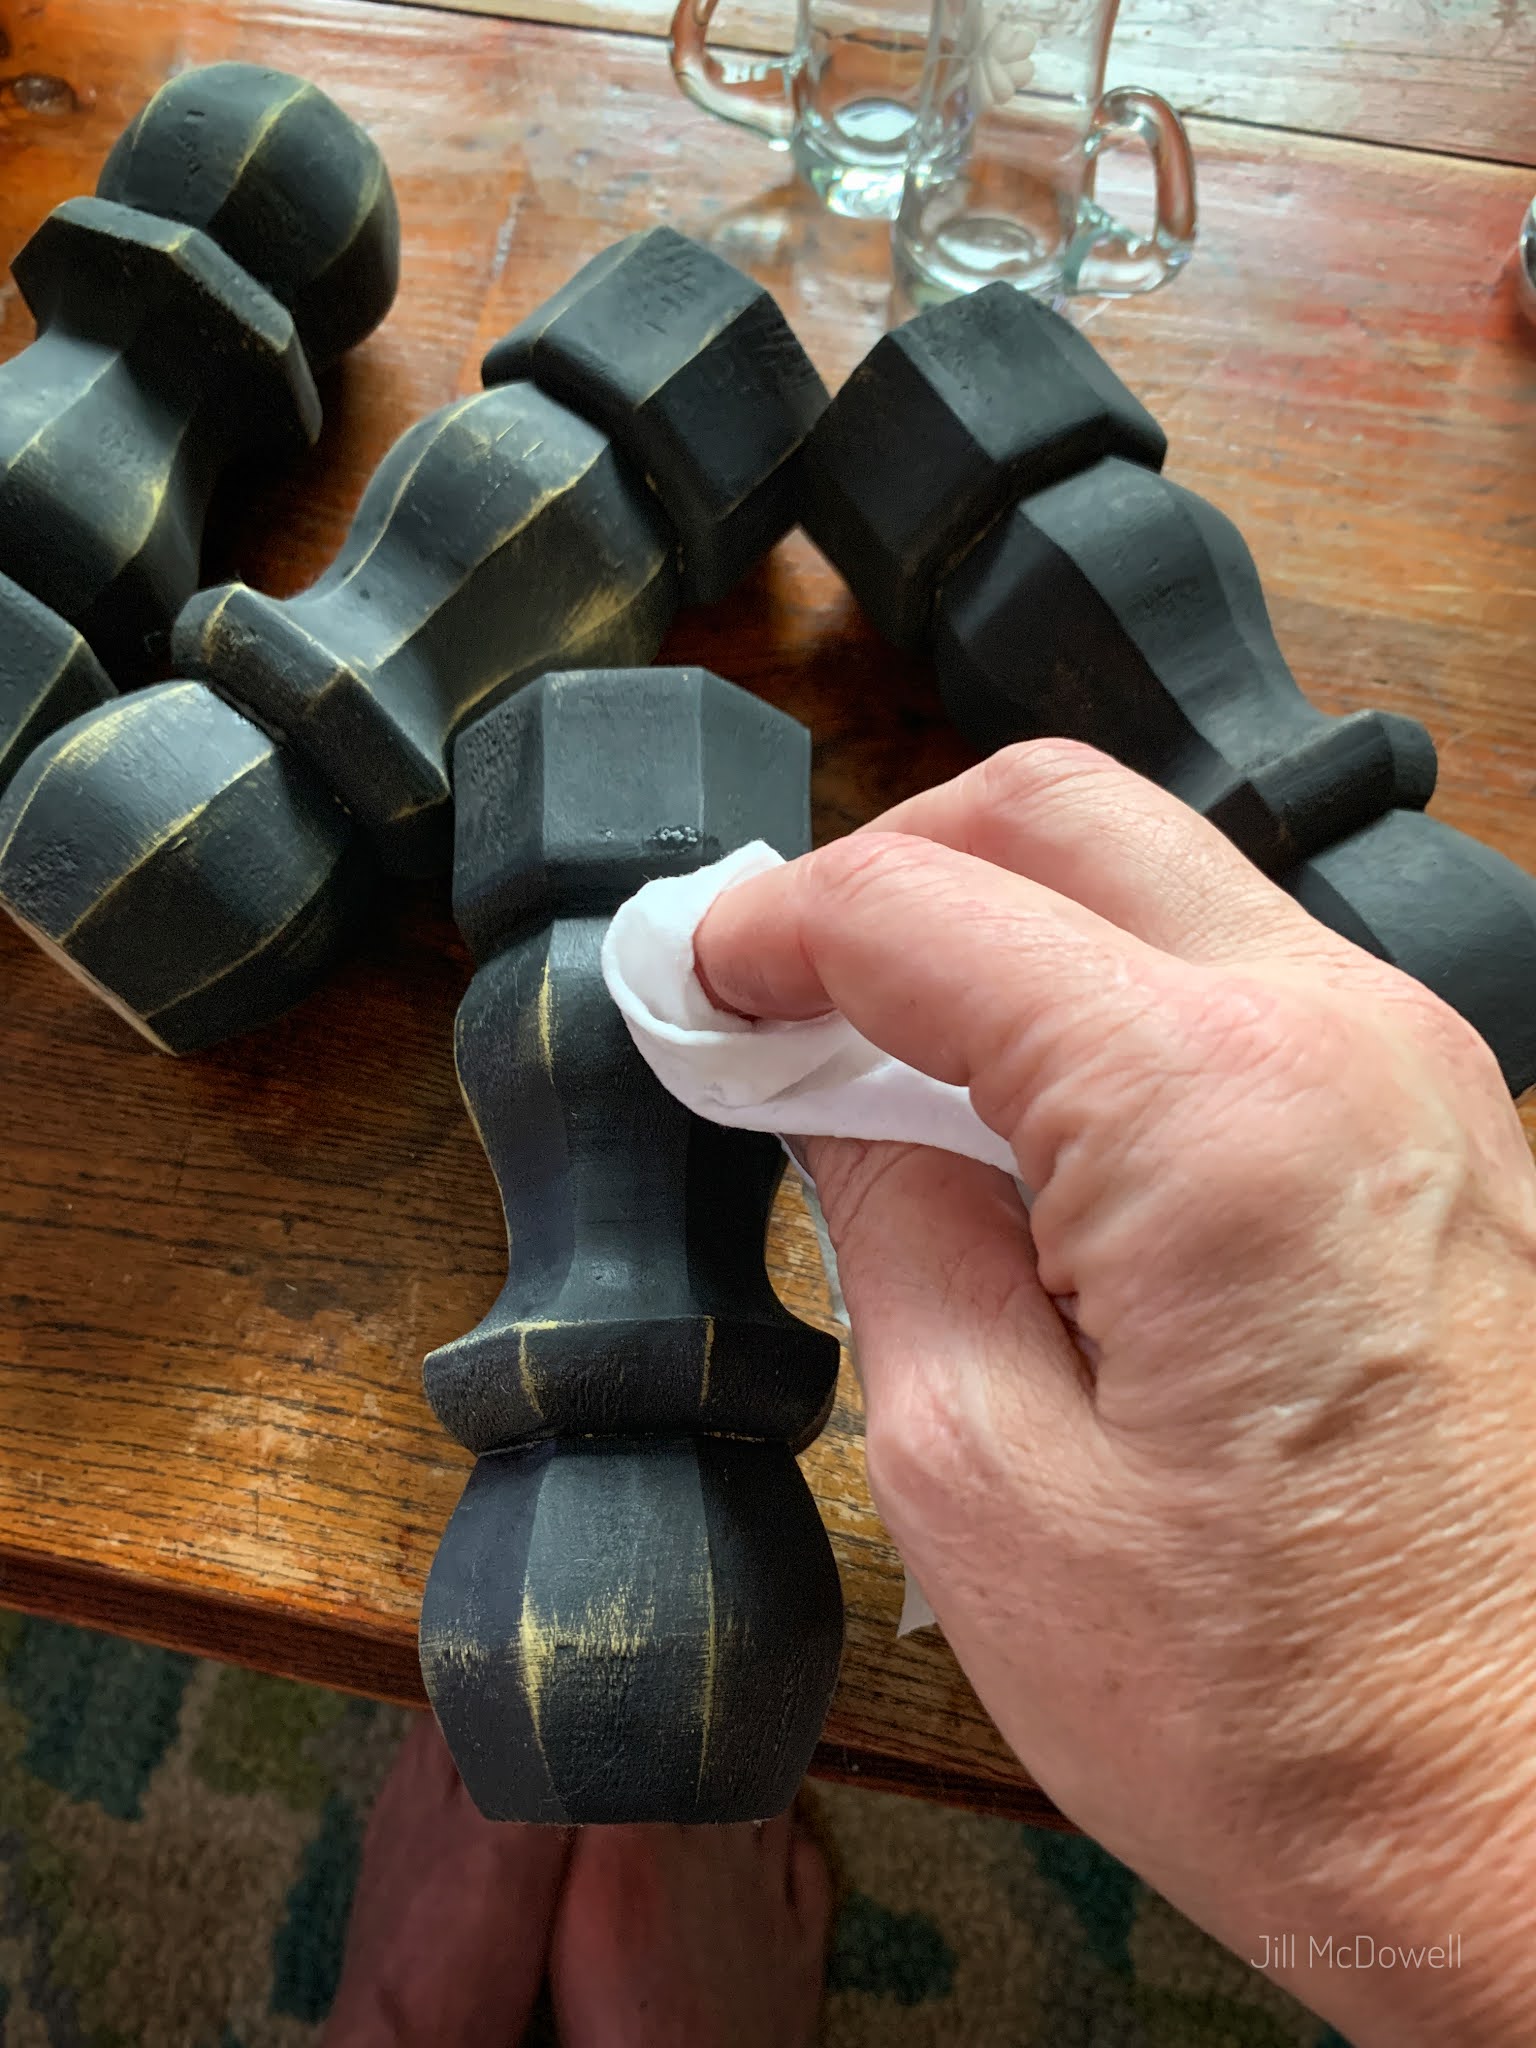
Adding legs to the piece was easy. I purchased four plates and the wooden legs from a big box hardware store, (you’ll find them both in the trim and moulding section). I predrilled the holes for the leg plates and used the screws provided to attach the plates to the bottom of the bureau.

Here's another tip: Glad Press N Seal is another Girls Best Friend. Open paint covered with Glad Press N Seal stays fresh for days. I also wrap my brushes in it, saving me from washing them when I know I’ll be using the same color again.

After that all I needed to do was to customize it with some new knobs and a beautiful glass bar that I salvaged from an old quilt rack. I thought I could use the bar to hang some of my prints to dry.
Now that she's in place, I just love her and the extra storage she gives me.


That’s it for this Rags to Riches Upcycled Project. I hope I’ve inspired you to give an ugly duckling piece of furniture some love to transform it into something really special. Don’t forget to tag me if you do. I’d love to see what you create.
Hugs until next time,
Jill

Amazing! You are so very, very talented! Jo x
ReplyDeleteLove!
ReplyDeleteGorgeous!
ReplyDeleteWhat a beautiful project with such excellent instructions! Jill, you really are so talented!!
ReplyDeleteI totally agree with Catherine - a wonderful project, and your instructions are so beautifully detailed and clear. Thanks for sharing your techniques in producing this beautiful piece.
ReplyDelete