
Hi all, it's Gwen here, starting off this new year with a new tutorial blending a few different types of paints as well as a fun texture technique.
As usual, I took photos along the way so that I could share my process with you.

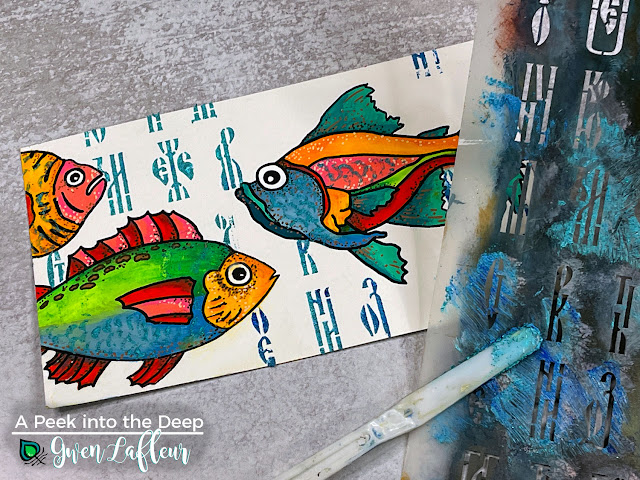
I started by stenciling images from my Boho Fish stencil onto a piece of 140lb watercolor paper using black Archival Ink and a blender brush. This doesn't have to be perfect - I used this layer as a guide for painting in the next parts of the process.
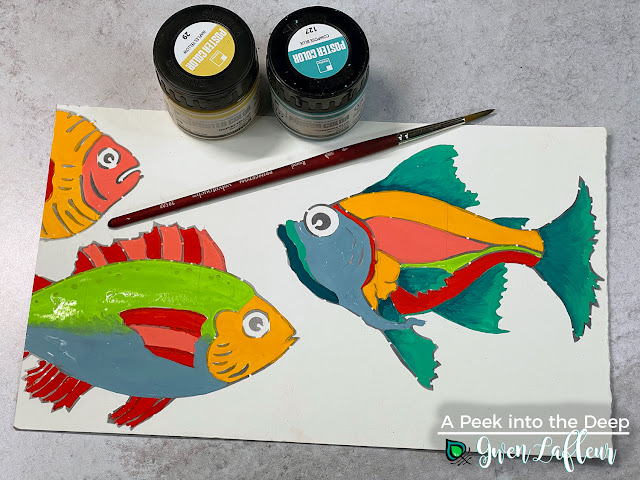
While I love my acrylic paints, I'm also a big fan of poster paint - they're a bright and opaque paint that's very often used by illustrators. Since I was thinking of going in a more illustrative direction with this piece, I thought it would be a fun and a propos choice. (You can also use acrylics, markers, colored pencils... whatever you prefer as a medium for this type of work.)
I used my paintbrushes to block in color in the different areas designated by the stencil, but you can also take the opportunity to change up the design by painting over lines.
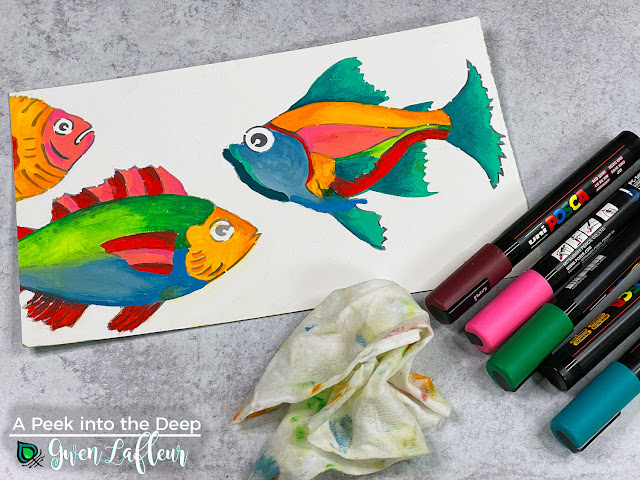
This third step is optional, but while I like the plain, bold color, I generally like it even more with some shading on top. Posca paint pens are a great shortcut for that... I frequently use them to blend on top of my dried acrylics and poster paints. (Fun art term: blending on top of dried paint is called "scumbling.")
Basically, once the base layers were dry, I just used the pens to add a darker version of the same color on top and smudged it out with my finger. Then I used a baby wipe to blend away any hard lines and make sure the color faded out nicely.
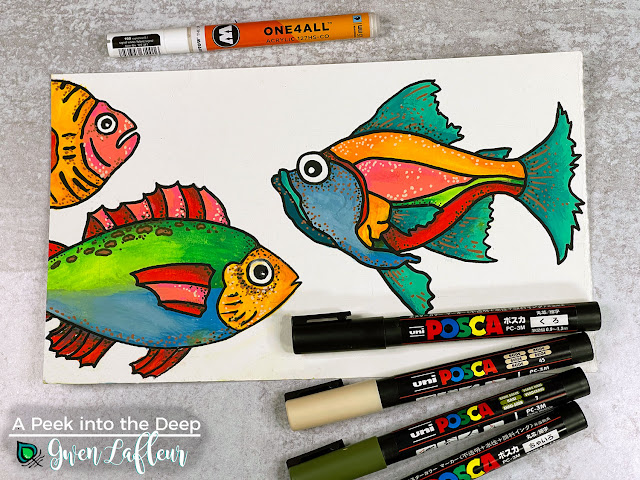
Once again this is an optional step as it's definitely personal preference, but since I wanted that illustrative style here, I used my black Posca pen to go back over the stencil lines and add a strong outline (you can also put the stencil back down and trace or use a brush to re-stencil.) I like how clean it makes it and how much the black brightens the colors and it also covers up the bridges and helps it look hand-drawn vs. stenciled.
Then I took a few other pens in white, brown, and dark green to add some dots and small details.

Here's where we get to have fun playing with supplies and creating a subtle texture. I used this technique to give the sense of fish scales, but you can use a different shape to get different effects with the same tools.
Basically, I made my own pearlescent glitter gel. To do that, just put a dollop of gel medium onto your palette (I used a heavy gloss medium because I wanted the shine and I also wanted it thick enough to create texture.) Then I added about 3 drops of Interference Blue Green paint, 1 drop of Teal, then mixed. Without going any further, you've created your own pearlescent paint (you can also use an iridescent medium instead of an interference paint for a similar effect.) Then to make a glitter gel, I scooped in some teal eco-friendly glitter and mixed and added and mixed some more until I had the consistency I wanted.
Once the glitter gel was ready, I used a tube to stamp glittery circles (or to be precise, I angled it to stamp rough half circles.) For my tube, I used the inside of a roll of doggie doodie bags (I have a fabulous little rescue dog named Jake.) I keep those chipboard tubes - they're great for all kinds of things and they make fab stamps!
Here's a closeup of how it looked - just a suggestion of scales.

I made enough of my glitter gel that I could also use it to add some texture to the background, so I used a palette knife to spread it through my Collage Textures and Patterns - Medieval Cyrillic stencil in a few random spots. (Make sure to clean your stencil afterwards... the glitter can gunk up the openings and it will NOT come off after it's dry.)
One of my favorite things about "mixed media" is that technically, it just means that you mix multiple media together! While that often gets interpreted as paint plus collage or other paper supplies (and collage is definitely a favorite medium of mine,) you can create mixed media artwork by simply mixing different wet media like I've done here... ink, poster paint, and now... watercolor.
I grabbed a few pans of iridescent watercolor in shades of blue and then used them to paint the background. (Fun tip - the dried acrylic glitter gel will act as a resist for your watercolor.) I used darker colors around the edges to create some natural framing and a suggestion of deeper water and then lighter around the fish to allow them to better stand out.
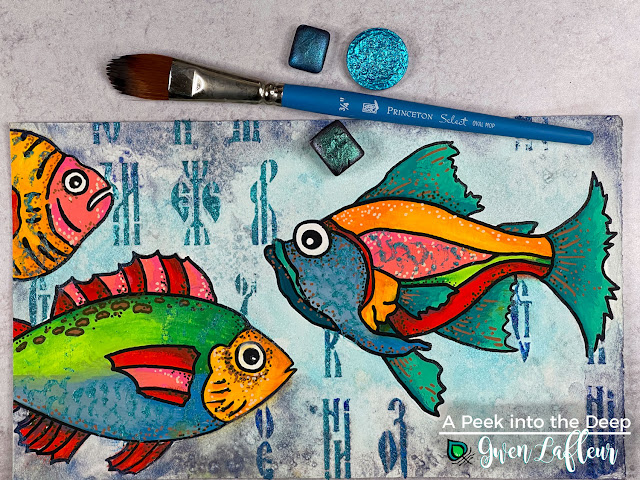
From here on out, each step could really be your final piece. The last step with just the watercolor background could be finished. Of course, more is more, so I went in with the 4x4 stencil from my February 2021 Feathered Tribe StencilClub set along with some of the patterns from my EGL15 stamp set from PaperArtsy to put more pattern into the background.

Again, this could be complete at this point. And although I had my final concept in mind when I started, I seriously considered stopping here because I love how it turned out. But I didn't. lol.
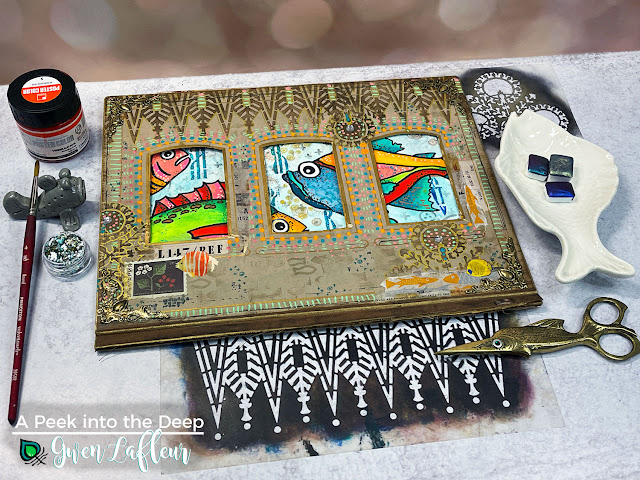
To take it one step further, I took a page from an antique photo album and adhered my painting on the back, positioning it so that I liked how the images showed through the frames. (You can also adhere with temporary adhesive in case you want to remove your painting later.) I love the contrast between the bright fish and the signs of age on the frame. You could also use a photo mat or a diecut frame... whatever you have that works for your style and subject.
Although I liked it plain, ultimately I couldn't stand leaving it without adding some more layers. I pulled out a few postage stamp stickers and some washi tape and then used my Art Deco Borders and Suzani Circle Flowers stencils to add more pattern and also arranged the images in a way that would draw the viewer's eye into the center. I also used a gold pen to do some outlining that would tie to the gold accents on the original frame.

I finished it off with a few more marks with my paint pens and then I adhered some decorative metal corners as the final touch. And there you go!


That's it for today's project... I hope you enjoyed it and that it brought a bit of brightness to your January day (it's been snowing where I am!) Have fun playing... especially making your own pearlescent and glitter gels, and Happy New Year to all!
Here are a few closeups so that you can see some of the details as well as the dimension from the frame, which adds its own fun texture to the piece.
Happy Stenciling!

Love how you manage to always cover new ground technique wise and still stay true to the "gwen boho" look that we all love so much!
ReplyDeleteI love the contrast between the old frame and the bright, contemporary fish. You are an amazing example of the More Is More school of art that I wish I could emulate. Thanks for sharing your technique.
ReplyDeleteAbsolutely fabulous!!!
ReplyDeleteThis is so awesome!! I need this stencil!!
ReplyDelete