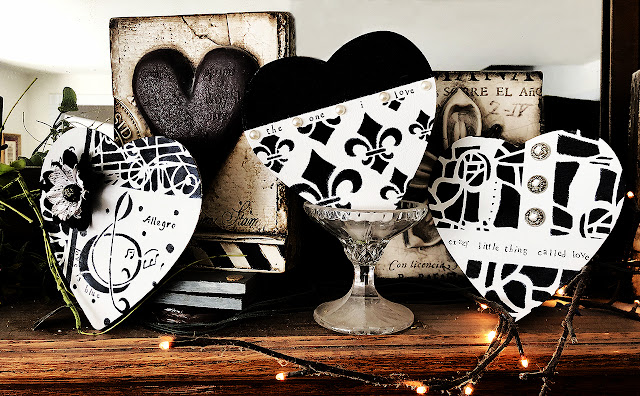
I am happy to be back on the blog today with another installment of music themed artwork. I know it's the day after Valentine's Day, but I couldn't help myself so we'll extend the celebration. It all started when I was wandering the aisles of Target earlier this month and happened upon a pack of six heart shaped canvasses. On a whim, I bought them, thinking they were destined to be in my pile of "almost" used substrates. I had some other commitments to work on through much of the month, but this week I'd cleared my schedule to create something special for this blog. I have to admit I was low on ideas until I walked into my studio with my newly opened StencilGirl® January Club stencils to put them away and the lightbulb went off. One of January's stencils is a grid of four different patterns. You'll see that stencil in the first process photo, but I linked it here so you could see both of the current ones available. Mary Beth is the queen of the grid, but I don't often work that way so these pieces are a bit of a departure for me, yet I use some familiar design techniques. I always love the strong, graphic nature that working with one dark color can emote and I do love to play with asymmetry so I decided to play with those ideas on all five hearts. Let's breakdown the materials and then get to my process.
MATERIALS: hearts of any kind, gesso, a dark color of acrylic paint (I used Payne's Gray that reads as black on the computer monitor and in low light), stencils (duh), painter's tape (I used blue Scotch in a wider format and narrow ), Golden gel matte, scrap paper to mask, embellishments, Hero Arts playful flowers set (using your own writing would make these uniquely yours). I linked you to the particular media I chose, but any descent quality will do.
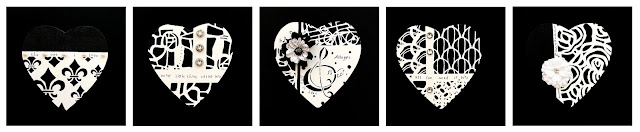
1 2 3 4 5
STENCILS USED:
- 1: SO23 Fleur-de Lys Michelle Ward
- 2: S864 Abstract Composition Mask 1 Cecilia Swatton
- 3: S462 Ornamental Iron Curls Cecilia Swatton M055 Allegro Clef mini Nancy Curry S257 Allegro Clef Nancy Curry StencilClub10-2014 Mini Circles Mary Beth Shaw (A side note: You can buy past club stencils when you belong to StencilClub!!!!)
- 4: StencilClub Jan 2022 Mary Beth Shaw
- 5: L436 Garden Dreams Suzi Dennis
OFF CAMERA: I prepped the canvases with another layer of gesso as soon as I got them home from the store. Mine happened to be white, but clear would also work well.
STENCILING PROCESS: I varied the widths and placement of the stencils on all five. The stenciling process is the same for all of them. I will show you snippet pictures of each choice I made.
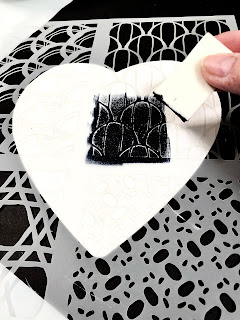
Heart #4
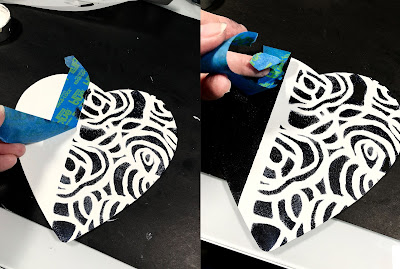
I am using a cosmetic sponge, paper towel and Payne's Gray acrylic on a paper plate. For good coverage without seepage, be sure to tap the sponge off on the paper towel before pouncing through the stencil. If you are concerned about stencil movement during the pouncing use Pixie spray.
Heart #2
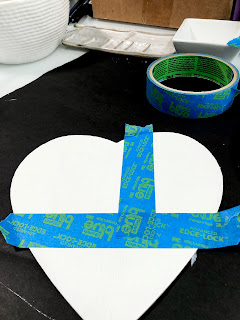
I use a wide painter's tape to grid the space on the heart. I used only one stencil on this one, but used different areas to create interest. Be sure to get the tape down solidly. You can always use a clean brayer to ensure good adhesion.
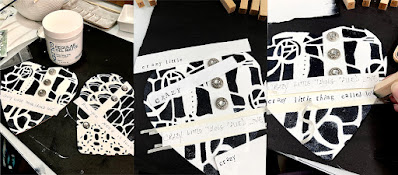
Heart #3 below
(a) I used scrap paper to mask areas that already had stencil motifs and then added two parallel tape strips (1/8") to create the vertical stripe.
(b) I wanted smaller solid areas to offset the treble area and the embellishment that's in my head to use.
(c) I broke up the vast white space in the treble grid portion with different sized dots.
 a b c
a b cHeart #5 below


VERBIAGE:


 The One I Love (REM) Crazy Little Thing Called Love Love is Blue (Paul Mauriat) (Queen)


Very striking pieces, Nancy. Thanks for sharing your technique.
ReplyDeleteThank you so much, Terry! I love the boldness and the crispness of the grids.
Delete