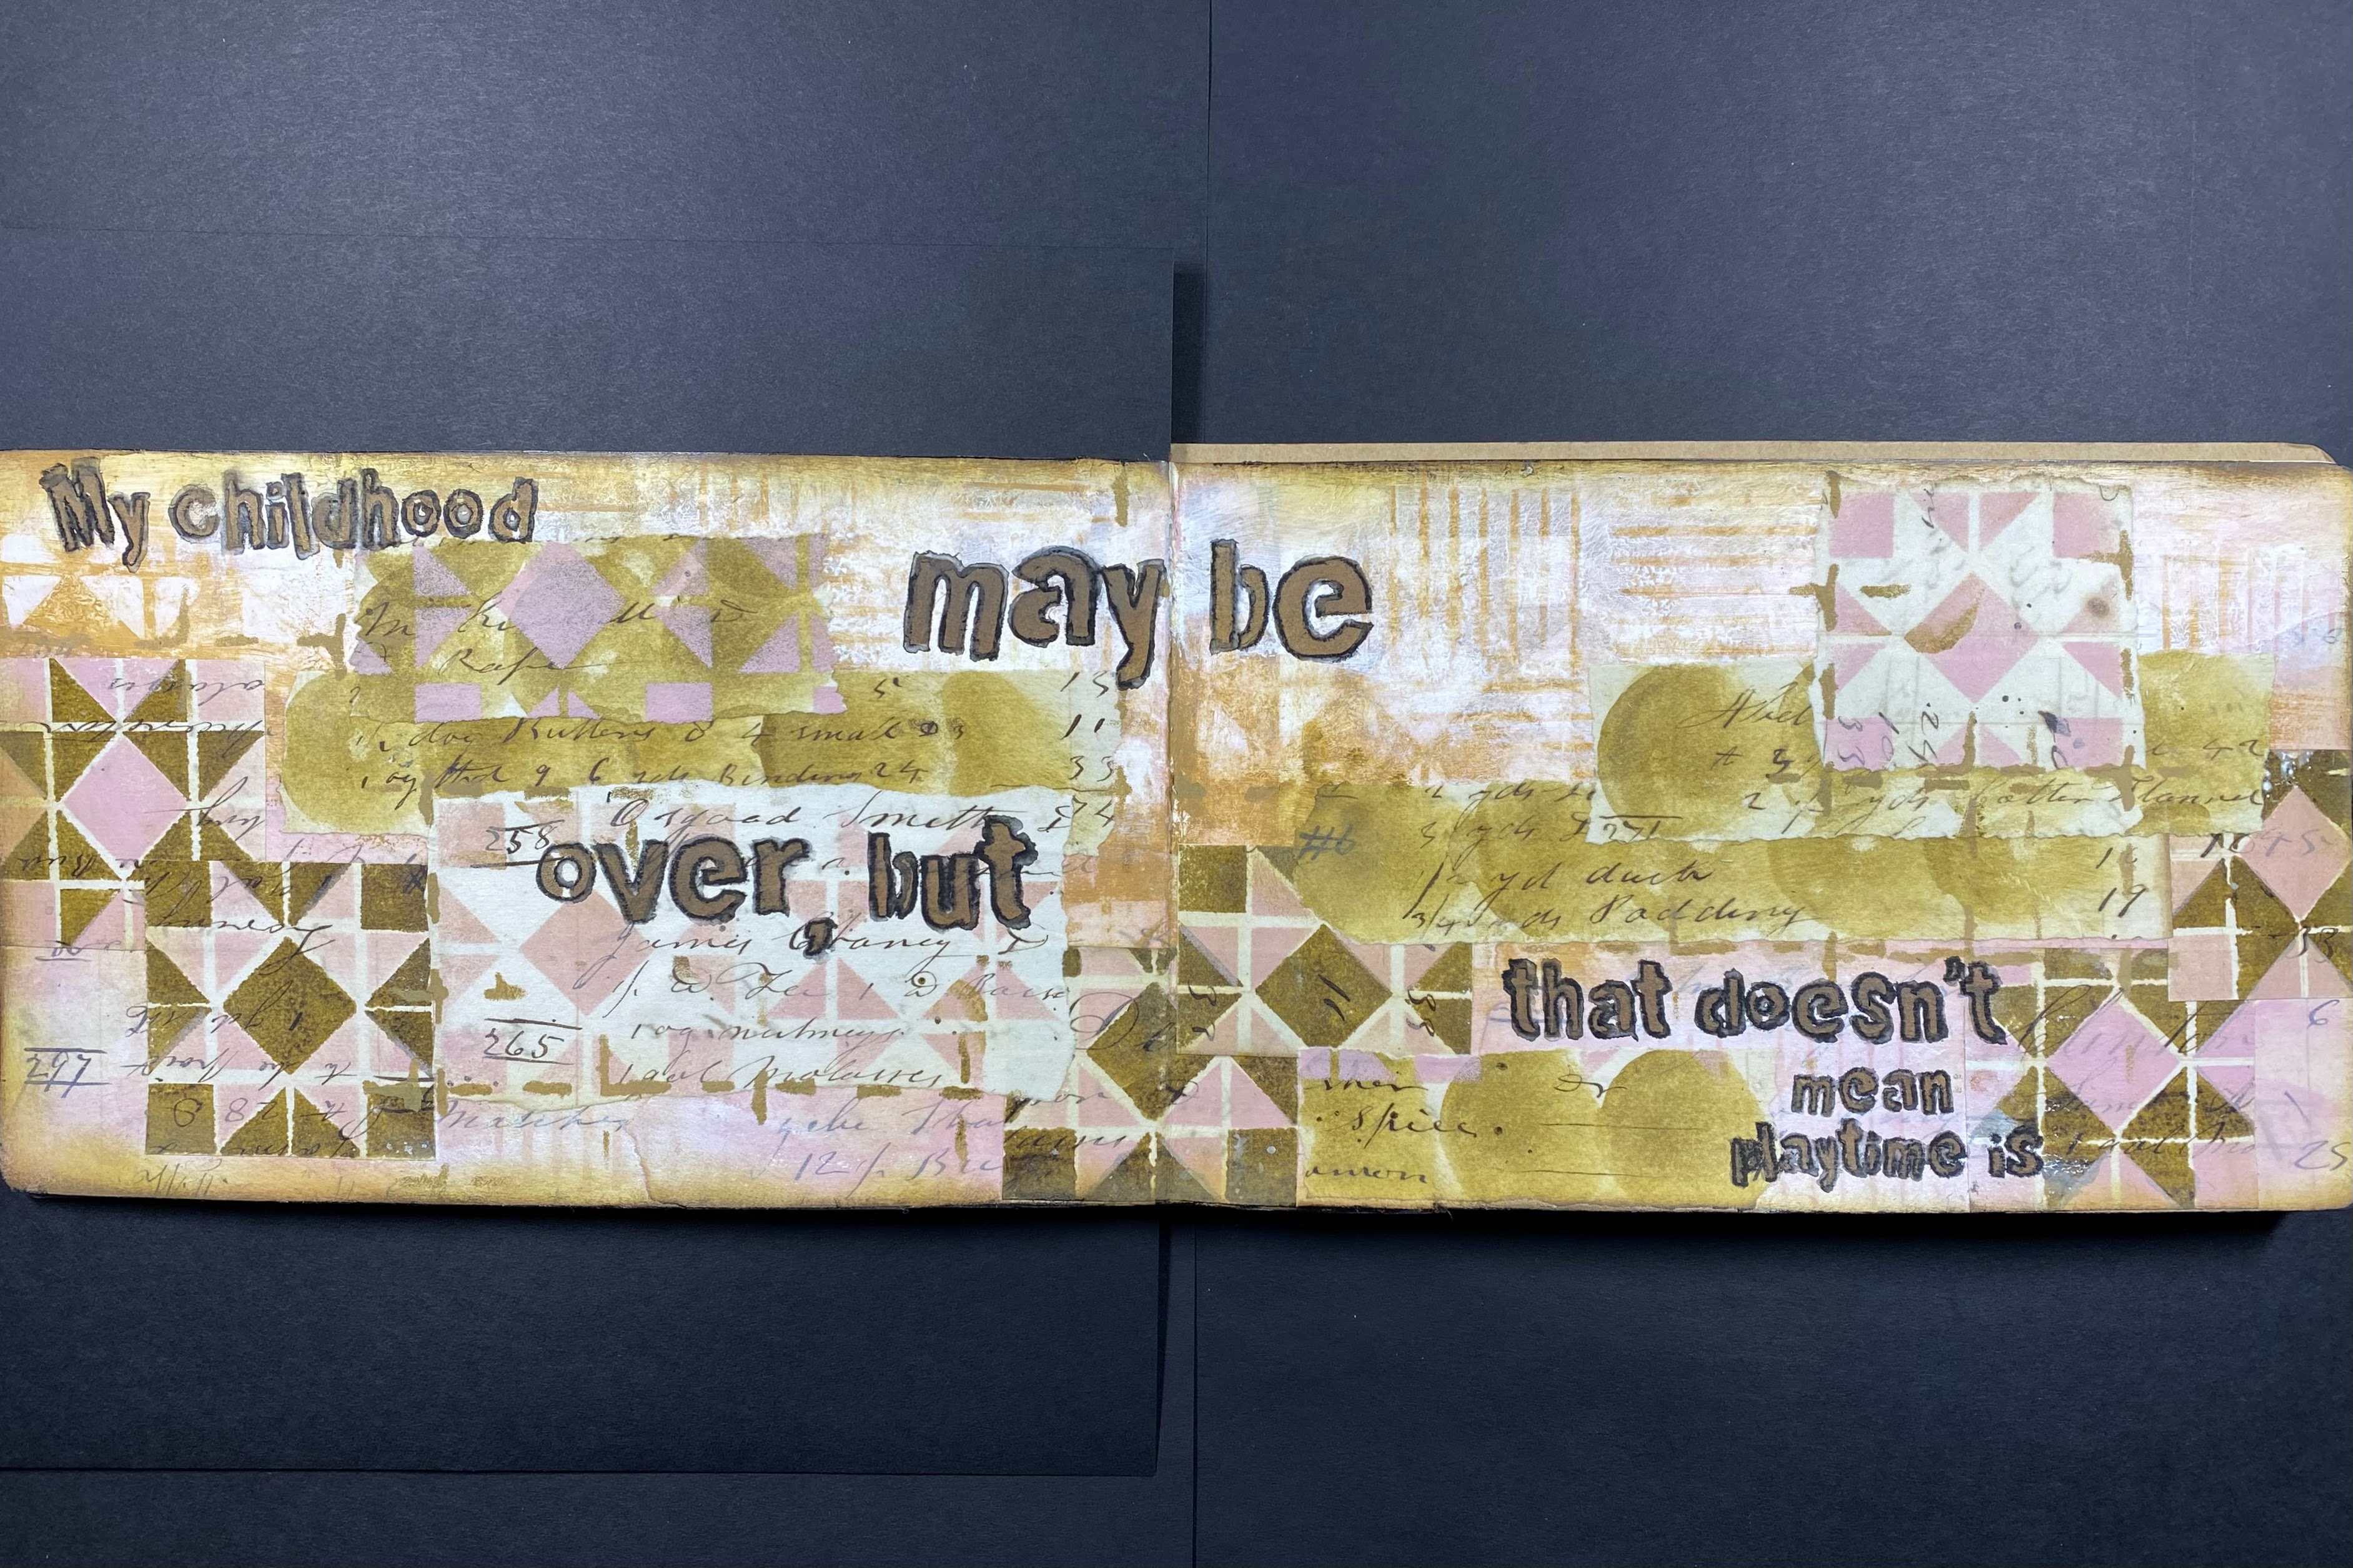
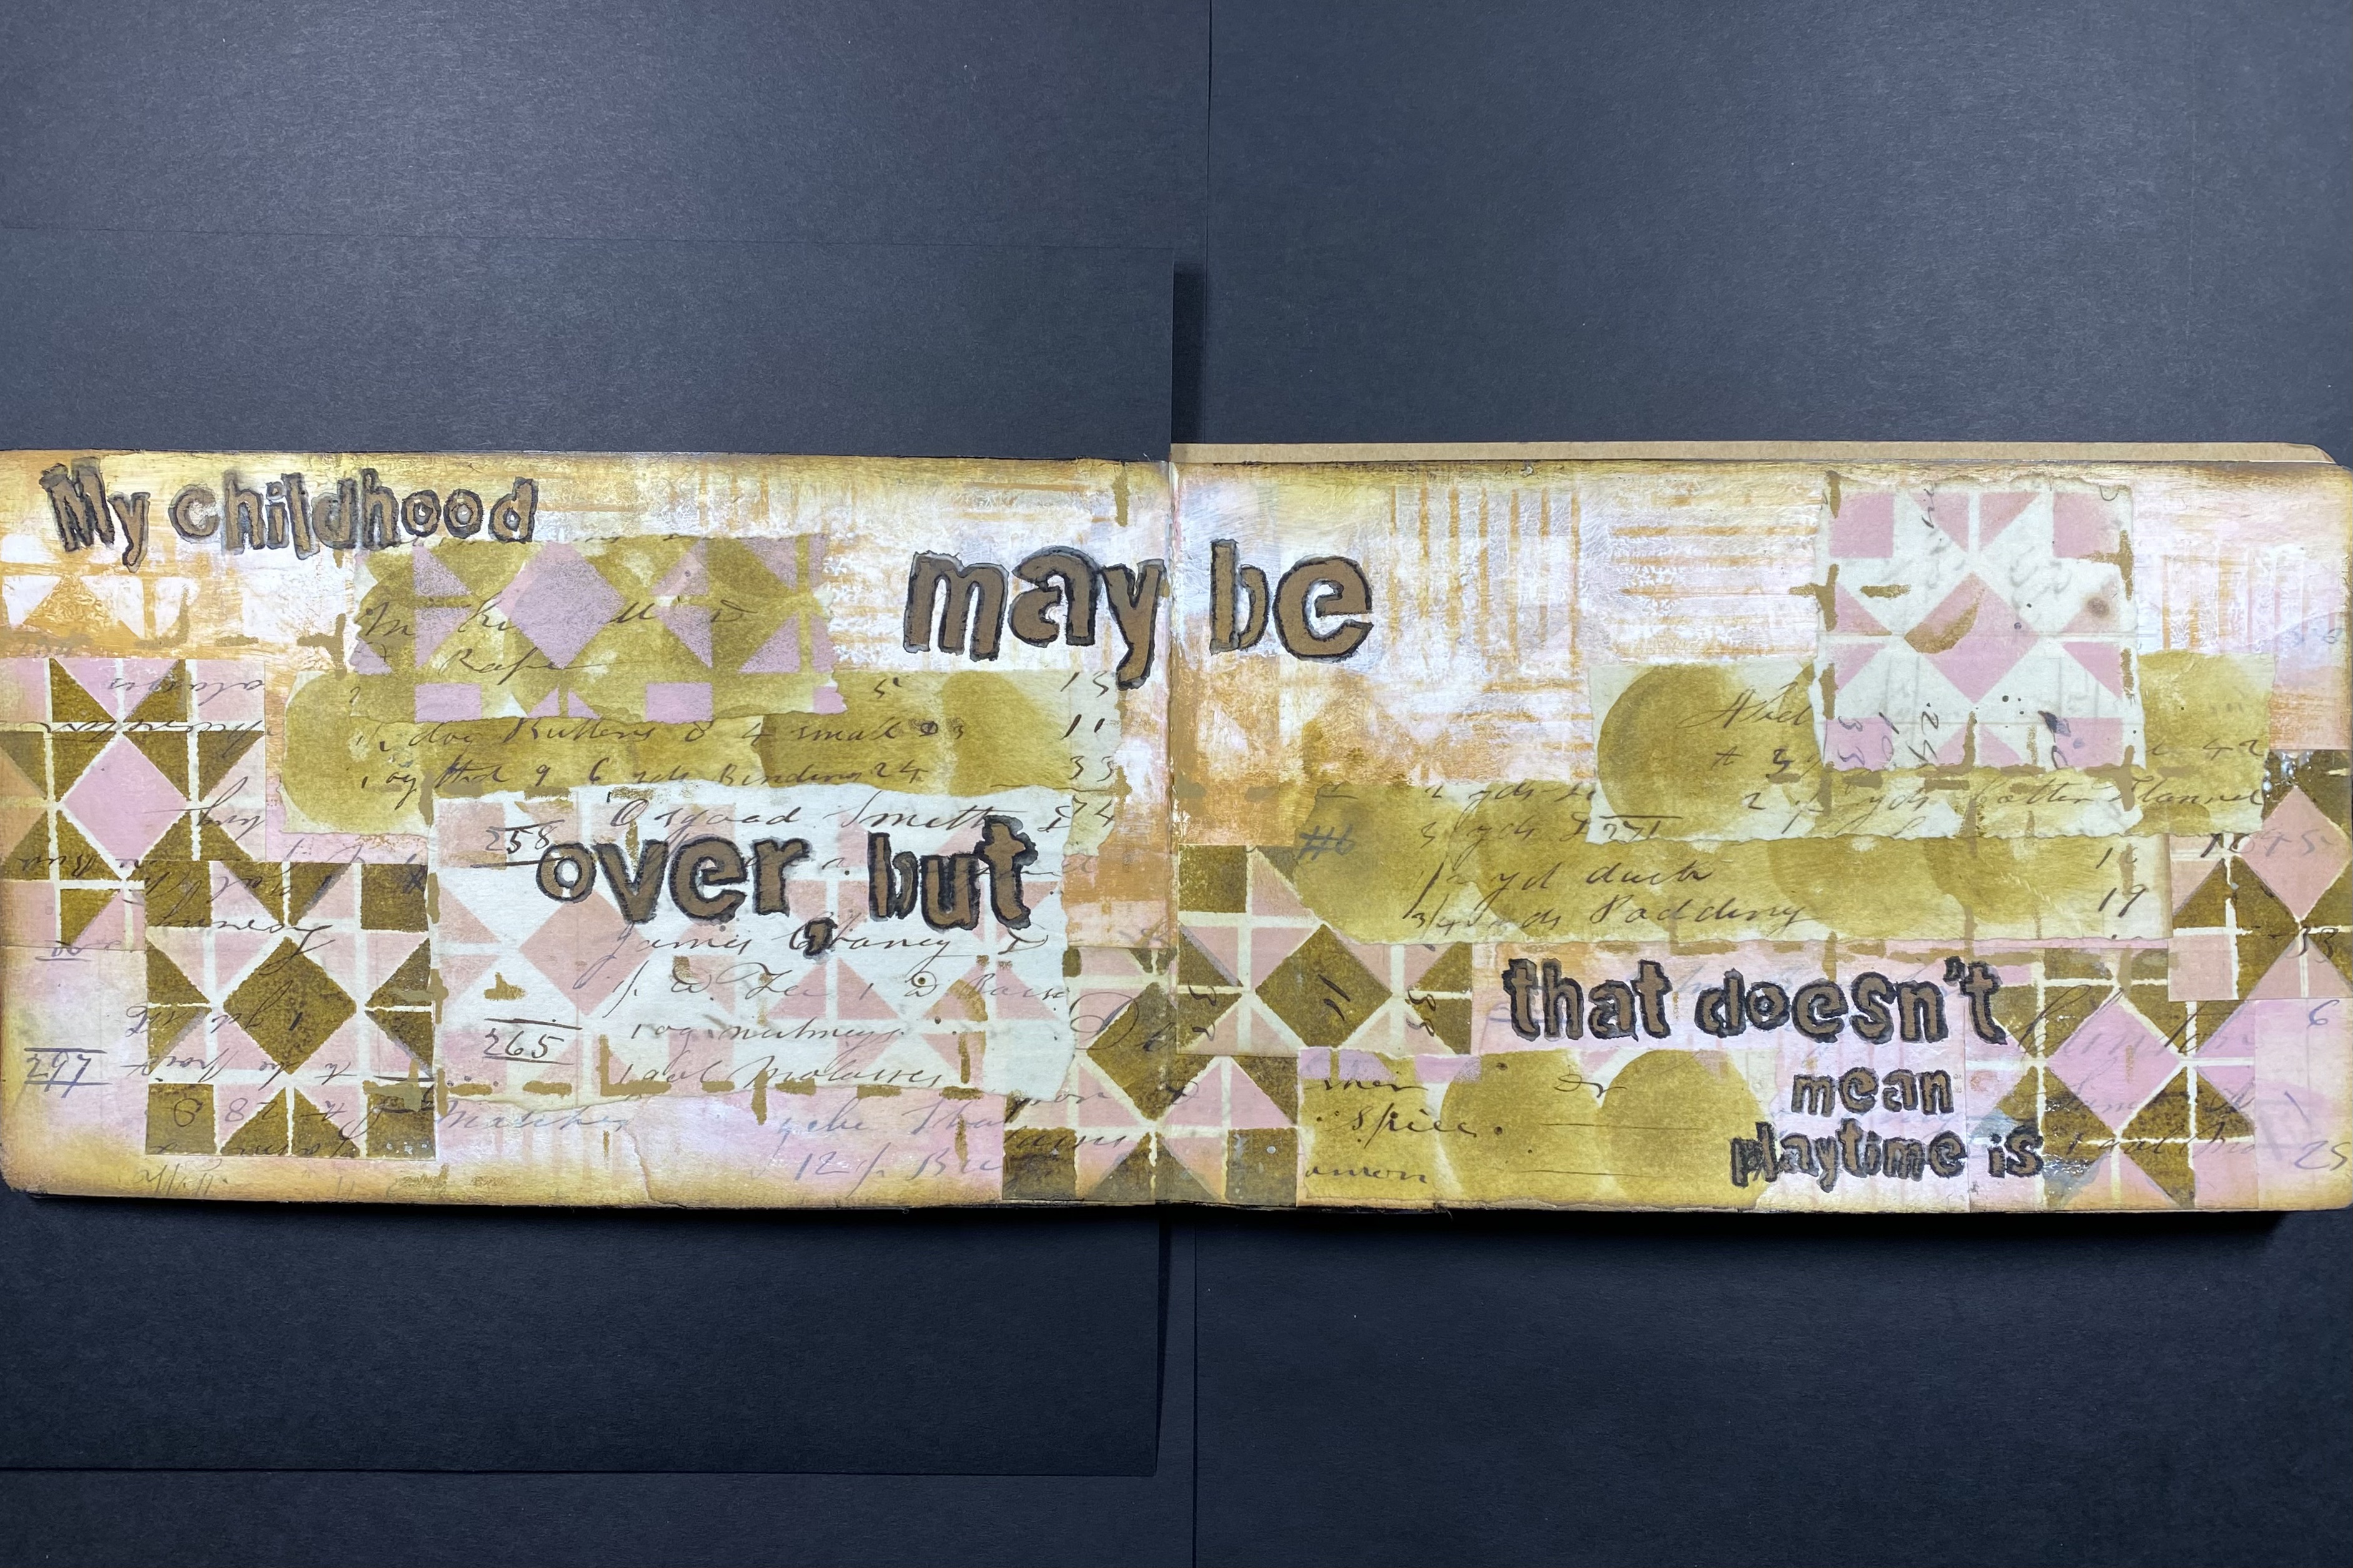
Welcome to Fall everyone (at least here in the US)! This is Carol Ponsford sharing a journal spread that was inspired by the October StencilClub set designed by June Pfaff Daley. Once again these vintage quilt designs beckoned me back to my childhood and just made me want to play in my 5 1/2" x 8 1/2" Dylusion journal by Ranger Ink.

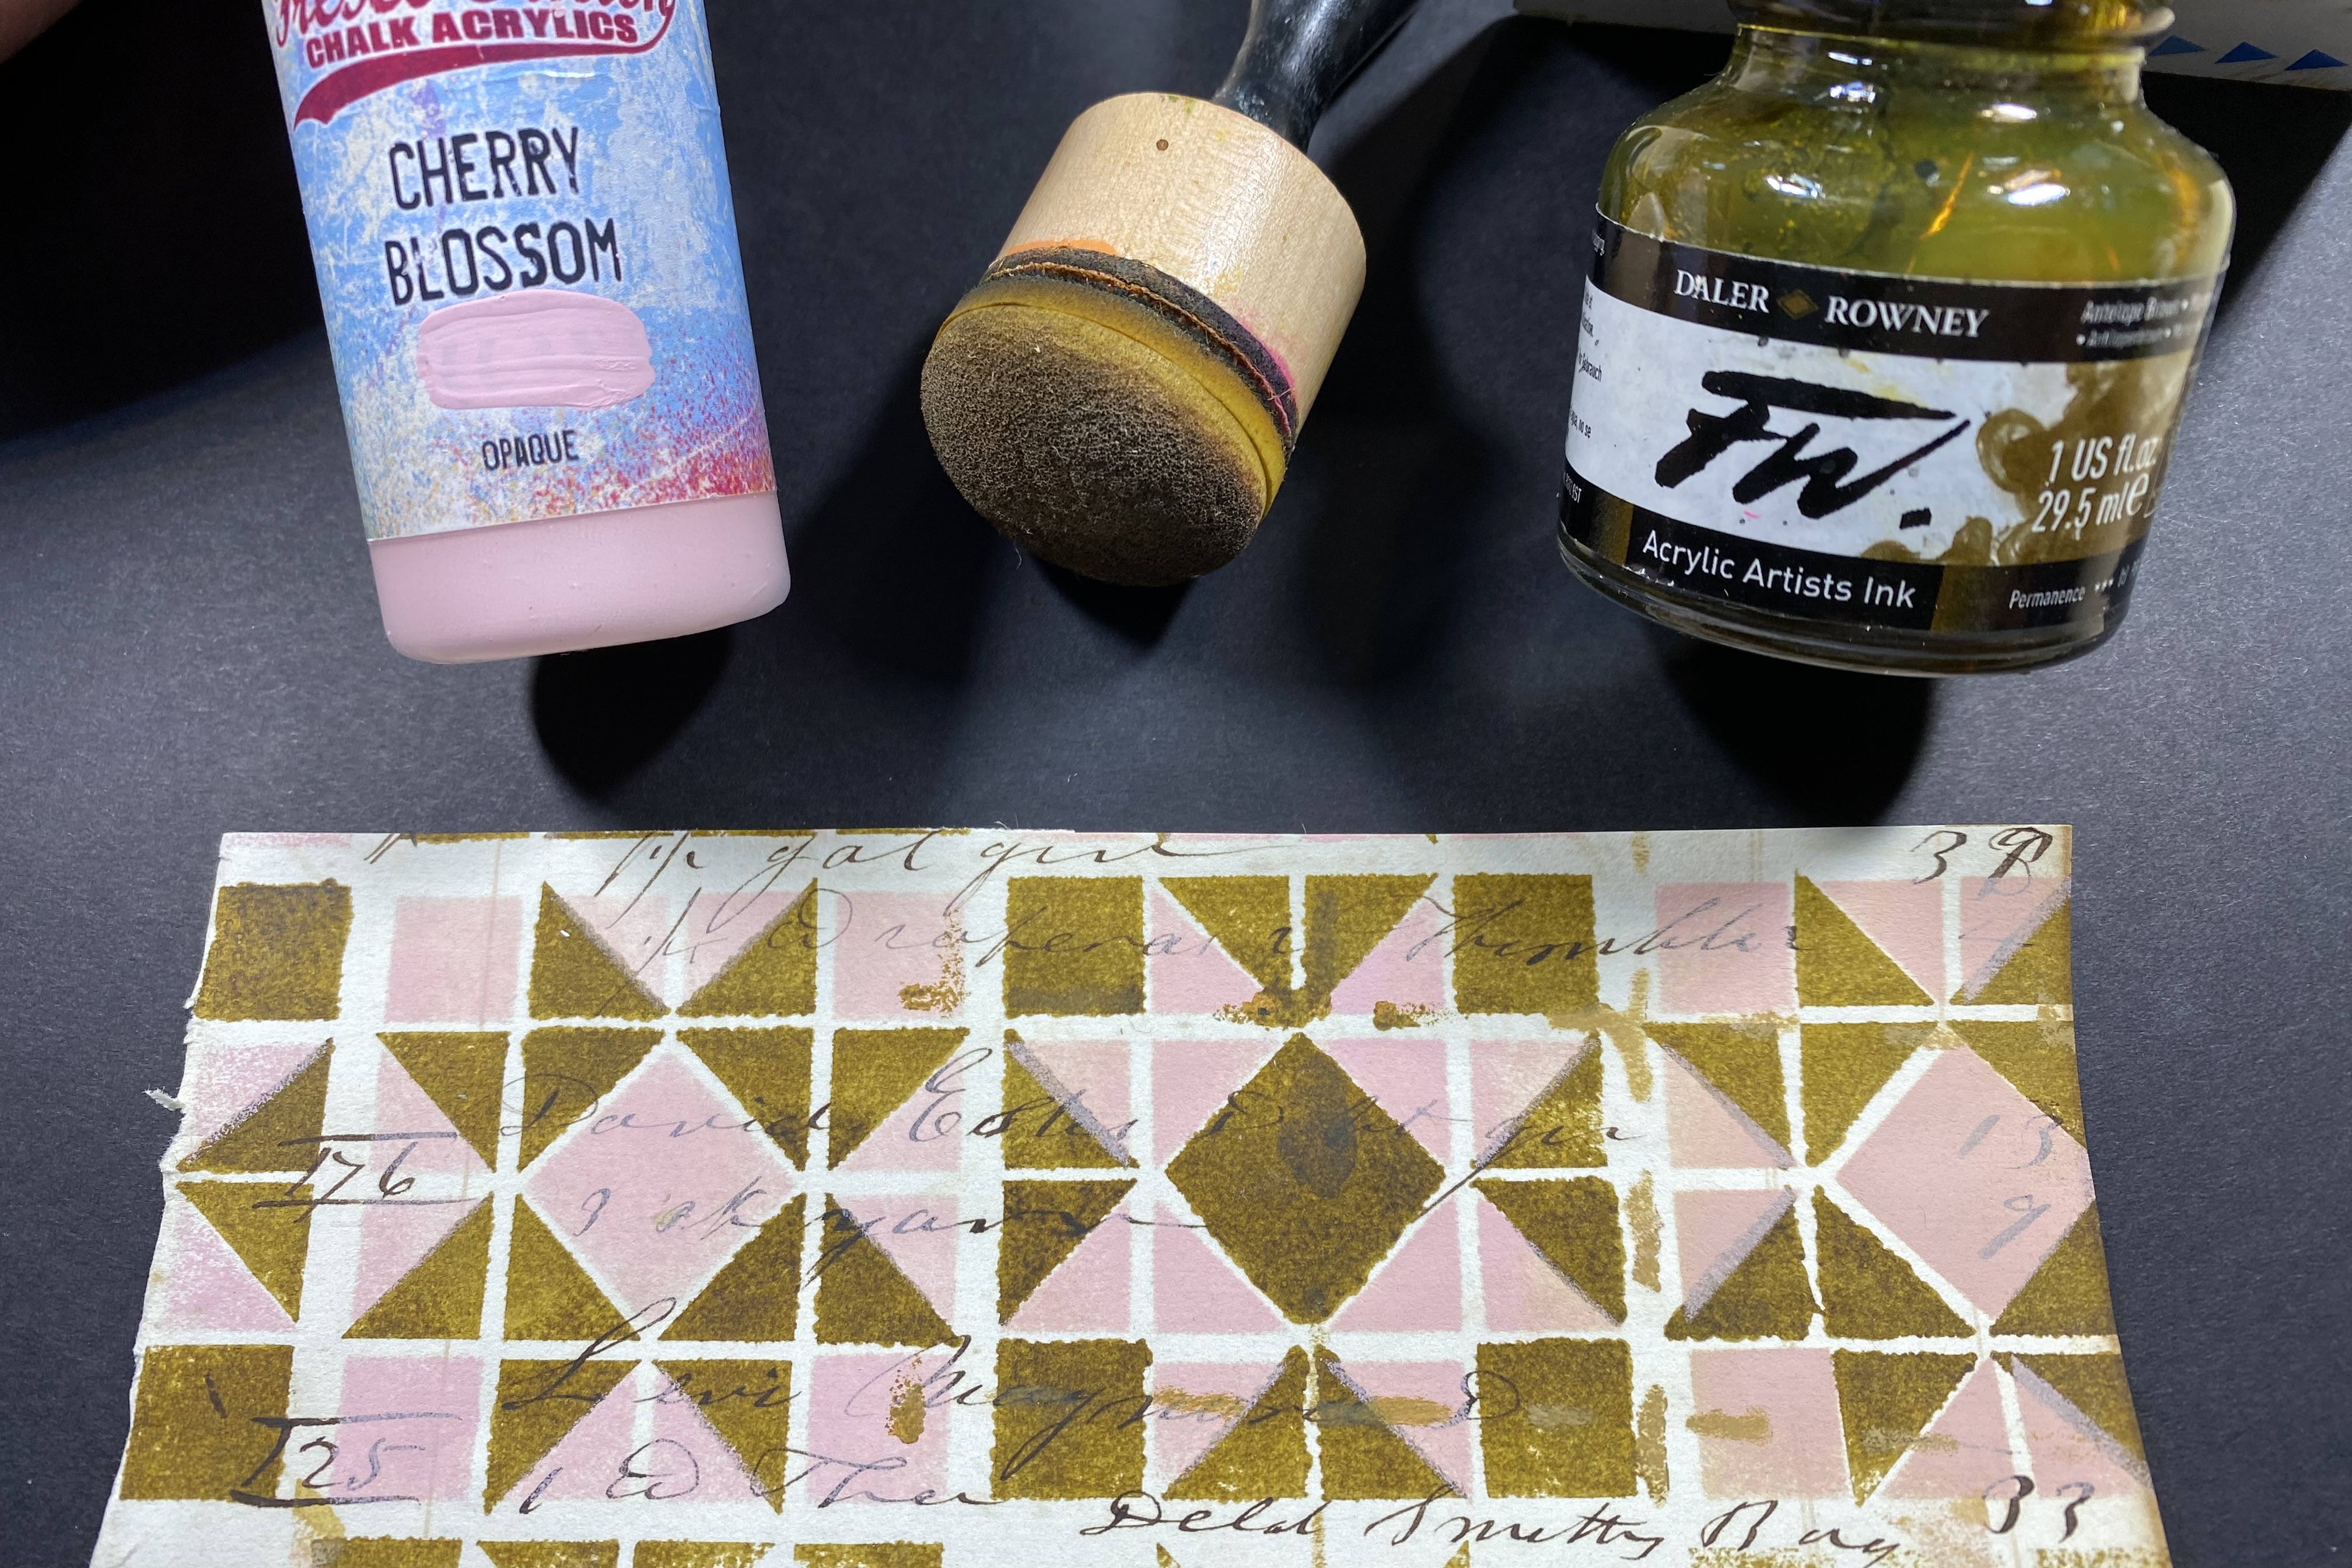
To begin, I pulled a piece of vintage ledger paper and used the stencil with the starshine quilt pattern. Using a sponge applicator, I stenciled with Dale Rowney Antelope Brown Acrylic Ink. I then shifted the stencil so the pattern was covered and in the open areas I applied PaperArtsy Cherry Blossom Fresco Chalk Acrylic paint to fill in the pattern. I love the combination of these two colors.

I then used the same pattern to make a less solid pattern further down the page with the Cherry Blossom paint. Since I had more of the antelope brown ink on my applicator, I press it on the paper to create circle patterns. (below).

Now I had several patterns on the page so that I had a variety of paper to use for collage.

I also cut some of the quilt squares out and after the ledger paper was adhered I started playing with the placement of where the squares would end up.


Setting the squares aside I then used the Cherry Blossom paint and applied a thin layer over the entire spread, blotting off areas until I got the desired look. I then applied some PaperArtsy Caramel Acrylic paint to the top section and before it was dry, I laid the stencil on top and with a baby wipe rubbed of the paint through the pattern. I also blotted the paint after I removed the stencil to grunge it up some and remove excess paint in some areas. You will need to move quickly as this paint dries fast.


After I had the look I wanted I proceeded to tear up more of my collage papers and auditioned them on the page to see where I would want to place them and also determine if I needed to do anything additional to the background. I decided I needed to lighten up some of the Caramel on the top of the page so I took some white paint and covered some of the Caramel color and using the same technique as before, I placed the cross-hatched section of the stencil on top of the white (while the paint was still wet) and removed some of the white by rubbing with a baby wipe.


I then adhered the collage papers using matte medium.
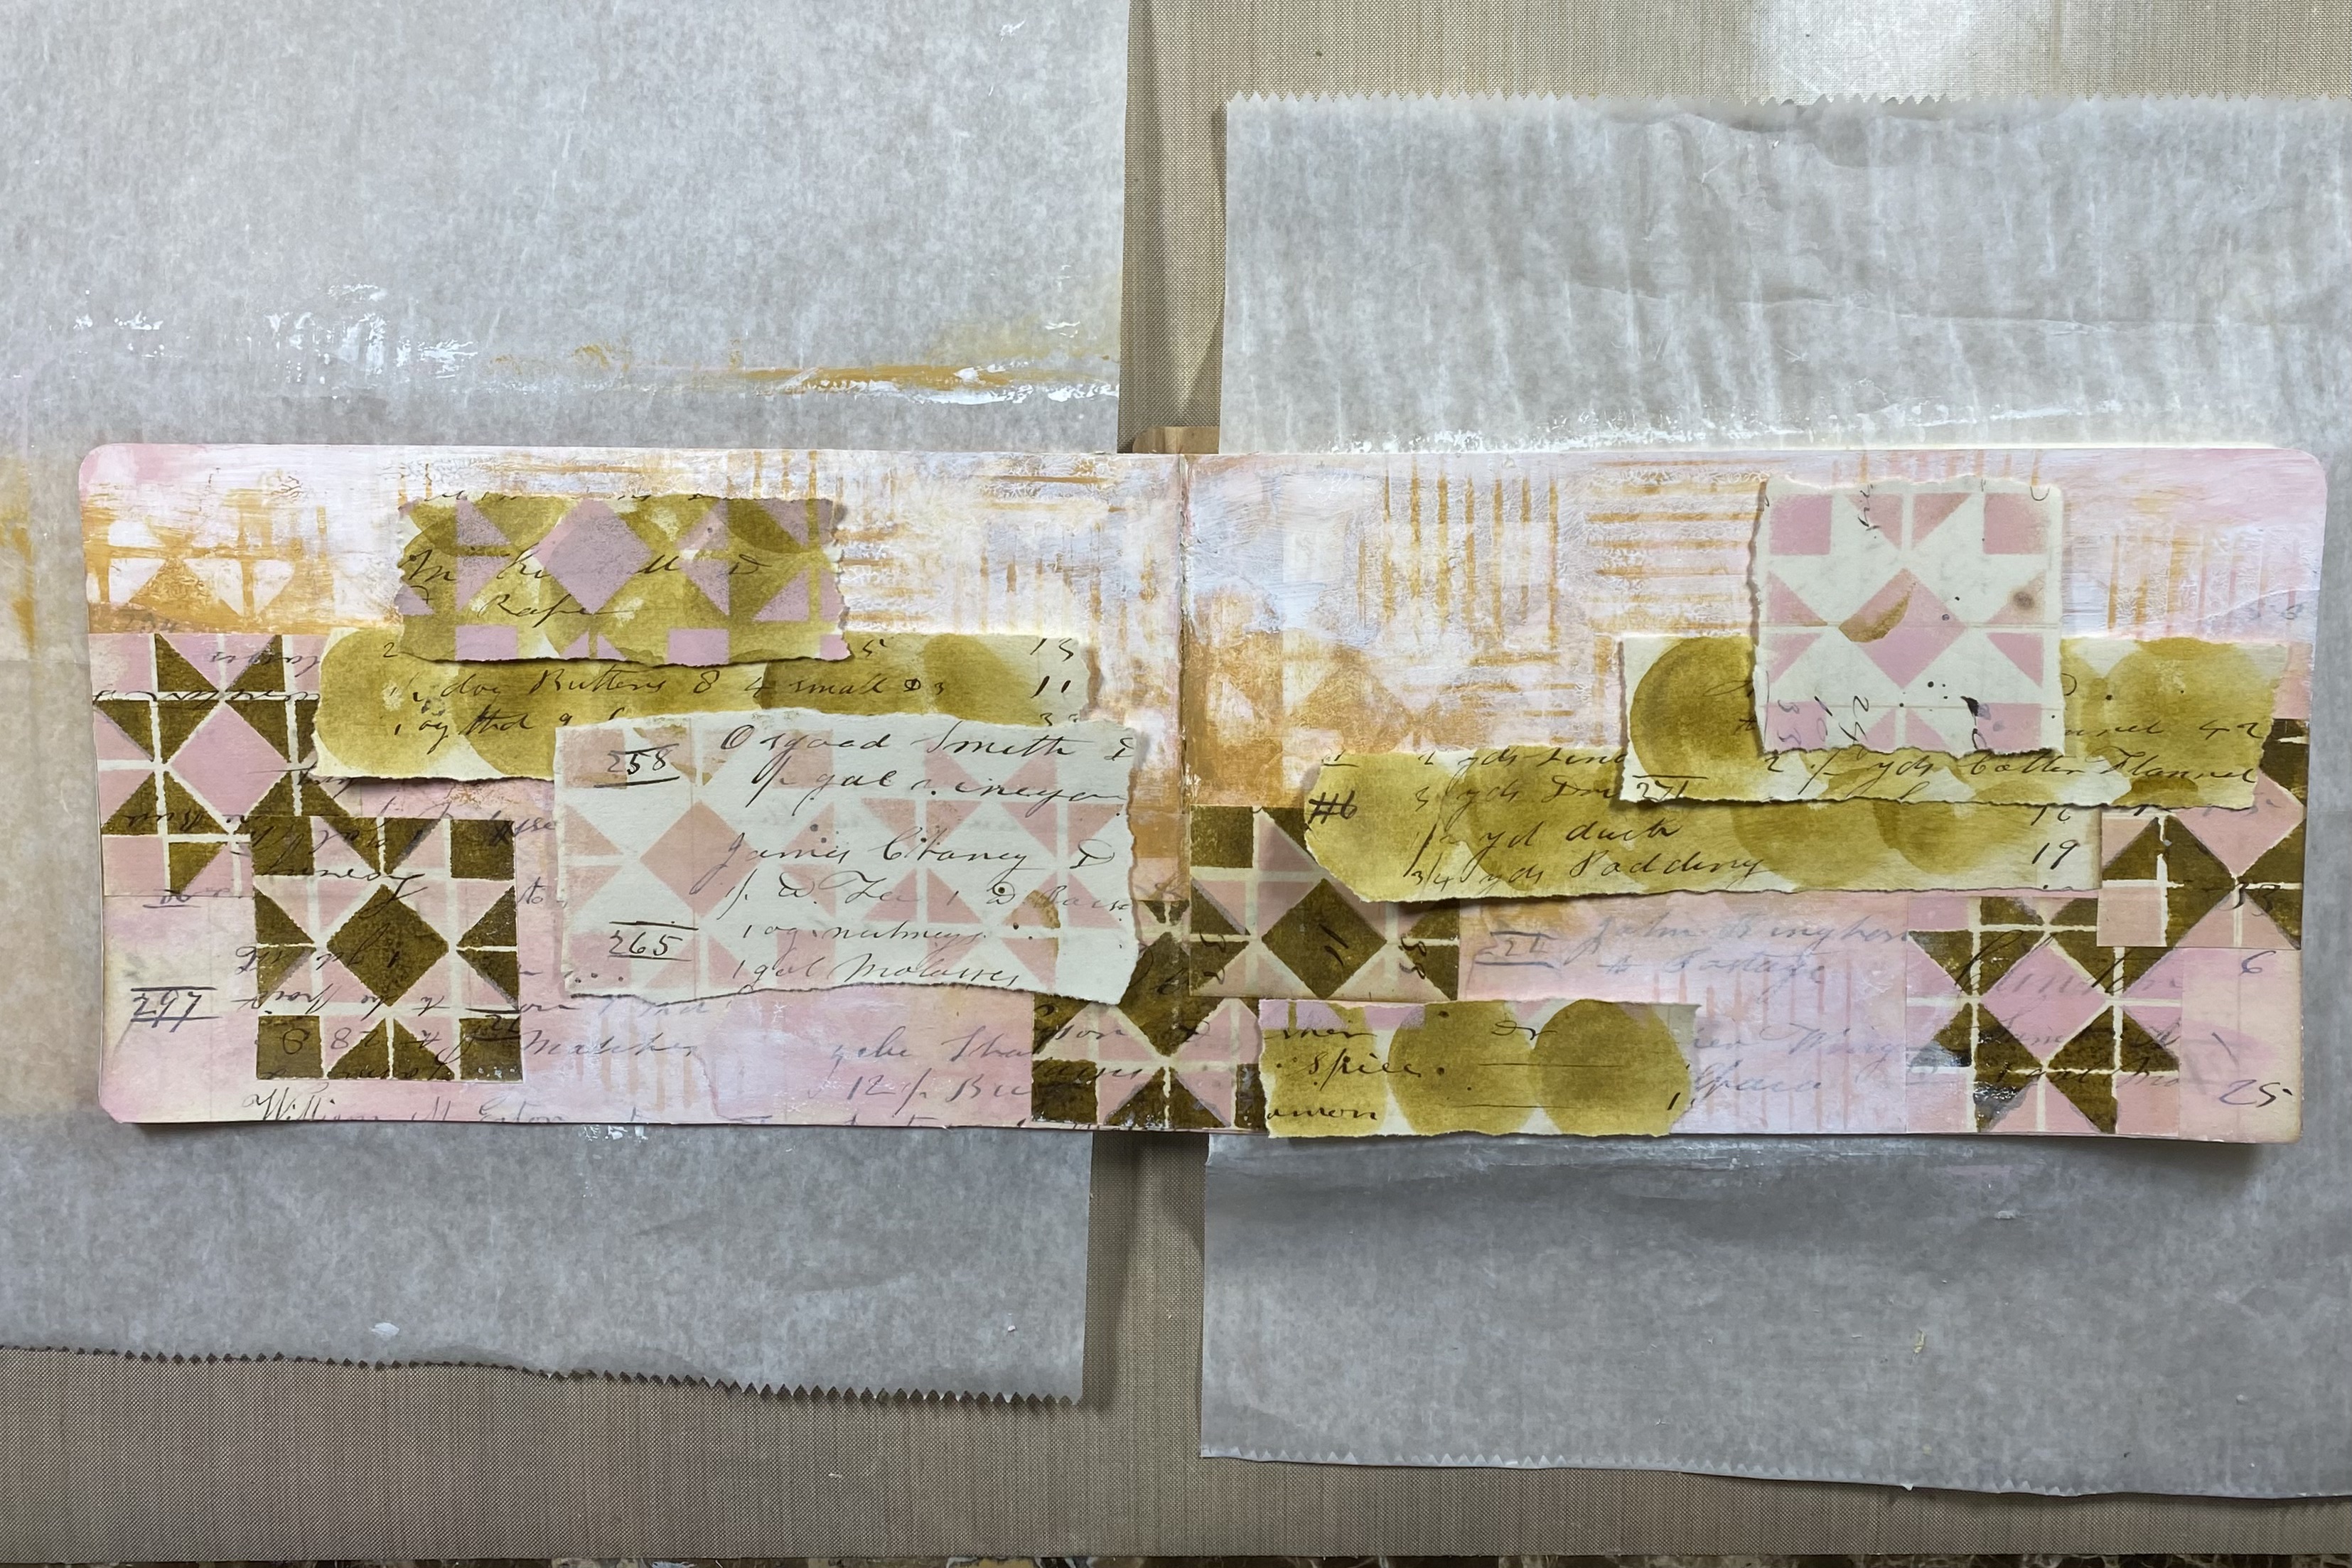
I wanted to add just a few more highlights so using the stitching part of the stencil set, I sponged some of the Antelope Brown ink through the stencil in random spots where I thought it could use some tweaking.


Now all I had to do was add the saying that I wanted so I grabbed my StencilGirl@ stencil #L726 by Carolyn Dube's and using Coffee Archival Ink pad by Ranger Ink, I sponged the ink through the stencil. The finishing touches include outlining the lettering with a Stabilo All pencil then tracing over the marks with a damp fine-line paint brush to set the pencil on the page. I decided to use the Coffee ink on a sponge to rub along the outer edges of both pages to give the spread a little more definition and then I took my Jet Black Archival Ink pad direct to the edge of the pages and rubbed along all edges except the center fold.
Thanks so much for joining me for my playtime in my journal. I hope you enjoy playing with this wonderful stencil set! I will be watching on FaceBook to see what you do with them.
Join StencilClub by October 15 to receive these exclusive stencils and accompanying video tutorial with PDF (both downloadable!), and 20% OFF STENCILS EVERY DAY!!
Happy Creating!

To see more of my work please visit my Instagram page.
Great page, Carol - thanks!
ReplyDeleteGreat job my friend!!!
ReplyDeleteGreat inspiration - thanks!
ReplyDelete