
Carol Ponsford here wishing you a very happy November! When I looked at this months
StencilGirl@ StencilClub set by Nancy Curry and Mary Beth Shaw, I found myself
imagining what wonderful fabric the designs would create. It took me back to the time I spent
in college working late nights in the IU Art Dept. studios printing on fabric. Back then I
was creating silkscreens to print the patterns but I knew that stencils and a foam tool would
give me a similar effect. I recently acquired some of Jacquard Textile Colors so I thought I
would give them a try. If you don't have these fabric paints, no worries, there are several
companies that sell a fabric medium that can be mixed with your acrylic paints.
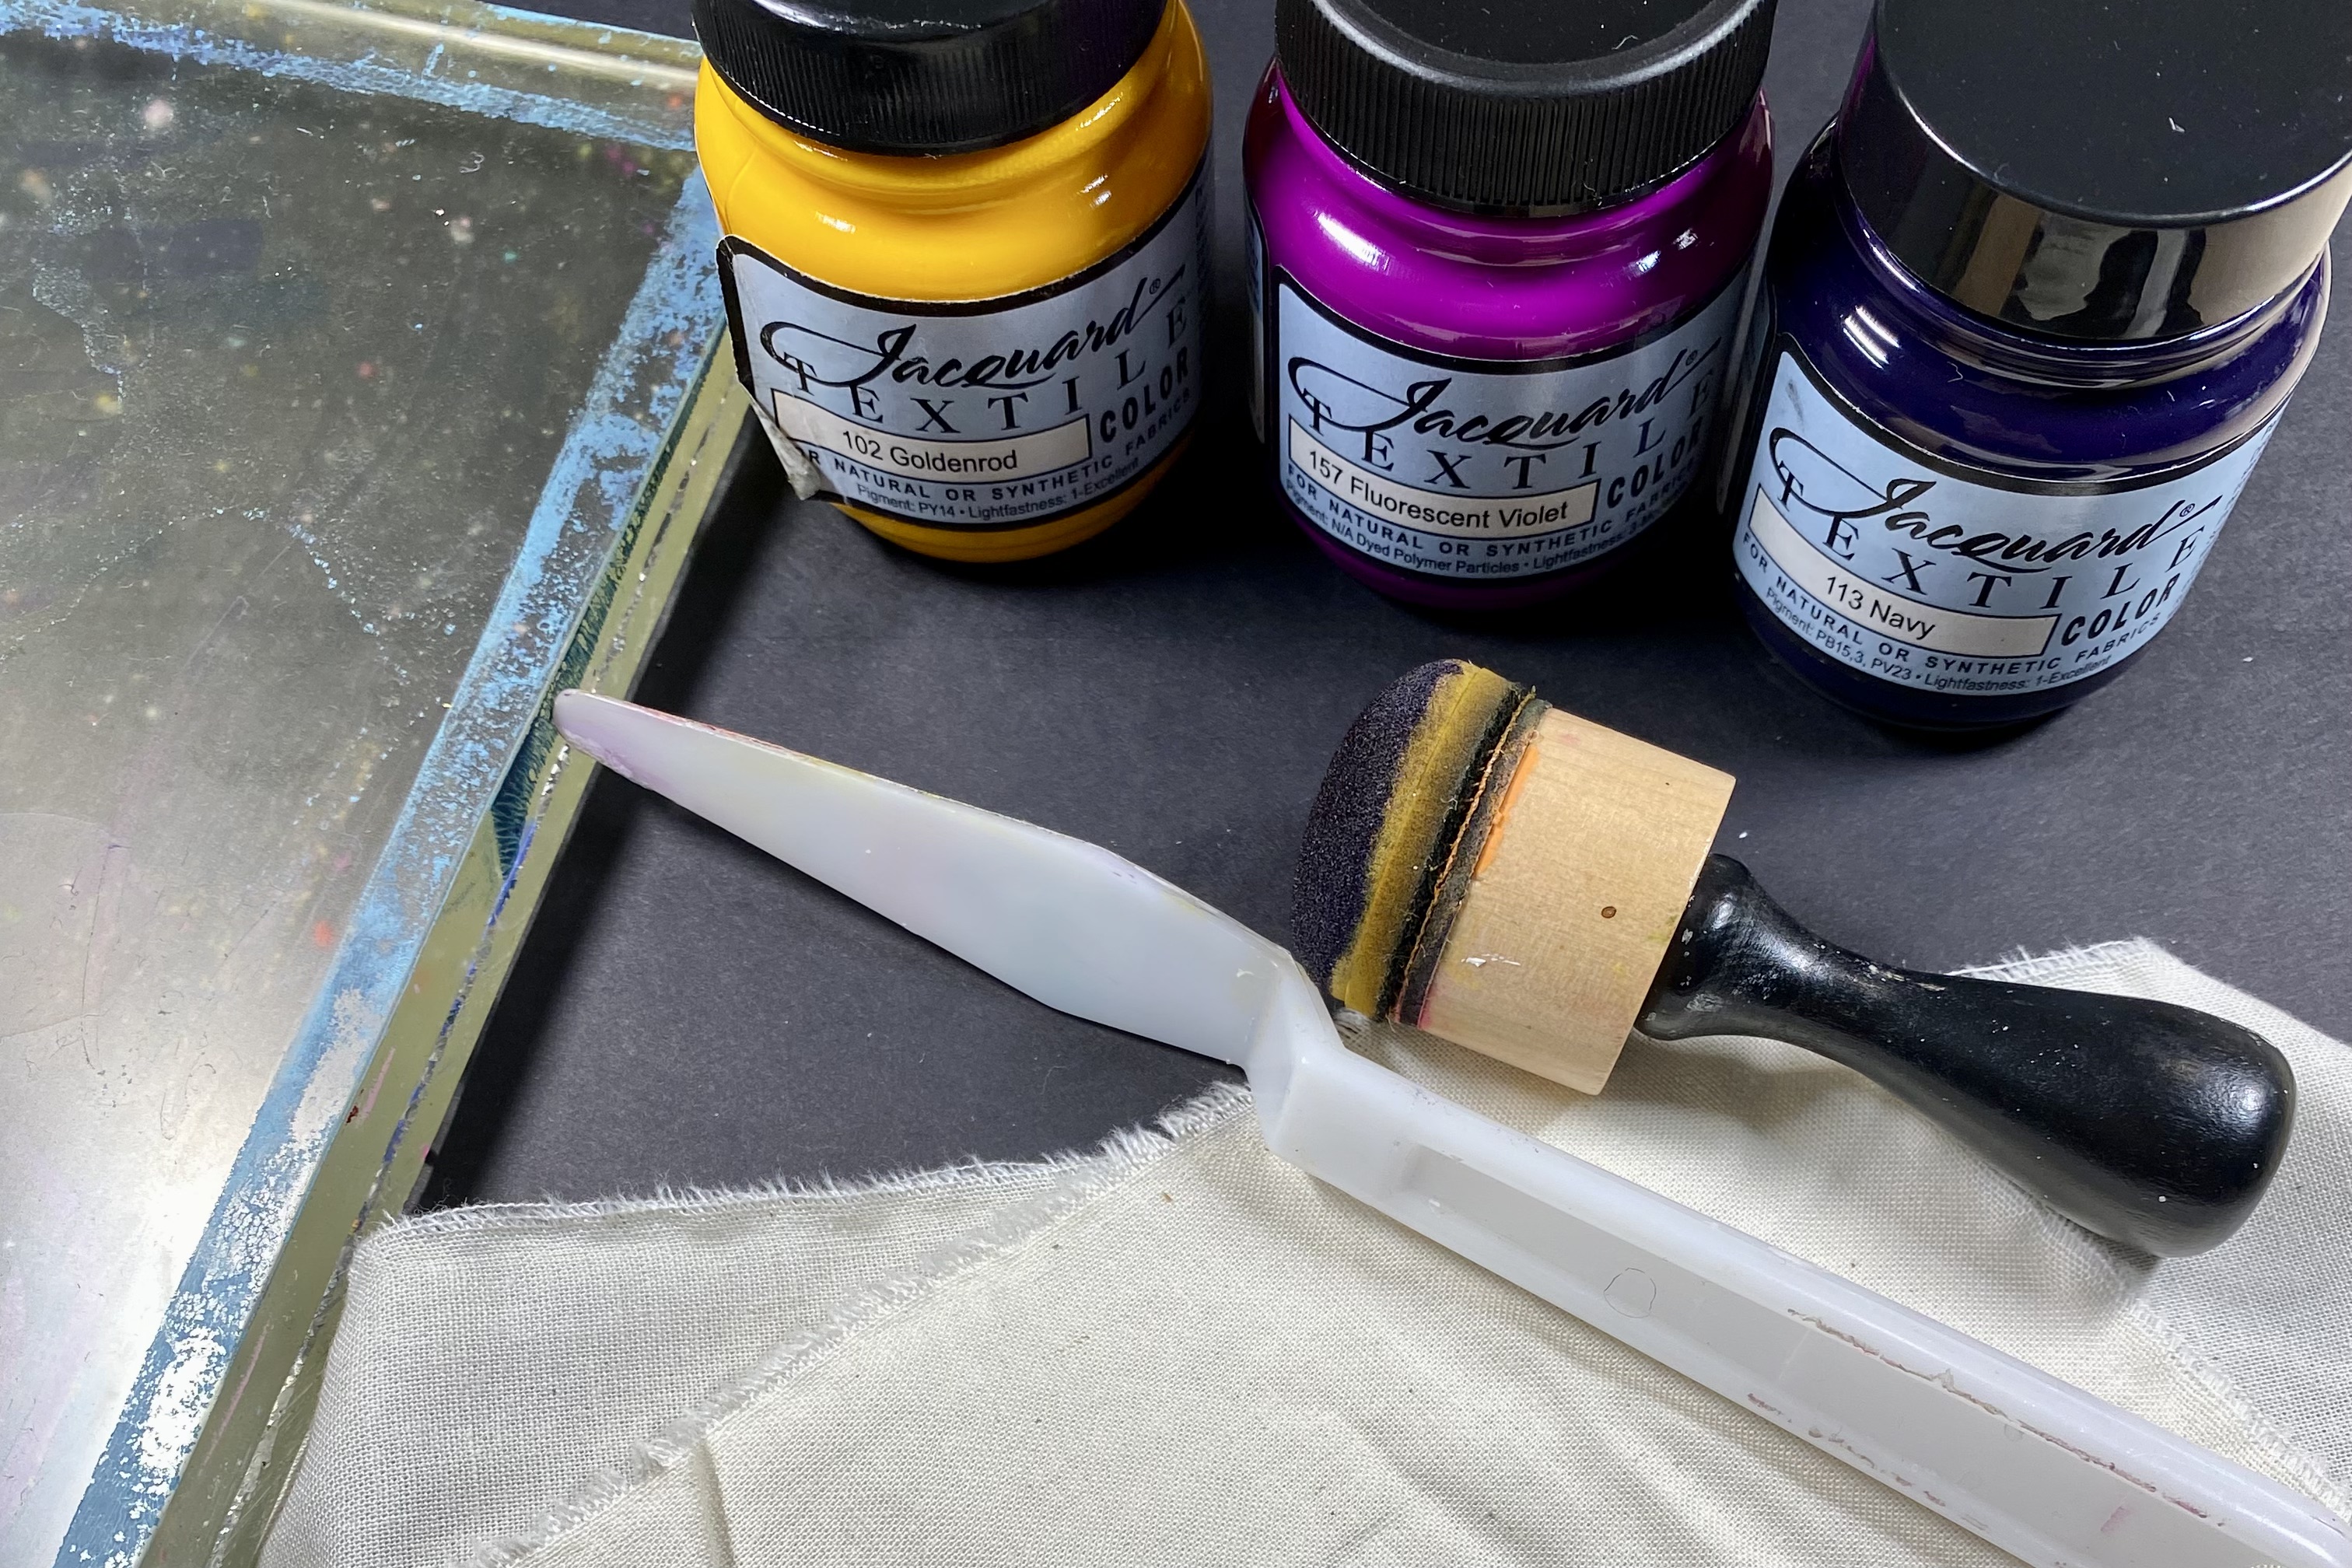
The supplies I used were: a gel plate, brayer (not pictured), a palette knife, pre-washed muslin
fabric, 3 colors of Jacquard Textile Colors (102-Goldenrod, 157-Fluorescent violet, 113-Navy),
Ranger mini ink blending tool with a domed blending foam.


I decided to get my base colors onto the fabric using my gel plate since I wanted an ombre of color. I put the paint on my gel plate using a palette knife and using a brayer spread the goldenrod across the top of the plate first, cleaned off the brayer on a scrap piece of paper, then spread the fluorescent violet across the plate and as I was ending I moved up the plate into the goldenrod creating a smooth blend of the 2 colors. I ended up not using enough paint the first print so I re-applied the paints and used a little more paint on the gel plate and pulled a second print right over the first print. I set this aside to dry.

Now it was time to start stenciling the patterns. I decided that I wanted to make rows of patterns
that I could rip into strips when I was finished so I started in one corner and stenciled down the side
of the fabric piece changing the stencil design every third of the way. (I ended up using 7 sections
of this stencil set. I used the corner of the sheet that has the buildings on it with the swirls and
circles, the wavy lines on the side of the stencil, and the large circles from the same page plus
all 4 sections of the patterns on the other page. Two of the patterns I flipped and used a second
time in order to have the 9 spaces filled on the fabric.)
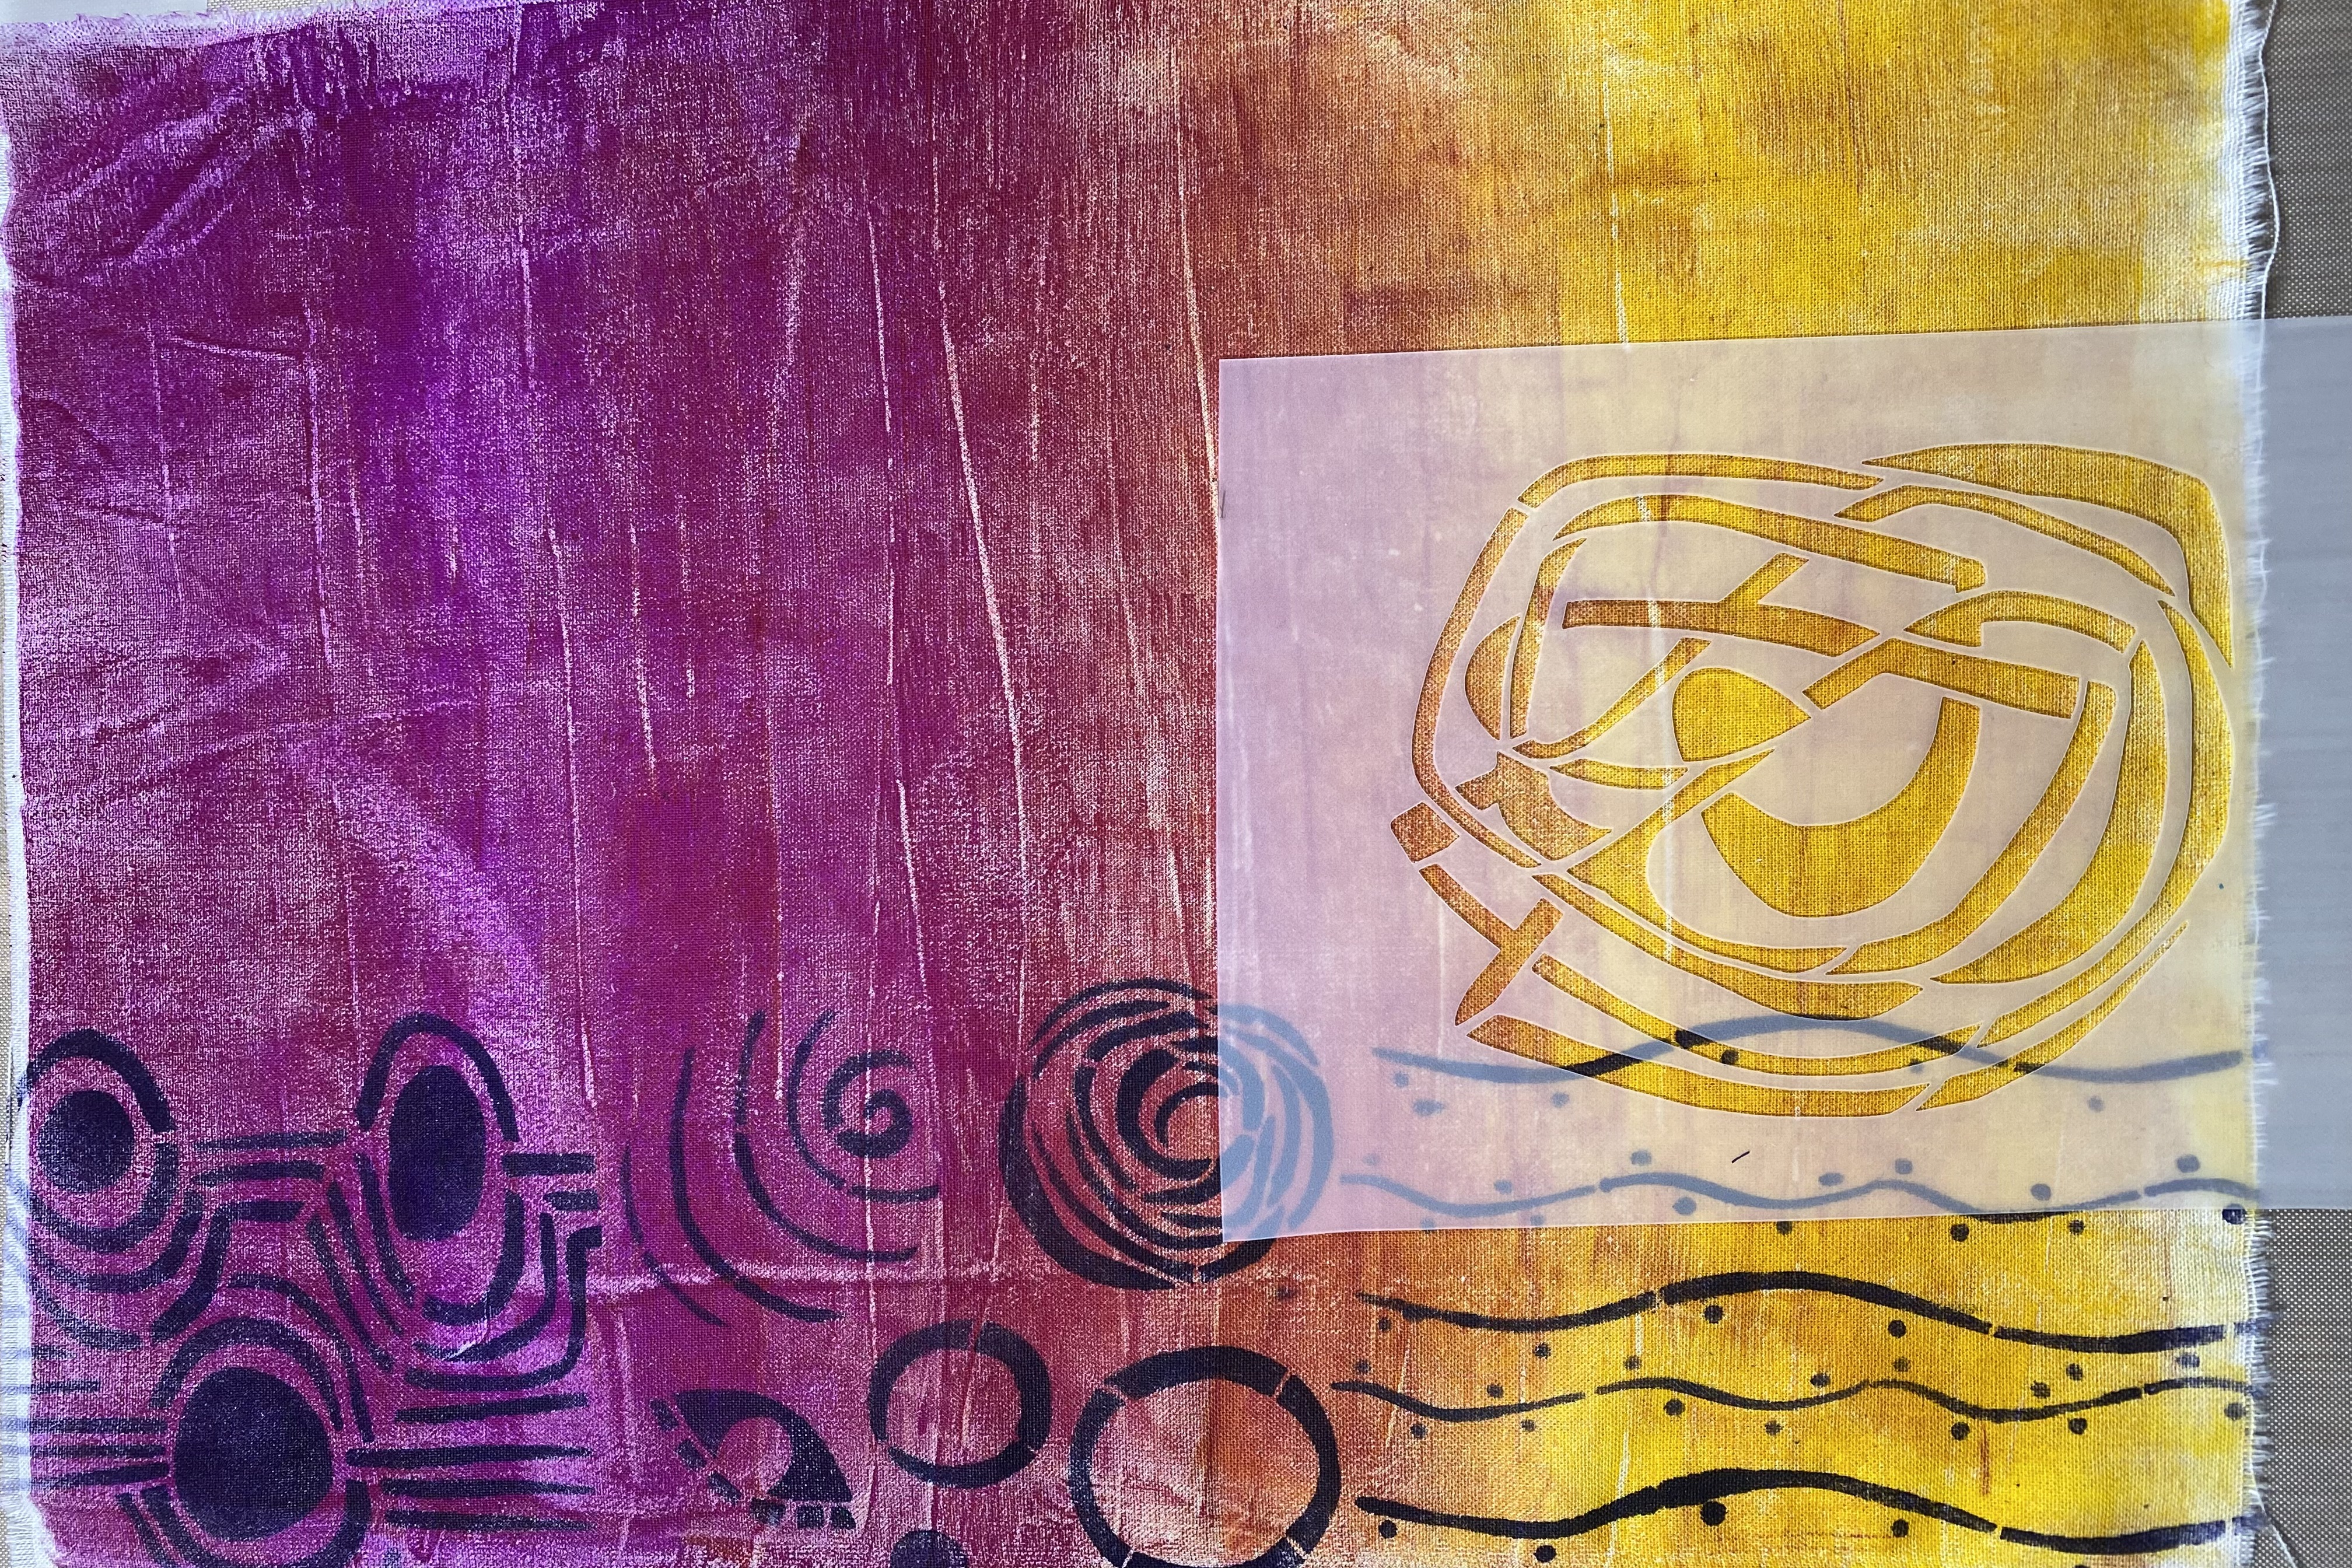
I then stenciled the center section using 3 patterns and continued the same onto the last section.

Once I had my fabric looking the way I wanted, I followed the manufacturer's directions on
how to set the paint on the fabric.

For this brand it included heat setting with an iron. Follow the instructions for your specific brand.

After ironing, I hand-washed the fabric (there was no color released during this process which
I was happy to see, even with the dark colors I used),
I let it air dry and then ripped it into 3 strips to use in future projects.

Thanks so much for stopping by to see what I have been up to. I hope you enjoyed seeing this
process and will give it a try for yourself to use in your artwork. I will see you next month
with another fun project! In the meantime enjoy playing with and creating art you love.
Join StencilClub by November 15 to receive these exclusive stencils and accompanying video
tutorial with PDF (both downloadable!), and 20% OFF STENCILS EVERY DAY!!
Happy Creating!

To see more of my work please visit my Instagram page.
I love the fabrics you produced - those colors are wonderful together, and the stencils made great patterns. I would love to see how you use these fabric strips! Thanks for sharing this project.
ReplyDeleteThank you so much Terry for your kind words. I will try to let you know once I use them in a snippet roll.
DeleteCarol, I love this project. It is beautiful and gives some wonderful ideas on use of stencils outside paper. And these prints would look great in snippet rolls.. Well done!
ReplyDelete