
Hello creative friends Tina Hois here and happy December to you all.
Super excited to be sharing this stencil and stitch project with you.
This time of year conjures up wonderfull memories of years past when I would gather up crafty items and sit at the table with my daughters enjoying hot cocoa and creating our annual tree decoration.
Let me say throughout the years our trees were adorned with some spectacular accessories.
So here is a little secret ~ I can not for the life of me stitch a straight line let alone create even cross stitches so the Cross Stitch stencil by Tammy Tutterow was the perfect solution!
In addition to perfect stitches the stencil can be used for art journal and card backgrounds and mark making.
What I love about these little trees is that they can be hung on your tree, added to gift parcles and combine in multiples as a garland.
For this little project there will be no paint or paper ~gasp!
Now let's get festive!!!
Supply List:
- Cardstock or cardboard (for the template)
- Stencil ~ Cross Stitch - Two Step Stencil ~ Product Code: L530Cross Stitch - Two Step
- Ruler
- Pencil
- Fabric
- Embroidery floss
- Embroidery needle
- Poly fil
- Pins
- Cotton Twine
- Hot Glue Gun and glue sticks
- Branches or Cinamon Sticks
- Buttons
- Sweing machine (they can also be hand stitched)
- Scissors
The Process:
- Determine the size of your tree ornamnet (I used 4.5"x13.5")
- Fold your paper in half ( see diagram) and draw out your lines


- Fold your fabric in half and pin the template to it
- Cut
- Remove the pins and template
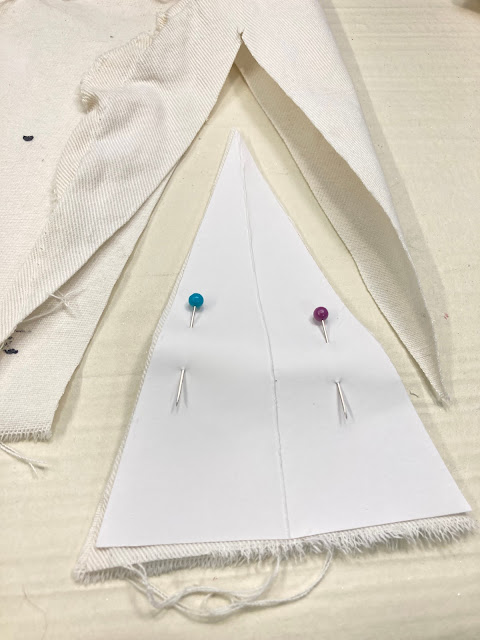
(I changed the fabric for better visibility)

- With the "good" sides facing out, place stencil on top of fabric and mark where your "x" will be

.jpg)
- Thread your needle and stitch over all your marks

- Using the hot glue gun add a drop of glue on the inside of the bottom tree panel and adhere the cotton twine (this will be used for hanging)
- Add a bit more glue and lay the stitched panel evenly on top ~ pin together

- With sewing machine (or handstitch) stitch along the sides (do not stitch the bottom)

- Frey the ends of the fabric (i used small crafting scissors to pull the threads apart)
.jpg)
- Fill the tree cavity with the Polyfil (use a pen to assist with pushing the fil to the top)
.jpg)
- Tuck all the poly fill in, cut a small piece of branch or cinammon stick for the trunk
- With your non dominant hand hold the trunk in place
- Using the hot glue gun run a line of glue along the inside of the tree base and press both pieces together (you may need some more glue in certain spots, add as needed)

- For the final step glue a button or jewel on the top
.jpg)
Have fun, create memories and enjoy the holidays.
Wishing you all a wonderful Christmas.

Let's connect

Love these Tina! Great project.
ReplyDeleteThank you Tracy!🙏🏻♥️
DeleteOh Tina! These are so darling! I hope I can make one before the holidays are upon us!
ReplyDeleteThank you Rose!!
ReplyDeleteI hope you had the time
To make them!
I even made some for my cats and filled them
With catnip!! ✨😁♥️