Hi Everyone,
Tracy here to share one of my favorite things to do with stencils...create depth with layers! I have used this technique on a number of pieces including cards, canvases and journal pages.
I like to layer botanicals, but you can do this with any shape or design to make a background, frame or entire piece!
Happy Layering!
Supplies:
- Substrate of choice
- 3-4 Stencils, I am using: Poplar Leaves, Scandinavian Geometrics 4"x4" Clustered Leaves, and Mix and Match Botanicals 4"x4"
- Different shades of acrylic paint
- Make-up Sponge
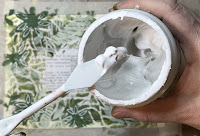
- Modeling Paste
- Palette Knife
- Gel Pens
- Optional: Book Pages, Matt Medium and Gesso (for background)
Technique:
STEP 1: If you want to start with a background like mine, adhere book pages to your substrate with matte medium and then push back the print with a light coat of gesso. I took one of my stencils and used a baby wipe to wipe away some gesso for a very faint design.
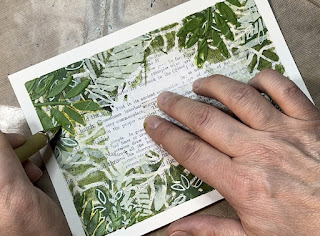
STEP 3-4: Using a lighter shade, stencil a second design directly on top of the first. Once dry, use a gel pen to randomly outline some of the design to may it stand-out.
STEP 5: Stencil a third design on top using a third stencil and your lightest shade of paint.
STEP 6: Mix another shade of paint with the modeling paste and stencil using a palette knife. Make sure to clean your stencil right away!
STEP 7: Outline your dried modeling paste design with gel pen.
NOTE: I like to leave the center of a design like this blank. I will add more gesso to make the negative space really white and the design look like it is popping off the page!
More from me:
PROCESS VIDEO:


Love this technique - thank you, Tracy!
ReplyDeleteYou are very welcome :)
Delete